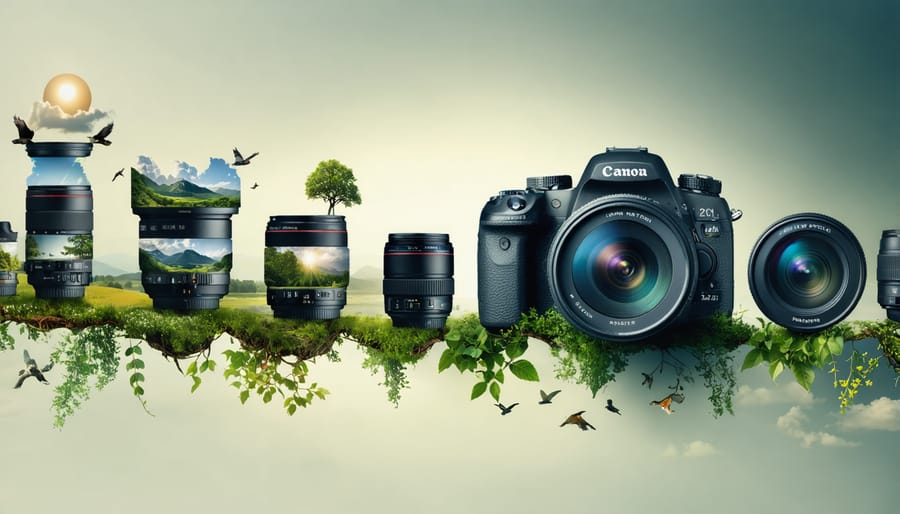
Stepping into the world of camera lenses transforms your photography from simple snapshots to compelling visual stories. Every lens opens up new creative possibilities, from capturing sweeping landscapes to intimate portraits, but choosing the right one doesn’t have to be overwhelming. Think of your camera lens as your eye into the world – each one sees things differently, telling stories from unique perspectives.
Understanding camera lenses begins with three fundamental concepts: focal length, which determines your field of view; aperture, controlling light and depth of field; and lens type, defining your creative approach. Whether you’re shooting stunning portraits with a 50mm prime lens or capturing distant wildlife with a telephoto zoom, each lens choice shapes your photographic vision in distinct ways.
For beginners, mastering lens basics unlocks a new realm of creative control. This guide cuts through the technical jargon to deliver practical insights about choosing and using different lenses, helping you make informed decisions that match your photographic goals. From understanding lens markings to selecting the perfect focal length for your style, we’ll explore everything you need to know to start your journey into the fascinating world of camera lenses.
Understanding Lens Basics
Focal Length Explained
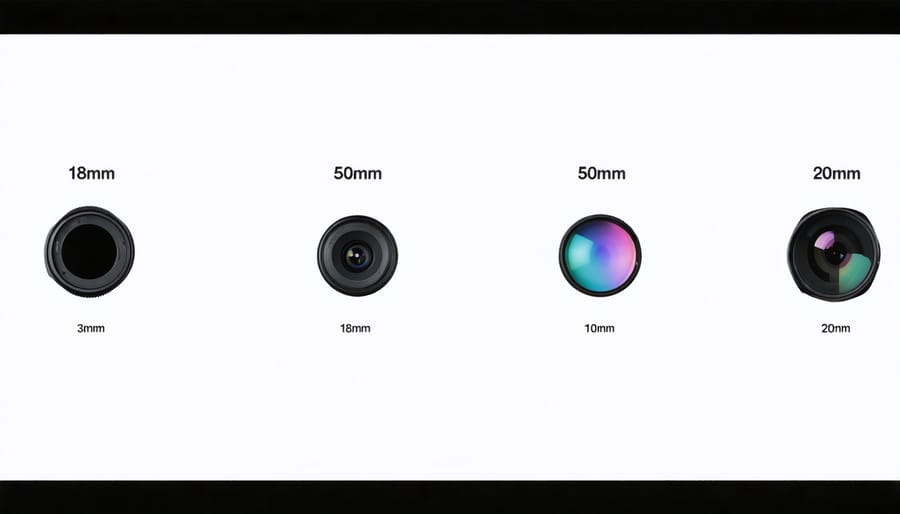
Focal length is one of the most important characteristics of a camera lens, determining how much of a scene you can capture and how your subjects appear in the frame. Think of focal length as your lens’s “zoom level” – it’s measured in millimeters and tells you whether you’re looking at a wide view or a closer, more detailed perspective.
A shorter focal length (like 16mm-35mm) gives you a wider field of view, perfect for landscapes or architectural photography where you want to capture as much of the scene as possible. These wide-angle lenses make objects appear smaller and more distant, but they let you fit more into your frame.
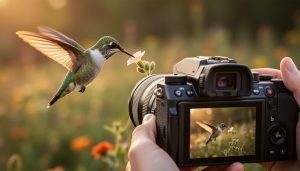
On the flip side, longer focal lengths (like 70mm-200mm) create a narrower field of view, bringing distant subjects closer – ideal for wildlife or sports photography. These telephoto lenses compress perspective, making objects appear larger and closer together than they actually are.
The “standard” focal length of around 50mm most closely matches what we see with our human eyes, making it a popular choice for everyday photography. This focal length produces natural-looking images without the distortion often seen in wide-angle lenses or the compression effect of telephotos.
Understanding focal length helps you choose the right lens for your intended subject. Want to capture sweeping landscapes? Go wide. Need to photograph wildlife from a distance? Choose a telephoto. The focal length you select will dramatically impact the story your images tell.
Aperture and F-stops
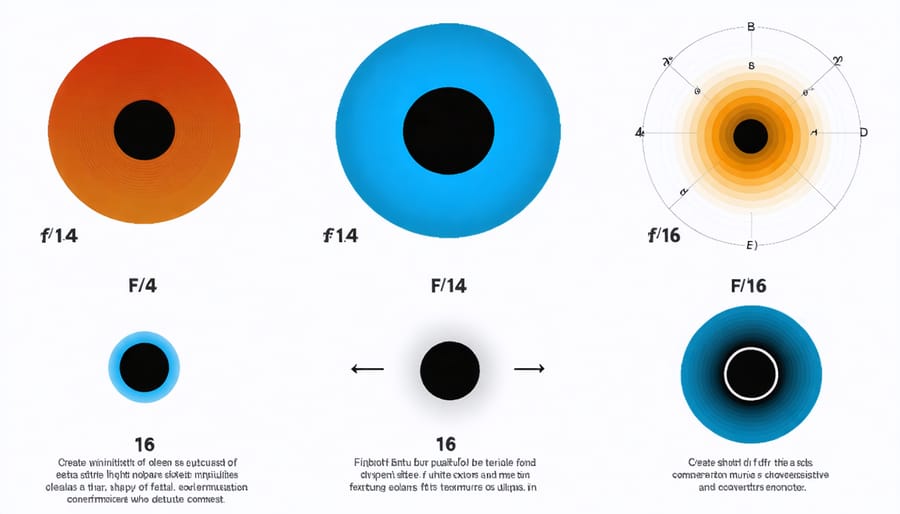
Aperture is one of the most crucial aspects of photography, controlling both light intake and depth of field. Think of it as your lens’s pupil – the wider it opens (lower f-number), the more light enters, and the narrower it gets (higher f-number), the less light passes through. As you master your camera settings, understanding aperture becomes second nature.
F-stops are how we measure aperture, typically ranging from f/1.4 to f/22 on most lenses. A lower f-number like f/1.8 creates that beautiful background blur (bokeh) photographers love, perfect for portraits or isolating subjects. Higher f-numbers like f/16 keep more of your scene in focus, ideal for landscapes or architecture.
The relationship between f-stops and light is straightforward: each step up (like f/2.8 to f/4) cuts the light in half, while each step down doubles it. This understanding is crucial when mastering light in photography.
Remember, lenses are often described by their maximum aperture (lowest f-number). A “fast” lens with f/1.4 or f/1.8 is excellent for low-light situations but typically costs more than a lens that only opens to f/4. Consider your shooting style and common scenarios when choosing between different aperture ranges.
Common Lens Types and Their Uses
Standard Kit Lenses
Most digital cameras come bundled with what’s known as a kit lens – typically an 18-55mm zoom lens for crop sensor cameras or a 24-70mm for full-frame models. While some photographers dismiss kit lenses as basic, they’re actually quite versatile tools for beginners.
Your kit lens offers a practical range from moderate wide-angle to short telephoto, making it suitable for everything from landscapes to portraits. The 18-55mm range, for instance, lets you capture group photos at wider angles and zoom in for individual portraits. Most kit lenses also feature image stabilization, helping you get sharper photos in lower light conditions.
These lenses usually have a variable aperture (typically f/3.5-5.6), meaning the maximum aperture changes as you zoom. While they may not offer the ultra-wide apertures of premium lenses, they’re perfectly capable of producing sharp, high-quality images when used properly.
Don’t feel pressured to immediately upgrade from your kit lens. Instead, use it to learn fundamental photography concepts like focal length, aperture, and composition. Many professionals started their journey with a kit lens, and understanding its capabilities and limitations will help you make more informed decisions when you’re ready to expand your lens collection.
Prime vs. Zoom Lenses
When starting your photography journey, you’ll encounter two main types of lenses: prime and zoom lenses. Each has its unique advantages, and understanding their differences will help you make better choices for your shooting style.
Prime lenses have a fixed focal length, meaning you can’t zoom in or out. For example, a 50mm prime lens stays at 50mm – no more, no less. While this might seem limiting at first, prime lenses offer several compelling benefits. They typically provide superior image quality, better low-light performance with wider maximum apertures, and are generally lighter and more compact than their zoom counterparts. They also tend to be sharper and produce less distortion, making them excellent choices for portraits, street photography, and detailed work.
Zoom lenses, on the other hand, offer variable focal lengths, like 24-70mm or 70-200mm. This versatility means you can adjust your composition without physically moving closer to or farther from your subject. They’re particularly valuable when shooting events, sports, or in situations where changing lenses isn’t practical. While zoom lenses are incredibly convenient, they usually have smaller maximum apertures and might be slightly less sharp than prime lenses at comparable focal lengths.
For beginners, starting with a standard zoom lens (like a 24-70mm) can be practical as it allows you to experiment with different focal lengths and discover your preferred shooting style. However, many photographers eventually add a prime lens to their kit, often starting with a 50mm “nifty fifty” – an affordable lens that offers excellent image quality and low-light performance.
Remember, there’s no “better” choice between prime and zoom lenses – it all depends on your shooting needs. Many photographers use both types, selecting the appropriate lens based on their specific shooting situation. The key is understanding the strengths of each type and choosing accordingly.
Specialty Lenses
Beyond standard kit lenses, specialty lenses open up exciting creative possibilities for photographers. Let’s explore three popular categories that can transform your photography: macro, wide-angle, and telephoto lenses.
Macro lenses are designed for extreme close-up photography, allowing you to capture stunning details of flowers, insects, and small objects. These lenses typically offer a 1:1 magnification ratio, meaning subjects appear life-sized on your camera’s sensor. While dedicated macro lenses can be expensive, you might start with extension tubes or close-up filters to experiment with macro photography.
Wide-angle lenses, typically ranging from 10mm to 35mm, excel at capturing expansive scenes and dramatic perspectives. They’re perfect for landscape photography, architecture, and interior shots where you need to fit more into the frame. The wider field of view can create compelling compositions, though be mindful of distortion, particularly at the edges of ultra-wide lenses.
Telephoto lenses, with focal lengths beyond 70mm, bring distant subjects closer and are essential for wildlife photography techniques and sports photography. These lenses compress perspective and create beautiful background blur, making subjects stand out dramatically. While professional telephoto lenses can be heavy and expensive, many manufacturers offer affordable 70-300mm options perfect for beginners.
Each specialty lens serves a unique purpose and can dramatically impact your photographic style. Before investing, consider renting different lenses to explore which types align with your creative vision. Remember that while these lenses are powerful tools, mastering their use takes practice and patience. Start with one type that matches your primary photography interests and gradually expand your collection as your skills and needs evolve.
Choosing Your First Additional Lens
Budget Considerations
When starting your lens collection, it’s essential to understand that quality glass can be a significant investment. While entry-level lenses might cost between $100-300, professional-grade options can easily exceed $2,000. However, don’t let these numbers discourage you – there are excellent options for every budget.
For beginners, we recommend starting with a versatile “kit lens” that typically comes with your camera. These lenses offer good value and decent quality for learning the basics. As you progress, consider investing in a “nifty fifty” (50mm f/1.8) lens, which usually costs around $125-200 and provides exceptional value for portrait photography.
When shopping for lenses, remember that cheaper isn’t always more economical in the long run. Quality lenses retain their value well and can last decades with proper care. If you’re using a Canon system, you’ll find numerous options across different price points – check out our guide to the best lenses for Canon cameras for detailed recommendations.
Consider buying used lenses from reputable dealers to save money. Many photographers successfully build their collections this way. Just ensure the lens is in good condition and comes with a return policy. Third-party manufacturers like Sigma and Tamron also offer excellent alternatives to brand-name lenses, often at more competitive prices.
Remember to factor in additional costs like filters, lens hoods, and cleaning supplies. While these accessories aren’t always expensive, they’re essential for protecting your investment and maintaining image quality. Start with one or two quality lenses that match your photography goals rather than collecting multiple budget options that might limit your creative potential.
Matching Lenses to Your Photography Style
Different photography styles demand different types of lenses, and matching your lens to your preferred subjects can dramatically improve your results. Let’s explore which lenses work best for various photography styles.
For landscape photography, wide-angle lenses (typically 14-35mm) are ideal, allowing you to capture sweeping vistas and dramatic scenery. These lenses help you include more of the scene in your frame while maintaining sharp focus throughout the image.
Portrait photographers often gravitate toward medium telephoto lenses (85-135mm) because they create flattering perspectives and beautiful background blur. These lenses help separate your subject from the background while avoiding facial distortion that can occur with wider lenses.
If you’re passionate about wildlife or sports photography, telephoto lenses (200mm and beyond) are essential. They let you get close to distant subjects without physically approaching them, which is crucial for capturing wildlife in their natural habitat or athletes in action.
Macro photography enthusiasts should consider dedicated macro lenses, which allow for extreme close-up shots with incredible detail. These lenses are perfect for capturing the intricate details of flowers, insects, and other small subjects.
Street photographers often prefer prime lenses in the 35-50mm range, as they’re compact, discrete, and closely match the human eye’s perspective. These focal lengths are versatile enough for both environmental portraits and urban scenes.
For indoor and architectural photography, consider wide-angle zooms (16-35mm) that can capture tight spaces while maintaining straight lines. These lenses are also excellent for real estate photography and interior documentation.
Remember that your shooting style may evolve over time, so starting with a versatile zoom lens can help you discover which focal lengths you use most frequently before investing in specialized lenses.
Essential Lens Care Tips
Cleaning and Storage
Proper lens maintenance is crucial for preserving image quality and protecting your investment. Start by keeping a microfiber cloth handy for regular dust removal – always use gentle, circular motions from the center outward. For stubborn spots, use a lens cleaning solution specifically designed for camera optics, applied to the cloth first, never directly to the lens.
When changing lenses, always face your camera downward to minimize dust entering the sensor chamber, and try to work in a clean, wind-free environment. Remember that even with stable camera handling techniques, accidents can happen, so invest in quality lens caps and always keep them on when the lens isn’t in use.
Store your lenses in a dry, temperature-controlled environment. Humidity is particularly damaging to lens elements and can promote fungal growth. Consider using silica gel packets in your camera bag and storing lenses upright to prevent stress on the barrel mechanisms. For long-term storage, a dedicated dry cabinet might be worth the investment, especially if you live in a humid climate.
Never attempt to clean the internal elements of your lens – this requires professional expertise. If you notice internal dust or issues, consult a qualified camera technician. With proper care and regular maintenance, your lenses can maintain their optical quality for many years of creative photography.

Must-Have Lens Accessories
Protecting your investment in camera lenses starts with having the right accessories. A high-quality UV filter is your first line of defense against scratches, dust, and environmental elements. While some photographers debate their impact on image quality, the protection they offer usually outweighs any minimal effects.
Lens caps are non-negotiable essentials – both front and rear. Always keep them on when your lens isn’t in use. A lens hood is another crucial accessory that prevents unwanted lens flare and offers additional protection against bumps and scratches.
For cleaning, invest in a basic kit that includes a microfiber cloth, lens cleaning solution, and a blower brush. Never use regular tissues or clothing to clean your lens, as these can cause microscopic scratches. A lens pen with a carbon cleaning tip is particularly useful for removing fingerprints without liquid cleaners.
A padded lens case provides essential protection during transport and storage. If you’re carrying multiple lenses, consider a dedicated compartmentalized camera bag. For those shooting in humid environments, silica gel packets in your storage case can prevent moisture damage and fungal growth.
Finally, keep a polarizing filter handy – it’s not just for protection but can enhance your photos by reducing reflections and improving color saturation, especially in landscape photography.
As we’ve explored throughout this guide, understanding camera lenses doesn’t have to be overwhelming. The key is to start with the basics – focal length, aperture, and lens types – and gradually build your knowledge from there. Remember that every photographer started exactly where you are now, learning one concept at a time.
Your journey into lens mastery should begin with mastering your kit lens before investing in additional glass. Practice with different focal lengths, experiment with aperture settings, and understand how these elements affect your images. Pay attention to how your lens performs in various lighting conditions and shooting scenarios.
To continue developing your skills, consider these next steps:
– Practice shooting the same subject with different focal lengths to understand perspective
– Experiment with depth of field by adjusting your aperture
– Join local photography groups to try different lenses before buying
– Start building your lens collection based on the type of photography you enjoy most
– Maintain proper cleaning and storage habits to protect your investment
Remember that the “best” lens is the one that helps you achieve your creative vision. Don’t feel pressured to buy expensive gear right away. Instead, focus on learning to use what you have effectively, and let your photography needs guide future purchases.
As your confidence grows, you’ll naturally discover which lenses best suit your style and subjects. Keep practicing, stay curious, and most importantly, enjoy the journey of discovering how different lenses can transform your photography.