Capturing nature’s raw beauty demands both technical precision and artistic vision. From the golden light of dawn breaking through morning mist to the intricate details of a dewdrop on a leaf, nature photography presents endless opportunities for creating stunning images that move and inspire.
Mastering this art requires more than just good equipment – it’s about understanding the delicate dance between light, timing, and technique. Whether you’re stalking wildlife in their natural habitat, capturing sweeping landscapes at golden hour, or exploring the microscopic world of macro photography, success lies in combining technical expertise with patience and environmental awareness.
This guide delves into proven techniques that elevate nature photography from simple snapshots to compelling visual stories. We’ll explore essential camera settings, composition principles, and field strategies that professional nature photographers rely on, while also addressing the unique challenges of working in unpredictable outdoor environments.
From selecting the right gear and mastering natural light to understanding animal behavior and weather patterns, these techniques will help you create images that not only document the natural world but reveal its hidden magic. Whether you’re a beginner venturing into nature photography or an experienced shooter looking to refine your craft, these methods will enhance your ability to capture those fleeting moments of natural wonder.
Let’s explore how to transform your nature photography from good to extraordinary, one frame at a time.
Essential Gear for Environmental Photography
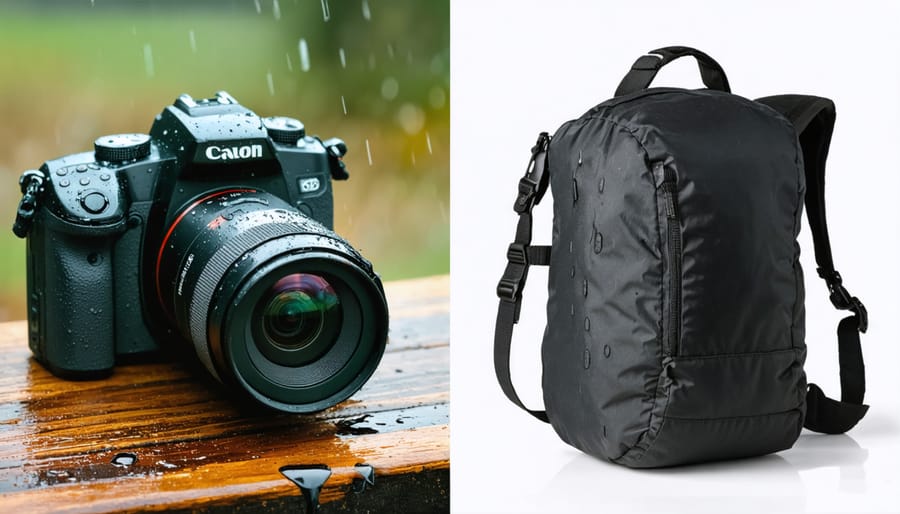
Weather-Proofing Your Equipment
Nature photography often takes you into challenging environments, and protecting your gear is crucial for both its longevity and your shooting success. Start by investing in a quality rain cover or camera sleeve – these lightweight solutions can shield your equipment from unexpected downpours and sea spray. For humid conditions, pack silica gel packets in your camera bag and store your gear in airtight containers when not in use.
When shooting in cold environments, keep spare batteries close to your body, as cold temperatures drastically reduce battery life. Consider using hand warmers in your camera bag to maintain optimal operating temperature. Watch out for condensation when moving between temperature extremes – let your gear gradually adjust by keeping it in your closed camera bag during transitions.
For dusty or sandy environments, avoid changing lenses in the field when possible. If you must, turn your camera off first and do it quickly with your back to the wind. A rocket blower is essential for removing loose particles without touching the sensor or lens elements.
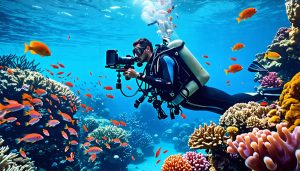
Beach photography requires extra vigilance – salt water is particularly damaging to equipment. Keep a UV filter on your lens for added protection, and always clean your gear with a slightly damp cloth after exposure to salt air. Consider using a weather-sealed camera body and lenses for added protection in harsh conditions.
Remember to bring microfiber cloths for quick cleaning and zip-lock bags for emergency weather protection. These simple preparations can save your equipment and help you capture those perfect moments in nature, regardless of the conditions.
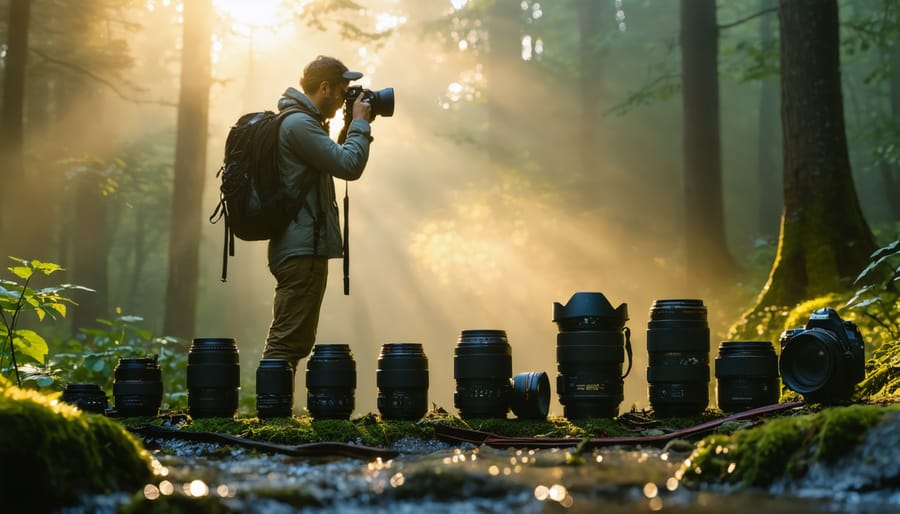
Lens Selection for Nature Photography
Selecting the perfect lens for nature photography can make the difference between a good shot and a spectacular one. Choosing the right lens depends largely on your subject matter and shooting conditions.
For landscape photography, a wide-angle lens (16-35mm) is often your best companion, capturing sweeping vistas and dramatic perspectives. These lenses excel at including foreground elements while maintaining sharp focus throughout the frame, perfect for those golden hour mountain shots or expansive seascapes.
When photographing wildlife, telephoto lenses (200mm and beyond) become essential tools. They allow you to maintain a safe distance from animals while capturing intimate portraits and behavior. A 70-200mm serves as a versatile option for larger animals and closer subjects, while a 400mm or longer lens might be necessary for small birds or distant wildlife.
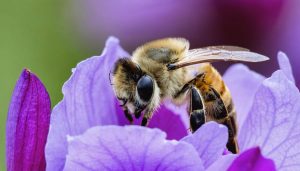
For macro nature photography, dedicated macro lenses (typically 90-105mm) reveal the intricate details of flowers, insects, and small natural elements. These lenses offer 1:1 magnification, bringing tiny subjects to life in stunning detail.
Consider carrying a mid-range zoom (24-70mm) as your walk-around lens. It’s perfect for environmental shots, capturing both context and detail without constantly switching lenses. Remember that weather-sealed lenses are worth the investment for outdoor photography, protecting your gear from moisture and dust in challenging conditions.
Light and Timing in Natural Settings
Golden Hour Photography
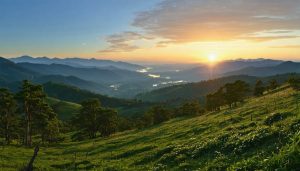
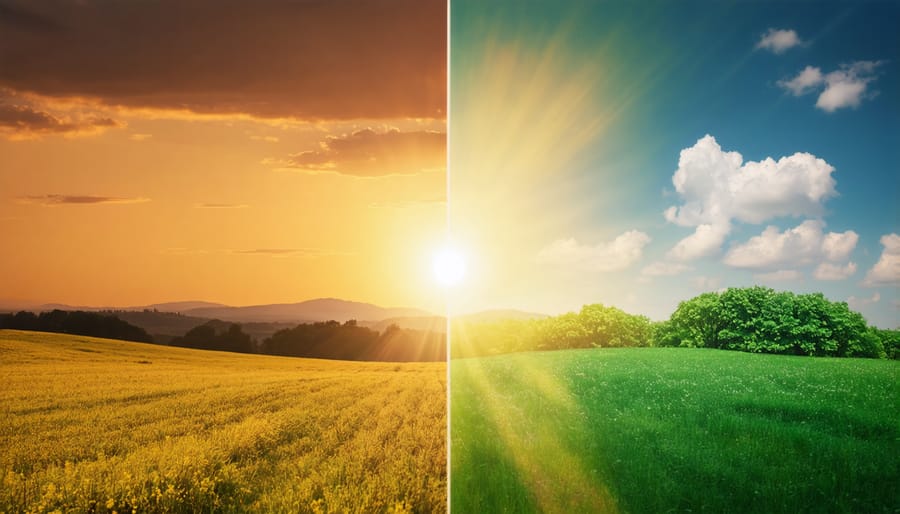
The golden hour – that magical period just after sunrise and before sunset – offers photographers the most enchanting natural light for capturing stunning nature photographs. During these precious moments, the sun’s position near the horizon creates warm, soft light that bathes landscapes and wildlife in golden hues, producing long shadows and dimensional depth that’s impossible to achieve at other times of day.
To make the most of golden hour photography, timing is crucial. Plan to arrive at your location at least 30 minutes before sunrise or sunset. This gives you time to set up your equipment and compose your shots before the optimal light arrives. The golden hour typically lasts 20-40 minutes, depending on your geographical location and the season.
During this time, experiment with backlighting to create dramatic silhouettes of trees, animals, or landscapes. The low-angle sunlight is perfect for capturing rim lighting around subjects, adding a ethereal glow to your images. Side-lighting during golden hour reveals textures and patterns in landscapes that might otherwise go unnoticed during harsh midday light.
For the best results, use a tripod to maintain sharp images in the lower light conditions. Consider using graduated neutral density filters to balance exposure between bright skies and darker foregrounds. Set your white balance to “cloudy” or “shade” to enhance the warm tones, or keep it on auto and adjust in post-processing for more control.
Remember that golden hour lighting changes rapidly, so work quickly and be prepared to adjust your settings as needed. Don’t forget to occasionally turn around – some of the most breathtaking shots might be behind you as the light transforms the landscape in unexpected ways.
Working with Challenging Light
Challenging light conditions are a common hurdle in nature photography, but with the right techniques, you can turn these obstacles into opportunities. During harsh midday sun, the intense overhead lighting can create unflattering shadows and wash out colors. Combat this by using a circular polarizing filter to reduce glare and enhance color saturation. Consider shooting in the shade or creating your own using a diffuser, which helps soften harsh shadows and provide more even illumination.
For overcast conditions, embrace the natural softbox effect of cloud cover. This diffused light is perfect for capturing detailed shots of flowers, forest scenes, and intimate landscapes. While some photographers pack up their gear on cloudy days, these conditions can actually reveal subtle color variations and textures that might be lost in direct sunlight. If you’re interested in expanding your shooting schedule, check out our low-light photography tips for capturing nature after sunset.
When working in challenging light, your camera’s exposure compensation becomes your best friend. In bright conditions, try underexposing by 1/3 to 2/3 stops to preserve highlight detail. For overcast scenes that appear flat, boost contrast in-camera or utilize HDR techniques to capture more dynamic range. Remember to check your histogram frequently and shoot in RAW format, giving yourself more flexibility to adjust exposure and recover details in post-processing.
Composition Techniques for Natural Environments
Leading Lines in Nature
Leading lines are one of the most powerful landscape photography techniques you can master in nature photography. These natural pathways draw viewers into your image and create a sense of depth that transforms flat photographs into immersive experiences.
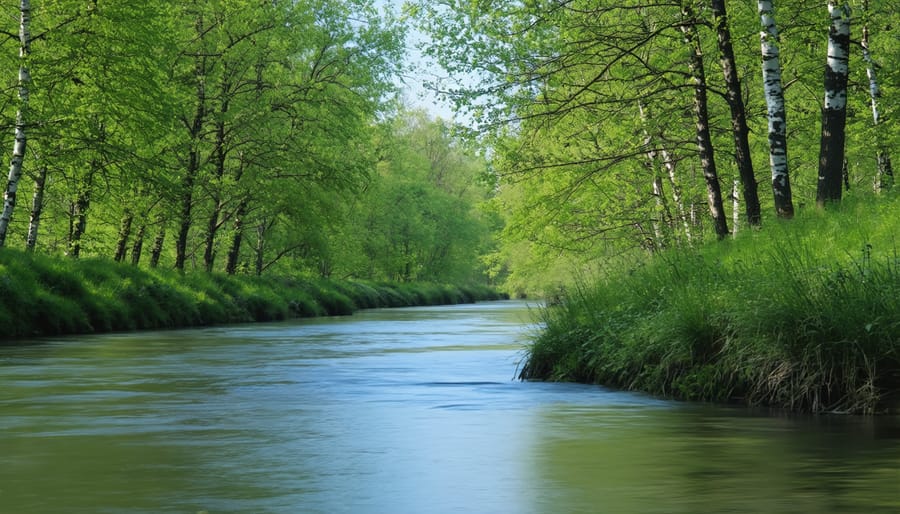
In nature, leading lines appear everywhere once you train your eye to spot them. Fallen trees create powerful diagonal lines that guide viewers through forest scenes. Meandering streams and rivers form subtle S-curves that add grace and movement to your compositions. Even the repetitive patterns of sand dunes or rock formations can serve as compelling directional elements.
To effectively use leading lines, position yourself to maximize their impact. Get low to emphasize the sweeping curve of a beach shoreline, or find high vantage points to capture the dramatic lines of mountain ridges. Consider how these lines interact with your main subject – they should guide the viewer’s eye toward your focal point, not away from it.
Morning and evening light can enhance leading lines dramatically. The long shadows cast during golden hour create temporary lines that add depth to otherwise flat landscapes. In forests, shafts of light breaking through the canopy form ethereal leading lines that transform ordinary scenes into magical moments.
Remember that leading lines don’t always need to be straight. Curved paths, winding rivers, and spiral patterns in nature often create more engaging compositions than straight lines. They invite viewers to linger and explore your image more thoroughly, creating a more memorable visual experience.
Frame Within Frame
Nature offers countless opportunities to create stunning compositions using natural frames, a technique that can add depth and context to your wildlife and landscape photos. Think of tree branches arching over a mountain vista, a cave opening revealing a sunset, or flowering vines creating a natural window around your subject.
To effectively use frame within frame composition, start by looking for natural elements that can serve as borders around your intended subject. These might include overhanging branches, rock formations, archways created by bent trees, or even tall grass in the foreground. The key is to ensure these natural frames complement rather than compete with your main subject.
Position yourself so the framing elements appear on at least two sides of your composition, though complete frames often create the most striking results. Consider the balance between the frame and subject – your natural frame should enhance the viewer’s focus on the main subject rather than distract from it.
When exposing your shot, remember that natural frames are often darker than your subject. You might need to use spot metering on your subject or bracket your exposures to ensure proper lighting throughout the image. Additionally, experiment with different apertures – a wider aperture can blur the framing elements slightly, creating a subtle vignette effect that draws even more attention to your subject.
The most effective natural frames often tell a story about the environment itself. A gnarled tree branch framing a desert scene speaks to the harsh conditions, while delicate flowers framing a butterfly capture the essence of spring. Look for these storytelling opportunities as you compose your shots.
Camera Settings for Environmental Shots
Focus Stacking for Landscapes
Focus stacking is a game-changing technique for landscape photographers who want to capture razor-sharp images from foreground to background. While a small aperture like f/16 can provide good depth of field, it often isn’t enough to keep every element perfectly sharp in complex scenes with close foreground elements.
To create a focus-stacked image, you’ll need to take multiple shots of the same composition, each focused at different distances. Start with the closest foreground element, then gradually shift focus toward the background, typically taking 3-7 images depending on the scene’s complexity. Using a tripod is absolutely essential for this technique to work.
The real magic happens in post-processing, where specialized software combines the sharpest parts of each image into a single, perfectly focused photograph. Popular options include Photoshop’s auto-blend layers feature or dedicated focus stacking software like Helicon Focus.
For best results, use manual focus and avoid changing your composition between shots. Wind can be your enemy here, so choose calm conditions when photographing scenes with delicate flowers or moving foliage. Remember to slightly overlap your focus points to ensure smooth transitions in the final image.
This technique is particularly effective for compositions featuring interesting foreground elements like rocks, wildflowers, or fallen leaves, while maintaining crystal-clear detail in distant mountains or trees.
Long Exposure Techniques
Long exposure photography can transform ordinary nature scenes into ethereal masterpieces, particularly when working with flowing water and moving clouds. The key to achieving these dreamy effects lies in understanding how to control your shutter speed and manage available light.
For waterfalls and streams, try starting with shutter speeds between 1/2 and 2 seconds to create that signature silky-smooth water effect. As you get more comfortable, experiment with longer exposures up to 30 seconds, especially in low-light conditions. This technique works particularly well during golden hour or on overcast days when the light is softer.
To capture dramatic cloud movements, you’ll need even longer exposures – typically between 30 seconds and several minutes. This transforms scattered clouds into striking streaks across the sky, adding a dynamic element to your landscape compositions. Remember that cloud movement is most visible when there’s a good mix of clouds and clear sky, and when winds are moderate.
Essential gear for long exposure work includes a sturdy tripod and neutral density (ND) filters. ND filters reduce the amount of light entering your lens, allowing for longer exposures even in bright conditions. Start with a 6-stop ND filter for general use, and consider a 10-stop filter for extreme long exposures.
Pro tip: Use your camera’s live view mode to focus before attaching the ND filter, as these filters can make it challenging to see through the viewfinder. Also, enable your camera’s long exposure noise reduction feature for cleaner final images.
Post-Processing for Nature Photography
Post-processing nature photos requires a delicate balance between enhancing the image’s natural beauty and maintaining its authenticity. The goal is to help your photographs tell the story you witnessed in the field, not create something that looks artificial or overly manipulated.
Start with basic adjustments in your editing software, focusing first on white balance to ensure accurate color reproduction. Nature’s colors are often subtle and nuanced, so avoid oversaturating your images. Instead, make selective adjustments to bring out the natural vibrancy of specific elements like autumn leaves or wildflowers.
Exposure adjustments are crucial but should be handled with care. Use graduated filters to balance bright skies with darker foregrounds, mirroring the techniques you might use with physical filters in the field. When working with shadows and highlights, maintain detail in both areas while preserving the natural contrast of the scene.
Cropping can strengthen your composition, but remember that less is often more. Consider the rule of thirds and natural framing elements when making your adjustments. For wildlife photos, ensure you’re not cropping too tightly and losing important context about the animal’s environment.
Detail enhancement requires a subtle touch. While sharpening can bring out texture in elements like tree bark or rock formations, avoid over-sharpening that creates halos or artificial-looking edges. When reducing noise, strike a balance between smoothing out graininess and maintaining fine detail.
For landscape images, consider using luminosity masks to make targeted adjustments to specific brightness zones. This technique allows you to enhance details in both shadows and highlights while maintaining a natural look. When working with skies, use careful dodging and burning to enhance cloud structure without making them appear dramatic or unrealistic.
Finally, before exporting your image, step away from your screen for a few minutes and return with fresh eyes. Ask yourself if the edited version still reflects the natural scene you experienced. The best nature photographs are those that enhance reality while staying true to it.
Nature photography is a journey of continuous learning and discovery, where each shoot presents new opportunities to refine your skills and creative vision. By mastering the fundamental techniques we’ve explored – from understanding your camera settings and composition rules to working with natural light and weather conditions – you’ll be well-equipped to capture stunning images of the natural world.
Remember that patience is perhaps your most valuable tool. The perfect shot often requires waiting for the right moment, whether it’s the golden hour light filtering through trees or wildlife emerging from its habitat. Don’t be discouraged if your first attempts don’t match your vision – every experienced nature photographer started exactly where you are.
Practice these techniques regularly, starting with familiar locations near your home. This allows you to experiment with different approaches while becoming intimately familiar with your equipment and the environment. As your confidence grows, challenge yourself by photographing in varying conditions and locations.
Keep a photography journal to track your progress and learn from each session. Note what worked, what didn’t, and why. This reflection will help you develop your unique style and approach to nature photography.
Most importantly, maintain respect for the natural environments and subjects you photograph. The best nature photographers are also stewards of the wilderness, capturing its beauty while ensuring its preservation for future generations.