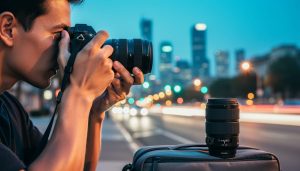
Transform your iPhone photography by learning to master your camera settings with precision-focused techniques that professional photographers use daily. Unlock your device’s full potential by mastering ProRAW capture for maximum editing flexibility, leveraging Portrait mode’s depth control for studio-quality shots, and harnessing the power of Night mode’s extended exposure capabilities. Whether you’re shooting sunlit landscapes or dimly lit interiors, your iPhone’s advanced camera system holds untapped potential through its professional-grade settings.
The difference between an ordinary snapshot and a stunning photograph often lies in the subtle adjustments of exposure, focus, and composition controls built into your iPhone’s camera interface. From controlling depth of field with Portrait mode to capturing high-dynamic-range scenes using Smart HDR, these professional-grade features rival traditional DSLR capabilities when properly configured. Understanding these settings doesn’t just improve your photos—it fundamentally changes how you approach mobile photography.
This guide breaks down essential camera settings for every shooting scenario, ensuring you capture frame-worthy shots in any lighting condition. Learn to harness your iPhone’s computational photography capabilities while maintaining creative control over every aspect of your image capture process.
Essential iPhone Camera Controls Every Photographer Should Master
Focus and Exposure Lock
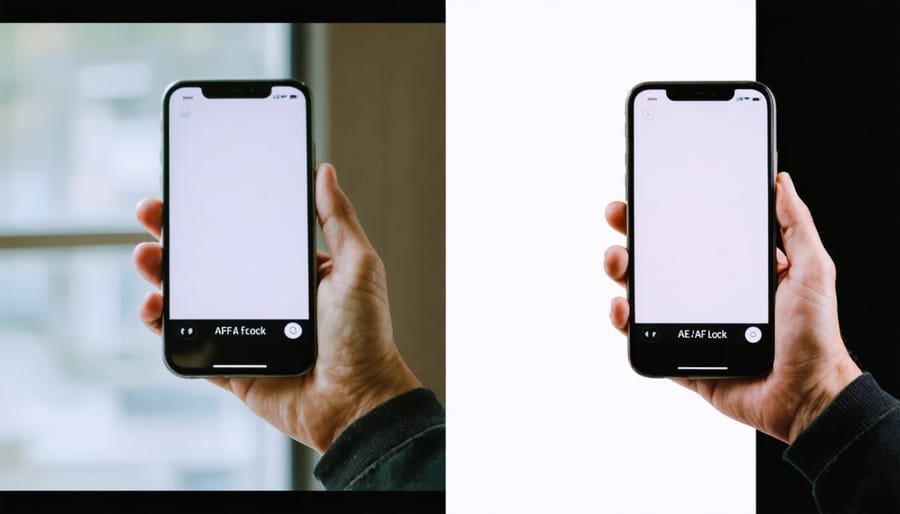
One of the most powerful features of your iPhone’s camera is the AE/AF lock (Auto Exposure/Auto Focus lock), which gives you precise control over your image composition. To activate this, simply tap and hold on your desired focus point until you see “AE/AF LOCK” appear at the top of your screen. This locks both the focus and exposure settings, allowing you to recompose your shot without the camera readjusting.
This feature is particularly useful in challenging lighting situations or when photographing moving subjects. For example, if you’re taking a portrait against a bright background, lock the exposure on your subject’s face to prevent overexposure. Similarly, when capturing action shots, pre-focus on your subject’s expected position by locking the focus.
To adjust exposure separately after locking focus, slide your finger up or down on the screen. This fine-tuning helps balance highlights and shadows while maintaining sharp focus. Remember that the lock stays active until you tap elsewhere on the screen, making it perfect for taking multiple shots with consistent settings.
Pro tip: When shooting in backlit situations, lock focus on your subject, then slightly increase exposure for better detail in shadowed areas.
HDR and ProRAW Settings
HDR (High Dynamic Range) and ProRAW are powerful features that can dramatically enhance your iPhone photos when used correctly. HDR automatically captures multiple exposures and combines them, perfect for scenes with bright highlights and dark shadows, like sunset landscapes or backlit portraits. Enable Auto HDR in your camera settings for the iPhone to intelligently decide when to use it, or toggle it manually in the camera app for more control.
ProRAW, available on iPhone 12 Pro and newer models, gives you the best of both worlds: Apple’s computational photography combined with the flexibility of RAW format. Enable it in Camera Settings when you need maximum editing control, especially in challenging lighting conditions or for professional work. Keep in mind that ProRAW files are significantly larger than standard photos, so use it selectively.
For everyday shots, HDR is usually sufficient, but switch to ProRAW when you need that extra editing headroom for fine-tuning exposure, white balance, and color. Remember to disable ProRAW when shooting casual photos to save storage space and processing time.
Grid Lines and Composition Tools
Your iPhone’s grid overlay is a powerful composition tool that can dramatically improve your photos. To enable it, go to Settings > Camera > Grid. This will display a 3×3 grid on your screen, helping you apply the rule of thirds – a fundamental photography principle where key elements are placed along the grid lines or at their intersections.
The grid also helps you keep your horizons perfectly level, which is especially important for landscape photography. For architectural shots, use the grid lines to ensure your vertical lines are straight and parallel. When capturing portraits, try positioning your subject’s eyes along the upper horizontal line for a more engaging composition.
For added precision, your iPhone’s camera also includes a built-in level that appears when shooting straight down or when your phone is perfectly parallel to the ground – particularly useful for food photography and overhead shots.
Portrait Photography Settings
Portrait Mode Depth Control
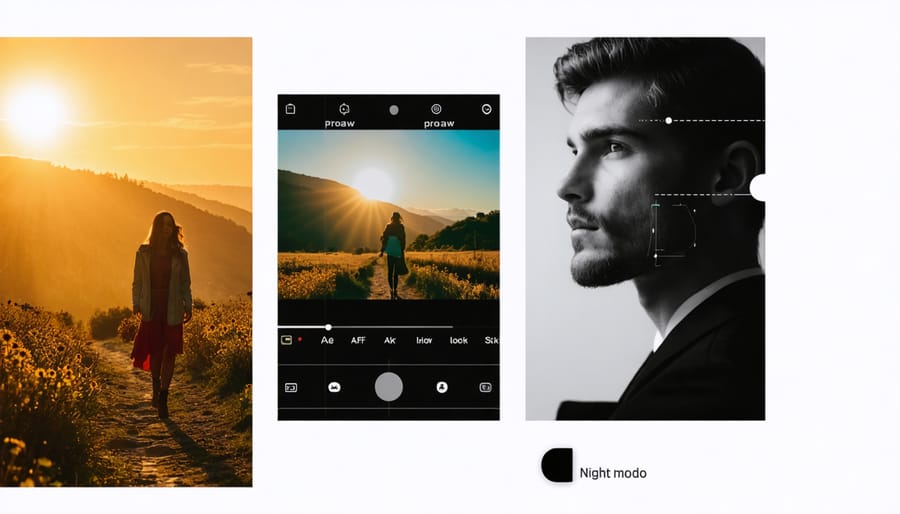
Portrait Mode on your iPhone isn’t just about creating a blurred background; it’s about having complete control over the depth effect to create professional-looking portraits. The depth control slider, which appears as an f-stop indicator at the top of your screen, lets you adjust the background blur both while shooting and after taking the photo.
For the most natural-looking results, start with an f/4.0 setting and adjust based on your subject and environment. Lower f-stop numbers (f/1.4 to f/2.8) create a more dramatic blur, perfect for isolating your subject against busy backgrounds. Higher numbers (f/8.0 to f/16) retain more background detail, which works well when the environment is part of your story.
Lighting effects in Portrait Mode add another dimension to your photos. The Natural Light setting works best in good ambient lighting, while Studio Light brightens facial features without appearing artificial. For dramatic shots, try Stage Light, which creates a spotlight effect by darkening the background. High-Key Light Mono transforms your portraits into elegant black-and-white images with a clean, white background.
Remember that Portrait Mode works best when your subject is 2-8 feet away from the camera, and ensure there’s adequate separation between your subject and the background. For the most accurate depth effect, avoid complex foregrounds and shoot in well-lit conditions where your iPhone can clearly distinguish between subject and background.
Natural Light Portrait Settings
Natural lighting can transform your iPhone photos from ordinary to extraordinary when you understand the right settings. Mastering light in photography starts with proper exposure control. For outdoor shots, tap and hold on your subject to lock focus and exposure, then slide up or down to fine-tune brightness. In bright conditions, enable HDR mode to capture both highlights and shadows effectively.
When shooting outdoors, activate the grid feature (Settings > Camera > Grid) to help compose your shots using the rule of thirds. If you’re dealing with harsh sunlight, use the exposure compensation tool by tapping the screen and adjusting the sun icon that appears. This helps prevent overexposed skies and underexposed subjects.
For indoor natural light portraits, position your subject near windows where natural light photography techniques work best. Set your iPhone’s camera to Portrait mode and choose Natural Light or Studio Light, depending on the ambient lighting conditions. In low-light situations, tap to focus on your subject’s face and slightly increase exposure by sliding up.
Pro tip: Use your iPhone’s Night mode selectively for indoor portraits in challenging light. While it’s automatically enabled in low light, you can adjust the capture time by tapping the Night mode icon and sliding the timer. For the sharpest results, keep it at 1-2 seconds and stabilize your phone against a solid surface.
Remember to avoid using flash in natural light situations, as it can create harsh shadows and unnatural skin tones. Instead, work with the available light and use reflective surfaces like white walls or cards to bounce light onto your subject’s face.
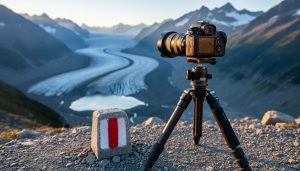
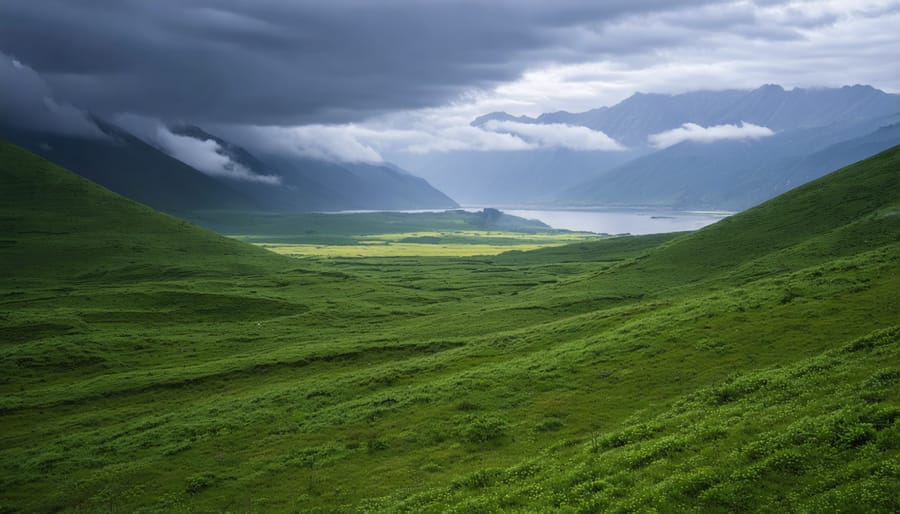
Landscape Photography Configuration
Wide-Angle Lens Settings
The iPhone’s ultra-wide lens opens up exciting possibilities for capturing expansive landscapes and dramatic architectural shots. To maximize its potential, start by ensuring you’re shooting in well-lit conditions, as the wider aperture can sometimes struggle in low light. Position yourself to include interesting foreground elements that create depth and lead the viewer’s eye through the frame.
For the sharpest wide-angle shots, tap to focus on the main subject and swipe down on the exposure control to slightly underexpose the image, preventing highlight blowout. When shooting landscapes, enable the grid overlay to keep your horizon perfectly level. The ultra-wide lens works best when you’re close to your subject, typically within 2-3 feet, creating a dramatic perspective that emphasizes depth.
To minimize distortion at the edges, keep important subjects toward the center of the frame. If you’re shooting architecture, enable the lens correction feature in your camera settings to reduce the barrel distortion common in wide-angle photography. For group shots, position people slightly away from the edges to avoid unflattering stretching effects.
For creative effects, try shooting from extremely low or high angles. The ultra-wide lens can make ordinary scenes look extraordinary when you experiment with unique perspectives. Remember to clean your lens frequently, as the wider field of view makes dust and smudges more noticeable in your final images.
Dynamic Range Optimization
Mastering dynamic range is crucial for capturing stunning iPhone photos in challenging lighting conditions. The iPhone’s Smart HDR and HDR settings are your best allies when dealing with scenes that have both bright highlights and dark shadows.
To access these controls, open your Camera app and look for the HDR icon at the top of the screen. By default, your iPhone automatically decides when to use HDR, but you can take manual control by tapping the icon. When enabled, your iPhone captures multiple exposures and combines them into a single image that preserves detail in both bright and dark areas.
For high-contrast scenes, like sunset landscapes or backlit portraits, consider enabling HDR manually. However, in some situations, like artistic silhouettes or dramatic shadow play, you might want to disable HDR to maintain the natural contrast of the scene.
A pro tip for maximizing dynamic range is to tap and hold on your focus point, then slide up or down to adjust exposure compensation. This gives you precise control over the overall brightness while HDR handles the dynamic range. For extremely challenging scenes, try capturing in ProRAW format (available on newer iPhone models), which preserves more detail in highlights and shadows for post-processing.
Remember that HDR photos take slightly longer to process, so keep your iPhone steady for a moment after pressing the shutter to ensure sharp results.
Low-Light and Night Photography
Night Mode Customization
Night Mode on your iPhone is a powerful feature that can transform challenging low-light situations into stunning photographs when properly configured. To make the most of Night Mode, you’ll want to fine-tune its settings based on your specific shooting scenario.
When shooting in very dark conditions, tap the Night Mode icon (the moon symbol) to access manual controls. By default, your iPhone automatically suggests an exposure time, but you can adjust this by sliding the timer above the shutter button. Longer exposures (up to 30 seconds on newer models) capture more light but require greater stability.
For cityscapes and static scenes, opt for longer exposure times of 10 seconds or more to capture rich details and vibrant light trails. However, when photographing people or moving subjects, keep exposures shorter (2-3 seconds) to minimize motion blur. Using a tripod or stabilizing your iPhone against a solid surface becomes crucial for exposures longer than 5 seconds.
Pay attention to the yellow Night Mode indicator, which suggests the optimal exposure time based on available light and camera movement. For the sharpest results, enable the timer feature to eliminate any camera shake from pressing the shutter button.
In extremely dark environments, combine Night Mode with the Focus Lock feature by tapping and holding on your subject. This prevents the camera from hunting for focus during the long exposure. For scenes with varying brightness levels, such as city streets, tap to set exposure on mid-tones rather than the brightest or darkest areas to maintain balanced lighting throughout your image.
Remember that Night Mode automatically disables when there’s sufficient light, so you’ll need to manually enable it in borderline lighting conditions if you want that specific effect.
Low-Light Focus Techniques
Capturing sharp photos in low light can be challenging, but your iPhone has several features to help you nail focus even in dim conditions. Start by tapping the darkest part of your scene to activate the iPhone’s autofocus system. Hold your finger down until you see “AE/AF Lock” appear – this locks both focus and exposure, preventing the camera from hunting for focus while you compose your shot.
In extremely low light, use your iPhone’s flashlight feature (not the camera flash) to temporarily illuminate your subject. This helps the camera find focus, after which you can turn off the light and take your photo. If you’re shooting through glass or in foggy conditions, place your iPhone lens directly against a solid surface to minimize interference with the focusing system.
The iPhone’s Night mode automatically activates in low light, but you can manually adjust its duration by tapping the Night mode icon and sliding the timer. Longer exposure times require steadier hands, so consider using a tripod or stabilizing your phone against a solid surface.
For close-up subjects in low light, try using the telephoto lens if your iPhone has one. It typically has a larger aperture, which helps gather more light and achieve better focus. Remember that patience is key – give your iPhone a moment to find focus before pressing the shutter, especially in challenging lighting conditions.
Action and Sports Photography
Burst Mode Settings
Burst mode is your secret weapon for capturing fast-moving subjects or ensuring you get the perfect shot in challenging situations. To activate burst mode on newer iPhone models, simply press and hold the shutter button in the Camera app. For iPhone XS and earlier models, hold down the Volume Up button while holding your camera steadily.
When using burst mode, your iPhone captures multiple frames per second, allowing you to select the best shot afterward. This feature is particularly valuable for action shots, sports photography, or capturing the perfect expression in portrait photography.
To get the most out of burst mode:
1. Ensure you have adequate lighting, as burst shots require faster shutter speeds
2. Maintain focus on your subject by tapping and holding the focus point before starting the burst
3. Keep your device as stable as possible during the burst sequence
4. Consider using a tripod for extended burst sessions
After capturing your burst shots, tap the burst thumbnail and select “Select…” to review your images. Scroll through the sequence and tap the circles below each photo you want to keep. The dots below each frame indicate the quality of that particular shot, helping you identify the sharpest images.
Remember to delete unnecessary burst photos to save storage space, as these sequences can quickly fill up your device’s memory.
Motion Blur Control
Controlling motion blur on your iPhone can dramatically impact the storytelling quality of your photos, whether you want to freeze action or create artistic blur effects. The key lies in understanding how to manipulate your shutter speed through available iPhone controls.
For freezing motion, tap to focus on your subject, then slide down on the exposure control to slightly darken the image. This tricks your iPhone into using a faster shutter speed. In bright conditions, this technique works particularly well for capturing sports, kids playing, or wildlife in motion.
To intentionally create motion blur, do the opposite: slide up on the exposure control to brighten the scene, forcing a slower shutter speed. This technique works beautifully for flowing water, moving lights at night, or creating artistic streaks in your composition. For best results, stabilize your iPhone against a solid surface or use a tripod.
In the latest iPhone models, you can also use Night mode to your advantage. When activated in low-light conditions, it naturally uses longer exposure times. Try deliberately moving your camera during a Night mode shot to create interesting light trails and motion effects.
For precise control over motion blur, consider using third-party camera apps that offer manual shutter speed settings. These give you more creative freedom but require some practice to master.
Remember that successful motion shots often need several attempts, so don’t be discouraged if your first few tries don’t yield the results you’re looking for.
Mastering your iPhone’s camera settings is an ongoing journey of discovery and experimentation. As we’ve explored throughout this guide, the key to capturing stunning photos lies in understanding and utilizing the various controls at your disposal. From adjusting exposure and focus to mastering Portrait mode and Night mode, each setting serves a specific purpose in helping you achieve your creative vision.
Remember that while these recommended settings provide an excellent starting point, photography is inherently personal and creative. What works perfectly for one scene might need adjustment for another. Don’t be afraid to step outside these guidelines and experiment with different combinations of settings to develop your unique style.
Keep in mind that lighting conditions, subject matter, and your artistic intent will always influence which settings work best. Start with the basics we’ve covered – proper exposure, focus control, and composition tools – then gradually incorporate more advanced techniques as you become comfortable.
Practice is essential. Take time to familiarize yourself with these settings in different scenarios. Try shooting the same subject with various configurations to understand how each setting affects your final image. Save your favorite combinations in your camera presets for quick access during future shoots.
Most importantly, enjoy the process of learning and creating. Your iPhone is a powerful photographic tool, and with these settings mastered, you’re well-equipped to capture memorable moments with professional-quality results.