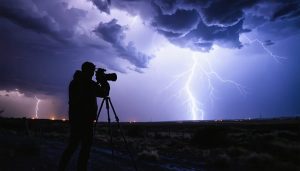
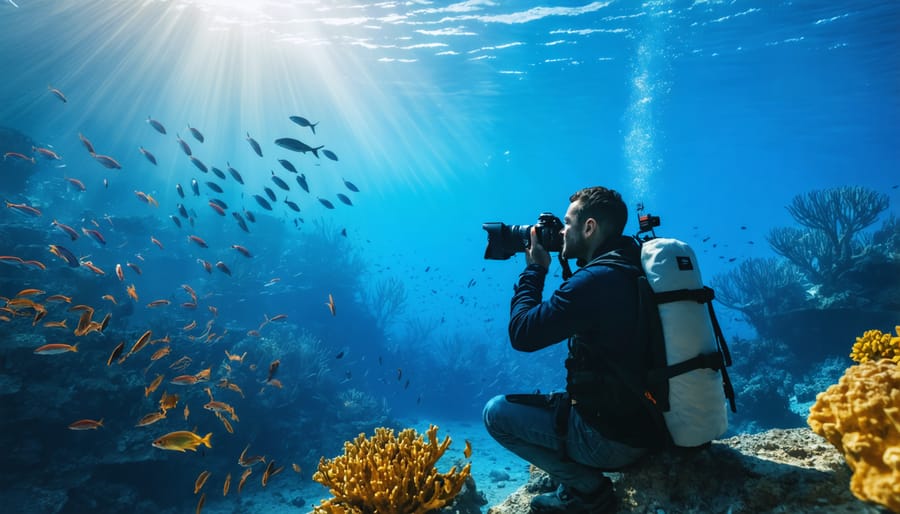
Dive beneath the surface to discover a world where light dances through crystal-clear waters, creating magical moments waiting to be captured. Professional underwater photography techniques transform fleeting encounters with marine life into timeless masterpieces, merging technical precision with artistic vision.
The ocean’s depths present unique challenges and unparalleled opportunities for photographers. Every ripple, every ray of sunlight filtering through the waters, and every vibrant coral formation offers potential for extraordinary images. Yet success requires more than just waterproof equipment – it demands an intimate understanding of marine environments, mastery of natural light behavior underwater, and unwavering respect for aquatic ecosystems.
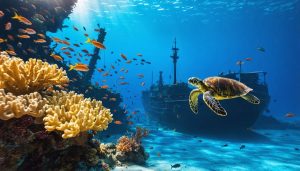
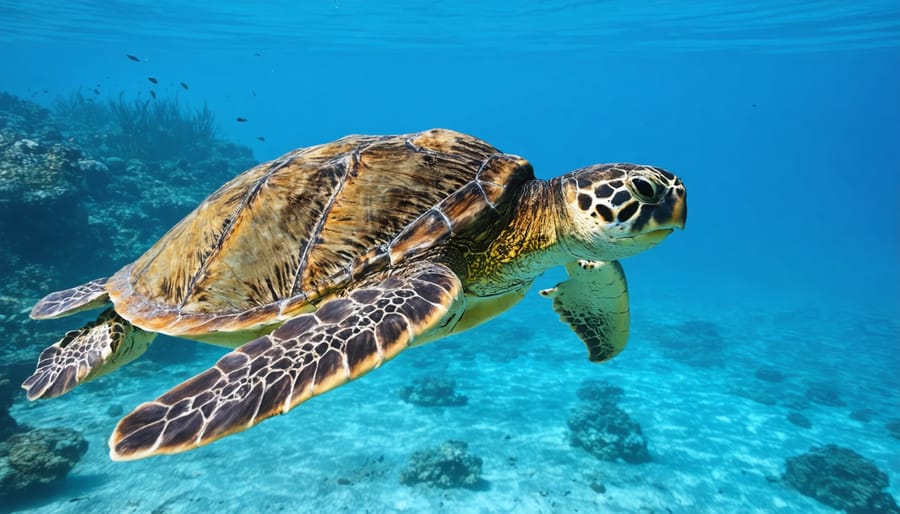
From the gentle ballet of sea turtles gliding through azure waters to the dramatic interplay of light and shadow in underwater caves, each shot tells a story of our planet’s most mysterious realm. Whether you’re capturing macro images of tiny seahorses or wide-angle scenes of expansive reef systems, underwater photography combines technical expertise with environmental stewardship to create compelling visual narratives that inspire conservation and wonder.
Essential Underwater Photography Gear
Choosing the Right Camera and Housing
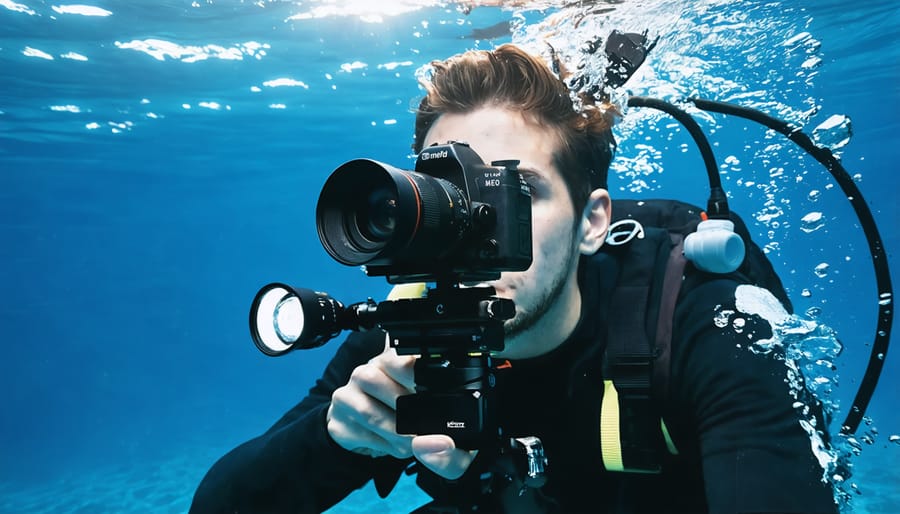
Selecting the right camera and housing setup is crucial for capturing stunning underwater images. For beginners, a quality compact camera with a dedicated underwater housing offers an excellent entry point. Popular options like the Olympus Tough TG-6 or Sony RX100 series provide great image quality and built-in underwater modes without breaking the bank.
For more serious photographers, mirrorless cameras offer an ideal balance between image quality and portability. Cameras like the Sony A7 series or Olympus OM-D line paired with quality underwater housings from manufacturers like Nauticam or Ikelite provide professional-grade results. These setups allow for interchangeable lenses and offer superior low-light performance, crucial for deeper dives.
When choosing a housing, consider depth rating, build quality, and control accessibility. Entry-level plastic housings are suitable for shallow dives and snorkeling, while aluminum housings offer better durability and deeper depth ratings. Ensure your housing includes moisture detectors and multiple O-ring seals for maximum protection.
Don’t forget about lighting accessories – most underwater housings feature mounting points for strobes or video lights. Start with a single strobe setup and add a second as your skills progress. Look for housings with fiber optic ports for reliable flash triggering.
Remember that proper maintenance is essential. Regular O-ring inspection, proper lubrication, and careful cleaning after each dive will protect your investment. Consider purchasing backup O-rings and silica gel packets to prevent fogging. While professional setups can be expensive, many rental options are available for trying different configurations before making a significant investment.
Lighting Equipment for the Deep
When shooting underwater, natural light quickly diminishes as you descend, making artificial lighting essential for capturing vibrant, colorful images. Two primary lighting tools dominate underwater photography: strobes and video lights, each serving distinct purposes in your underwater arsenal.
Strobes are powerful flash units specifically designed for underwater use, providing brief, intense bursts of light that freeze motion and reveal the true colors of marine life. Most underwater photographers use a dual-strobe setup, positioning them at 10 and 2 o’clock relative to the camera for even illumination. This arrangement helps eliminate unwanted shadows and creates depth in your images. When mastering advanced lighting techniques, you’ll learn to adjust strobe power and positioning to achieve different creative effects.
Video lights, on the other hand, provide continuous illumination, making them ideal for focus assistance and video work. They’re particularly useful in macro photography, helping you compose shots in darker waters. Modern LED video lights offer adjustable power settings and color temperature controls, allowing you to match ambient light conditions or create dramatic lighting effects.
The choice between strobes and video lights often depends on your shooting style and subjects. Strobes excel at wide-angle photography and capturing fast-moving subjects, while video lights shine in macro situations and cave photography. Many photographers carry both types, switching between them as conditions demand.
Remember that proper maintenance of your lighting equipment is crucial in the harsh marine environment. Regular cleaning of O-rings, checking for water damage, and carrying backup batteries can prevent equipment failures during crucial moments underwater.
Mastering Underwater Camera Settings
Understanding Light Behavior Underwater
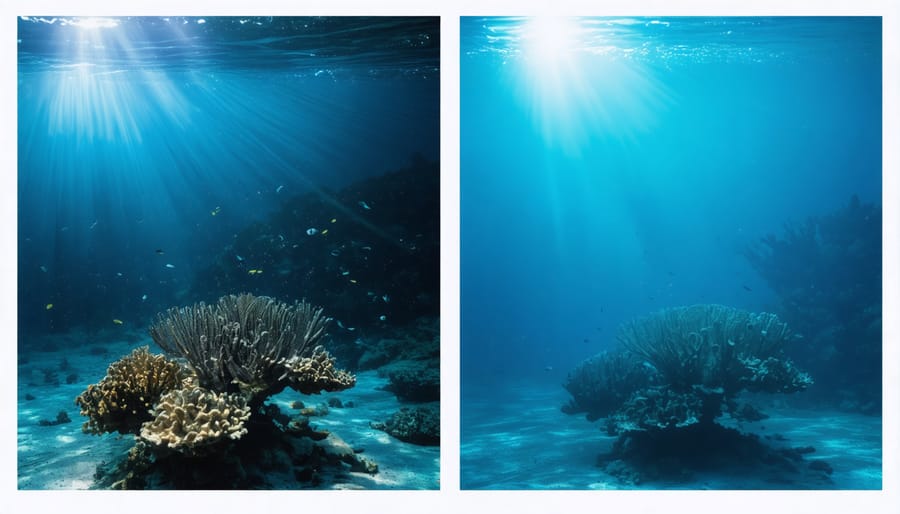
Water dramatically alters how light behaves, making underwater photography uniquely challenging yet rewarding. As light travels through water, it encounters particles and molecules that scatter, absorb, and reflect it in ways quite different from air. To improve underwater image quality, understanding these interactions is crucial.
The first thing photographers notice underwater is how quickly colors fade with depth. Red wavelengths disappear first, typically within the first 15-20 feet, followed by orange, yellow, and green. This explains why many underwater photos appear predominantly blue or green. To counteract this effect, you’ll need to either use artificial lighting or adjust your white balance settings accordingly.
Water also reduces the amount of available light reaching your camera sensor. For every 33 feet (10 meters) of water depth, light intensity decreases by approximately 50%. This means you’ll often need to compensate by increasing your ISO, opening up your aperture, or using slower shutter speeds – though the latter can be challenging when photographing moving subjects like fish.
Backscatter is another common challenge underwater photographers face. These are tiny particles suspended in water that reflect light from your flash or strobe, appearing as bright spots in your images. To minimize backscatter, position your lighting at angles (usually 45 degrees or more) rather than pointing directly at your subject.
The refraction of light through water also affects how we perceive distance and size underwater. Objects appear about 25% larger and 25% closer than they actually are. This optical illusion means you’ll need to adjust your composition and focusing distance accordingly. Wide-angle lenses become even wider underwater, while macro lenses help capture stunning details of smaller subjects.
Remember that these light behaviors can vary significantly based on factors like water clarity, time of day, and depth. Understanding these principles will help you anticipate and adapt to changing conditions, resulting in more compelling underwater photographs.
Optimal Camera Configuration
Getting your camera settings right underwater is crucial for capturing stunning images. For general reef scenes in clear water during daylight, start with an aperture of f/8 to f/11 for good depth of field, and a shutter speed of at least 1/125 to freeze any movement. ISO can typically be set between 200-400 in good lighting conditions.
For macro photography of small creatures, open up your aperture to f/5.6 or wider to create beautiful bokeh while keeping your subject sharp. Use a faster shutter speed of 1/160 or higher to counteract any camera shake, especially important when shooting close-up.
When photographing fast-moving subjects like dolphins or sea turtles, increase your shutter speed to at least 1/250 and use continuous autofocus (AI Servo for Canon, AF-C for Nikon). Consider switching to burst mode to capture the perfect moment of action.
In low-light situations, such as diving at dawn or photographing deeper reefs, you’ll need to adjust accordingly. Open your aperture wider (f/4 or larger), slow your shutter speed to 1/60 (being careful not to go too slow), and increase ISO up to 800 or even 1600 if necessary. Remember that higher ISOs will introduce more noise, but modern cameras handle this well.
For wide-angle scenes with sun rays, expose for the highlights and use a slightly smaller aperture (f/11 to f/16) to create stunning sunburst effects. Keep your shutter speed relatively fast at 1/200 to maintain sharp details.
Always shoot in RAW format underwater to give yourself maximum flexibility in post-processing, particularly for adjusting white balance, which can be tricky underwater due to the way water absorbs different colors at varying depths. Start with auto white balance and fine-tune in post-production for the most natural-looking results.
Remember to check and adjust these settings before each dive, as conditions can change dramatically even at the same location depending on time of day, weather, and water clarity.
Composition Techniques for Underwater Shots
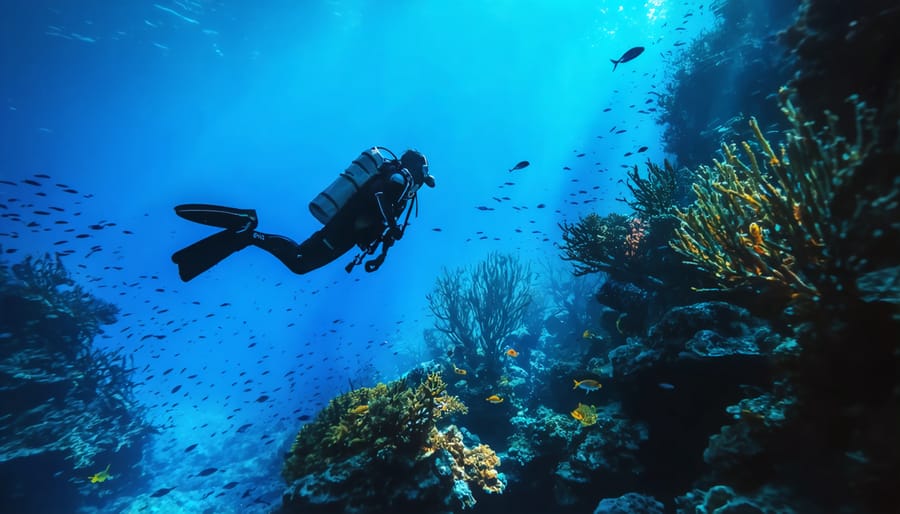
Working with Marine Life
When it comes to photographing marine wildlife responsibly, patience and respect for the underwater ecosystem are paramount. Always maintain a safe distance from marine creatures – a good rule of thumb is to stay at least 3-4 meters away from larger animals and never chase or pursue them. Let them approach you naturally, which often results in more authentic and engaging photographs.
Remember that flash photography can startle or disorient marine life. If using artificial light, opt for continuous lighting systems that are less disruptive. Keep your movements slow and controlled to avoid disturbing the surrounding environment and creating sediment clouds that can ruin your shots.
Before diving, research the behavior patterns of the species you hope to photograph. Understanding when and where certain creatures are most active will increase your chances of successful encounters while minimizing disturbance to their natural routines.
Never touch or manipulate marine life for a photo opportunity. Coral reefs are particularly fragile – even slight contact can damage decades of growth. Maintain proper buoyancy control and be aware of your fins and equipment to prevent accidental contact with the reef or seabed.
Consider using a wide-angle lens for larger marine life, as it allows you to capture the subject in its natural environment while maintaining a respectful distance. For smaller creatures, a macro lens will help you get detailed shots without getting too close.
Creating Depth and Drama
Creating depth and drama in underwater photography requires mastering several key techniques that transform flat images into captivating underwater scenes. One of the most effective methods is to incorporate foreground elements, such as coral formations or sea fans, to frame your main subject. This layering approach guides the viewer’s eye through the image while creating a strong sense of dimension.
Light plays a crucial role in adding drama to underwater shots. Position yourself so that sunlight creates striking light rays piercing through the water column – these ethereal beams add both depth and atmosphere to your compositions. For added impact, try shooting during the “golden hours” when the sun is low, creating dramatic shadows and highlighting textures in the underwater landscape.
Another powerful technique is to use negative space effectively. Sometimes, positioning your subject against the open blue water can create a striking sense of scale and isolation. When photographing larger subjects like whale sharks or shipwrecks, include a diver in the frame to provide scale reference and add human interest.
Color contrast can dramatically enhance your images’ visual impact. Look for complementary colors in the marine environment – orange clownfish against purple anemones, or red soft corals against the blue water background. Using a wide-angle lens close to your subject while maintaining visibility of the background creates that sought-after depth that makes underwater images so compelling.
Remember to experiment with different angles – shooting upward toward the surface can create stunning silhouettes, while getting low and shooting up at your subject can make even small creatures appear larger than life.
Environmental Considerations and Conservation
Minimizing Environmental Impact
As underwater photographers, we have a unique responsibility to protect the marine environments we capture. The key principle is simple: take only pictures, leave only bubbles. Before entering any marine environment, familiarize yourself with local regulations and best practices for the specific location you’ll be photographing.
Maintain proper buoyancy control to avoid damaging coral reefs or disturbing marine life. Stay at least three feet away from coral formations, and never touch or move marine creatures for a better shot. Practice your underwater photography skills in open water first, so you’re not learning buoyancy control while trying to photograph delicate ecosystems.
Choose reef-safe sunscreen to protect both your skin and marine life. Traditional sunscreens contain chemicals that can harm coral reefs and other marine organisms. Additionally, ensure your diving gear is properly secured to prevent any items from dragging across reefs or seabeds.
When photographing marine life, observe without interference. Avoid using artificial feeding to attract subjects, as this can disrupt natural behaviors and feeding patterns. Flash photography should be used sparingly around sensitive species, and never aimed directly at an animal’s eyes.
Be mindful of your positioning in the water. Hover horizontally rather than vertically to minimize stirring up sediment, which can harm coral polyps and reduce visibility for other photographers. When shooting macro subjects, be extra cautious of your fins and equipment placement.
Consider joining local marine conservation efforts or contributing your images to scientific research. Many organizations use underwater photography to monitor reef health and marine populations. By documenting these environments responsibly, you can help raise awareness about marine conservation while creating beautiful images.
Remember that timing is crucial. Some marine areas have specific seasons or times when photography causes minimal disruption to breeding or feeding activities. Research these patterns and plan your shoots accordingly to ensure both great shots and minimal environmental impact.
Using Photography for Conservation
Underwater photography isn’t just about capturing beautiful images – it’s becoming an increasingly powerful tool for marine conservation. As our oceans face unprecedented challenges, photographers are uniquely positioned to document both the beauty and destruction of marine ecosystems, following in the footsteps of pioneering environmental photographers throughout conservation photography history.
By capturing compelling images of marine life and habitats, photographers can raise awareness about critical issues like coral bleaching, plastic pollution, and endangered species. These visual stories often resonate more deeply with audiences than statistics alone, inspiring action and policy changes. For instance, images of sea turtles entangled in plastic waste have become powerful symbols in the fight against ocean pollution.
Photographers can contribute to conservation efforts in several practical ways:
Documentation: Regular photography of specific reef locations helps scientists track changes over time, providing valuable data about ecosystem health and the effects of climate change.
Species Identification: High-quality photographs assist marine biologists in identifying and monitoring species populations, including discovering new species.
Public Education: Sharing beautiful underwater images on social media and through exhibitions helps educate the public about marine life and conservation needs.
However, responsible photography practices are essential. Always maintain appropriate distances from marine life, never touch or manipulate subjects for a shot, and be mindful of your equipment’s impact on the environment. Many successful conservation photographers partner with marine scientists and conservation organizations to ensure their work directly supports research and protection efforts.
Consider joining citizen science projects where your images can contribute to scientific databases, or collaborate with local marine conservation groups to document their work. Remember that even simple, well-composed photos of common species can help tell important stories about our oceans’ health and the need for protection.
As we’ve explored throughout this guide, underwater photography opens up a mesmerizing world of possibilities, allowing us to capture the breathtaking beauty that lies beneath the waves. From selecting the right equipment to mastering lighting techniques and understanding marine life behavior, each element plays a crucial role in creating stunning underwater images.
Remember that successful underwater photography requires patience, practice, and respect for the marine environment. Always maintain a safe distance from marine life, never touch or disturb coral reefs, and be mindful of your buoyancy to avoid damaging delicate ecosystems. The best underwater photographers are those who understand that they are guests in this remarkable underwater world.
Start with the basics we’ve covered – proper camera settings, understanding natural light, and maintaining stable positioning underwater. As you grow more confident, experiment with different perspectives, compositions, and advanced lighting techniques. Don’t be discouraged if your first attempts aren’t perfect; every experienced underwater photographer started as a beginner.
Most importantly, approach underwater photography with a conservation mindset. Share your images to raise awareness about marine life protection and ocean conservation. Beautiful underwater photography isn’t just about capturing stunning images; it’s about becoming an ambassador for our oceans and inspiring others to appreciate and protect these precious ecosystems for future generations.