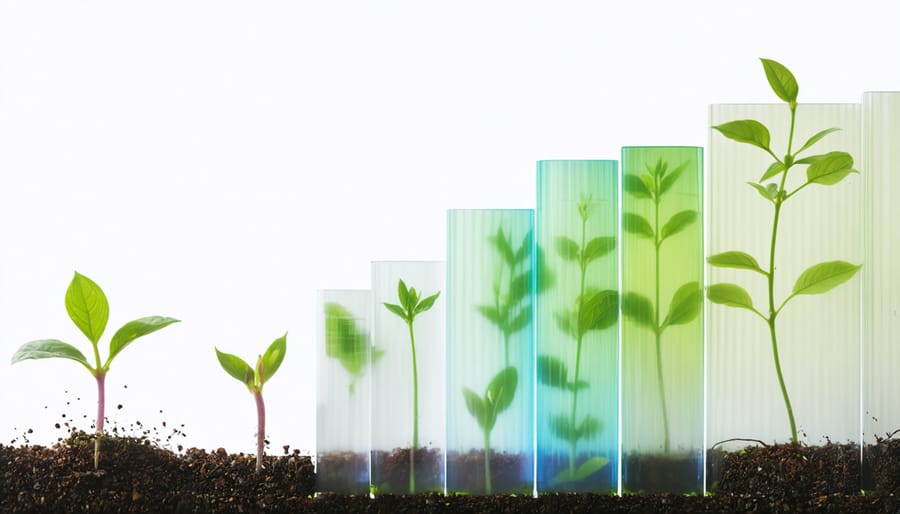
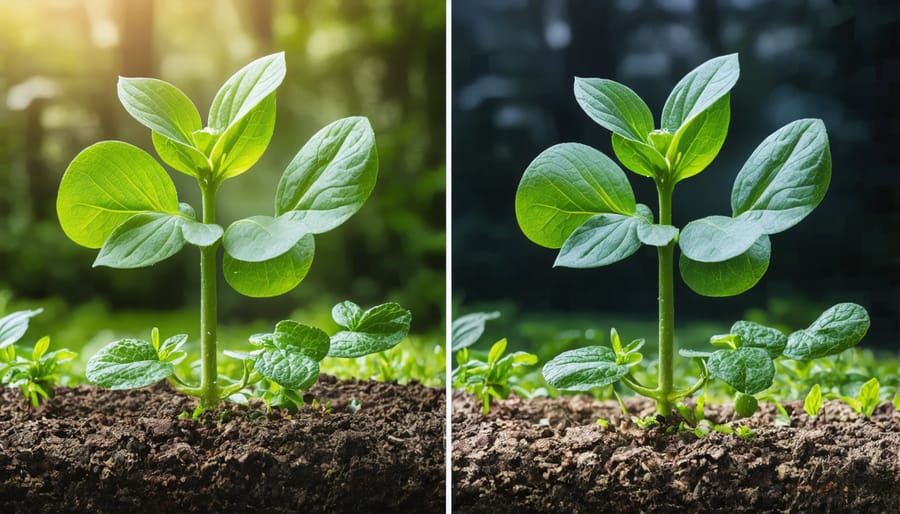
Time-lapse photography transforms months of plant growth into mesmerizing minutes, revealing nature’s hidden ballet of unfurling leaves, stretching stems, and blooming flowers. Through precisely timed exposures spanning days or weeks, photographers capture the subtle dance of phototropism, the dramatic burst of germination, and the graceful arc of flowering cycles that normally escape our notice.
This intersection of technical precision and botanical patience has revolutionized how we understand and appreciate plant development. Whether documenting a simple bean sprout’s emergence from soil or recording the complex choreography of a vine climbing its trellis, time-lapse photography unveils the dynamic nature of seemingly static plant life.
For photographers and plant enthusiasts alike, mastering plant time-lapse photography requires a unique blend of horticultural knowledge, camera expertise, and environmental control. From selecting the right intervals for different growth stages to maintaining consistent lighting conditions, every element must be carefully orchestrated to create compelling visual narratives that compress time while preserving the natural beauty of plant movement.
As we explore the technical and creative aspects of plant time-lapse photography, you’ll discover how to transform your camera into a window through time, revealing the extraordinary in the ordinary growth patterns of the botanical world. Whether you’re a seasoned photographer or an curious gardener, these techniques will open new perspectives on the living, breathing nature of plants.
Essential Equipment for Plant Time-Lapse Photography
Camera and Lens Selection
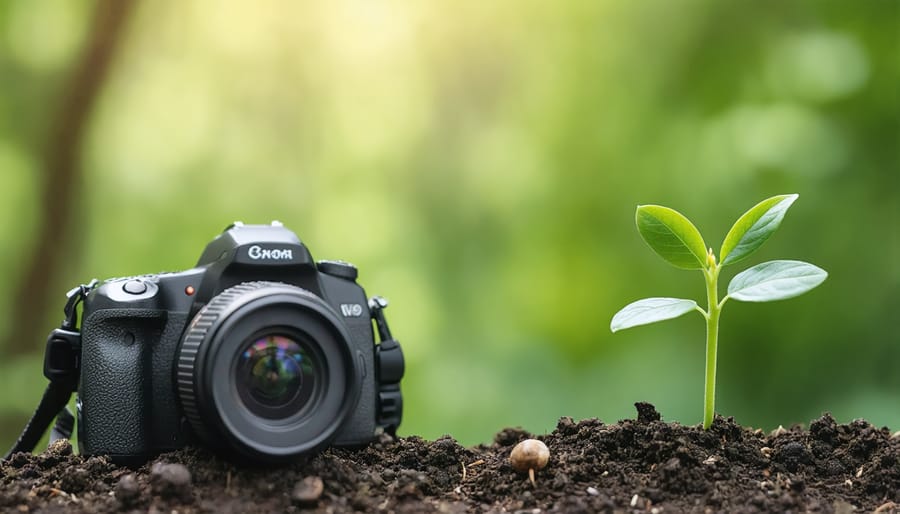
For plant time-lapse photography, your choice of camera and lens can significantly impact the final result. A DSLR or mirrorless camera with manual controls and intervalometer capabilities is essential. Look for cameras with good battery life and the ability to handle extended shooting periods. The Canon EOS R or Nikon Z series are excellent choices, offering reliable performance and weather sealing for outdoor shoots.
When it comes to lenses, versatility is key. While you might be tempted to immediately reach for macro photography techniques and specialized lenses, a standard 24-70mm zoom lens often provides the perfect balance for most plant subjects. This focal range allows you to capture both detailed shots of individual plants and wider compositions showing environmental context.
For smaller subjects or detailed growth patterns, consider adding a macro lens to your kit. The 100mm macro is particularly versatile, offering enough working distance to avoid disturbing your subject while maintaining sharp detail. Whatever your choice, ensure your lens has good minimum focusing distance capabilities and consistent performance across apertures.
Support and Stabilization Gear
Stable support gear is crucial for capturing smooth, consistent plant time-lapse sequences. A sturdy tripod forms the foundation of your setup, and choosing one with a robust locking mechanism ensures your camera won’t drift during extended shooting periods. Look for tripods with adjustable legs that can handle uneven surfaces, as you might need to position your setup in gardens or greenhouses.
For more dynamic sequences, a motorized camera slider can add subtle movement to your shots, creating cinematic results. These devices move your camera incrementally between frames, though they require careful setup to maintain consistent lighting across the sequence.
Plant-specific mounting solutions include clamp systems and flexible arms that can be secured to greenhouse frames or garden structures. When working indoors, magic arms with super clamps offer versatile positioning options. Remember to factor in your plant’s expected growth direction when positioning your support gear – you’ll want to leave ample space for the subject to develop without interfering with your equipment.
Consider using a dedicated macro focusing rail for detailed close-up sequences of smaller plants or specific plant parts, allowing precise camera positioning adjustments.
Lighting and Environmental Control
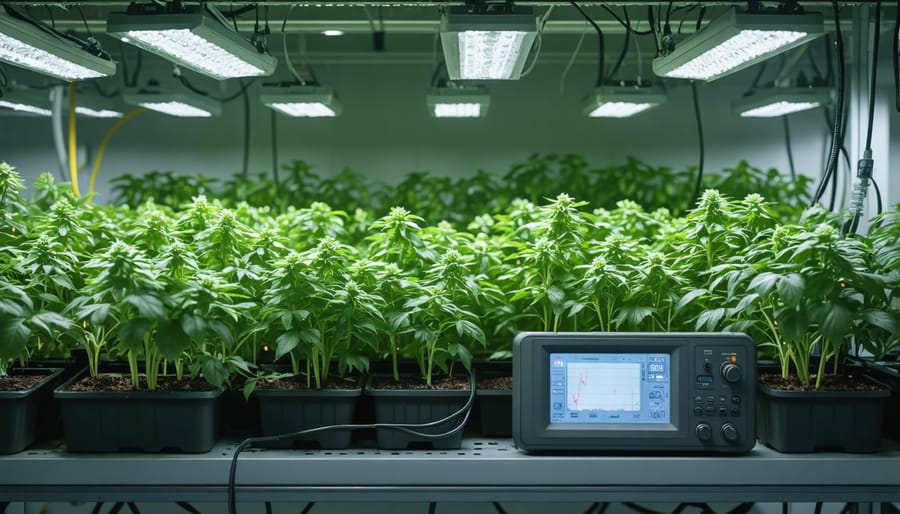
Consistent lighting is crucial for creating seamless time-lapse sequences of growing plants. Natural light can work well, but it introduces variables that might affect your final result. For better control, consider using LED grow lights, which provide steady illumination while supporting plant health. Creating an optimal lighting setup might involve combining grow lights with diffused ambient lighting to minimize harsh shadows.
Temperature and humidity control are equally important. Most indoor plants thrive between 65-75°F (18-24°C) with relative humidity around 50-60%. Use a basic thermometer and hygrometer to monitor conditions, and consider adding a small humidifier if needed. Maintain consistent environmental conditions throughout your shooting period to ensure healthy plant growth and avoid stress responses that could affect your time-lapse sequence.
For more controlled results, dedicate a small space like a grow tent or corner of a room where you can manage both lighting and environmental factors without interference from external conditions.
Setting Up Your Plant Time-Lapse Shot
Interval and Duration Planning
Calculating the right interval between shots is crucial for creating compelling plant time-lapse sequences. Different plants grow at varying rates, so your shooting schedule needs to adapt accordingly. Fast-growing plants like bamboo or sunflowers might require shots every 15-30 minutes, while slower-growing plants like succulents could need only 1-2 shots per day.
A good rule of thumb is to observe your plant’s growth rate for 24-48 hours before starting your project. If you notice visible changes within hours, set shorter intervals (10-30 minutes). For plants that show minimal daily growth, longer intervals of 3-6 hours might be more appropriate.
Consider these general guidelines for common plants:
– Seedlings and sprouts: 5-15 minute intervals for the first 48 hours
– Flowering plants: 20-30 minute intervals during bloom periods
– Vine growth: 30-60 minute intervals
– Indoor houseplants: 2-4 hour intervals
– Slow-growing cacti: 12-24 hour intervals
Remember to factor in your storage capacity and final video length. For a 30-second video at 24fps, you’ll need 720 frames. Working backward from your desired video duration helps determine your shooting frequency. Also account for lighting conditions – you might want to adjust intervals to capture key moments during daylight hours.
Always plan for longer than you think you’ll need, as plant growth can be unpredictable and influenced by environmental factors like temperature and humidity.
Camera Settings and Configuration
For successful plant time-lapse photography, getting your camera settings for nature photography dialed in is crucial. Start by setting your camera to manual mode to maintain consistent exposure throughout the sequence. Choose an aperture between f/8 and f/11 for optimal depth of field, ensuring your entire plant remains sharp as it grows.
ISO should be kept as low as possible (ideally 100-400) to minimize noise in your images. If shooting indoors with grow lights, you might need to increase this slightly, but try to stay below ISO 800. Shutter speed isn’t as critical since plants move slowly, but 1/60th to 1/200th of a second typically works well.
White balance must be set manually to prevent color shifting between frames. If using artificial lighting, take a test shot with a gray card to establish accurate colors. Enable your camera’s interval timer or connect an external intervalometer to capture images consistently. For most plants, taking a photo every 15-30 minutes during daylight hours will produce smooth motion in your final video.
Set your focus manually and disable auto-focus to prevent the camera from hunting between shots. If your camera has a silent shooting mode, enable it to reduce wear on the mechanical shutter. Always shoot in RAW format to give yourself maximum flexibility during post-processing.
Environmental Considerations
Creating the perfect environment for plant time-lapse photography is crucial for achieving professional results. Light consistency is particularly important – sudden changes in lighting can create flickering effects in your final video. Consider setting up your shoot in a room with controlled lighting, using LED grow lights that can maintain constant illumination throughout your capture period.
Temperature control plays a vital role in both plant health and equipment performance. Most plants thrive between 65-75°F (18-24°C), but your camera and other electronic equipment need to stay cool to prevent overheating during long shooting sessions. Keep your setup away from direct heat sources and ensure proper ventilation around your equipment.
Humidity is another critical factor, especially for indoor shoots. While many plants enjoy humidity, excess moisture can damage your camera equipment. Consider using a small dehumidifier near your camera setup while maintaining appropriate moisture levels for your plants with a humidity tray or mister.
Air movement can cause unwanted plant motion, resulting in jerky time-lapse sequences. Shield your setup from air conditioning vents and drafts, but don’t completely eliminate air circulation – plants need some airflow to stay healthy. A gentle fan set on low can provide the right balance.
Remember to monitor your environmental conditions regularly. Small changes in these factors can significantly impact both your subject’s growth and the quality of your final time-lapse production.
Advanced Techniques and Creative Approaches
Multiple Camera Angles
Capturing plant growth from multiple angles adds depth and visual interest to your time-lapse project while ensuring you don’t miss any crucial moments of development. By strategically positioning two or more cameras, you can document your subject from different perspectives, creating a more comprehensive and engaging final presentation.
Consider setting up cameras to capture both side and top-down views of your plant. A side angle shows the vertical growth and stem development, while an overhead shot reveals leaf spread and flowering patterns. For climbing plants or vines, you might want to add a third camera positioned at 45 degrees to capture the plant’s interaction with its support structure.
When working with multiple cameras, synchronization is crucial. Use cameras of the same make and model if possible, as this ensures consistent image quality and simplifies post-processing. Set identical intervals across all cameras and use a central timer or controller to trigger them simultaneously. This coordination makes editing much smoother later on.
Space management becomes more critical with multiple cameras. Create a lighting setup that evenly illuminates your subject from all angles without casting shadows from one camera onto another’s field of view. Use smaller, more compact camera bodies when possible, and consider mounting options that don’t interfere with each other’s shots.
Remember to account for power supply and storage capacity across all devices. External power adapters and high-capacity memory cards are essential for long-term shooting. Additionally, ensure each camera’s settings are optimized for the specific angle it’s covering, adjusting exposure and focus accordingly.
Combining Different Time Scales
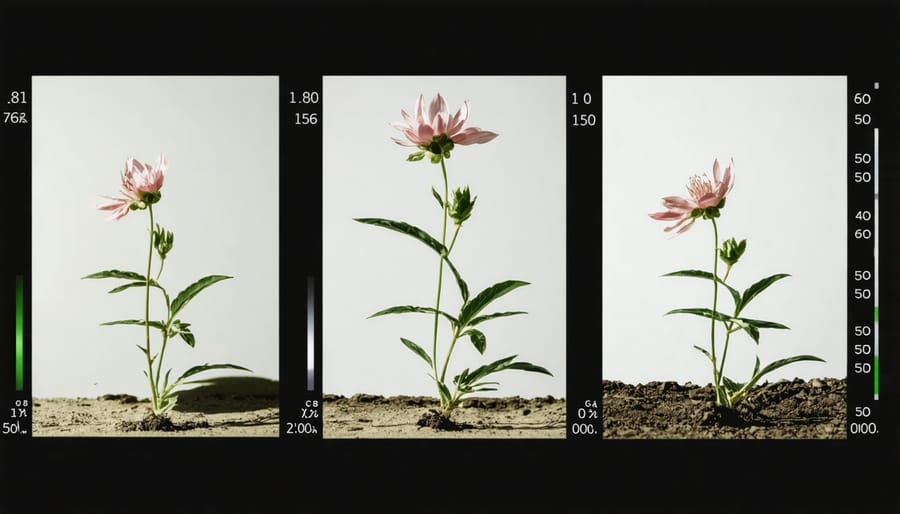
One of the most captivating aspects of plant time-lapse photography is the ability to mix different time intervals within a single sequence. By varying your capture intervals, you can highlight both rapid changes and gradual developments in your plant’s growth journey.
For instance, you might want to capture a flower’s dramatic blooming moment at shorter intervals (perhaps every 30 seconds) while documenting the slower leaf growth at longer intervals (maybe every 30 minutes). This technique creates a more engaging narrative and helps viewers focus on the most interesting moments of plant development.
To execute this effectively, start by mapping out your plant’s growth phases. Morning glory flowers, for example, open rapidly at dawn but remain static for hours afterward. You could capture the unfurling at 15-second intervals, then switch to 10-minute intervals for the rest of the day. This approach ensures you don’t miss crucial moments while avoiding unnecessary frames during slower periods.
Modern intervalometers and time-lapse apps often include programming features that allow you to set multiple capture schedules. If your equipment doesn’t support this, you can achieve similar results by manually adjusting intervals at key times or combining separate sequences in post-processing.
Remember that lighting conditions will change dramatically across different time scales. Consider using manual camera settings to maintain consistency, or gradually adjust your exposure settings to match the changing light. This careful balance of technical precision and creative timing will result in a more compelling and professional-looking final sequence that truly showcases your plant’s complete growth story.
Special Effects and Post-Processing
Post-processing can transform your plant time-lapse footage from good to extraordinary. While capturing growth is fascinating on its own, applying thoughtful effects and adjustments can emphasize the subtle changes and create more engaging visual narratives.
Start by adjusting basic parameters like exposure, contrast, and white balance consistently across all frames. This creates a seamless flow and eliminates distracting fluctuations. Color grading plays a crucial role – consider using warmer tones for flowering sequences or cooler tones for seedling emergence to enhance the mood.
One powerful technique is selective masking, which allows you to highlight specific areas of growth while maintaining natural background elements. This approach, common in advanced nature photography techniques, can draw viewer attention to minute details like unfurling leaves or emerging buds.
Deflickering is essential for smooth playback. Many editing software packages offer specialized tools to reduce frame-to-frame brightness variations caused by changing natural light conditions. Consider adding subtle motion effects like gentle zooms or pans in post-production to create more dynamic sequences.
For dramatic impact, experiment with transition effects between day and night cycles. Fade transitions or cross-dissolves can soften harsh lighting changes, while adding a slight blur effect during rapid growth spurts can emphasize the organic nature of the movement.
Remember to export your final sequence at an appropriate frame rate – 24-30 fps typically works well for plant growth, though you might want to adjust this based on your specific subject and the story you’re telling. Always maintain backup copies of your original frames before applying any effects.
Common Challenges and Solutions
Dealing with Changing Light
Light changes pose one of the biggest challenges in plant time-lapse photography, similar to night photography challenges. Natural daylight variations can create flickering effects and inconsistent exposure in your final video, but there are several effective ways to manage this.
For indoor setups, consider using artificial lighting as your primary source. LED grow lights work exceptionally well because they provide consistent illumination and can be set on timers to match your shooting schedule. Position them at a 45-degree angle to minimize harsh shadows and create even lighting across your subject.
If you’re shooting outdoors, try to position your setup where it receives indirect light rather than direct sunlight. This helps reduce extreme contrast and harsh shadows. Consider using a translucent diffuser above your subject to soften natural light. During longer shoots, you might need to adjust your camera settings gradually to account for seasonal light changes.
A reliable solution is to use aperture priority mode with auto ISO limitations. This allows your camera to adjust to light changes while maintaining consistent depth of field, crucial for plant photography.
Long-Term Equipment Management
When documenting plant growth over weeks or months, proper equipment maintenance becomes crucial for successful time-lapse photography. Start by securing your camera and tripod in a stable position where they won’t be disturbed by wind, vibrations, or accidental bumps. Consider using weather-resistant covers or building a simple protective housing if shooting outdoors.
Keep your lens clean by checking it daily – pollen, dust, and moisture can accumulate quickly around plants. Use a lens cleaning kit and microfiber cloth for regular maintenance. For battery management, either connect your camera to a continuous power supply or invest in a battery grip for extended shooting periods.
Memory cards should be regularly backed up and formatted to prevent data corruption. If using external triggers or intervalometers, check their battery levels and connections weekly. During long-term setups, inspect all cable connections for wear and protect them from moisture and UV damage.
Climate control is essential – use silica gel packets near your equipment to combat humidity, especially in greenhouses or humid environments. Regular equipment checks every few days will help catch potential issues before they compromise your project.
Time-lapse photography of plants offers a unique window into the fascinating world of botanical growth and movement. Through this mesmerizing technique, we can witness nature’s slow dance in mere minutes, revealing the hidden beauty of plant life that normally unfolds too gradually for our eyes to perceive.
As we’ve explored throughout this guide, successful plant time-lapse photography requires careful planning, the right equipment setup, and patience. Remember that consistency in lighting, camera settings, and environmental conditions is key to achieving smooth, professional-looking results. Whether you’re using a basic smartphone setup or professional DSLR equipment, the principles remain the same: stable mounting, reliable power source, and proper intervalometer settings.
Don’t be discouraged if your first attempts aren’t perfect. Like the plants you’re capturing, your skills will grow with time and practice. Start with hardy, fast-growing specimens like beans or sunflowers before moving on to more challenging subjects. Experiment with different angles, lighting conditions, and time intervals to develop your unique style.
The rewards of plant time-lapse photography extend beyond just creating compelling visual content. This practice can deepen your appreciation for nature’s processes and enhance your understanding of plant biology. It’s also an excellent way to document your gardening journey or create engaging educational material.
Ready to start your plant time-lapse adventure? Grab your camera, set up your workspace, and prepare to capture the magical transformation of plant life. The possibilities are endless, and the results are always worth the wait.