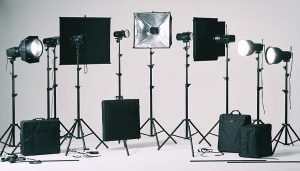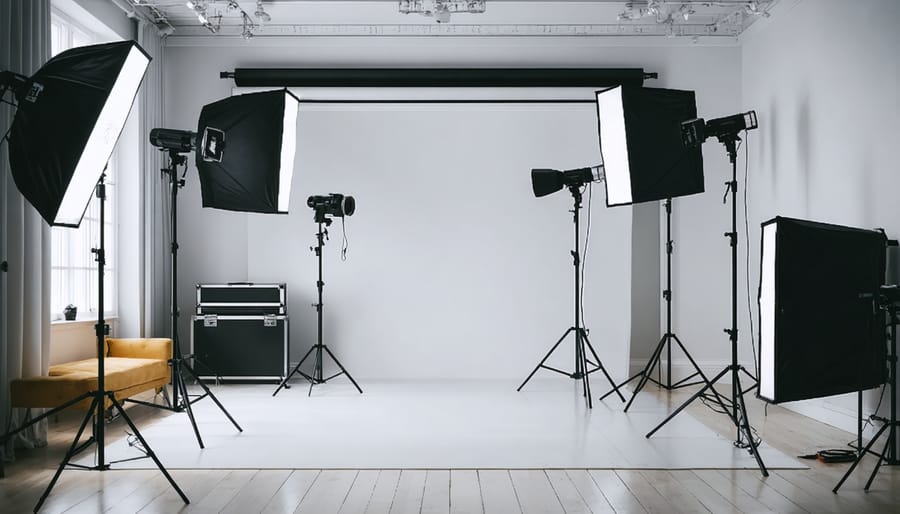
Transform any space into a professional photography studio by mastering three essential elements: lighting, backdrop control, and gear organization. Start with a reliable strobe lighting kit featuring at least two heads, softboxes, and wireless triggers – these form the backbone of consistent, professional-quality images. Create versatile shooting zones by installing a heavy-duty backdrop support system with multiple background options, from seamless paper to textured vinyl. Establish dedicated storage zones for protecting and accessing your equipment efficiently, while exploring creative home studio ideas that maximize your available space. Whether you’re shooting portraits, products, or commercial work, these foundational components enable endless creative possibilities while maintaining professional standards in any studio environment.
Essential Lighting Equipment
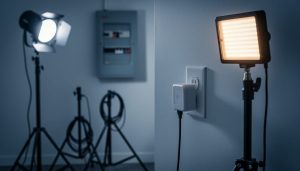
Studio Strobe Lights vs. Continuous Lighting
When setting up your photography studio, one of the first decisions you’ll need to make is choosing between studio strobe lights and continuous lighting. As you learn to master studio lighting, understanding the strengths and applications of each option is crucial.
Studio strobe lights deliver powerful, instantaneous bursts of light that freeze motion and provide crisp, sharp images. They’re ideal for portrait photography, product shoots, and any situation requiring precise light control. The main advantages include their high power output, ability to overpower ambient light, and faster recycle times. However, they require more technical knowledge and what you see isn’t exactly what you get until you take the shot.
Continuous lighting, on the other hand, offers a “what you see is what you get” experience. These lights stay on constantly, making it easier to visualize the final result and adjust shadows in real-time. They’re perfect for beginners, video production, and situations where immediate feedback is essential. LED panels, in particular, have become popular due to their energy efficiency and low heat output.
For versatility, many photographers combine both types in their studio. Consider starting with continuous lighting if you’re new to studio photography, then adding strobes as you develop your skills and tackle more challenging projects. Remember that quality of light and proper placement matter more than the type of lighting you choose.
Light Modifiers and Their Effects
Understanding light modifiers is crucial for achieving professional-looking studio photographs. Let’s explore the most essential types and their unique effects on your images.
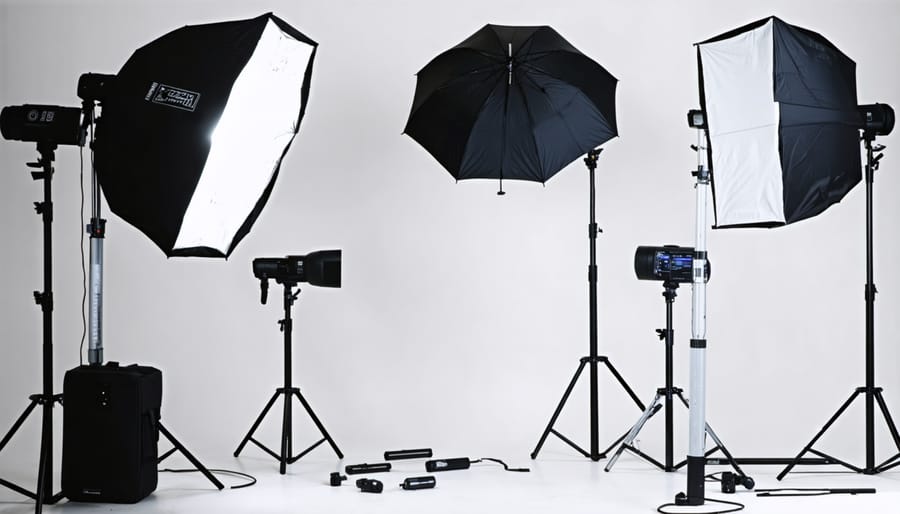
Softboxes are the workhorses of studio photography, creating soft, wraparound light that’s flattering for portraits. They come in various shapes and sizes, with larger softboxes producing softer light. A 3×4 foot softbox is versatile enough for most situations, while strip boxes excel at creating elegant rim lighting.
Photography umbrellas come in two main varieties: reflective and shoot-through. Reflective umbrellas bounce light back toward your subject, creating a broad, soft light source that’s perfect for group shots. Shoot-through umbrellas diffuse light directly, offering a quick setup option for when you need soft lighting in tight spaces.
Reflectors are incredibly versatile and budget-friendly tools. Silver reflectors add contrast and cool-toned highlights, while gold reflectors create warm, sunny effects. White reflectors provide subtle fill light, and black ones can subtract light to enhance shadows and create mood.
Diffusers come in various forms, from simple scrims to sophisticated beauty dishes. They help tame harsh light sources, creating a more pleasing transition between highlights and shadows. A collapsible diffuser is particularly useful for both studio and location work, helping you manage challenging lighting conditions.
For beginners, I recommend starting with a medium-sized softbox and a reversible umbrella. This combination gives you plenty of creative options while you learn to shape and control light. As your skills grow, you can add specialized modifiers to achieve specific effects in your photography.
Light Stands and Support Systems
A reliable support system forms the backbone of your studio lighting setup. Light stands are essential workhorses that come in various heights and weight capacities to accommodate different lighting equipment. For most studio work, heavy-duty C-stands (Century stands) are invaluable due to their sturdy construction and versatile positioning options. Their unique design allows for precise light placement and can support heavy modifiers without wobbling.
Boom arms extend your lighting possibilities by enabling overhead positioning – crucial for hair lights or creating dramatic shadows. When selecting stands, always factor in the weight of your heaviest light plus modifiers, and choose stands rated for at least 1.5 times that weight for safety.
Don’t overlook grip equipment like sandbags and safety cables – they’re crucial for preventing accidents and protecting your investment. For mobile shooters, consider collapsible stands with air cushioning to prevent damage from accidental drops. Backdrop support systems, consisting of crossbars and sturdy stands, are also essential for mounting seamless paper or fabric backgrounds.
Remember to invest in quality support gear – it’s better to buy once and buy right than risk your expensive lighting equipment with inadequate support.
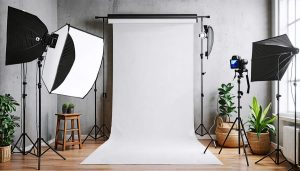
Background Solutions
Backdrop Materials and Types
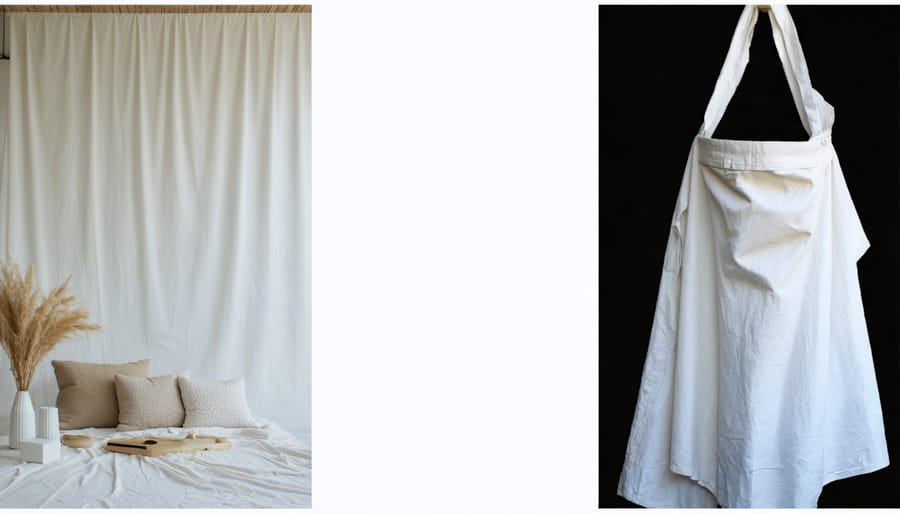
Choosing the right backdrop material can make or break your studio photography, and there’s no one-size-fits-all solution. Paper backdrops are the industry standard for good reason – they’re cost-effective, easy to replace when damaged, and provide a clean, seamless look. Professional photographers often keep several rolls in classic colors like white, black, and gray for versatility.
Vinyl backdrops offer excellent durability and are perfect for high-traffic studios. They’re water-resistant, easy to clean, and particularly useful when working with children or messy setups. While slightly more expensive than paper, their longevity makes them a smart investment for frequent use.
Fabric backdrops bring texture and depth to your images, with muslin being the most popular choice. These backgrounds can be wrinkled or smooth depending on your creative vision, and they’re highly portable. Canvas backdrops, though heavier, provide a more premium look and are fantastic for formal portraits.
Collapsible backgrounds are a game-changer for photographers who need mobility or have limited space. These pop-up solutions typically come in reversible designs, offering two color options in one package. While they’re not as large as traditional backdrops, they’re perfect for headshots and three-quarter portraits.
For beginners, starting with a medium-gray paper backdrop and a collapsible option gives you excellent versatility without breaking the bank. As your studio grows, you can expand your collection based on the types of shoots you most frequently handle. Remember to store your backdrops properly – rolled for paper, hung for fabric, and in protective cases for collapsibles – to extend their lifespan.
Background Support Systems
A reliable support system forms the backbone of any photography studio, quite literally holding your equipment in place. Light stands are your most frequent companions, with basic aluminum stands being perfect for speedlights and small softboxes, while heavy-duty C-stands offer superior stability for larger modifiers and overhead setups. Don’t overlook the importance of sandbags – they’re essential safety measures that prevent your stands from tipping over.
Background support systems deserve special attention. A wall-mounted or ceiling-mounted system with a roller mechanism offers the most professional solution for seamless paper backgrounds. However, if you’re just starting out or need portability, a portable background stand with crossbars will serve you well. These typically extend from 6 to 10 feet in width and can handle paper rolls, muslin backdrops, or vinyl backgrounds.
For mounting solutions, invest in quality grip heads and super clamps. These versatile tools allow you to attach various accessories to your stands, from reflectors to LED panels. Remember to include at least one boom arm in your kit – it’s invaluable for positioning lights at precise angles without stand legs getting in your frame.
Essential Studio Accessories
Tethering Equipment
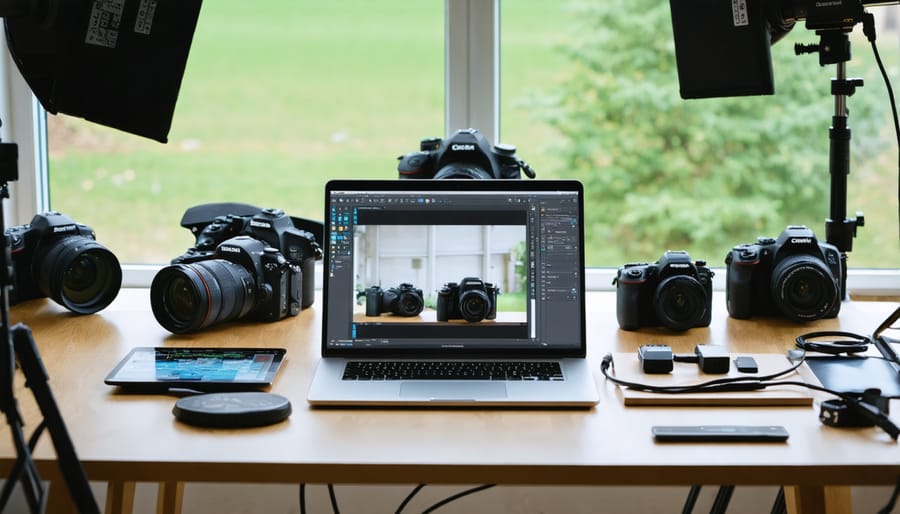
Tethered shooting is a game-changer for studio photography, allowing you to instantly view your images on a larger screen while shooting. To get started, you’ll need a reliable tethering cable – typically a USB-C or Thunderbolt cable, depending on your camera model. Make sure to get a high-quality cable with adequate length (at least 15 feet) and reinforced ends to prevent connection issues during crucial shoots.
Your tethering software is equally important. Popular options include Capture One Pro and Adobe Lightroom Classic, both offering robust features for live view, instant image transfer, and basic editing capabilities. Some camera manufacturers also provide their own tethering software, which can be a cost-effective starting point.
Set up your workspace with a dedicated tethering station, including a sturdy table or cart that can hold your laptop securely. A tethering cable holder or clips are essential to prevent accidental disconnections and protect your camera’s ports. Consider adding a USB hub if you need to connect multiple devices, and always keep backup cables handy.
To ensure smooth operation, position your workstation within easy reach but out of the shooting area. A laptop stand or monitor arm can help maintain good ergonomics during long shoots. Don’t forget about power management – keep your laptop plugged in and consider using an uninterruptible power supply (UPS) for added security during important sessions.
Props and Posing Tools
Props and posing tools are the unsung heroes of studio photography, helping you create polished, professional-looking images while keeping your subjects comfortable and properly positioned. A sturdy posing stool is essential, allowing for various sitting positions and heights. Look for adjustable options with a stable base and comfortable seat that can support different body types.
Posing blocks and apple boxes come in various sizes and are invaluable for creating levels, adjusting height differences between subjects, and achieving dynamic compositions in group shots. Consider getting a set of blocks in different heights, typically ranging from 2 to 12 inches.
Reflectors and V-flats serve double duty as both lighting modifiers and posing aids. These versatile tools can create clean backgrounds while helping subjects maintain proper posture. Keep a mix of white, black, and silver surfaces on hand for different effects.
For portrait photography, a head posing table and hand posing blocks can help achieve natural-looking poses while providing comfort for longer sessions. These smaller tools are particularly useful for headshots and beauty photography.
Don’t overlook the importance of simple props like chairs, stools, and benches with clean, timeless designs. These can enhance your compositions without dating your images or drawing attention away from your subjects.
For comfort during longer sessions, keep cushions and padding nearby to adjust posing tools as needed. Remember, the most effective props are those that enhance your subject’s comfort while remaining invisible in the final image.
Storage and Organization Solutions
An organized studio is a productive studio, and proper storage solutions are essential for protecting your valuable equipment while keeping it readily accessible. Start with dedicated storage cabinets featuring adjustable shelves and foam padding to safely house your cameras, lenses, and delicate accessories. Consider clear storage bins or drawers for smaller items like memory cards, batteries, and filters – labeling everything clearly saves precious time during shoots.
Wall-mounted solutions can maximize your available space. Install pegboards for hanging light stands, tripods, and commonly used tools, or add sturdy hooks for backdrop storage. Rolling carts are invaluable for frequently used equipment, allowing you to move your gear exactly where you need it during shoots.
Cable management is often overlooked but crucial. Use velcro straps or cable ties to keep cords neat and prevent tripping hazards. Dedicated storage tubes or hooks can keep extension cords tangle-free and easily accessible.
For props and smaller accessories, consider implementing a color-coding system or using clear storage boxes with detailed inventory lists. Keep frequently used items at eye level and less-used equipment in higher or lower storage areas.
Remember to maintain a clean workspace by incorporating a designated area for cleaning supplies and equipment maintenance tools. This organized approach not only protects your investment but also helps maintain a professional atmosphere that clients will appreciate.
Studio Space Considerations
Space Requirements and Layout
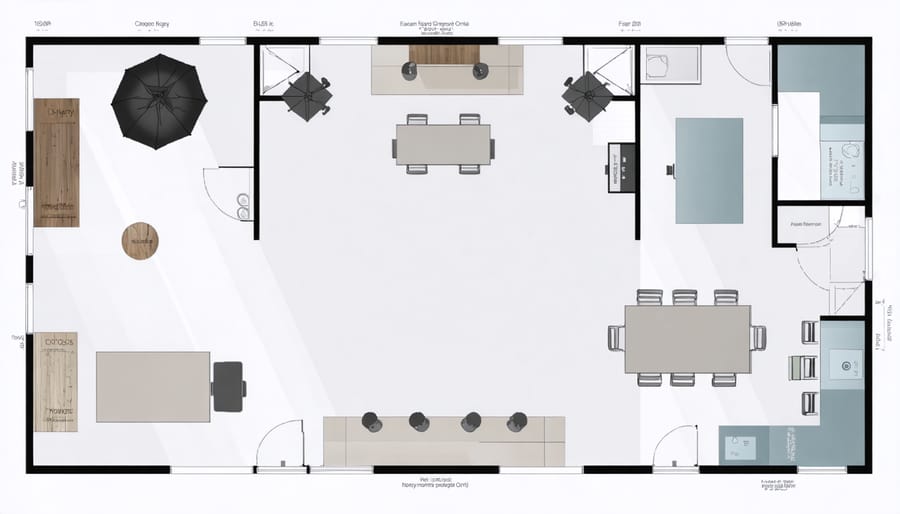
When planning to build a pro-quality home studio, space requirements are crucial for creating an efficient workflow. The minimum recommended area for a basic photography studio is 400 square feet (roughly 20′ x 20′), though you can work with less space if necessary.
Height matters as much as floor space – aim for at least 10 feet of ceiling clearance to accommodate lighting setups and allow for full-length shots. Remember to factor in space for both your shooting area and client waiting or changing areas if applicable.
For optimal layout, divide your studio into distinct zones:
– Main shooting area (50% of space)
– Equipment storage and prep area (20%)
– Client area (15%)
– Post-processing workspace (15%)
Position your main shooting area away from windows unless you’re specifically incorporating natural light. This gives you complete control over lighting conditions. Create a clear path between your storage and shooting areas to ensure quick access to equipment during sessions.
Consider the flow of movement when arranging your space. You’ll want enough room to move lights and modifiers freely, plus space for subjects to move naturally during shoots. Leave at least 6 feet of clearance between your background setup and the nearest wall to prevent unwanted shadows and allow for proper light falloff.
For seamless background setups, plan for an additional 3-4 feet of space behind your background stand to accommodate paper rolls or fabric backdrops. Remember that different types of photography may require different arrangements – product photography might need less space than full-body fashion shoots.
Power and Electrical Setup
Proper electrical setup is crucial for a safe and efficient photography studio. Start by assessing your power requirements – most home studios can operate on standard 15-20 amp circuits, but professional setups might need dedicated 20-30 amp lines. Consider that studio strobes, continuous lights, and other equipment can draw significant power when used simultaneously.
Install multiple power outlets along your walls, ideally positioned every 6-8 feet. This eliminates the need for dangerous daisy-chaining of extension cords. Speaking of extension cords, invest in heavy-duty ones rated for professional use, and always check their amperage rating matches your equipment needs.
Surge protectors are non-negotiable – get commercial-grade units to protect your expensive gear from power spikes. Consider installing a dedicated circuit breaker panel for your studio space, especially if you’re running multiple high-powered lights or specialized equipment.
For safety, keep all cables organized and away from foot traffic. Use cable management solutions like floor tracks or gaffer tape to secure wires. Install emergency shutoff switches in easily accessible locations, and always have a fire extinguisher rated for electrical fires nearby.
If you’re working with clients, consider backup power solutions like an uninterruptible power supply (UPS) for critical equipment. This prevents losing work during power outages and protects sensitive gear from sudden power loss.
Remember to regularly inspect all electrical equipment for wear and tear, replacing anything that shows signs of damage immediately.
Setting up a photography studio is an exciting journey that requires careful planning and consideration of essential elements. Throughout this guide, we’ve explored the fundamental components that make a successful studio, from lighting equipment and backdrops to camera gear and props. Remember that while having professional equipment is important, it’s equally crucial to create a workspace that’s both functional and comfortable for you and your clients.
Start with the basics we’ve discussed – a reliable camera system, versatile lighting setup, and quality backgrounds – then gradually expand your studio as your needs and budget allow. Pay special attention to your lighting configuration, as it’s the heart of any photography studio. Invest in a mix of continuous and strobe lighting to handle various shooting scenarios.
Don’t forget the often-overlooked essentials like storage solutions, backup equipment, and comfortable seating for clients. A well-organized studio not only looks professional but also helps streamline your workflow and enhance productivity.
For those just starting, consider beginning with a minimal setup and expanding based on the types of photography you most frequently pursue. Remember that some of the most striking images have been created in modest spaces with carefully chosen equipment.
Above all, create a space that reflects your style and supports your creative vision. With these essentials in place, you’ll have a solid foundation for producing professional-quality work and growing your photography business.