Transform your video vision into a compelling visual story by mastering the art of storyboarding – the essential pre-production tool used by filmmakers from Hollywood blockbusters to viral YouTube content. A well-crafted storyboard serves as your video’s blueprint, mapping out every shot, transition, and camera movement before you hit record.
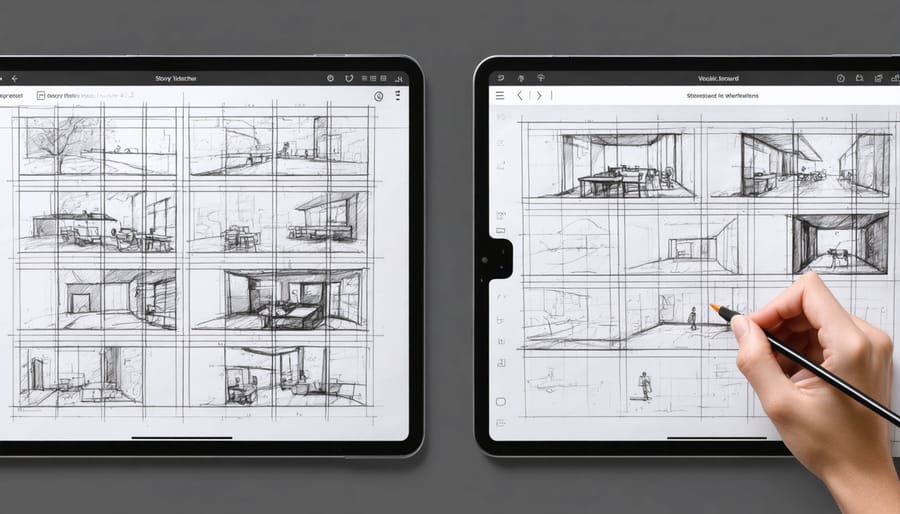
Start by sketching rough thumbnails of key scenes on a simple grid template, focusing on composition and camera angles rather than artistic perfection. Include basic directorial notes, timing estimates, and movement arrows to communicate your creative intent to your team or remind yourself of the planned execution. Professional directors and content creators rely on storyboards to save valuable production time, ensure shooting efficiency, and maintain visual consistency throughout their projects.
Whether you’re planning a short promotional video or an ambitious narrative piece, your storyboard becomes the visual roadmap that aligns everyone’s creative vision, prevents costly mistakes, and helps you capture exactly the footage you need. Think of it as creating a comic book version of your video – each panel representing a deliberate choice in how you’ll tell your story through the lens.
Begin your storyboarding journey today with just a pencil and paper. Your future self will thank you when production day arrives.
Essential Storyboarding Tools and Materials
Traditional vs Digital Storyboarding
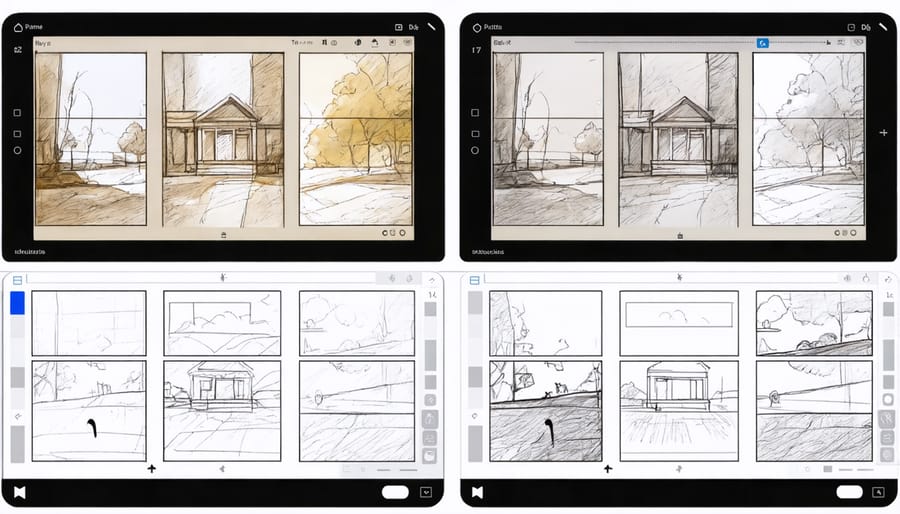
When it comes to storyboarding, creators typically choose between traditional hand-drawn methods and digital tools. Traditional storyboarding involves sketching scenes on paper or cards, offering a tactile experience that many artists prefer. It allows for quick iterations, requires no technical knowledge, and can be particularly effective during collaborative brainstorming sessions. However, physical storyboards can be cumbersome to store, difficult to modify, and challenging to share with remote team members.
Digital storyboarding, on the other hand, offers unprecedented flexibility and efficiency. Software like Adobe Photoshop or dedicated storyboarding apps provide features like layers, easy editing, and instant sharing capabilities. Digital tools also allow for precise timing measurements, seamless organization, and the ability to include additional notes or audio references. The main drawbacks include the learning curve associated with software, potential technical issues, and the initial cost of equipment and programs.
Many professionals opt for a hybrid approach, starting with rough paper sketches for initial ideation, then transitioning to digital tools for refinement and presentation. This combination leverages the spontaneity of traditional methods while harnessing the power of digital organization and collaboration.
Popular Storyboarding Software and Apps
Today’s digital landscape offers numerous excellent storyboarding tools that can streamline your pre-production process. Storyboarder stands out as a free, user-friendly option perfect for beginners, featuring basic drawing tools and an intuitive interface that lets you quickly sketch out your scenes.
For professionals, Adobe’s suite includes several powerful options. Photoshop combined with Adobe Premiere Pro provides comprehensive storyboarding capabilities, while Adobe Animate offers advanced features for more dynamic presentations. Frame.io has revolutionized the collaboration aspect, allowing teams to review and comment on storyboards in real-time.
Toon Boom Storyboard Pro remains the industry standard for professional productions, offering sophisticated tools for both 2D and 3D visualization. For those preferring tablet-based solutions, Concepts and Procreate on iPad provide excellent drawing capabilities with layers and export options perfect for storyboarding.
Budget-conscious creators might appreciate Canva’s storyboard templates, which offer a quick way to visualize scenes without advanced drawing skills. Shot Designer is another notable mention, particularly useful for planning complex camera movements and blocking.
Remember, the best tool is the one that fits your workflow and budget – even simple presentation software like PowerPoint can serve as an effective storyboarding platform when used creatively.
Creating Your First Storyboard Frame
Shot Types and Camera Angles
When creating your storyboard, understanding different shot types and camera angles is crucial for effectively conveying your story. Let’s explore the essential compositions you’ll want to consider.
Establishing shots, typically wide angles, set the scene and provide context for your viewers. These shots help orient your audience to the location and atmosphere of your story. For intimate conversations or emotional moments, close-ups capture facial expressions and subtle details that connect viewers with your characters.
Medium shots strike a balance between context and detail, showing characters from the waist up while maintaining some environmental elements. They’re perfect for dialogue scenes or showing character interactions. When you need to emphasize power dynamics or create dramatic tension, try varying your camera angles. Low angles make subjects appear dominant or intimidating, while high angles can make them seem vulnerable or insignificant.
For dynamic storytelling, consider including tracking shots that follow your subject’s movement, or over-the-shoulder shots that create a sense of conversation and relationship between characters. Point-of-view (POV) shots immerse viewers directly in a character’s perspective, making scenes more engaging and personal.
Remember to mix your shot types throughout your storyboard. A good rule of thumb is to alternate between wide, medium, and close-up shots to maintain visual interest and create a natural flow in your story. This variety helps prevent your video from becoming visually monotonous while ensuring each scene serves its intended purpose.

Adding Movement and Transitions
To bring your storyboard to life, it’s essential to effectively communicate how scenes will transition and how the camera will move. Start by using standard directional arrows to indicate dynamic camera movements – a straight arrow for panning, curved for tracking, and diagonal for crane shots or zooms. Make these arrows bold and clear, using different colors if needed to distinguish between movement types.
For scene transitions, develop a consistent system of symbols in the corners of your frames. Common indicators include dissolves (overlapping wavy lines), cuts (straight lines between frames), and fades (graduated shading). Consider using small sketches between frames to show special transitions like wipes or motion graphics.
Remember to note the duration of each movement and transition. A simple “3s” or “2.5s” beneath your arrows helps the production team understand timing. For complex sequences, add mini-diagrams showing the camera’s path relative to your subject.
Don’t forget to indicate camera speed – use dashed arrows for slow movements and solid, thicker arrows for faster ones. If you’re planning dolly shots or steadicam sequences, draw a dotted line along the ground plane to show the exact path the camera operator should follow.
Always keep your movement indicators clean and uncluttered. If needed, add numbered reference notes in the margins for more detailed explanations of particularly complex sequences.
Advanced Storyboarding Techniques
Lighting and Atmosphere
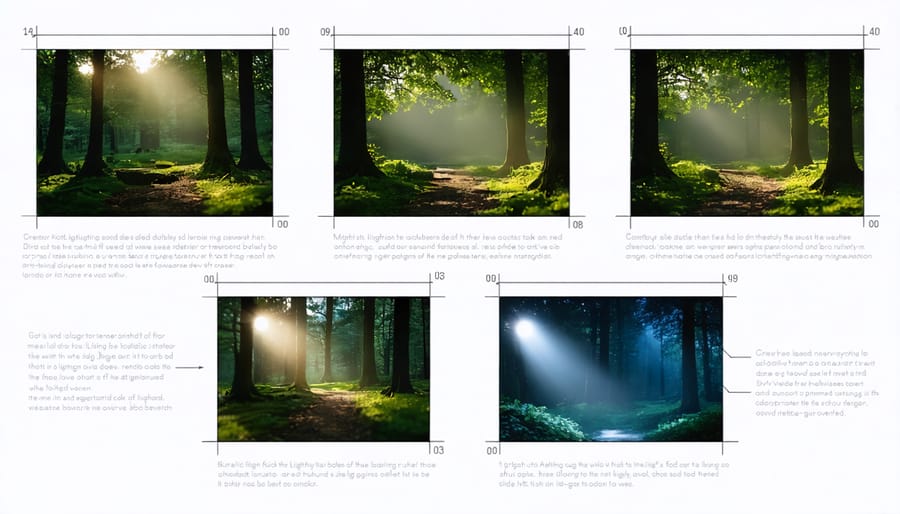
Lighting and atmosphere are crucial elements in video storytelling, serving as powerful tools to convey mood, emotion, and time of day in your storyboard. When sketching your scenes, you’ll want to indicate professional lighting techniques through simple yet effective methods.
Start by using arrows to show the direction of your main light sources. Draw these arrows from the edge of your frame, pointing toward your subjects. For key lights (primary light sources), use solid lines; for fill lights (secondary sources), use dashed lines. This helps your crew understand the lighting setup at a glance.
To indicate atmosphere and mood, incorporate basic shading techniques. Use diagonal lines or cross-hatching to show shadows, with closer lines indicating deeper shadows. For bright areas, leave the space white or add minimal shading. Remember to note specific lighting conditions in the margins – terms like “golden hour,” “harsh noon sun,” or “moody backlight” provide crucial context.
For indoor scenes, clearly mark practical light sources like lamps or windows. These details help communicate both the technical setup and the emotional tone you’re aiming for. When depicting nighttime or low-light scenes, consider using darker shading overall, with specific areas highlighted to show where your light sources will create focus.
Don’t forget to include notes about any special lighting effects you plan to use, such as lens flares, silhouettes, or dramatic shadows. These elements can significantly impact the final look of your scene and should be clearly communicated in your storyboard to ensure your vision is properly executed during filming.
Sound and Special Effects
Sound plays a crucial role in video storytelling, and your storyboard should reflect this important element. While primarily a visual tool, incorporating audio cues and special effects in your storyboard helps create a more comprehensive pre-production plan. Understanding cinematic sound design principles early in the planning process can elevate your final video significantly.
Start by developing a system of symbols or annotations to represent different audio elements. Common conventions include using musical notes for background music, zigzag lines for sound effects, and speech bubbles for dialogue or voiceovers. Be consistent with your notation throughout the storyboard to avoid confusion during production.
Consider creating a separate audio column alongside your visual panels. This dedicated space allows you to detail specific sound requirements, including:
– Background music timing and transitions
– Sound effect placement and duration
– Dialogue or narration cues
– Ambient sound requirements
– Audio fade-ins and fade-outs
When planning sound effects, think about both diegetic (sounds that naturally occur within the scene) and non-diegetic sounds (added effects and music). Note any specific timing requirements, such as sound effects that need to sync with particular actions or movements in your shots.
Remember to indicate volume levels and any special audio treatments you envision, such as echo effects, reverb, or audio filters. This detailed planning helps ensure your sound design enhances rather than detracts from your visual storytelling, creating a more immersive viewing experience.
From Storyboard to Screen
Shot Lists and Production Notes
Once your storyboard is complete, it’s time to transform those sketches into actionable shooting plans. Start by creating a detailed shot list that breaks down each scene into specific camera setups, angles, and movements. For each storyboard frame, note essential technical details like lens choices, camera height, and any special equipment needed.
Include timing estimates for each shot and group similar setups together to maximize efficiency during production. For example, if you have multiple shots from the same angle or location, schedule them consecutively to minimize setup time. This planning stage is also crucial for determining which shots might require special attention for cinematic color grading later in post-production.
Create production notes that detail specific requirements for each scene, including lighting setups, props, wardrobe, and any special effects. Be sure to include backup options for outdoor locations in case of weather issues, and note any potential challenges that might arise during filming.
Consider practical elements like power sources, equipment accessibility, and crew positioning. Make notes about sound requirements, particularly for dialogue scenes or locations with potential audio challenges. This detailed planning helps prevent on-set confusion and ensures smooth execution of your creative vision while staying on schedule and within budget.
Common Pitfalls to Avoid
When creating your storyboard, watch out for these common mistakes that can derail your video production. First, avoid overcrowding your frames with too much detail. While enthusiasm is great, cluttered storyboards can confuse your team and lead to muddled execution. Instead, focus on the essential elements that drive your story forward.
Many creators fall into the trap of inconsistent shot sizes between frames. This can create jarring transitions in the final video. Make sure your shot progressions feel natural and maintain visual continuity throughout your sequence.
Another pitfall is neglecting to account for camera movement. Static storyboard frames often don’t tell the whole story. Include clear arrows or notes indicating pans, tilts, or dolly movements to ensure your vision translates accurately during filming.
Be careful not to skip important transitional scenes. While it might seem obvious how one scene flows into another in your mind, your team needs visual guidance for every significant change. Missing transitions can lead to confusion during production and costly reshoots.
Watch out for unrealistic timing expectations. Each frame represents a specific duration in your final video. Make sure your planned shots allow enough time for the action to unfold naturally without feeling rushed or dragging.
Lastly, avoid creating storyboards that are too vague or lacking technical notes. While artistic skill isn’t crucial, clear communication is. Include essential details like shot types, camera angles, and key action notes to guide your production team effectively.
Creating a storyboard for your video doesn’t have to be an intimidating process. As we’ve explored throughout this guide, it’s a valuable tool that can transform your video production from good to exceptional. Remember, your storyboard serves as a visual roadmap, helping you communicate your vision effectively while saving time and resources during production.
Whether you choose to create detailed illustrations or simple stick figures, the key is to focus on clarity and purpose. Each frame should convey your intended shot composition, camera movements, and important visual elements. Don’t forget to include those essential notes about lighting, audio cues, and transitions that will help bring your vision to life.
Start small with your first storyboard – perhaps a short sequence or a simple scene. As you gain confidence, you can tackle more complex projects and develop your own efficient storyboarding style. The beauty of storyboarding lies in its flexibility; adapt the techniques we’ve discussed to suit your specific needs and project requirements.
Most importantly, don’t let perfectionism hold you back. Your storyboard is a working document, not a piece of art for display. What matters is that it effectively communicates your ideas to your team or serves as your personal shot guide during filming.
Ready to begin? Grab your pencil, paper, or digital tool of choice, and start sketching out your story. Remember, every great video production starts with a plan, and your storyboard is that crucial first step toward creating something remarkable.