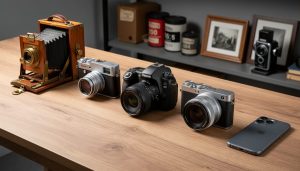
Load your first roll of film with deliberate precision, advancing slowly until you feel the leader catch and watching the rewind knob rotate – this single moment sets the foundation for every frame that follows. Despite the rise of digital technology, film photography’s enduring appeal lies in its distinctive process, where each mechanical click of the shutter writes light onto silver halide crystals, creating images with unmatched depth and character.
Master the exposure triangle with heightened awareness – in film, there’s no instant preview to rescue mistakes. Your light meter becomes an essential companion, guiding decisions that balance ISO (determined by your film stock), aperture (controlling depth of field), and shutter speed (freezing or blurring motion). Each frame costs money and carries weight, demanding thoughtful composition and precise timing.
Film photography rewards those who embrace its constraints and peculiarities. The grain structure of Tri-X 400 responds differently to light than the subtle tones of Portra 160. Understanding these characteristics transforms technical limitations into creative opportunities, allowing photographers to craft images with distinct moods and textures that digital sensors simply cannot replicate.
Essential Film Camera Controls and Settings
Understanding Film Speed (ISO)
Film speed, measured in ISO (International Standards Organization), is a fundamental aspect of exposure and light sensitivity in film photography. The ISO rating indicates how quickly the film reacts to light, with lower numbers like ISO 100 requiring more light but producing finer grain, and higher numbers like ISO 800 or 1600 needing less light but showing more prominent grain.
Think of film speed as a trade-off between image quality and light sensitivity. Lower ISO films (50-200) excel in bright conditions, delivering smooth, detailed images perfect for landscapes or portraits. These films capture rich colors and subtle tones, making them ideal when you want the cleanest possible image.
Higher ISO films (400-3200) are your allies in low-light situations or when you need faster shutter speeds. While they introduce more noticeable grain, this characteristic can add a distinctive aesthetic to your photos. Street photographers often embrace this grainy quality, using it to create moody, atmospheric images.
Unlike digital cameras, you can’t change ISO mid-roll, so choosing your film speed requires careful consideration of your shooting conditions and creative vision.
Manual Metering Techniques
Manual metering in film photography is both an art and a science, requiring careful observation and understanding of your environment. The most reliable method is the “sunny 16” rule, which states that on a sunny day, setting your aperture to f/16 and your shutter speed to the reciprocal of your film’s ISO will yield proper exposure. For instance, with ISO 400 film, you’d use 1/400 second (or the closest available speed) at f/16.
For more nuanced situations, incident light metering provides exceptional accuracy. Hold your light meter at your subject’s position, pointing it toward the camera. This measures the light falling on your subject rather than light reflecting from it, helping you avoid being fooled by very bright or dark subjects.
When a light meter isn’t available, you can use the palm of your hand as a makeshift gray card. Your palm typically reflects about one stop more light than an 18% gray card, so meter off your palm and then adjust exposure down by one stop for surprisingly accurate results.
For backlit scenes, spot metering becomes invaluable. Choose the most important highlight or shadow detail you want to preserve, meter that specific area, and adjust your exposure accordingly. Remember the exposure latitude of film – negative film typically handles overexposure well, while slide film requires more precise metering.
A helpful practice is bracketing important shots: take one photo at your measured exposure, one slightly underexposed, and one slightly overexposed. This technique, while consuming more film, provides insurance against metering errors and helps you learn how your specific camera and film combination responds to different exposure values.
Creative Film Photography Methods
Double Exposure Magic
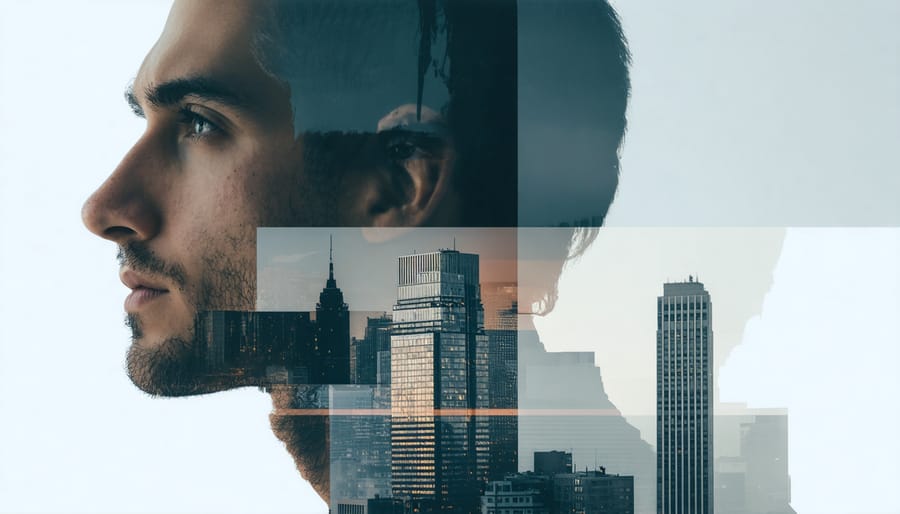
Double exposure photography is one of film’s most enchanting techniques, allowing you to create dreamlike images by exposing the same frame of film twice. This magical effect combines two distinct scenes into a single, layered composition that can’t be perfectly replicated with digital tools.
To create intentional double exposures, start by setting your camera’s multiple exposure switch (if available) or manually preventing the film advance after your first shot. Choose your first subject carefully – scenes with strong contrast and clear shapes work best. Dark areas in your first exposure will allow details from your second exposure to show through more prominently.
For your second exposure, consider complementary subjects that will interact meaningfully with your first image. Popular combinations include portraits overlaid with nature scenes, architectural elements merged with textures, or cityscapes blended with abstract patterns. Remember that both exposures contribute equally to the final image’s brightness, so you’ll typically want to underexpose each shot by one stop.
Experimentation is key to mastering double exposures. Try shooting a silhouette as your first exposure, then filling the dark areas with detailed texture in your second shot. Or capture the same subject from slightly different angles to create a ghostly, three-dimensional effect. Keep notes about your combinations – this will help you understand what works and what doesn’t as you develop your technique.
Push and Pull Processing
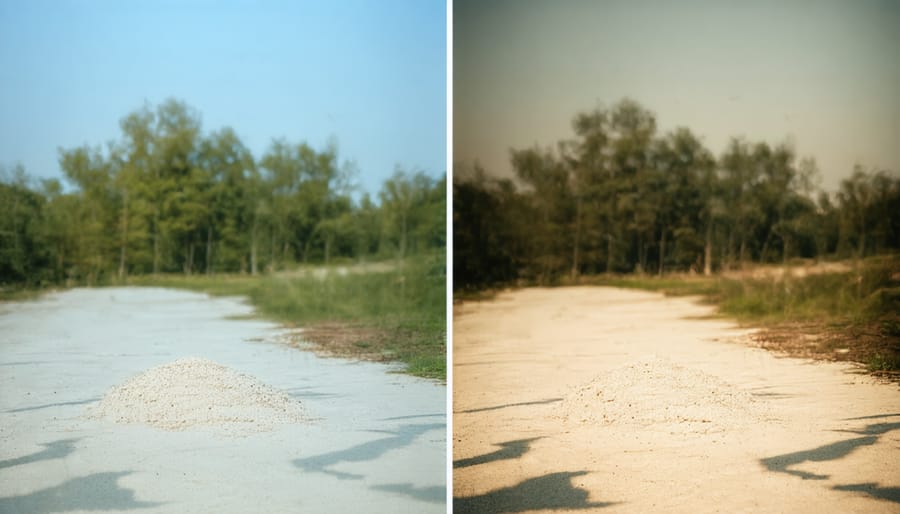
Push and pull processing are powerful techniques that allow photographers to manipulate their film’s exposure and development for creative effects. When you push film, you’re intentionally underexposing it and compensating by extending development time, resulting in higher contrast and more apparent grain. This technique is particularly useful in low-light situations or when you want to create a more dramatic look.
Pull processing takes the opposite approach: overexposing the film and reducing development time. This produces softer contrast and finer grain, perfect for achieving a more subtle, dreamy aesthetic. For example, pulling Tri-X 400 to ISO 200 can create beautifully smooth skin tones in portrait photography.
To push or pull film, you’ll need to shoot the entire roll at the adjusted ISO. For instance, if you’re pushing Ilford HP5+ from 400 to 800, every frame must be shot at 800. When developing, adjust your development time according to your film manufacturer’s recommendations – typically adding about 15-30% time for each stop pushed, or reducing by similar amounts for pulling.
Remember that these techniques affect more than just exposure – they influence the film’s contrast, grain structure, and tonal range. While pushing tends to increase contrast and grain, pulling can help retain highlight detail and create a more subtle look. Experiment with both techniques to discover which aesthetic suits your creative vision.
Cross-Processing Effects
Cross-processing is one of film photography’s most adventurous and unpredictable techniques, offering photographers a way to create striking color shifts and unique visual effects. This process involves deliberately developing film in the wrong chemical solution – typically processing color negative film in slide film chemistry (C-41 in E-6) or vice versa.
When cross-processed, images often display heightened contrast, unusual color casts, and exaggerated grain. Slide film processed in C-41 chemicals typically produces images with a distinctive green or blue cast and enhanced contrast, while color negative film in E-6 chemistry often results in reddish tones and increased saturation.
The beauty of cross-processing lies in its unpredictability. Different film stocks react differently to the process, making each roll an exciting experiment. Fuji films tend to produce green-heavy results, while Kodak films often lean toward warmer, more magenta tones.
To try cross-processing, start with cheaper film stocks as you experiment. Popular choices include Fuji Superia for its dramatic green shifts or Kodak Gold for warmer results. Remember that not all labs offer cross-processing services, so call ahead to confirm. Also, be aware that some modern films are optimized for their intended process and may not produce the dramatic effects of older emulsions.
The technique is particularly effective for fashion, street photography, and artistic portraits where unconventional colors can enhance the mood and create a distinctive style.
Film Selection and Character
Black and White Film Characteristics
Black and white film photography offers a unique way to capture the world through the interplay of light, shadow, and subtle gradations of gray. The fundamental characteristic that sets it apart is its ability to strip away the distraction of color, allowing photographers to focus purely on form, texture, and tonal relationships.
The magic of black and white film lies in its contrast range – the spectrum between the deepest blacks and brightest whites. Different film stocks offer varying contrast levels; for instance, Kodak Tri-X delivers punchy contrast perfect for street photography, while Ilford Delta provides smoother transitions ideal for portraits. Understanding your film’s contrast characteristics helps you pre-visualize how a scene will translate to monochrome.
Tonality in black and white film is particularly fascinating, as it can render colors into unexpected shades of gray. A vivid blue sky might appear almost white, while yellow flowers could transform into dark gray tones. This unique translation of color to grayscale creates opportunities for dramatic interpretations of everyday scenes.
Film grain, another distinctive characteristic, adds texture and character to your images. Fine-grain films like Ilford Pan F Plus produce smooth, detailed images, while faster films like Kodak T-Max 400 exhibit more pronounced grain structure, which can enhance the mood of your photographs.
To maximize these characteristics, consider using colored filters during shooting. A red filter can darken skies and lighten skin tones, while a yellow filter can help separate similar tones and add drama to landscape photography. These tools, combined with careful exposure consideration, allow you to craft images that transcend simple black and white reproductions into compelling artistic statements.
Color Film Personalities
Color film stocks each have their own distinct personality, offering photographers unique ways to capture the world. Kodak Portra 400 remains a favorite among portrait and wedding photographers for its natural skin tones and subtle color palette. Its gentle contrast and slightly warm undertones create a flattering, dreamy look that’s particularly evident in golden hour shots.
For those seeking more vibrant colors, Fujfilm Superia X-TRA 400 delivers punchy greens and bold blues, making it excellent for landscape and street photography. Its higher contrast and cooler color balance create images with immediate impact, though it can be less forgiving with exposure than Portra.
Kodak Ektar 100, with its ultra-fine grain and saturated colors, produces results that rival digital clarity. It’s particularly striking for travel and landscape photography, rendering deep blues in skies and rich reds in architecture. However, its high contrast and saturation mean it’s not always the best choice for portraits.
CineStill 800T brings a unique cinematic quality to night photography, with its tungsten balance and distinctive halation effect around bright lights. Originally modified from motion picture film, it creates an atmospheric mood that’s perfect for urban nightscapes and neon-lit scenes.
For everyday shooting, Kodak ColorPlus 200 offers a vintage aesthetic with slightly muted colors and warm undertones. While not as refined as premium films, its character has made it popular among photographers seeking a nostalgic look without breaking the bank. Each of these films can be pushed or pulled to further customize their distinctive looks, allowing photographers to fine-tune their creative vision.
Common Film Photography Challenges
Light Leaks and Fogging
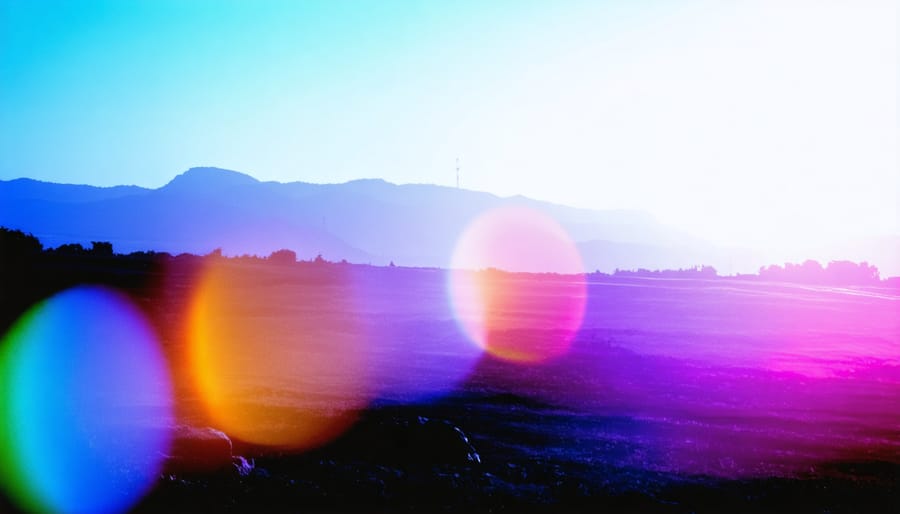
Light leaks and fogging, often considered defects in film photography, can either be unwanted nuisances or powerful creative tools, depending on your artistic vision. These effects occur when stray light penetrates your film, creating unique streaks, color shifts, and ethereal patterns that can’t be perfectly replicated in digital editing.
To prevent unwanted light leaks, always load and unload film in subdued lighting conditions, and regularly check your camera’s light seals – those small strips of foam or felt that prevent light from entering the camera body. If you notice deteriorating seals, they can be replaced inexpensively with light seal kits available from specialty retailers.
However, if you’re interested in experimenting with light leaks creatively, try carefully opening the camera back for a split second in bright conditions, or deliberately damaging the light seals in specific areas. Some photographers even pre-expose their film to light before loading it into the camera for unpredictable but striking results.
Fogging can be achieved by exposing your film to gentle light before or after shooting, creating dreamy, soft overlays that add atmosphere to your images. For more controlled effects, try using a flashlight or your phone’s light to deliberately expose specific areas of the film.
Remember that these techniques are irreversible, so it’s wise to experiment with less expensive film stocks until you’ve mastered the effect you’re seeking.
Focus and Composition Without Preview
Shooting without a preview screen might seem daunting at first, but it’s a skill that can significantly improve your photographic instincts. One of the most crucial aspects is mastering manual focusing techniques, which require practice and patience to perfect.
Start by using your camera’s focusing aids, such as the split-prism or microprism collar found in many vintage viewfinders. These tools help align your subject precisely, especially when shooting at wider apertures where focus accuracy is critical. For rangefinder cameras, practice aligning the double images until it becomes second nature.
When it comes to composition, the viewfinder is your window to the world. Many photographers swear by the practice of keeping both eyes open while shooting – one eye through the viewfinder and the other observing the scene. This technique helps you anticipate movement and maintain awareness of your surroundings.
Remember the rule of thirds, but don’t be afraid to break it intentionally. Use natural frames within your environment, and pay attention to leading lines. Without the instant feedback of a digital screen, it’s essential to slow down and really consider each element in your frame before pressing the shutter.
Distance estimation is another valuable skill to develop. Practice guessing distances and then verify them. This becomes particularly useful in street photography or other situations where quick focusing is necessary.
Film Storage and Handling
Proper storage and handling of film is crucial for maintaining image quality and preventing unwanted effects. Store your unexposed film in a cool, dry place, ideally between 45-70°F (7-21°C). A refrigerator works well, but always let film return to room temperature for 2-3 hours before use to prevent condensation.
Keep film away from X-rays and strong electromagnetic fields, which can fog or create strange patterns on your images. When traveling, request hand inspection of your film at security checkpoints, especially for films rated ISO 800 or higher, as these are more sensitive to X-ray damage.
Handle film by its edges only, avoiding fingerprints on the emulsion surface. For 35mm film, load and unload your camera in subdued light when possible. While modern films are more forgiving, direct sunlight during loading can still affect the first few frames.
After shooting, process your film as soon as practical. If you must wait, keep exposed film at room temperature and avoid high humidity environments. For long-term storage of processed negatives, use archival-quality sleeves and store them vertically in a dark, climate-controlled space.
Remember that expired film can produce interesting effects, but storage conditions greatly impact its usability. Well-stored expired film might only need minor exposure adjustments, while poorly stored film could be completely unusable.
Film photography remains a vibrant and rewarding medium that offers unique creative possibilities not found in digital capture. Throughout this guide, we’ve explored essential techniques from proper exposure metering and film selection to advanced darkroom processes. Whether you’re pursuing professional film photography or shooting for personal expression, these fundamental skills provide a strong foundation for your artistic journey.
Remember that mastering film photography is as much about experimentation as it is about technical precision. Don’t be afraid to push boundaries by trying different film stocks, testing various development techniques, or playing with alternative processes. Each “mistake” can lead to unexpected discoveries and help develop your unique visual style.
The methodical nature of film photography forces us to slow down, carefully consider each frame, and truly engage with our subjects. This deliberate approach often results in more thoughtful, meaningful images. As you continue your film photography journey, focus on developing both your technical expertise and creative vision.
Keep practicing, stay curious, and most importantly, enjoy the process. There’s something magical about watching an image emerge in the darkroom or receiving a fresh batch of developed negatives. With patience and persistence, you’ll find your voice in this timeless medium.