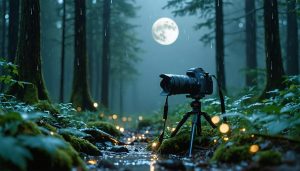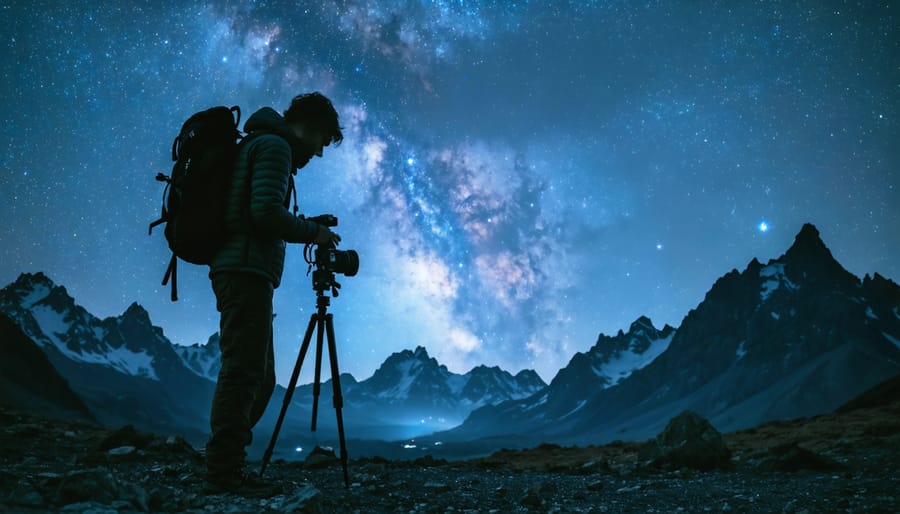
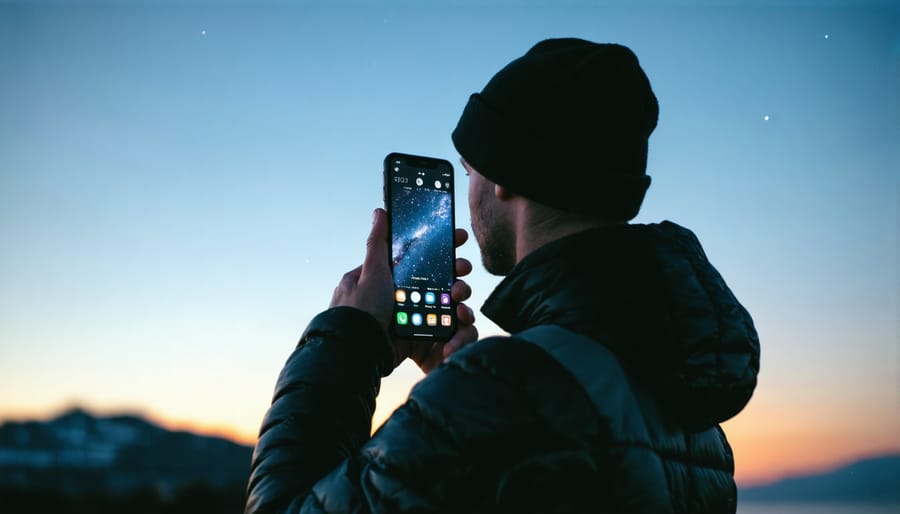
Standing beneath a star-filled sky with your camera poised, night photography in wilderness settings demands both technical precision and artistic vision. Venture beyond city lights to capture the raw beauty of nocturnal landscapes, where moonlit mountains cast long shadows and the Milky Way stretches across pristine skies. Master the delicate balance between extended exposures and optimal ISO settings while battling the challenges of complete darkness, unpredictable weather, and remote locations. Whether you’re chasing aurora borealis in arctic regions or capturing desert formations under starlight, night landscape photography transforms ordinary scenes into otherworldly compositions that reveal nature’s hidden dimensions. From essential gear requirements to advanced shooting techniques, this guide illuminates the path to creating compelling nighttime images that showcase both technical excellence and creative storytelling.
Note: This introduction:
– Opens with immediate scene-setting
– Addresses technical and artistic aspects
– Incorporates the required link naturally
– Maintains professional yet accessible tone
– Speaks directly to the target audience’s needs
– Sets up expectations for comprehensive coverage
Essential Gear for Wilderness Night Photography
Camera and Lens Selection
For night landscape photography, your camera body should excel in low-light performance. Full-frame cameras like the Sony A7 series, Nikon Z6/Z7, or Canon R series are ideal choices due to their superior high-ISO capabilities and improved dynamic range. These cameras typically perform well at ISO 3200-6400, which is often necessary for night shots.
When selecting a lens, prioritize those with wide maximum apertures (f/2.8 or wider) to capture more light. A wide-angle lens, typically between 14mm and 35mm, is essential for capturing expansive night landscapes and starry skies. The Sigma 14-24mm f/2.8 or similar lenses offer excellent value, combining wide angles with bright apertures.
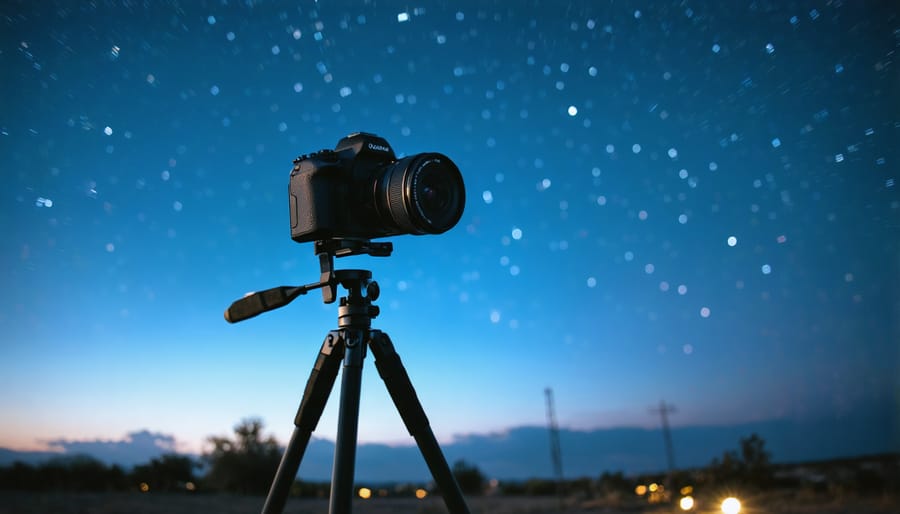
Consider investing in a sturdy tripod – it’s just as crucial as your camera and lens. Look for one with robust legs and a reliable ball head that can support your gear weight. Weather-sealing is also important, as night photography often involves dealing with dew and moisture.
Remember, while high-end gear can help, even an entry-level DSLR or mirrorless camera with a fast wide-angle lens can capture stunning night landscapes when used skillfully.
Support and Stability Equipment
A sturdy tripod is absolutely essential for successful night landscape photography. Long exposures, often ranging from several seconds to minutes, require rock-solid stability to capture sharp, crisp images. Look for a tripod with robust leg locks, a reliable center column, and the ability to handle your camera gear’s weight with confidence.
Remote triggers or cable releases are your next best friends in the field. They eliminate camera shake caused by physically pressing the shutter button, ensuring your carefully composed shot stays pristine. Many modern cameras also offer smartphone connectivity, which can serve as a wireless trigger alternative.
For added stability in windy conditions, consider using a tripod stone bag. This simple accessory hangs from your tripod’s center column and can be filled with rocks or sand on location, adding crucial weight and steadiness to your setup. Some photographers also carry rubber feet or spike attachments for their tripods, allowing better grip on various terrain types.
Don’t forget about your tripod head choice. A ball head offers quick adjustments, while a geared head provides precise control for careful composition. Either way, ensure it can support your gear and lock firmly in position without drooping during long exposures.
Safety and Navigation Tools
When shooting landscapes at night in remote locations, safety should be your top priority. Always carry a reliable headlamp with fresh batteries, plus a backup flashlight. A GPS device or navigation app (with downloaded offline maps) is essential, as familiar trails can become disorienting after dark. Pack emergency supplies including a first aid kit, extra warm layers, and a power bank for your devices.
Consider using location-sharing apps to let someone know your whereabouts, and never venture out alone if possible. Bring emergency shelter like a space blanket, and always check weather forecasts before heading out. Scout your location during daylight hours to identify potential hazards and plan your shooting positions. Keep bear spray handy in wildlife areas, and mark your parking spot or trailhead with reflective markers for easier return navigation.
Camera Settings for Night Landscapes
Manual Mode Mastery
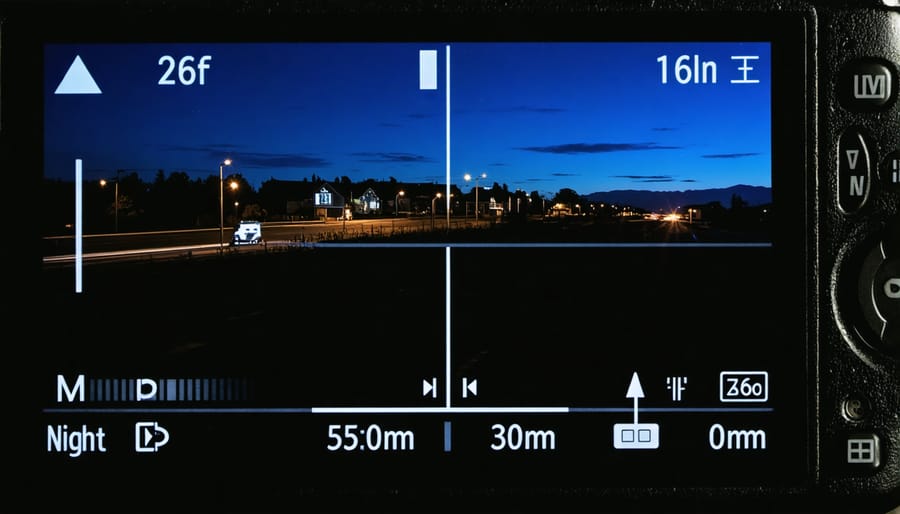
Mastering manual mode is crucial for successful night landscape photography, as your camera’s automatic settings often struggle in low-light conditions. Start by setting your camera to the lowest native ISO possible, typically 100 or 200, to minimize digital noise. However, don’t hesitate to increase it to 800-1600 if necessary to achieve proper exposure without extremely long shutter speeds.
For aperture, begin with f/2.8 to f/4 if your lens allows. While wider apertures let in more light, they might compromise depth of field. For scenes where you want both foreground and stars sharp, consider f/8 and compensate with longer exposure times or higher ISO.
Speaking of exposure time, this is where the magic happens. For basic night landscapes, start with 15-30 seconds. This duration allows enough light to enter while keeping stars as points rather than trails. Use the 500 rule as a starting point: divide 500 by your lens’s focal length to determine the maximum exposure time before stars begin to streak.
Remember to shoot in RAW format to preserve maximum detail in both highlights and shadows. Take test shots and review your histogram – it should show data across the range without significant clipping at either end. Don’t be afraid to experiment with different combinations of these settings until you find what works best for your specific scene and creative vision.
Finally, use manual focus and set it to infinity for sharp stars, or focus one-third into your frame if including foreground elements.
Focus Techniques in the Dark
Achieving sharp focus in the dark can be challenging, but several reliable techniques can help you nail your composition. The most effective method is to use live view focusing, where you can zoom in on bright stars or distant lights to fine-tune your focus manually. If there’s still some twilight, focus on a distant object like mountains or trees before it gets completely dark, then switch to manual focus to lock it in.
For landscapes without obvious focal points, use the hyperfocal distance technique. Set your lens to manual focus and turn it to infinity, then back it off slightly – about a quarter turn usually works well. Many lenses actually focus slightly beyond infinity, so this adjustment is crucial for sharp results.
A powerful flashlight can be your best friend for night focusing. Shine it on objects in your foreground, focus quickly, then switch to manual to maintain that focus point. Some photographers even use laser pointers (where legal) to illuminate distant objects momentarily for focusing.
Remember that autofocus often struggles in low light, so practicing these manual focusing techniques before heading out will help you work more confidently in the dark.
Long Exposure Considerations
Long exposures are a fundamental aspect of night landscape photography, requiring careful attention to several key factors. When shooting star-filled skies, the “500 rule” helps determine your maximum exposure time before stars begin to trail: divide 500 by your lens’s focal length. For example, with a 24mm lens, you shouldn’t exceed 20 seconds to keep stars as points of light.
However, sometimes star trails can create striking compositions. These long exposure techniques typically require exposures of 30 minutes or more, during which your camera must remain absolutely still. A solid tripod and remote shutter release are essential here.
Temperature changes during long exposures can cause lens fogging, so pack lens warmers or hand warmers secured with rubber bands. Battery life also becomes crucial – cold temperatures drain batteries faster, so always carry spares. For the sharpest results, enable your camera’s long-exposure noise reduction, though be aware this doubles your processing time as the camera captures a dark frame for each exposure.
Composition Techniques for Night Landscapes
Finding Foreground Interest
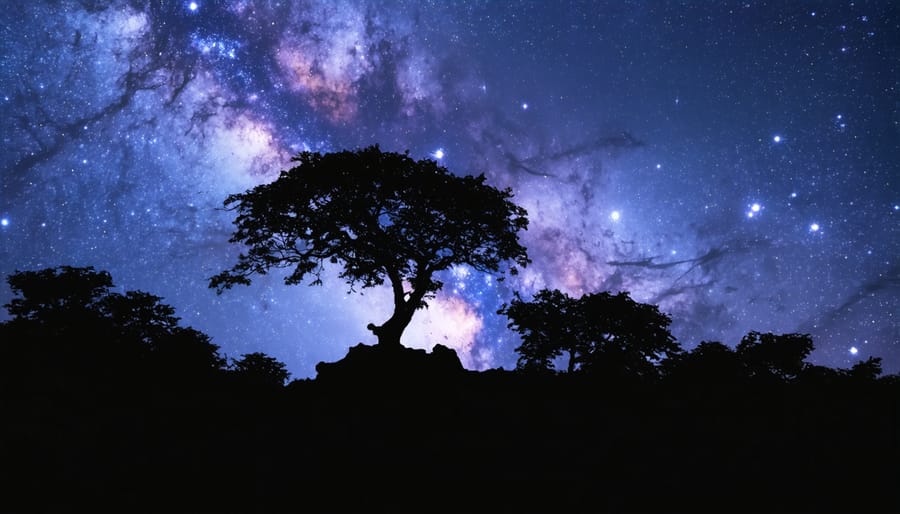
In night landscape photography, a compelling foreground can transform an ordinary shot into something extraordinary. Look for natural elements like rock formations, twisted trees, or reflective water bodies that can add depth and visual interest to your composition. During the blue hour, scout your location and identify elements that will create silhouettes or catch moonlight in interesting ways.
Consider using natural leading lines like winding paths, fence rows, or rocky outcrops to draw viewers into your image. These elements not only add dimension but also create a sense of scale against the vast night sky. For added interest, try incorporating items that reflect starlight or moonlight, such as still pools of water, wet rocks, or even frost-covered vegetation.
Light painting can also enhance foreground elements – use a subtle warm LED light to gently illuminate rocks or trees, being careful not to overpower the natural ambiance. Remember that foreground elements should complement, not compete with, the night sky. Position yourself low to the ground to emphasize foreground textures and create a more dynamic perspective that connects earth and sky in your composition.
Working with Natural Light Sources
Natural light sources can transform your night landscape photography, with moonlight being your most powerful ally. Understanding natural lighting techniques during nighttime shoots is crucial for capturing atmospheric images with depth and dimension.
The moon’s phase significantly impacts your shooting options. During a full moon, landscapes are softly illuminated, revealing details in foreground elements while maintaining the night sky’s character. Quarter moons offer interesting directional lighting, creating dramatic shadows across terrain features. Even starlight alone can provide subtle illumination during new moon phases, perfect for capturing the Milky Way.
Consider timing your shoots around moonrise or moonset for the most dramatic effects. The low angle of moonlight during these periods creates long shadows and adds texture to your compositions. Natural phenomena like aurora borealis or airglow can also serve as ethereal light sources, adding unique color dimensions to your night landscapes.
For the best results, scout your location during daylight and plan your composition around how moonlight will interact with the landscape features. Remember that natural light at night requires longer exposures, so stability and patience are essential.
Framing the Night Sky
When composing night landscapes, the celestial elements deserve as much attention as your terrestrial subjects. The key is to find compelling foreground elements that complement the starry sky above. Look for silhouetted trees, rock formations, or architectural features that create interesting shapes against the night sky. These elements add depth and scale to your composition, helping viewers connect with the vastness of the celestial scene.
Consider the position of the Milky Way when planning your shot. During summer months in the Northern Hemisphere, our galaxy’s core appears as a dramatic vertical band, perfect for creating striking compositions. Use the rule of thirds to position the Milky Way, or experiment with diagonal compositions that lead the viewer’s eye through the frame.
Don’t forget about other celestial objects. A crescent moon can provide subtle lighting for your landscape while still allowing stars to shine through. Star trails around Polaris create compelling circular patterns, especially when framed by natural features. For maximum impact, scout your location during daylight hours to identify potential composition elements and return after dark with a clear vision of your shot.
Field Techniques and Planning
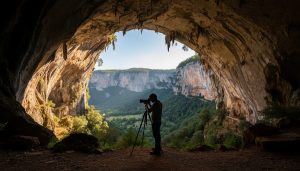
Location Scouting
Successful night landscape photography begins long before you press the shutter button. Location scouting during daylight hours is crucial for both safety and creative composition. Start by researching potential locations using tools like Google Earth, photography apps, and dark sky maps to identify areas with minimal light pollution.
Visit your chosen location during the day to familiarize yourself with the terrain and identify compelling foreground elements that will add depth to your night shots. Look for interesting rock formations, trees, or water features that can serve as anchors in your composition. Take test shots and make notes about camera positions and potential compositions.
Pay attention to practical considerations like parking accessibility, trail conditions, and the difficulty of navigation after dark. Mark your intended shooting spots using GPS coordinates or physical markers. Consider the moon phase and its position, as this will significantly impact your lighting conditions.
Safety should be your primary concern. Identify potential hazards like steep drops or unstable ground that might not be visible at night. Plan multiple backup shooting positions in case your primary location doesn’t work out. Research local regulations regarding night access and photography permits.
Timing is everything – check weather forecasts and clear sky charts to maximize your chances of good shooting conditions. Remember that some locations may look completely different at night, so try to visit during dusk to observe how the light changes and identify any artificial light sources that might affect your shots.
Weather and Timing
Success in night landscape photography heavily depends on understanding and planning around weather conditions for photography and timing. Clear, moonless nights are ideal for capturing the Milky Way and stars, while a quarter moon can provide subtle natural lighting for foreground elements.
The best shooting opportunities often occur during what photographers call the “blue hour” – the period just after sunset or before sunrise when the sky takes on deep blue hues. This time offers a perfect balance between remaining ambient light and the emergence of stars.
Cloud cover plays a crucial role in your shoot’s success. While clear skies are essential for star photography, partial clouds can add dramatic elements to your compositions, especially when illuminated by moonlight or distant city glow. Check reliable weather apps that specifically forecast cloud coverage and visibility.
Seasonal timing also matters significantly. The Milky Way’s core is most visible during summer months in the Northern Hemisphere, typically from March to October. Winter offers shorter nights but often provides clearer atmospheric conditions and interesting foreground elements like snow.
For optimal results, plan your shoots around the lunar calendar. New moon phases provide the darkest skies for star photography, while full moons can illuminate landscapes naturally but may wash out fainter stars. Consider using apps like PhotoPills or The Photographer’s Ephemeris to predict celestial positions and lighting conditions for your chosen location.
Safety Considerations
Night photography in remote landscapes requires careful planning and awareness to ensure your safety while capturing stunning shots. Always inform someone about your location and expected return time before heading out. It’s recommended to shoot with a companion whenever possible, as navigating dark terrain alone can be risky.
Pack essential safety gear including a reliable headlamp with spare batteries, a fully charged phone, and a basic first aid kit. When shooting in extreme conditions, bring appropriate clothing layers and emergency shelter. Remember that temperatures can drop significantly at night, so pack thermal wear and weather-resistant outerwear.
Research your location thoroughly during daylight hours. Scout potential composition spots and mark them on your GPS or phone map. Take note of potential hazards like steep drops, unstable ground, or wildlife areas. Many photographers find it helpful to create waypoints marking their parking spot and planned shooting locations.
Keep your gear organized and easily accessible in the dark. Use a sturdy camera bag with reflective elements, and consider attaching glow-in-the-dark tape to essential items. Always carry spare batteries and memory cards in a waterproof container.
Be mindful of local regulations and obtain necessary permits for night photography in protected areas. Some locations may have specific access hours or restricted areas. Respect wildlife and maintain a safe distance from any animals you encounter. If shooting near water or cliffs, stay well back from edges and avoid risky positions for that “perfect shot.” Remember, no photograph is worth compromising your safety.
Night photography landscapes offer an enchanting gateway to capturing the world in its most mysterious and beautiful state. Throughout this guide, we’ve explored the essential elements that make nighttime landscape photography both challenging and rewarding. From mastering the technical aspects of your camera settings to understanding the crucial role of planning and preparation, you now have the foundational knowledge to begin your nocturnal photography journey.
Remember that successful night landscape photography requires patience, practice, and persistence. Don’t be discouraged if your first attempts don’t match your vision – every experienced photographer started exactly where you are now. Each session in the field is an opportunity to learn and refine your technique.
The magic of night photography lies in its ability to reveal scenes that are invisible to the naked eye. Whether you’re capturing the sweeping arc of the Milky Way over a mountain range, painting with light in a desert landscape, or documenting the dance of the northern lights, each image tells a unique story of our relationship with the natural world after dark.
As you venture into the night with your camera, always prioritize safety while pursuing your creative vision. Start with familiar locations close to home, gradually building your confidence and expertise before tackling more remote destinations. Join local photography groups, share your experiences, and learn from fellow night photographers.
The world of night landscape photography is constantly evolving, with new techniques and technologies emerging regularly. Stay curious, keep experimenting, and most importantly, enjoy the peaceful solitude and wonder that comes with photographing landscapes under the stars. Your next masterpiece awaits in the darkness.