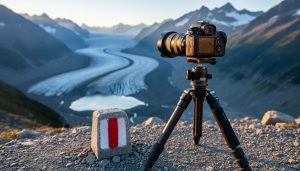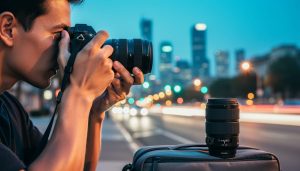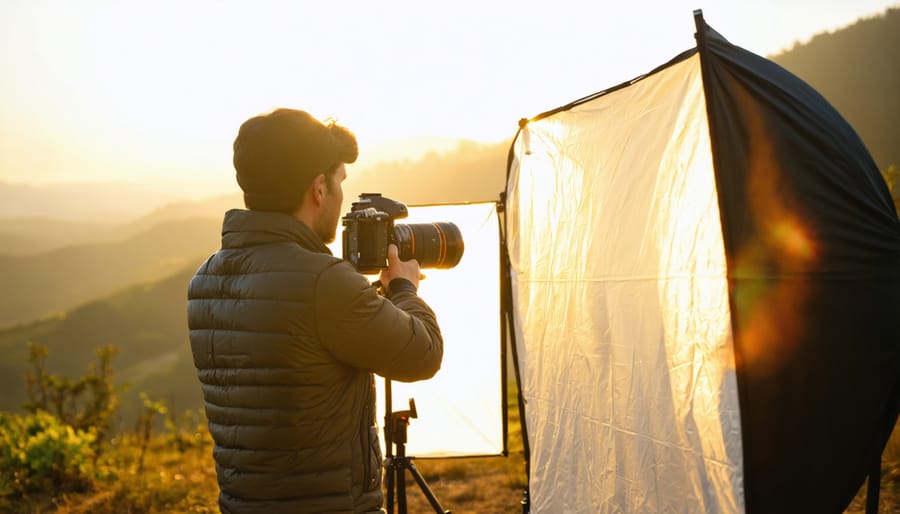
Master outdoor photography lighting by combining natural sunlight with portable strobes, creating the perfect balance between ambient light and artificial fill. Professional-grade location shoots demand more than just golden hour timing – they require strategic equipment choices that can withstand environmental challenges while delivering studio-quality results in any setting.
Successful outdoor lighting starts with understanding three essential gear categories: portable flash units for run-and-gun flexibility, battery-powered strobes for power and consistency, and light modifiers that shape and control natural and artificial light. Whether you’re shooting portraits in a sun-drenched park or capturing landscapes at dawn, your lighting kit must be both versatile and weather-resistant.
The key difference between indoor and outdoor lighting lies in your ability to control and adapt to constantly changing conditions. While studio photographers work in controlled environments, outdoor photography demands equipment that can compete with the sun, withstand unexpected weather, and pack down for transport across varied terrain. This introduction to outdoor lighting equipment will help you build a robust kit that meets these unique challenges head-on.
Natural Light vs. Artificial Light: Making the Right Choice

Working With Natural Light
Working with natural light is the foundation of outdoor photography, and mastering it can elevate your images even before adding artificial lighting. The “golden hours” – the first and last hour of sunlight each day – offer warm, directional light that’s perfect for landscapes and portraits. During these times, position your subject so the sun acts as a backlight or side light for dramatic effects.
Mid-morning and late afternoon provide stronger directional light that can create interesting shadows and contrast. Use reflectors to bounce light back onto your subject’s shadowed areas, or embrace the contrast for mood. Cloudy days act like nature’s softbox, providing even, diffused light that’s ideal for portraits and macro photography.
Pay attention to your surroundings – light reflecting off water, white walls, or light-colored surfaces can serve as natural fill lights. When shooting in harsh midday sun, look for open shade under trees or buildings to create more flattering light. Remember that your position relative to the sun dramatically affects the quality of light – experiment with different angles to find the most flattering direction for your subject.
When Artificial Light Becomes Essential
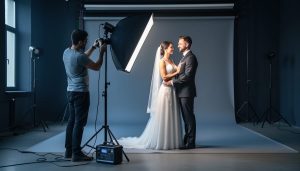
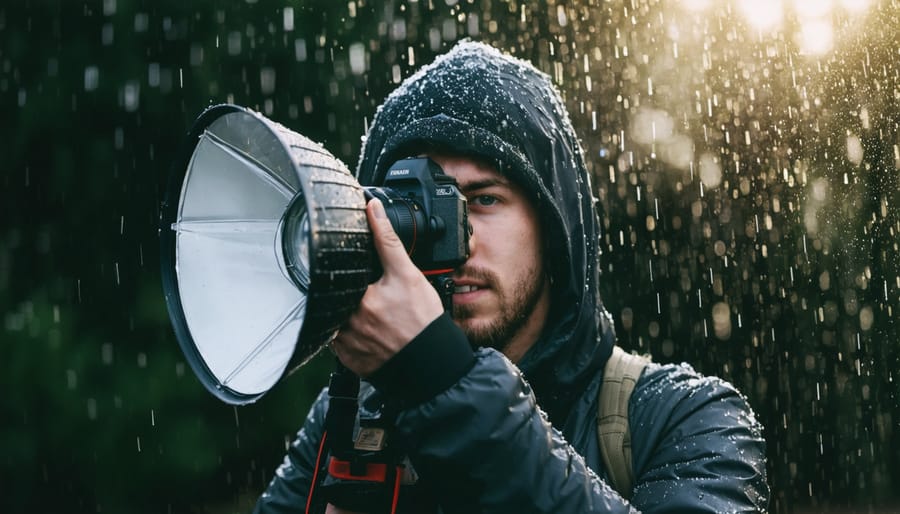
While natural light is often preferred, there are several situations where artificial lighting becomes not just helpful, but essential for capturing stunning outdoor photographs. During golden hour or blue hour shoots, for instance, the available light might be beautiful but insufficient for your subject. This is particularly true when photographing events like outdoor weddings or sports activities that can’t be scheduled around optimal lighting conditions.
Artificial lighting proves invaluable when shooting in heavily shaded areas, such as dense forests or urban environments with tall buildings. It’s also crucial for creating dramatic effects, like rim lighting for portraits or filling harsh shadows during midday shoots. Night photography, especially for events or architectural shots, absolutely requires artificial lighting to properly expose your subject while maintaining the ambient atmosphere.
Flash and continuous lighting equipment can help you overcome challenging weather conditions too. On overcast days, when natural light is flat and uninspiring, artificial lighting can add depth and dimension to your images. Even in bright conditions, fill flash can help balance exposure when shooting backlit subjects or dealing with strong contrast.
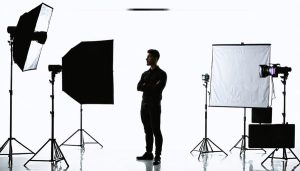
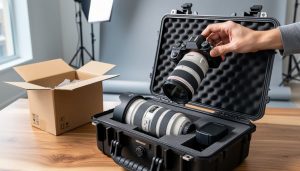
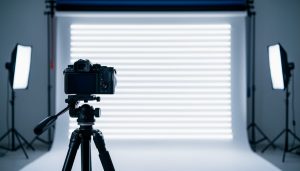
Essential Outdoor Lighting Equipment
Portable Flashes and Speedlights
Portable flashes and speedlights are invaluable tools for outdoor photographers, offering versatility and control over lighting conditions in any environment. These compact light sources can transform harsh midday sun into beautifully balanced portraits or add drama to landscape details at golden hour.
Modern speedlights pack impressive power into a portable package, with many offering TTL (Through The Lens) metering for automatic exposure calculations. Look for units with high guide numbers (typically 50-60) for adequate power when bouncing light outdoors, and ensure they have robust battery life for extended shoots.
Key features to consider include wireless triggering capabilities, which allow you to position lights away from your camera for creative effects. Many contemporary speedlights also offer HSS (High-Speed Sync), enabling flash synchronization at faster shutter speeds – perfect for controlling ambient light while maintaining flash exposure.
When working outdoors, consider investing in light modifiers like softboxes or diffusion domes to soften the light. A speed ring adapter lets you mount various modifiers, while collapsible reflectors can help bounce and shape the light. Don’t forget weather-sealed units if you frequently shoot in challenging conditions.
For maximum flexibility, carry multiple speedlights in your kit. This allows for complex lighting setups, from rim lighting to fill flash, giving you studio-quality results in any outdoor setting. Remember to pack spare batteries and protect your gear with weather covers when needed.
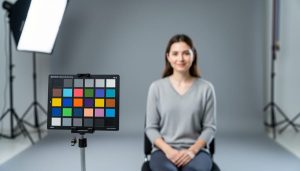
Light Modifiers and Diffusers
In outdoor photography, light modifiers and diffusers are essential tools for controlling harsh sunlight and creating beautiful, soft lighting for your subjects. One of the most versatile options is the collapsible reflector, which typically comes with multiple surfaces (white, silver, gold, and black) to either bounce light onto your subject or flag it away.
Softboxes and umbrellas, while traditionally studio equipment, can be incredibly effective outdoors when paired with strobes or speedlights. Look for lightweight, portable versions that can withstand light winds. A handy tip is to bring sandbags or weights to secure your modifiers, especially on breezy days.
Scrims are another invaluable tool, acting like a portable cloud to soften harsh sunlight. These translucent panels diffuse direct sunlight, creating even, flattering light for portraits or product shots. Many photographers also swear by the 5-in-1 reflector kit, which includes a translucent diffuser panel along with reflective surfaces.
For run-and-gun situations, consider compact options like flash diffuser caps or small collapsible softboxes that attach directly to your speedlight. These might not create as dramatic an effect as larger modifiers, but they’re perfect for travel and impromptu shoots where carrying minimal gear is crucial.
Remember to choose weather-resistant modifiers when possible, and always have a plan to protect your equipment from sudden weather changes.
Light Stands and Support Systems
When shooting outdoors, reliable light stands and support systems are crucial for securing your lighting equipment safely and effectively. Standard light stands might suffice in controlled environments, but outdoor photography demands more robust solutions.
C-stands are particularly valuable for outdoor work, offering superior stability with their three-legged design and multiple grip points. Their turtle base configuration allows for better weight distribution on uneven terrain, while the legs can be individually adjusted to accommodate slopes and rough ground.
For enhanced stability in windy conditions, sand bags are essential accessories. Place them on stand legs or hang them from hooks to prevent toppling. Some photographers also use ground stakes or spike feet attachments, which can be driven into soft earth for additional anchoring.
Heavy-duty boom arms extend your lighting positioning options while maintaining stability. When using boom arms outdoors, always counterbalance them properly and ensure all knuckles and joints are fully tightened.
Consider investing in weather-resistant stands made from aluminum or carbon fiber, which resist corrosion from moisture and salt air. For maximum versatility, look for stands with air cushioning to protect your equipment if a clamp accidentally loosens.
Transportation-friendly options include compact stands with folding designs and carrying cases. Some modern stands feature quick-release mechanisms for faster setup and breakdown, which is particularly valuable when working against changing weather conditions.
Weather-Proofing Your Lighting Setup
Protection Against Elements
When working with lighting equipment outdoors, protecting your gear from the elements is crucial for both its longevity and your shooting success. Weather-sealed cases are your first line of defense, with professional-grade options featuring rubber gaskets and waterproof closures. For active shooting, consider using rain covers or protective sleeves that allow access to controls while keeping moisture at bay.
Silica gel packets are invaluable for managing humidity inside your cases, particularly in tropical or coastal environments. Replace these regularly to maintain their effectiveness. For strobes and continuous lights, dedicated weather shields or umbrella-style covers provide essential protection during light rain, though it’s best to avoid shooting in heavy precipitation.
Cable management becomes especially important outdoors – use weatherproof tape or rubber covers for connection points, and always carry spare waterproof caps for unused ports. When working in dusty environments, lens cleaning kits and air blowers are essential, while UV filters can provide additional protection for your valuable front elements.
For battery-powered equipment, ensure all compartments are properly sealed, and consider using weather-resistant battery grips. Keep spare batteries in waterproof containers, as moisture can significantly impact their performance and safety. When packing up, always thoroughly dry equipment before storage, and maintain a regular cleaning schedule to prevent corrosion from salt air or mineral deposits.
Remember, even weather-resistant gear has its limits – always monitor conditions and have a quick-pack strategy ready when weather turns threatening.
Emergency Weather Solutions
Mother Nature doesn’t always cooperate with our shooting schedules, but that doesn’t mean you have to pack up and head home. Having a solid backup plan and some emergency solutions can save your shoot when weather takes an unexpected turn.
Keep a set of clear plastic bags and rubber bands in your kit – they make excellent improvised rain covers for your lighting equipment. For speedlights, cut a small hole for the flash head and secure the bag with rubber bands. This simple solution can keep your gear dry during light drizzles while maintaining full functionality.
A collapsible reflector with a translucent panel can double as a diffuser when clouds suddenly break, helping you manage harsh sunlight. It can also serve as a makeshift umbrella in light rain, protecting both you and your gear while you pack up or relocate.
For those shooting in challenging conditions, consider investing in weatherproof LED panels. While they’re pricier than standard options, they’re invaluable when working in unpredictable weather. These panels are particularly useful for low light photography techniques during stormy conditions.
Always keep silica gel packets in your bag to combat humidity and condensation. After exposure to moisture, seal your equipment in a large plastic bag with these packets before returning to an air-conditioned environment. This prevents condensation from forming inside your gear.
Remember to bring gaffer tape – it’s perfect for securing loose covers, temporary weather sealing, and countless other emergency fixes when you’re in a pinch.
Power Solutions for Outdoor Lighting
Portable Power Options
Power management is crucial for successful outdoor photography lighting, and there are several reliable options to keep your gear running smoothly in the field. Professional battery packs are the most popular choice, offering high capacity and quick recycling times for flash units. V-mount and Gold-mount batteries are industry standards, providing consistent power output and compatibility with various lighting equipment.
For longer shoots or higher power demands, portable generators deserve serious consideration. Modern inverter generators are significantly quieter than their predecessors and provide clean power that won’t damage sensitive electronics. Look for models specifically designed for photography work, which typically offer pure sine wave output and multiple outlet options.
Solar power solutions have also become increasingly viable, especially for remote locations. Foldable solar panels paired with power banks can provide a sustainable power source for less demanding setups. For maximum versatility, consider a hybrid approach combining a compact battery pack for primary use with a solar backup.
When selecting portable power options, consider factors like weight, runtime, and weather resistance. Always carry backup power solutions, and remember that cold temperatures can significantly affect battery performance. A good rule of thumb is to bring twice the power capacity you think you’ll need, especially for critical shoots.
Power Management Tips
Managing power effectively is crucial when working with outdoor lighting equipment. Always carry multiple fully-charged batteries for your lights and pack them in a waterproof container to protect against moisture. For speedlights and battery-powered strobes, high-capacity rechargeable batteries are more cost-effective and environmentally friendly than disposables.
Consider investing in portable power stations or battery packs for continuous lighting setups. These provide reliable power for longer shoots and can serve as backup power sources for other equipment. When using multiple lights, stagger your power usage by only turning on lights when needed, which helps extend battery life throughout the session.
Keep a power consumption log during your shoots to better understand your equipment’s needs. This helps you plan future sessions more effectively and ensures you pack adequate power supplies. In cold weather, store batteries close to your body between shots, as cold temperatures can significantly reduce battery performance.
For extended shoots, bring a car power inverter or solar charging setup. These alternatives can be lifesavers when working in remote locations. Remember to test all power equipment before heading out, and always pack at least 50% more battery capacity than you think you’ll need – it’s better to have extra power than to cut a shoot short.
Real-World Lighting Setups
Let’s explore some practical lighting configurations that consistently deliver excellent results in various outdoor scenarios. These professional lighting setups have been tested and refined through countless photo shoots.
For portrait photography during golden hour, position your main light (preferably a battery-powered strobe) at a 45-degree angle to your subject, about 3 feet away. Add a silver reflector on the opposite side to fill in shadows. This setup creates beautiful, warm skin tones while maintaining natural ambient light.
When shooting events under harsh midday sun, use a scrim to diffuse sunlight overhead, paired with two speedlights on light stands. Position one light at 2 o’clock and another at 10 o’clock relative to your subject. This three-point lighting arrangement helps combat unflattering shadows while maintaining a natural look.
For environmental portraits in shaded areas, try using a key light with a softbox at eye level, slightly offset to one side. Add a bare speedlight behind your subject for rim lighting, creating separation from the background. A gold reflector placed at waist height adds warmth to the shadows.
Wedding photographers often face changing conditions throughout the day. For ceremony shots, position two speedlights on high stands at the back corners of the venue, set to 1/4 power. Use radio triggers to fire them simultaneously, creating even illumination without overwhelming the natural ambiance.
Beach photography presents unique challenges with reflective sand and bright conditions. Use a large octabox as your main light, positioned close to your subject to overpower the sun. Add a strip light behind for edge definition, and don’t forget neutral density filters to maintain proper exposure.
For wildlife photography, portable LED panels mounted on a bracket can provide just enough fill light for subjects in shadow without startling them. Use diffusion material to soften the light, and adjust color temperature to match the ambient conditions.
Remember to always carry sandbags or weights for your light stands, especially in windy conditions. Clear plastic bags or specialized rain covers should be readily available to protect your gear from unexpected weather changes. These setups can be modified based on your specific needs, but they provide a solid foundation for consistently beautiful outdoor images.
Mastering outdoor photography lighting requires both the right equipment and the knowledge to use it effectively. Throughout this guide, we’ve explored various essential tools that can transform your outdoor photography from good to exceptional. From portable strobes and reflectors to diffusers and LED panels, each piece of equipment serves a unique purpose in helping you achieve your creative vision.
Remember that successful outdoor lighting isn’t just about having the most expensive gear – it’s about understanding how to use what you have effectively. Start with the basics: a reliable flash unit and a good reflector. As your skills develop, gradually expand your kit to include more specialized equipment like softboxes or continuous lighting solutions.
Weather protection should always be a priority when shooting outdoors. Invest in quality protective gear for your lighting equipment, and always have backup solutions ready. Consider the portability of your setup, as the best lighting equipment is the one you’ll actually bring with you on location.
For beginners, we recommend starting with a basic kit consisting of a speedlight, a collapsible reflector, and basic modifiers. More advanced photographers might want to explore portable strobe systems or multiple light setups for complex outdoor shoots. Whatever your level, remember that practice and experimentation are key to mastering outdoor lighting techniques.
The most important takeaway is that great outdoor photography lighting is about finding the right balance between natural and artificial light while maintaining the authenticity of your scene. Choose equipment that matches your shooting style, budget, and practical needs, and don’t be afraid to start small and build your kit over time.