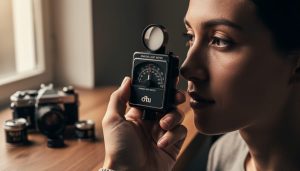
Check your camera’s light seals first—deteriorated foam around the film door causes light leaks that ruin exposures, and replacement costs under $15 for a DIY kit. Test your shutter speeds by comparing them against a smartphone stopwatch app in bulb mode; if your 1/125th setting actually fires at 1/60th, you’ll need professional CLA (clean, lubricate, adjust) service. Verify film advance issues by opening the back and watching whether sprockets engage properly with empty camera—stuck advance levers often result from old lubricant rather than broken gears.
Your mechanical film camera represents decades-old engineering that’s simultaneously robust and vulnerable. Unlike digital bodies that fail electronically and become obsolete, film cameras suffer predictable, often fixable mechanical problems. That sticky aperture blade? Dried lubricant. The sluggish shutter? Likely the same issue. Understanding what you can repair at home versus what requires a specialist’s touch saves both money and your camera’s lifespan.
This guide breaks down the most common film camera malfunctions into practical troubleshooting steps. You’ll learn which problems demand nothing more than cotton swabs and isopropyl alcohol, which require ordering inexpensive parts, and when sending your camera to a repair technician becomes necessary. Whether you’re rescuing a thrift store find or maintaining a cherished heirloom, knowing basic diagnosis keeps you shooting. After all, if you’re committed to developing your own film, maintaining the camera itself follows naturally.
Why Film Cameras Break (And Why That’s Actually Good News)
Here’s the good news: film cameras break because they’re mechanical marvels packed with gears, springs, levers, and precision-engineered parts—and that’s exactly why you can fix them. Unlike modern digital cameras with proprietary circuit boards and sealed electronics, analog cameras operate on principles unchanged since the mid-20th century. When something goes wrong, you’re dealing with physical components you can see, touch, and often repair yourself.
Most film camera failures trace back to three culprits: age, lubricant degradation, and simple wear-and-tear. That 1970s Pentax sitting in your grandfather’s closet probably has sticky shutter curtains because the lubricants turned gummy after decades. Light seals crumble into black dust because foam deteriorates over time—it’s chemistry, not catastrophe. Advance mechanisms stick because old grease hardens. These aren’t design flaws; they’re natural consequences of mechanical systems aging.
Think of it this way: when a digital camera’s image sensor fails or its processor dies, you’re often looking at a total loss or repair costs exceeding the camera’s value. But when a film camera’s shutter speeds drift or its film counter jams, you’re dealing with replaceable parts and adjustable mechanisms. Many issues can be resolved with basic tools, fresh lubricant, and patience.
This mechanical nature connects directly to your film photography workflow—understanding your camera’s physical operation helps you shoot more confidently and troubleshoot problems on location. A photographer who knows why their advance lever feels different can often diagnose issues before they become shooting disasters.
The empowering reality? Resources abound. Service manuals circulate online, replacement parts exist for popular models, and repair communities eagerly share knowledge. Your broken film camera isn’t electronic waste—it’s a puzzle waiting to be solved, with solutions that don’t require engineering degrees or specialized equipment for many common problems.

Essential Tools and Materials for Camera Repair
The Basic Toolkit
Before you dive into fixing your film camera, let’s talk about the essential tools you’ll need. Having the right equipment makes the difference between a successful repair and a frustrating afternoon that ends with more problems than you started with.
First and most important: invest in a proper JIS (Japanese Industrial Standard) screwdriver set. Here’s why this matters. Most film cameras, particularly vintage Japanese models like Nikons, Canons, and Pentaxes, use JIS screws rather than Phillips head screws. They look nearly identical, but using a Phillips screwdriver on JIS screws will strip the heads faster than you can say “professional repair bill.” A good JIS set runs about $30-50 and will save you countless headaches.
You’ll also need precision tweezers with fine tips for handling small springs, shims, and tiny screws that inevitably try to escape during repairs. Look for non-magnetic tweezers to avoid accidentally magnetizing delicate components.
Spanner wrenches are essential for removing lens retaining rings and filter rings without marring the surface. These come in various sizes, so consider getting an adjustable set that covers multiple diameters.
Keep lens tissue and a proper cleaning solution on hand for optical work. Regular tissues or cotton swabs can scratch delicate lens coatings, so don’t skimp here.
Round out your toolkit with a soft brush for removing dust, a magnifying loupe for inspecting small components, and good lighting—preferably an adjustable desk lamp. A camera parts tray with compartments will keep those minuscule screws organized and prevent the “where did that spring go?” moments that plague every repair.
Specialty Items Worth Having
While screwdrivers and tweezers will get you started, certain specialty tools make film camera repair significantly easier and safer for your equipment. These items might seem like luxury purchases at first, but they quickly prove their value when you’re working on delicate mechanisms.
Lens wrenches, also called spanner wrenches, are essential for disassembling lens elements and retaining rings. These thin, curved tools fit into the notches of lens components without scratching the glass or marring the metal. You’ll find various sizes, so consider purchasing a set that covers multiple diameters. A basic set typically runs between $15 and $30.
Rubber grippers deserve a spot in every repair kit. These simple friction tools help you twist stubborn filter rings, remove stuck lens elements, and grip components without leaving marks. You can find dedicated camera repair grippers, but clean rubber jar openers from kitchen supply stores work surprisingly well as affordable alternatives.
Quality lubricants separate successful repairs from future headaches. Camera-specific lubricants like Nyoil or synthetic watch oils provide the right viscosity for shutter mechanisms and focusing helicals. Never use general-purpose oils like WD-40, which can migrate onto shutter blades and aperture mechanisms, creating more problems than they solve. A small bottle of proper camera lubricant costs around $10 and lasts years.
For sourcing these specialty items, consider online retailers like B&H Photo, Adorama, or specialty tool suppliers like Micro-Tools. eBay often has vintage tool sets from retired repair technicians. Camera repair forums frequently have vendor recommendations based on quality and pricing.
Common Film Camera Problems You Can Fix at Home
Sticky Shutter or Inaccurate Shutter Speeds
A sticky shutter is one of the most common ailments affecting vintage film cameras, and the good news is that it’s often fixable with some patience and care. You’ll know you’re dealing with this issue when your shutter speeds sound sluggish, the curtains move unevenly, or your photos come out consistently overexposed or underexposed despite correct meter readings.
The culprit is almost always old lubricant that has thickened into a gummy mess over decades, sometimes combined with dust and debris that have worked their way into the shutter mechanism. Camera lubricants were designed for specific viscosities, but time and temperature changes turn them into performance-killing sludge.
To diagnose the problem, set your camera to different shutter speeds and fire them while listening carefully. A healthy shutter has a distinct, crisp sound at each speed. At 1/1000, you should hear a sharp snap. At 1/30, a noticeably slower but still precise action. If everything sounds roughly the same or you hear hesitation and uneven movement, you’ve got sticky shutter syndrome.
For basic cleaning, you can try firing the shutter repeatedly at different speeds without film loaded. Sometimes this alone can break up minor gumming. If you’re comfortable going further, removing the bottom plate of many cameras gives access to the slow speed governor, a common trouble spot. Using a clean, lint-free cloth and lighter fluid or naphtha, you can gently clean visible gears and escapement mechanisms. Apply cleaning fluid to the cloth, never directly to the camera.
Here’s where restraint becomes critical: do not touch the shutter curtains themselves. These delicate fabric or metal blinds are precisely tensioned and easily damaged. Avoid adding any lubricant unless you know exactly what you’re doing and have the correct type. Modern oils can migrate onto curtains and destroy them. Also, never force any mechanical parts or over-tighten screws during reassembly.
If your initial gentle cleaning doesn’t restore proper speeds, this is where professional service becomes the wise choice rather than risking permanent damage to an irreplaceable camera.
Light Seals and Light Leaks
If you’ve noticed mysterious streaks of light ruining your film images, or if your camera’s back feels suspiciously loose, deteriorated light seals are probably to blame. These foam strips line the camera body’s openings to prevent stray light from exposing your film. Over time—and we’re talking decades for many vintage cameras—the foam breaks down into a sticky, crumbly mess that fails at its job.
Inspecting your light seals is straightforward. Open the camera back and look along the edges where the door meets the body. You’ll typically find thin foam strips or channels. If they’re gummy, flaking, or completely disintegrated into black residue, it’s time for replacement. Check the hinge side too, as well as around the film door latch.
Removing old seals requires patience rather than expertise. Use a pair of tweezers or a toothpick to peel away the degraded foam. The adhesive backing often leaves sticky residue behind, which you’ll want to clean thoroughly with isopropyl alcohol and cotton swabs. This step matters because new seals won’t adhere properly to a contaminated surface. Take your time here—rushing leads to incomplete cleaning.
For replacement materials, purchase camera-specific light seal kits when available, as they’re pre-cut to match your model’s exact dimensions. Companies like Jon Goodman’s Micro-Tools or USCamera offer quality kits for popular cameras. Alternatively, you can buy bulk foam sheets in various thicknesses—typically 1.5mm to 3mm works for most applications. Look for closed-cell neoprene or polyurethane foam with adhesive backing, as these materials resist degradation better than the original foam used in vintage cameras.
When installing new seals, cut them slightly longer than needed, press them firmly into place, and trim excess with a sharp blade. Close the camera back gently to test the fit—you want snug contact without preventing the door from latching properly.

Advance Lever Issues and Film Transport Problems
Few things are more frustrating than a stuck advance lever when you’re in the middle of a perfect photo opportunity. The film advance mechanism is the heart of your camera’s transport system, and when it fails, your camera becomes a very expensive paperweight. Let’s walk through the most common problems and their solutions.
A completely stuck advance lever usually means one of three things: the film isn’t properly loaded on the take-up spool, there’s excessive friction in the transport mechanism, or the shutter hasn’t fully reset. Before assuming the worst, open the back of your camera and check if film is actually threaded correctly. I’ve seen countless “broken” cameras that simply had film incorrectly loaded or the rewind lever engaged.
If the advance lever feels stiff or grindy rather than completely stuck, dried lubricant is often the culprit. After decades, the original grease in your camera’s gears can harden into a tar-like substance that impedes movement. You can try placing a tiny drop of lighter fluid (not lighter fuel) on the advance lever shaft and working it back and forth gently. This sometimes dissolves old lubricant enough to restore function temporarily. However, this is a temporary fix at best.
Sprocket issues present differently. If your advance lever moves but film isn’t winding properly, inspect the sprocket teeth for damage or debris. Remove any visible dirt with a soft brush. The sprockets should engage smoothly with film perforations—if they’re worn down or bent, film transport becomes unreliable.
Double-exposures happening unintentionally often indicate that the film counter mechanism has disconnected from the advance system. While some simple cameras allow access to this connection, many require partial disassembly that’s best left to professionals who have proper tools and replacement parts on hand.
Viewfinder and Mirror Problems
A foggy or hazy viewfinder can turn every shot into guesswork, and it’s one of the more common complaints with older film cameras. The good news? Sometimes it’s just surface grime. Start by examining the eyepiece. Remove it if possible and gently clean both sides with a microfiber cloth and lens cleaning solution. You’d be surprised how often the problem is simply skin oils and dust buildup on the exterior surfaces.
If the fog persists, the issue might be internal condensation or, more seriously, fungus growing on the viewfinder prism or focusing screen. Fungus appears as web-like patterns or spots and requires immediate attention. At this stage, disassembly is necessary, which means it’s time to consult a professional repair technician. Attempting to access the prism yourself risks damaging delicate internal components and mirror mechanisms.
Speaking of mirrors, stuck or sluggish mirrors in SLRs prevent proper image composition and often indicate dried lubricant or foam deterioration. The mirror damper foam, which cushions the mirror’s movement, tends to break down into sticky residue over decades. While cleaning accessible foam residue with isopropyl alcohol and cotton swabs is manageable, anything involving the mirror box mechanism itself requires expertise.
Here’s the rule: if you can’t see or easily reach the problem area without removing screws or prying apart camera sections, stop. Mirror timing and alignment are precision adjustments that demand specialized tools and knowledge. A well-intentioned repair can quickly become an expensive restoration project. When in doubt, photograph what you’re seeing through the viewfinder and consult with a repair specialist first.

Battery Compartment Corrosion and Electrical Issues
Battery compartment issues are surprisingly common culprits behind film camera malfunctions, particularly in cameras that have sat unused for years. The good news? This is often one of the most straightforward repairs you can tackle at home.
Start by removing the batteries and inspecting the compartment under good lighting. Corrosion typically appears as white, blue, or green crusty deposits on the metal contacts. This buildup prevents proper electrical connection, causing your light meter to fail or the camera to appear completely dead. Even if you don’t see obvious corrosion, tarnished contacts can still interfere with function.
For light corrosion, use a pencil eraser to gently rub the contacts in a circular motion. The mild abrasiveness removes oxidation without damaging the metal. Follow up with a cotton swab dipped in isopropyl alcohol (90% or higher) to clean away residue. For heavier corrosion, a small piece of fine-grit sandpaper or a specialized contact cleaner can work wonders, but be gentle to avoid removing too much metal.
If corrosion has eaten through the spring contacts completely, replacement becomes necessary. Some camera repair suppliers sell replacement battery contact springs, though this repair requires basic soldering skills in many cases.
After cleaning, install fresh batteries and check whether your meter activates. If the meter still doesn’t respond, test the batteries in another device to confirm they’re working. Sometimes the issue extends beyond the contacts to the circuit board, which typically requires professional attention. However, restored battery contacts solve the problem in about 70% of non-functioning meters in my experience, making this a worthwhile first troubleshooting step.
Preventive Maintenance: Keep Your Camera Running Smoothly
Regular Cleaning and Lubrication Schedule
Think of your film camera like a vintage car—regular maintenance prevents bigger problems down the road. A simple cleaning routine every few months can save you from costly repairs and keep your camera shooting smoothly for decades.
For cameras you use regularly, plan a basic cleaning session every three to six months. This involves gently wiping down the exterior with a soft, lint-free cloth, clearing dust from the film chamber with a blower (never compressed air, which can damage delicate components), and checking that all dials and controls move freely. If you notice any stiffness, that’s your cue that lubrication might be needed.
Here’s a practical example: Many photographers who embrace DIY film photography keep a small maintenance kit with their gear—a rocket blower, microfiber cloths, and lens cleaning solution. After every ten rolls or so, they’ll do a quick five-minute inspection.
For lubrication, exercise caution. Modern synthetic lubricants work best, but internal mechanisms should typically only be serviced by professionals every five to ten years, depending on usage. You can safely apply a tiny amount of appropriate lubricant to external moving parts like film advance levers, but less is always more. Over-lubrication attracts dust and can gum up mechanisms, creating the very problems you’re trying to prevent.
Storage and Environmental Considerations
The best film camera repair is the one you never have to make. Environmental factors cause more camera problems than most photographers realize, and a few simple storage habits can prevent the majority of mechanical issues you might encounter down the road.
Humidity is your film camera’s silent enemy. Too much moisture leads to fungus growth on lens elements and internal mechanisms, while excessive dryness can cause lubricants to harden and leather components to crack. Aim to store your cameras in environments with 40-50% relative humidity. A simple solution is placing silica gel packets in your camera bag or storage cabinet, replacing them every few months. If you live in particularly humid climates, consider investing in a dry cabinet designed for camera storage, which maintains optimal humidity levels automatically.
Temperature stability matters just as much as humidity control. Avoid storing cameras in attics, basements, or garages where temperatures fluctuate dramatically. These swings cause materials to expand and contract at different rates, potentially throwing delicate mechanisms out of alignment. Room temperature storage is ideal, keeping your cameras where you live rather than in extreme environments.
When storing cameras long-term, release the shutter tension and remove batteries to prevent corrosion. Keep cameras in well-padded bags or cases, but allow some air circulation rather than sealing them in airtight containers. This prevents trapped moisture from becoming problematic and keeps your equipment ready for action whenever inspiration strikes.

When to Call a Professional (And How to Find a Good One)
Let’s be honest: there’s a certain point where even the most enthusiastic DIYer needs to step back and admit defeat. I learned this the hard way when I attempted to repair a sticky shutter on my grandfather’s Leica M3. What started as confidence quickly turned into a pile of springs and parts I couldn’t identify, let alone reassemble.
Some repairs simply require specialized tools, years of experience, and a delicate touch that comes from working on hundreds of cameras. Shutter mechanisms, for instance, involve dozens of precisely timed components. A professional technician has the knowledge to adjust spring tensions and escapements to achieve accurate shutter speeds across the full range. Similarly, rangefinder calibration requires optical alignment tools that cost more than most vintage cameras themselves.
Lens element separation, where the cemented layers inside a lens come apart, is another job for experts. Attempting to re-cement elements without proper materials and controlled conditions can permanently ruin valuable glass. The same goes for mirror box repairs in SLRs, light meter recalibration, and any work involving the film advance mechanism’s intricate gearing.
Finding a reputable camera repair technician takes some research. Start by asking fellow photographers in local camera clubs or online communities for recommendations. Check specialized forums where people discuss their repair experiences. When you’ve identified potential technicians, ask about their experience with your specific camera model. A great Nikon technician might not be the best choice for your Hasselblad.
Before shipping your camera, get a written estimate. Quality repairs aren’t cheap. Expect to pay anywhere from 75 dollars for minor cleaning and adjustments to 300 dollars or more for complex shutter overhauls. However, this investment often costs less than replacing a beloved camera and preserves its long-term functionality.
Reputable repair shops will communicate clearly about timelines, typically ranging from two weeks to several months depending on parts availability. They should also guarantee their work for at least 90 days.
Taking care of your film camera doesn’t require an engineering degree or a fortune in repair costs. By starting with simple fixes like cleaning the battery compartment, lubricating sticky parts, or replacing light seals, you’ll build confidence that empowers you to tackle more complex issues over time. Every repair you complete yourself strengthens your connection to these beautiful mechanical instruments and deepens your understanding of how photography actually works.
Beyond the practical benefits, maintaining film cameras plays a vital role in preserving photographic heritage for future generations. These cameras represent decades of engineering excellence and creative possibility that simply can’t be replicated by digital sensors. When combined with traditional film printing processes, they offer a tangible, intentional creative experience that many photographers find deeply rewarding.
Remember, even professional repair technicians started with their first simple fix. Don’t be intimidated by initial setbacks or mistakes. Each camera you bring back to life is a small victory worth celebrating. We’d love to hear about your repair experiences, successes, and lessons learned. Share your stories with the film photography community and inspire others to keep these remarkable machines clicking.