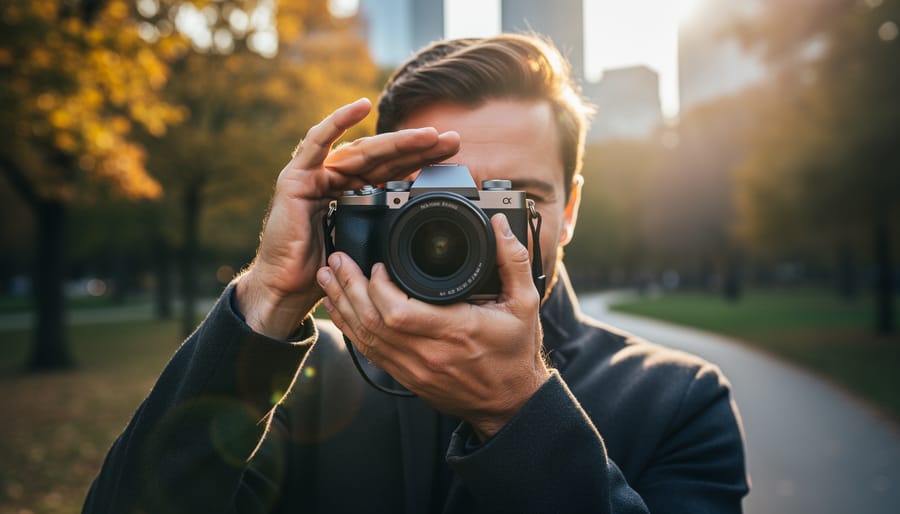
Position yourself with the sun just outside your frame’s edge to minimize direct light hitting your lens elements. Shield your lens with your hand, a lens hood, or any nearby object to create shade when shooting toward bright sunlight. Adjust your aperture to f/8 or smaller if you want to emphasize sunstars while managing flare, or shoot at wider apertures like f/2.8 to reduce internal reflections. Clean your lens and filter surfaces thoroughly, as fingerprints and dust particles amplify flare significantly.
Lens flare from the sun occurs when intense light scatters and reflects between the glass elements inside your lens, creating those characteristic streaks, halos, and washed-out patches across your image. Unlike the geometric polygonal shapes of ghosting or the deliberate starburst patterns created by your aperture blades, sun flare manifests as atmospheric veils of light that can either ruin a perfectly composed shot or add cinematic magic to your work.
Understanding this phenomenon transforms you from a frustrated photographer battling technical limitations into someone who controls light deliberately. The same solar flare that destroys contrast in your landscape can become the hero element in a golden-hour portrait, wrapping your subject in warmth and drama. The difference lies entirely in your awareness and technique.
Whether you’re shooting a backlit wedding ceremony, capturing mountain vistas at sunrise, or experimenting with creative light effects, mastering sun-related lens flare means knowing exactly when to embrace it and when to eliminate it from your frame.
What Actually Happens When Sunlight Hits Your Lens
When you point your camera toward the sun, you’re essentially aiming at the brightest light source in our sky—and your lens doesn’t always know how to handle it gracefully. Here’s what’s happening inside that sophisticated piece of glass you’ve invested in.
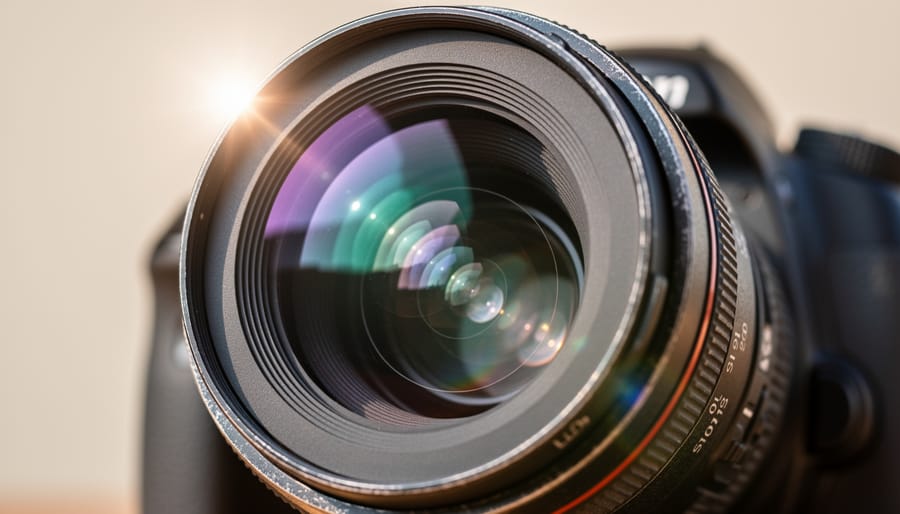
Modern camera lenses aren’t single pieces of glass. They’re complex systems containing anywhere from 5 to 20+ individual lens elements, all working together to focus light onto your sensor. Each of these glass surfaces acts as a potential mirror. When intense sunlight enters your lens, particularly at angles, it doesn’t always travel the intended straight path to your sensor. Instead, some light rays bounce between these elements like a pinball, reflecting off one surface, then another, before finally reaching the sensor. This internal reflection is what creates those characteristic bright spots and hazy washes we call lens flare.
The sun is the primary culprit for several reasons. First, it’s extraordinarily bright—roughly 400,000 times brighter than a full moon. Second, it’s a point light source from our perspective, which means its light rays enter your lens at similar angles, creating concentrated reflections rather than diffused ones. Third, unlike artificial lights, you can’t simply turn it off or move it.
Lens manufacturers apply special anti-reflective coatings to each glass element to minimize these internal reflections. These coatings work remarkably well under normal conditions, but when you’re shooting directly toward the sun or have it just outside your frame, even the best coatings struggle. The angle of incidence matters tremendously—when sunlight enters your lens head-on or at sharp angles, you’ll get more pronounced flare than when the sun is at moderate angles to your optical axis.
The aperture also plays a role. Light hitting the aperture blades creates additional reflection points, which is why flare patterns often mirror your lens’s blade count and shape.
The Three Types of Sun-Related Optical Effects
Lens Flare: Those Colorful Orbs and Streaks
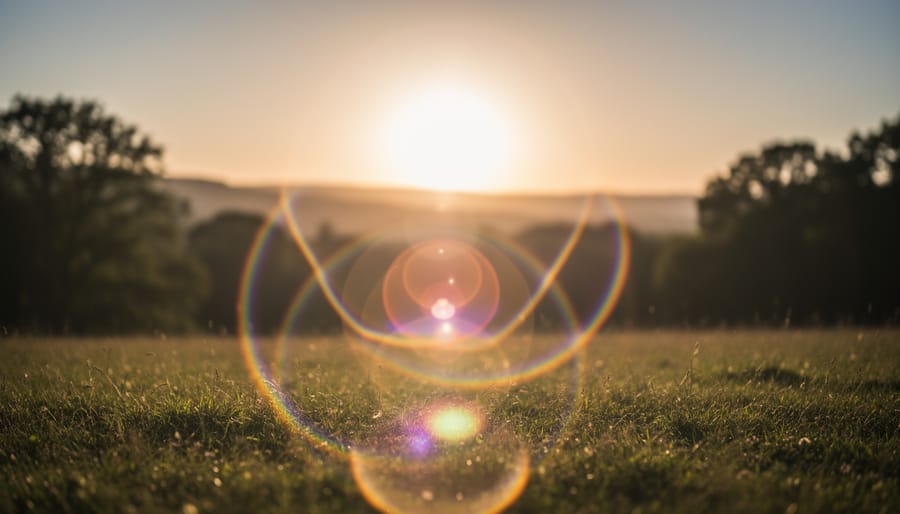
Lens flare appears as those distinctive bright spots, colorful circles, and luminous streaks that stretch across your images when shooting toward the sun or other intense light sources. You’ve probably noticed them—those hexagonal or circular artifacts that seem to float in a line through your frame, often displaying rainbow colors from green and purple to orange and blue.
These patterns aren’t random. The shape and arrangement of lens flare depends on your lens construction. The colored circles typically mirror your aperture shape, which is why you’ll often see hexagonal or octagonal spots corresponding to your aperture blades. The rainbow effect occurs because different wavelengths of light refract at slightly different angles as they bounce between lens elements, separating into distinct colors much like a prism.
The classic linear arrangement happens because light bounces internally between your lens elements in a predictable path. When bright sunlight enters your lens at an angle, it reflects off the surfaces of multiple glass elements before reaching your sensor, creating a chain of artifacts that traces back toward the light source. The intensity and number of these spots varies based on your lens quality, the number of elements, and whether it has anti-reflective coatings—more complex lenses with more glass-to-air surfaces generally produce more prominent flare.
Ghosting: The Hazy Veil Over Your Image
While lens flare shows up as bright artifacts and distinct shapes in your photos, ghosting is the sneaky culprit that robs your entire image of its punch. Think of ghosting as a subtle haze that settles over your photograph, reducing contrast and leaving everything looking washed out and flat. It’s like viewing your scene through a thin veil—the details are still there, but they lack depth and vibrancy.
Here’s what makes ghosting particularly frustrating: it’s often less noticeable when you’re reviewing images on your camera’s LCD screen in bright sunlight. You might not discover the problem until you’re back at your computer, wondering why that dramatic landscape looks disappointingly dull.
Ghosting occurs when light bounces between lens elements and the camera sensor, creating an overall loss of contrast rather than specific bright spots. Unlike the obvious polygons and streaks of traditional flare, ghosting affects the entire frame uniformly. This makes it more insidious—and often more damaging to image quality.
The practical impact? Your blacks become milky grays, colors lose saturation, and that crisp separation between subject and background vanishes. While you can sometimes recover contrast in post-processing, severe ghosting means you’ve permanently lost tonal information that no editing software can fully restore.
Sunstars: When Light Becomes Geometry
While lens flare typically appears as soft, glowing orbs or hazy streaks, sunstars transform light into sharp, geometric patterns that radiate from your light source. These pointed stars occur when intense light passes through the polygon-shaped opening created by your lens’s aperture blades, diffracting around the edges to create those distinctive rays shooting outward from the sun or street lamps.
What makes sunstars fundamentally different from other flare types is that they’re a diffraction effect rather than an internal reflection. While ghosting creates duplicate images of your light source and veiling flare washes out your scene with haze, sunstars add a crisp, structured element. The number of points in your star depends on your aperture blade count—lenses with even-numbered blades produce twice as many points (a six-blade aperture creates a twelve-point star), while odd-numbered blades create stars matching their blade count.
To capture pronounced sunstars, you’ll need to use a narrow aperture, typically f/11 or smaller. The smaller your aperture, the more dramatic the effect becomes. Position a bright point light source—the sun peeking around a building edge or through tree branches works beautifully—and watch as geometry takes over.
Unlike ghosting and veiling flare, which photographers often fight to eliminate, sunstars are almost universally embraced as a creative tool. They add visual interest to landscapes, particularly sunrise and sunset scenes, and can transform ordinary street photography into something more dynamic. That said, they work best when used deliberately rather than accidentally appearing in every backlit shot.
Why Some Lenses Handle Sunlight Better Than Others
Not all lenses are created equal when it comes to handling direct sunlight, and understanding why can save you from frustrating flare problems in the field.
The most significant factor in flare resistance is lens coatings. Modern professional lenses use multiple layers of specialized coatings—sometimes as many as 10 to 15 layers per glass element—that reduce reflections and unwanted light bouncing around inside the lens barrel. These nano-crystal or fluorine coatings work like the anti-reflective coating on eyeglasses, but engineered specifically to handle the intense light photographers encounter. Budget lenses typically use fewer, simpler coatings, making them more susceptible to flare when shooting into or near the sun.
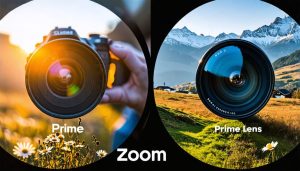
The number of lens elements also plays a crucial role. Each glass surface creates an opportunity for light to reflect internally. A lens with 20 elements has more potential reflection points than one with 8 elements. This is where the prime vs. zoom lenses comparison becomes relevant. Prime lenses, with their simpler optical designs and fewer elements, generally handle direct sunlight better than zoom lenses. A 50mm f/1.8 prime might have just 6 or 7 elements, while a 24-70mm zoom could have 16 or more.
Lens design matters tremendously too. The arrangement and curvature of elements affects how stray light travels through the lens. Engineers can position elements to minimize internal reflections, but this requires sophisticated computer modeling and precise manufacturing—investments typically reserved for professional-grade glass.
Build quality extends beyond just optical performance. Better lenses feature internal baffling—ridged, matte-black surfaces inside the lens barrel that trap stray light before it reaches your sensor. Premium lenses also maintain tighter tolerances in manufacturing, ensuring elements are perfectly aligned and sealed against dust that could create additional scattering points.
In real-world terms, shooting backlit portraits at sunset with a professional 85mm f/1.4 prime will typically produce cleaner results with less veiling flare than using a budget 18-135mm kit zoom at comparable focal lengths. The professional lens might cost ten times more, but that investment includes superior coatings, better internal construction, and an optical formula specifically designed to resist flare. For photographers regularly working in challenging lighting conditions, this difference isn’t just noticeable—it’s essential.
How to Minimize Unwanted Lens Flare from the Sun
Using Lens Hoods and Strategic Positioning
Your lens hood is your first line of defense against unwanted flare. Proper lens hood usage means keeping it attached whenever you shoot outdoors—even on cloudy days. These simple attachments block stray light from hitting your front element at oblique angles, dramatically reducing flare potential.
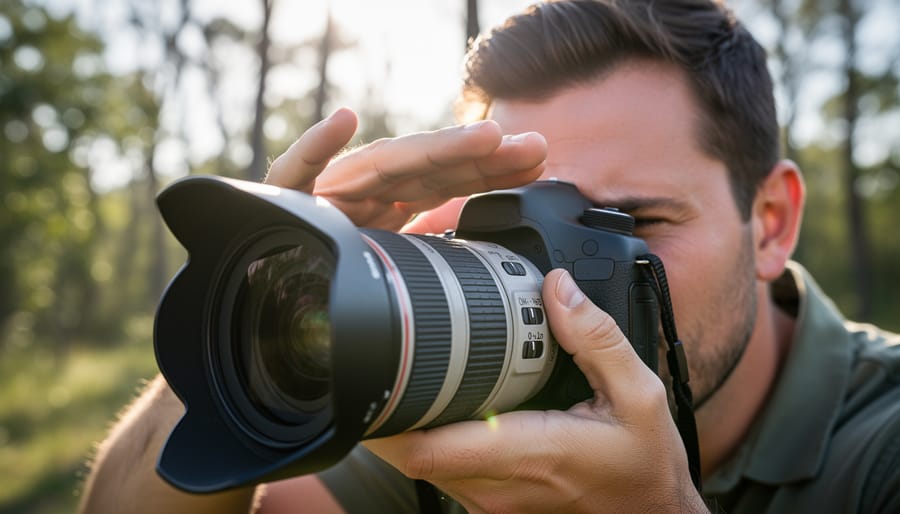
When the sun sits just outside your frame, try the hand-shading technique. Cup your hand above the lens to cast a shadow across the front element, essentially extending your hood’s reach. Position your hand carefully so it doesn’t appear in the shot—check your viewfinder edges while adjusting. This works especially well with wide-angle lenses where standard hoods offer limited protection.
Strategic positioning makes a huge difference. Move a few steps left or right to place the sun behind trees, buildings, or other natural blockers. Even partially obscuring the sun reduces flare intensity. If you’re shooting portraits outdoors, position your subject so their head blocks direct sunlight from reaching your lens. Small adjustments in your shooting angle—sometimes just tilting up or down slightly—can mean the difference between a flare-filled image and a crisp, contrast-rich photograph.
Aperture and Exposure Settings That Help
Your choice of aperture settings plays a significant role in how lens flare appears in your images. When shooting toward the sun, understanding how aperture affects both flare intensity and character can make the difference between a ruined shot and a keeper.
Stopping down to smaller apertures (higher f-numbers like f/11 or f/16) generally reduces the overall intensity of flare and ghosting because less light enters through a smaller opening. However, smaller apertures also create more defined sunstars, which can add visual interest. Wide apertures (f/1.8 to f/4) tend to produce softer, more diffused flare with less distinct ghost patterns.
Metering presents a particular challenge when shooting toward the sun. Your camera’s meter will typically underexpose the scene to protect highlights, leaving your subject too dark. Try using spot metering on your subject rather than evaluative metering, or dial in positive exposure compensation (typically +1 to +2 stops) to properly expose foreground elements. Take test shots and check your histogram to ensure you’re not clipping highlights while maintaining detail in shadows.
Composition Tricks to Block Direct Sunlight
Sometimes the best way to manage lens flare isn’t avoiding the sun entirely, but strategically placing objects between your lens and the light source. This technique gives you control while keeping that beautiful backlit quality in your images.
Position yourself so natural elements partially obscure the sun. Tree branches, leaves, or building edges work exceptionally well. For example, when shooting a portrait during golden hour, you might frame your subject so a tree trunk blocks the direct sunlight while allowing warm light to wrap around from the sides. This creates gorgeous rim lighting without the harsh flare across your frame.
People can serve as effective blockers too. In group shots or street photography, position subjects so their heads or bodies eclipse the sun. This adds dimension and prevents blown-out hotspots while maintaining atmospheric backlighting.
The key is maintaining your composition while using these environmental shields. Don’t just randomly place an object in front of the sun—integrate it meaningfully into your frame. A building corner that blocks direct rays can add architectural interest, while a distant hillside creates depth and context.
This approach is particularly useful when you want backlit subjects without sacrificing image clarity to excessive flare.
When to Embrace Lens Flare as a Creative Tool
While lens flare often gets labeled as a mistake, there are plenty of situations where it becomes your secret weapon for creating compelling images. Understanding when to embrace flare rather than fight it can elevate your photography from technically perfect to emotionally resonant.
Golden hour and sunrise/sunset photography naturally benefit from intentional flare. That soft, warm glow streaming across your frame adds atmosphere and nostalgia that’s nearly impossible to replicate in post-processing. Portrait photographers frequently use sun flare to create dreamy, romantic moods—think of those backlit engagement photos with soft light wrapping around the subjects. The flare adds dimension and warmth that connects viewers emotionally to the image.
Lifestyle and documentary photography also thrive on authentic flare. When capturing candid moments at outdoor events, concerts, or street scenes, flare reinforces the feeling of being present in that sun-drenched moment. It tells viewers, “This is real, unfiltered life.”
The key to successful creative flare lies in control. Start by adjusting your shooting angle—small movements dramatically change flare intensity and placement. Position the sun just outside your frame’s edge or partially hidden behind your subject to create that signature glow without overwhelming your image. Experiment with different apertures; smaller apertures (higher f-numbers) can intensify flare effects while maintaining some definition.
Use your hand or a piece of card just outside the frame to partially block direct sunlight, giving you precise control over how much flare enters your lens. This technique, called flagging, lets you dial in exactly the amount of atmospheric glow you want.
Remember that intentional flare should enhance your story, not distract from it. If the flare draws attention away from your subject or obscures important details, it’s decoration rather than enhancement.
Post-Processing: Fixing or Enhancing Sun Flare
Whether you’ve captured unwanted flare artifacts or want to enhance an intentional flare effect, modern post-processing techniques offer powerful solutions for both scenarios.
For removing unwanted flare or ghosting, Adobe Lightroom’s Healing Brush and Clone Stamp tools work well for isolated artifacts. Simply paint over the problem areas and let the software blend them seamlessly with surrounding pixels. Photoshop’s Content-Aware Fill provides even more sophisticated removal for stubborn flare spots. I’ve successfully salvaged countless shots using these methods when shooting toward the sun proved unavoidable.
Reducing overall veiling flare requires different approaches. Try increasing contrast and clarity, adjusting the black point, or using localized adjustments to restore lost detail in washed-out areas. The Dehaze slider in Lightroom or Camera Raw can work wonders for images suffering from atmospheric haze combined with flare.
Conversely, if you want to add or enhance sun flare for creative effect, dedicated plugins like Knoll Light Factory or Optical Flares offer realistic, customizable flare effects. These tools provide various flare types mimicking different lenses and allow precise control over position, intensity, and color.
For a more authentic approach, consider shooting real flare in-camera and blending it with your image in Photoshop using layer masks and blend modes like Screen or Lighten. This technique preserves the organic quality that artificial plugins sometimes lack.
Understanding lens flare from the sun transforms it from a frustrating accident into a creative choice you can control. Once you recognize what causes those bright streaks and hazy patches in your images, you’re no longer at the mercy of chance—you’re making deliberate decisions about when to embrace flare and when to eliminate it.
The key is experimentation. Spend an afternoon shooting directly into the sun with different lenses, apertures, and angles. Notice how even small adjustments to your position or lens hood placement dramatically change the results. Try deliberately creating artistic flare in one series of shots, then work to eliminate it completely in another. This hands-on practice builds the intuition that separates snapshots from intentional photography.
Remember that professional photographers don’t avoid sun flare because it’s inherently bad—they control it because they understand it. Some of the most compelling images ever captured feature intentional flare that adds mood, atmosphere, and visual interest.
So here’s a question to consider: What story does flare tell in your images? Does it evoke warmth and nostalgia, or does it distract from your subject? Your answer will guide every decision you make when shooting in bright sunlight.