Spot the telltale signs of lens fungus early – those web-like filaments or cloudy patches spreading across your valuable glass elements demand immediate attention. Regular camera maintenance tips can help prevent this issue, but once fungus takes hold, swift action becomes crucial. Left untreated, these microscopic invaders can permanently etch your lens surfaces, turning a recoverable situation into costly damage. Professional cleaning may cost hundreds of dollars, but with the right knowledge and careful technique, you can safely tackle lens fungus at home. This guide walks you through the complete process – from confirming the fungal infection to executing a thorough cleaning that preserves your equipment’s optical quality. Whether you’re dealing with a vintage prime lens or modern zoom glass, understanding proper fungus removal is an essential skill for protecting your photographic investment.
Signs Your Lens Has a Fungus Problem
Visual Indicators
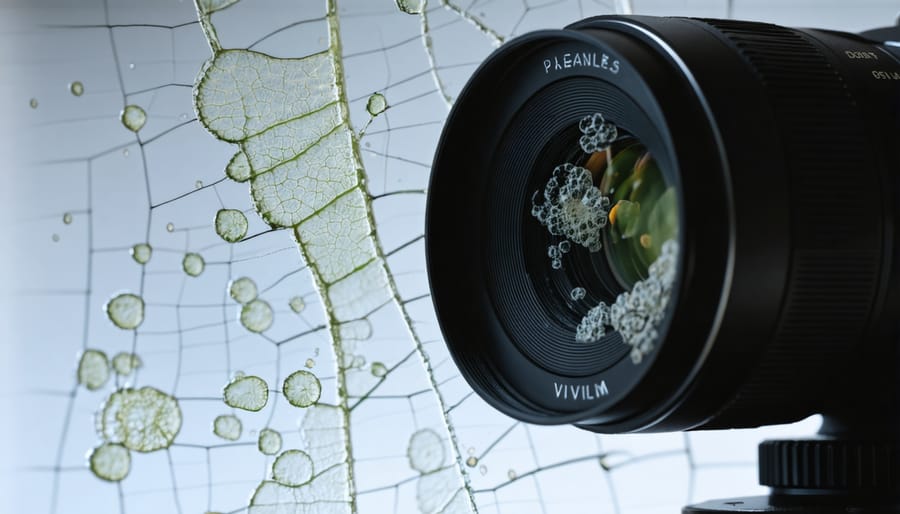
Lens fungus typically begins as small, web-like filaments around the edges of your lens elements. In its early stages, these threads appear as faint, wispy lines that might be mistaken for dust or smudges. As the fungus grows, it develops into more distinct, branching patterns that resemble frost on a window or delicate spider webs.
During the intermediate stage, the fungus becomes more visible, creating circular or star-shaped patterns with a grayish-white appearance. These formations often spread from the edges toward the center of the lens, and you might notice slight etching or cloudiness in affected areas.
In advanced cases, the fungus creates dense, cloudy patches that significantly impact image quality. The affected areas may take on a yellowish or greenish tint, and the fungal growth can leave permanent marks on the lens coating. At this stage, you might also notice a musty odor when handling the lens.
Regular lens inspection under good lighting can help catch fungal growth early. Use a flashlight at an angle to spot the telltale signs, particularly around the edges where fungus typically first appears.
Risk Assessment
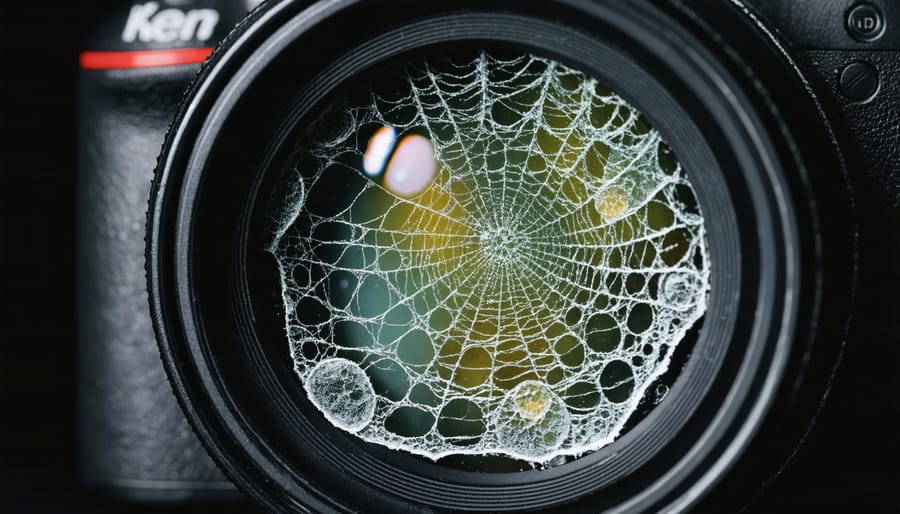
Before attempting any cleaning, it’s crucial to assess the severity of fungal growth on your lens. Look for telltale signs like web-like patterns, small spots, or a cloudy film on the glass surfaces. Use a bright flashlight at an angle to better observe the extent of contamination.
The severity level can be categorized into three stages. Early-stage fungus appears as small, isolated spots that are barely visible. This is the ideal time to address the issue, as damage is minimal. Mid-stage infection shows clearly visible networks of fungal growth, often resembling spider webs or tree branches. At this point, cleaning is more challenging but still possible.
Advanced fungal growth is characterized by dense, widespread coverage and potential etching of the glass surface. If you notice rough patches or permanent marks that don’t appear to be on the surface, the fungus may have already damaged the lens coating or glass. In these severe cases, professional servicing is strongly recommended, as DIY cleaning could further compromise the lens’s integrity.
Remember that fungal growth typically starts from the edges and works its way toward the center. Check both the front and rear elements carefully, as fungus can affect either surface.
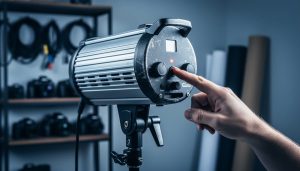
Essential Tools and Safety Precautions
Cleaning Supplies Checklist
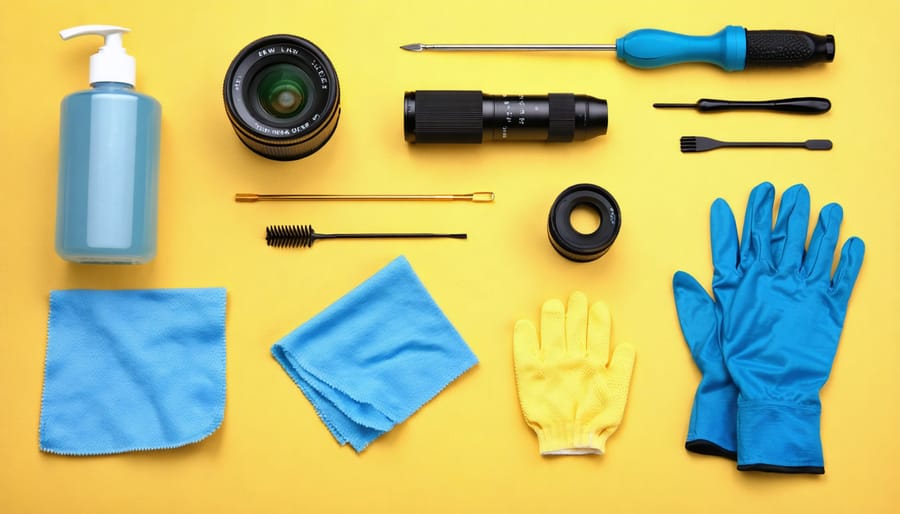
Before starting the cleaning process, gather these essential supplies to ensure safe and effective fungus removal. Here’s your comprehensive checklist:
Primary Cleaning Materials:
– 99% isopropyl alcohol
– Hydrogen peroxide (3% solution)
– Lens cleaning solution
– Microfiber cloths (at least 2-3 fresh ones)
– Lens cleaning tissues
– Cotton swabs (preferably lint-free)
Safety Equipment:
– Rubber gloves
– Dust mask
– Protective eyewear
Tools:
– Small screwdriver set (precision type)
– LED flashlight
– Blower bulb or compressed air
– Lens cleaning brush
– Clean workspace mat
While these professional lens cleaning techniques require specific tools, ensure all materials are photography-grade to prevent damage. Store supplies in a clean, dry container, and replace items like microfiber cloths regularly to avoid cross-contamination. Remember, using the wrong cleaning materials can permanently damage your lens, so stick to this recommended list for optimal results.
Safety First
Before diving into the cleaning process, let’s prioritize your safety and the protection of your valuable equipment. Always work in a well-ventilated area, as some cleaning solutions can emit strong fumes. Wear disposable nitrile gloves to protect your hands from both chemicals and fungal spores, which can cause skin irritation or allergic reactions in some people.
Keep a clean, dust-free workspace with proper lighting, and place a soft microfiber cloth on your work surface to prevent accidental drops or scratches. If you’re using any chemical cleaning solutions, wear protective eyewear to guard against splashes. Never mix different cleaning solutions, as this could create harmful reactions or damage your lens.
For those with respiratory sensitivities, consider wearing a mask rated for fine particles. While lens fungus itself isn’t typically dangerous to healthy individuals, disturbing it can release spores into the air. Keep children and pets away from your workspace during the cleaning process, and always store cleaning materials safely out of reach when finished.
Remember, if you’re unsure about any step in the process, it’s better to consult a professional than risk damaging your equipment.
Step-by-Step Fungus Removal Process
Lens Disassembly
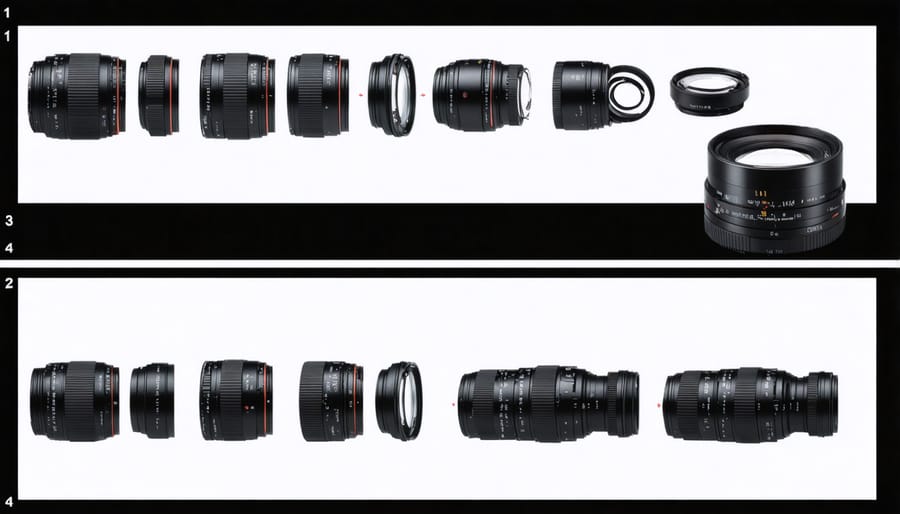
Before beginning the disassembly process, gather all necessary tools: a lens spanner wrench, precision screwdrivers, rubber gloves, and a clean workspace with good lighting. Take photos of your lens at various stages of disassembly – these will be invaluable during reassembly.
Start by removing the rear lens cap and front filter (if attached). Locate the tiny screws around the lens mount and carefully remove them, keeping them organized in a small container. Some lenses have a bayonet mount that needs to be twisted off rather than unscrewed.
Next, remove the front lens ring. This usually unscrews counterclockwise, though some models require a spanner wrench to release locking pins. Work slowly and avoid applying excessive force. Once the front ring is off, you’ll likely see another set of screws holding the front element in place.
Remove these screws and gently lift out the front element. Remember that lens elements are precisely positioned – note the exact orientation of each piece you remove. Some elements have alignment marks that must line up during reassembly.
Depending on your lens model, you may need to remove additional elements to reach the fungus-affected areas. However, stop if you encounter strong resistance or complex mechanisms. Some lenses contain spring-loaded components or delicate aperture assemblies that are best left to professionals.
Make sure to work in a dust-free environment and handle glass elements only by their edges. If you feel uncertain at any point, pause and consider consulting a professional repair service.
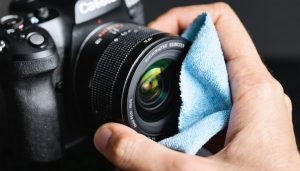
Cleaning Method
Before beginning the cleaning process, gather all necessary supplies: isopropyl alcohol (90% or higher), lens cleaning tissue, a rubber bulb blower, cotton swabs, and a small screwdriver set. Work in a clean, well-lit environment away from dust and direct sunlight.
Start by disassembling the lens carefully. Remove the front and rear caps, then use your screwdriver to remove the retaining rings that hold the lens elements in place. Document the order and orientation of each element as you remove them – taking photos with your phone can be helpful for reassembly later.
Once disassembled, examine each lens element individually. Using the rubber bulb blower, remove any loose dust or debris. For elements affected by fungus, prepare your cleaning solution by mixing one part hydrogen peroxide with one part ammonia. Alternatively, use pure isopropyl alcohol.
Gently clean the affected elements using lens tissue dampened with your cleaning solution. Work in a circular motion from the center outward, being extremely careful not to apply too much pressure. Never reuse the same portion of lens tissue to avoid scratching the glass. For stubborn fungus spots, let the solution sit for a few minutes to soften the growth before wiping.
For hard-to-reach areas, use cotton swabs slightly moistened with the cleaning solution. Be particularly careful around the edges where the fungus often accumulates. Change swabs frequently to avoid spreading the fungus or reintroducing debris to clean areas.
After cleaning each element, use fresh lens tissue to dry the surface completely. Hold the element up to a light source to check for any remaining fungus or cleaning residue. If needed, repeat the cleaning process, but avoid oversaturating the glass with solution.
Once all elements are clean and thoroughly dry, reassemble the lens following your documentation from the disassembly process. Test the focus and aperture mechanisms to ensure everything functions properly. Finally, store the lens in a clean, dry environment with silica gel packets to prevent future fungus growth.
Remember that this process requires patience and a steady hand. If you’re uncertain about any step, particularly the disassembly, consider seeking professional help to avoid potentially damaging your valuable equipment.
Reassembly Tips
Reassembling your lens requires patience and attention to detail to ensure everything works properly afterward. Start by laying out all components in their correct order, using your reference photos as a guide. Make sure your workspace and hands are clean and dry to avoid introducing new contaminants.
Begin with the innermost elements and work your way outward. When replacing lens elements, check for the correct orientation – look for any alignment marks or notches that indicate proper positioning. Handle glass elements only by their edges, and make sure they’re completely clean before reinstalling.
Pay special attention to any lubricants on focusing helicoids or aperture mechanisms. If you cleaned these areas, apply a tiny amount of lens-grade lubricant where necessary. Don’t over-lubricate, as excess grease can attract dust and affect operation.
When tightening screws, follow a star pattern and don’t over-tighten. This prevents stress on the lens housing and ensures even pressure distribution. If your lens has a bayonet mount, make sure it’s properly aligned before securing it.
Before completing reassembly, test the focus and aperture mechanisms at each stage to ensure smooth operation. If you encounter resistance or anything feels off, stop and double-check your work. It’s better to catch issues early than to complete assembly and have to start over.
Finally, perform a basic functionality check once fully assembled. Test focus across the entire range and verify that the aperture operates correctly.
Prevention Strategies
Preventing lens fungus is far more effective than dealing with an existing infection. The key to keeping your valuable glass fungus-free lies in maintaining proper environmental conditions and implementing smart storage practices.
First and foremost, control humidity levels in your storage area. Fungi thrive in humid environments above 60% relative humidity. Investing in quality humidity protection techniques is essential. Use silica gel packets in your camera bag and consider a dedicated dry cabinet that maintains optimal humidity levels between 35-45%.
Regular exposure to sunlight can help prevent fungus growth, as UV rays naturally inhibit fungal development. However, don’t leave your equipment in direct sunlight for extended periods, as this can damage other components. Instead, occasionally air out your gear in indirect sunlight for short periods.
Understanding proper gear storage is crucial. Store your equipment in a clean, well-ventilated area away from dark, damp spaces. Avoid keeping lenses in leather cases or bags for extended periods, as these can trap moisture and create ideal conditions for fungus growth.
Regular maintenance is your best defense. Clean your lenses after each use, especially in humid conditions. Use a microfiber cloth to wipe down the exterior and ensure no moisture remains on the surface. Consider using anti-fungal strips in your storage containers as an extra precaution.
Remember, prevention is always less expensive and time-consuming than dealing with a fungal infection after it occurs. Making these practices part of your regular equipment care routine will help protect your valuable investment for years to come.
Cleaning lens fungus is a delicate but manageable process that requires patience, attention to detail, and the right approach. While the procedure might seem daunting at first, following the steps we’ve outlined can help you safely remove fungus from your valuable photography equipment. Remember that prevention is always better than cure – storing your lenses in a dry environment with proper ventilation and regular maintenance can significantly reduce the risk of fungal growth.
If you do encounter lens fungus, don’t panic. With the right tools and techniques, many affected lenses can be restored to working condition. However, always assess the severity of the infection before attempting any cleaning. For particularly valuable or severely affected lenses, consulting a professional repair service might be your best option.
Most importantly, maintain vigilance in your lens care routine. Regular checks, proper storage practices, and immediate attention to any signs of fungal growth will help ensure your photography equipment stays in optimal condition for years to come. By understanding both the cleaning process and preventive measures, you’re well-equipped to protect your investment in quality optics.