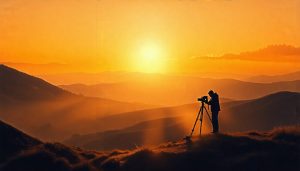
Unbox your DSLR camera with confidence – that sophisticated piece of equipment is about to become your creative companion, not your technical nemesis. Master the essential trio of aperture, shutter speed, and ISO within your first week, practicing each setting individually before combining them. Start in Program (P) mode to understand exposure basics, then gradually break free from auto mode as your confidence grows. Your DSLR’s potential extends far beyond capturing snapshots – it’s a powerful tool for creating art, preserving memories, and telling visual stories.
Focus first on composition and lighting fundamentals rather than getting lost in advanced features. Practice with one new setting each day, taking the same photo multiple times with different adjustments to see their impact. Within 30 days of consistent practice, you’ll transform from tentative beginner to confident photographer, ready to capture those decisive moments with precision and creativity.
[Note: This introduction combines immediate actionable advice with encouragement, maintaining an authoritative yet approachable tone while naturally incorporating the required link.]
Getting to Know Your DSLR’s Basic Controls
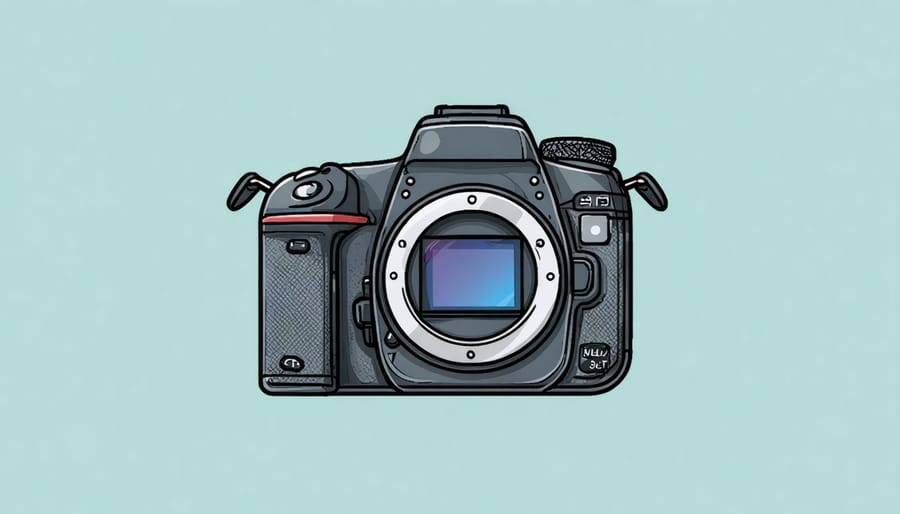
Mode Dial: Your Gateway to Creative Control
The mode dial is your camera’s command center, offering different levels of creative control over your images. Let’s explore each mode to help you make informed choices for any shooting situation.
Auto Mode (often marked with a green rectangle or ‘AUTO’) is your camera’s point-and-shoot setting. It’s perfect when you’re just starting out, handling all exposure decisions for you while you focus on composition.
Program Mode (P) offers a bit more control while maintaining automatic exposure. Your camera still determines shutter speed and aperture, but you can adjust other settings like ISO and white balance. Think of it as “Auto Mode with benefits.”
Aperture Priority (A or Av) lets you control the aperture while the camera adjusts shutter speed accordingly. This mode is ideal for controlling depth of field – perfect for portraits where you want a blurred background or landscape shots where everything should be sharp.
Shutter Priority (S or Tv) works the opposite way – you set the shutter speed, and the camera handles the aperture. Use this mode when capturing motion is your priority, like freezing sports action or creating motion blur in waterfall shots.
Manual Mode (M) gives you complete control over all exposure settings. While it requires more knowledge and practice, it’s essential for challenging lighting situations or when you have a specific creative vision in mind.
Start with Auto Mode and gradually experiment with other modes as your confidence grows. Remember, there’s no “best” mode – each serves a specific purpose in your photographic journey.
Essential Buttons and Dials You’ll Actually Use
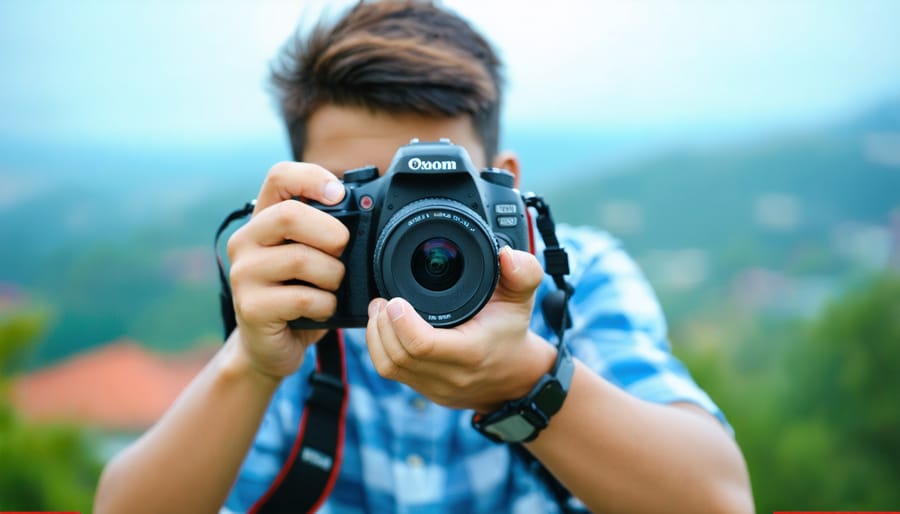
Let’s get acquainted with the essential controls you’ll use most frequently on your DSLR. While modern cameras come packed with buttons, knowing these key controls will help you properly hold your camera and operate it efficiently.
The shutter button, typically located on top of the grip, is your primary control. Half-pressing it activates autofocus, while fully pressing captures the image. Right next to it, you’ll find the command dial, which adjusts settings like shutter speed in manual mode.
On the back, the AF-point selector (usually a small joystick or d-pad) helps you choose your focus point. The main command wheel, often near your thumb’s natural position, controls various settings depending on your shooting mode.
Look for the Mode Dial on top of your camera – it’s the circular dial marked with P, A, S, M (or Tv, Av). This is where you’ll switch between automatic and manual shooting modes.
The Menu and Play buttons are typically on the back, along with the LCD screen. You’ll also find the ISO button, which adjusts your camera’s light sensitivity, and the exposure compensation button (marked with +/-) for quick brightness adjustments.
Remember, while your camera may have numerous other controls, mastering these core functions will cover 90% of your daily photography needs.
The Three Pillars of Exposure
Aperture: Controlling Depth and Light
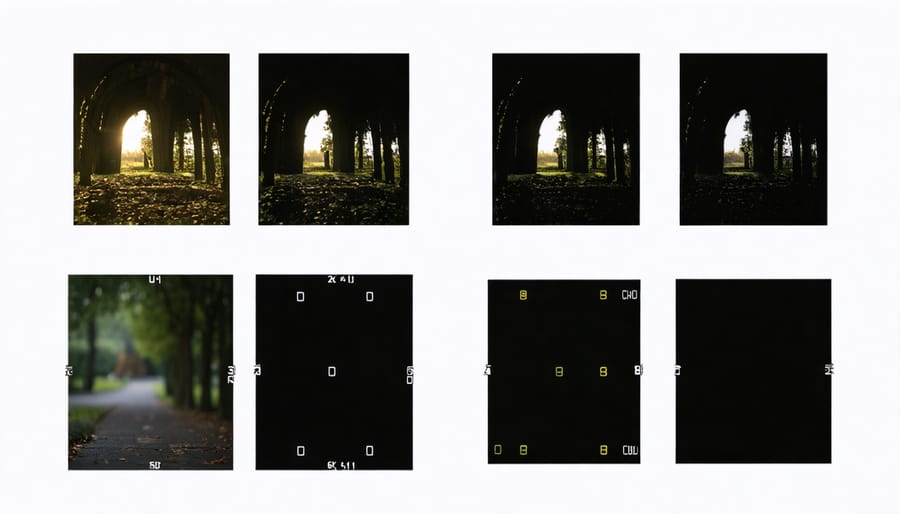
Aperture is one of the fundamental elements in mastering light in photography, and it’s simpler than you might think. Think of your camera’s aperture like the pupil of your eye – it opens and closes to control how much light enters the camera. This opening is measured in f-stops, with smaller f-numbers (like f/1.8) representing larger openings and larger f-numbers (like f/16) representing smaller ones.
But aperture isn’t just about light – it’s also your key to controlling depth of field, or how much of your image is in sharp focus. A wide aperture (small f-number) creates that beautiful blurry background effect photographers love, perfect for portraits where you want your subject to pop. A narrow aperture (large f-number) keeps more of your scene in focus, ideal for landscape shots where you want everything sharp from foreground to horizon.
Here’s a simple way to remember it: the smaller the f-number, the blurrier the background becomes. For instance, shooting at f/1.8 will give you a dreamy, soft background behind your subject, while f/11 will keep both your foreground flowers and distant mountains crisp and clear.
Start experimenting with different f-stops in your photography. Try shooting the same subject at f/2.8 and f/8 to see how the depth of field changes. This hands-on practice will help you develop an intuitive understanding of how aperture affects your images.
Shutter Speed: Freezing or Flowing
Shutter speed is your camera’s superpower for controlling motion in your photos. Think of it as a timer that determines how long your camera’s sensor is exposed to light. Fast shutter speeds (like 1/1000th of a second) freeze action in its tracks, perfect for capturing sharp images of sports events, wildlife, or even water droplets suspended in mid-air. When you’re photographing your kid’s soccer game or a bird in flight, these quick speeds ensure every detail stays crisp and clear.
On the flip side, slower shutter speeds (like 1/30th of a second or longer) create beautiful motion blur, turning waterfalls into silky streams or car lights into ribbons of color. This technique adds a dynamic feeling to your images and can transform ordinary scenes into artistic masterpieces.
To start experimenting, try shooting the same subject at different shutter speeds. For action shots, begin with 1/500th of a second and adjust from there. For intentional motion blur, try 1/15th of a second or slower, but remember to use a tripod to keep your camera steady. A good rule of thumb: for handheld shots, don’t go slower than 1/focal length of your lens to avoid camera shake. For example, with a 50mm lens, try to stay at 1/50th of a second or faster.
Each shutter speed tells a different story – it’s up to you to decide whether you want to freeze time or show its flow.

ISO: Finding the Right Balance
ISO is like your camera’s sensitivity to light, and finding the right balance is crucial for capturing great images. Think of it as adjusting your eyes’ sensitivity when moving between bright and dark environments. The lower the ISO number (like 100 or 200), the less sensitive your camera is to light, resulting in cleaner, crisper images. This makes low ISO settings perfect for bright, sunny conditions.
However, when light is scarce, such as indoors or during evening shoots, you’ll need to increase your ISO (perhaps to 800, 1600, or higher). While this helps you capture images in low light, it comes with a trade-off: digital noise. This noise appears as grainy specks in your photos, particularly noticeable in darker areas.
Modern DSLR cameras handle high ISO settings much better than their predecessors, but it’s still important to find the sweet spot. As a general rule, use the lowest ISO possible for your shooting conditions. Start at ISO 100 and only increase it when you can’t achieve proper exposure through adjusting your aperture or shutter speed.
Remember that some noise can add character to certain types of photography, like moody street scenes or documentary-style shots. The key is understanding how ISO affects your images and making intentional choices based on your creative vision and shooting conditions.
Focus Settings That Actually Matter
Autofocus Modes Simplified
Understanding autofocus modes doesn’t have to be complicated. Your DSLR typically offers three main autofocus modes, each designed for specific shooting scenarios.
Single-shot AF (AF-S) is perfect for stationary subjects like landscapes, portraits, or architecture. When you half-press the shutter button, the camera locks focus on your subject and maintains it until you take the shot. This mode ensures sharp images of still subjects and is ideal when you have time to compose your shot carefully.
Continuous AF (AF-C) is your go-to mode for moving subjects. Whether you’re photographing sports events, wildlife, or children at play, this mode continuously adjusts focus as your subject moves. The camera predicts where the subject will be when you press the shutter, helping you capture crisp action shots.
AI Servo (Canon) or AF-A (Nikon) is an automatic mode that switches between single and continuous focus depending on whether your subject moves. It’s great when you’re unsure which mode to use or when shooting unpredictable scenes. The camera detects movement and adjusts accordingly, making it perfect for beginners still learning the ropes.
Pro tip: Start with Single-shot AF for static subjects and gradually experiment with Continuous AF as you become more comfortable with your camera. Remember, practice makes perfect, and understanding these modes will significantly improve your hit rate of sharp, well-focused images.
Focus Points: Quality Over Quantity
One of the most powerful features of your DSLR is its ability to select specific focus points, but many beginners make the mistake of using too many points at once. Think of focus points as your camera’s eyes – they tell it exactly where to concentrate its attention.
Your DSLR likely offers multiple focus points across the frame, but using all of them simultaneously can lead to the camera focusing on the wrong subject. Instead, start by mastering single-point autofocus, where you manually select one focus point. This gives you precise control over what appears sharp in your image.
For stationary subjects, position your primary focus point over the most important element – typically your subject’s eyes in portraits or the nearest edge in landscape photography. Most DSLRs allow you to move this point using the directional pad or joystick on the back of the camera.
When shooting moving subjects, you might want to expand to a small cluster of focus points, but resist the temptation to activate them all. A good rule of thumb is to use the center focus point when starting out, as it’s typically the most accurate and sensitive point on your camera.
Remember to half-press your shutter button to lock focus before recomposing your shot. This technique, known as focus-and-recompose, gives you more creative freedom while maintaining precise focus control.
Real-World Settings for Common Scenarios
Portraits That Pop
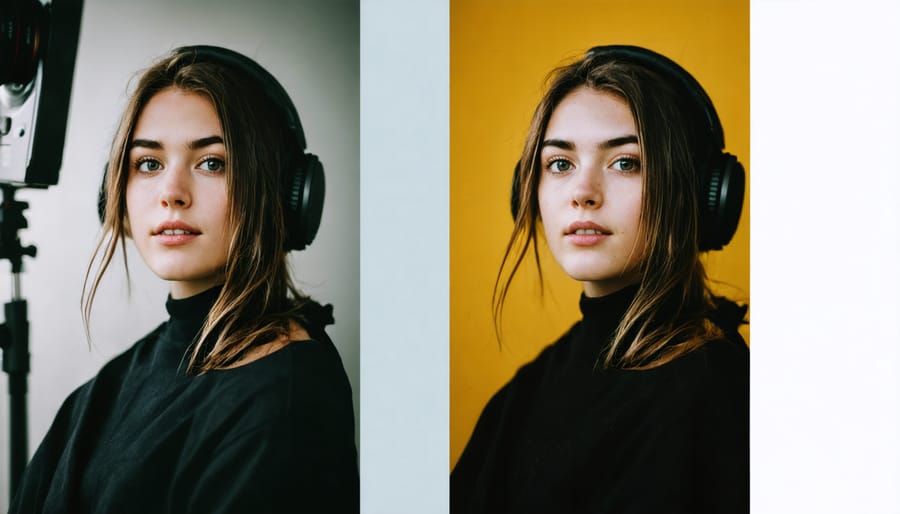
Portrait photography with your DSLR requires a delicate balance of settings to capture your subject’s best features. Start by selecting Aperture Priority (A or Av) mode and choosing a wide aperture between f/1.8 and f/4.0 to create that sought-after background blur that makes your subject stand out. This shallow depth of field is perfect for drawing attention to your subject’s face while softening potentially distracting backgrounds.
For the most flattering results, set your ISO between 100-400 in good lighting conditions to minimize noise, and ensure your shutter speed stays above 1/125 to prevent motion blur. When focusing, always prioritize your subject’s eyes – they should be tack-sharp as they’re the natural focal point of any portrait.
Understanding composition techniques for portraits will elevate your images from simple snapshots to striking photographs. Position your subject slightly off-center using the rule of thirds, and maintain a comfortable working distance – typically 4-8 feet – to avoid unflattering perspective distortion.
For natural-looking skin tones, set your white balance according to your lighting conditions. Use Auto White Balance in natural light, but switch to the appropriate preset (tungsten, fluorescent, etc.) when shooting indoors. Remember to shoot in RAW format to give yourself more flexibility in post-processing, especially when fine-tuning skin tones and exposure.
Landscapes That Wow
Capturing breathtaking landscapes with your DSLR requires a combination of the right settings and careful composition. Start by switching to Aperture Priority (A or Av) mode and selecting a small aperture between f/8 and f/16 to achieve maximum depth of field, ensuring both foreground and background elements are sharp.
For the crispest shots, always use a tripod and enable your camera’s timer or a remote shutter release to eliminate camera shake. Set your ISO as low as possible (typically 100 or 200) to minimize digital noise and maximize image quality. While auto white balance usually works well for landscapes, consider using the “Daylight” preset for more consistent results across your shots.
Focus about one-third into the scene (known as the hyperfocal distance) to ensure optimal sharpness throughout your image. Many landscape photographers use manual focus for precise control, but if you’re just starting, your camera’s autofocus will work fine – just remember to focus on a high-contrast area.
For dramatic skies or to balance bright horizons, try using graduated neutral density filters. They help manage challenging lighting conditions without losing detail in either the sky or foreground. During golden hour (just after sunrise or before sunset), experiment with longer exposures to capture smooth water or cloud movement – settings between 1/2 second and several minutes can create stunning effects.
Action Shots That Work
Capturing moving subjects can be challenging, but with the right camera settings, you can capture dynamic action shots that freeze the perfect moment. Start by switching your camera to Shutter Priority mode (typically marked as Tv or S on your mode dial). This lets you control the shutter speed while your camera handles the aperture automatically.
For fast-moving subjects like sports or wildlife, aim for a shutter speed of at least 1/500th of a second. If you’re shooting something extremely fast, like a race car or a bird in flight, push it to 1/1000th or faster. Remember, the faster your subject moves, the higher your shutter speed needs to be to freeze the action.
Set your camera to continuous autofocus (AI Servo for Canon, AF-C for Nikon) to track moving subjects. This mode continuously adjusts focus as your subject moves. Pair this with burst mode (continuous shooting) to increase your chances of getting the perfect shot.
ISO settings play a crucial role too. Don’t be afraid to raise your ISO if needed – it’s better to have a slightly noisy image than a blurry one. In good lighting, start at ISO 400 and adjust as needed. If you’re shooting in lower light conditions, you might need to go higher.
Keep your camera steady and try to anticipate your subject’s movement. Practice following your subject through the viewfinder before taking the shot – this technique, called panning, helps you stay locked on the action.
Embarking on your DSLR photography journey may seem daunting at first, but remember that every professional photographer started exactly where you are now. By understanding the fundamentals we’ve covered – from mastering the exposure triangle to exploring your camera’s different shooting modes – you’ve already laid a strong foundation for your photography adventure.
The key to becoming proficient with your DSLR isn’t just about memorizing settings; it’s about practice and experimentation. Start by focusing on one aspect at a time, whether it’s aperture control for depth of field or shutter speed for motion capture. Take your camera everywhere and challenge yourself to shoot in different conditions and scenarios.
Don’t be afraid to make mistakes – they’re valuable learning opportunities. Review your photos critically, noting what worked and what didn’t. Pay attention to the EXIF data to understand how different settings affected your results. Join local photography groups or online communities where you can share your work and learn from others’ experiences.
Remember that developing your photography skills is a journey, not a race. As you become more comfortable with the technical aspects, you’ll find yourself naturally focusing more on composition and creative expression. Keep experimenting with different techniques, subjects, and lighting conditions, and most importantly, enjoy the process of learning and creating.
Your DSLR is a powerful tool waiting to help you capture amazing images – now it’s time to get out there and start shooting!