Transform your smartphone photos into stunning culinary masterpieces with proven techniques used by professional food photographers. Master the essentials of food styling, lighting, and composition to create mouth-watering images that stand out on social media and food blogs.
Natural light remains your most powerful ally in food photography – position your setup near a window, using a white foam board to bounce light and soften harsh shadows. Understanding basic composition rules like the rule of thirds and leading lines will instantly elevate your shots from amateur to professional-looking results.
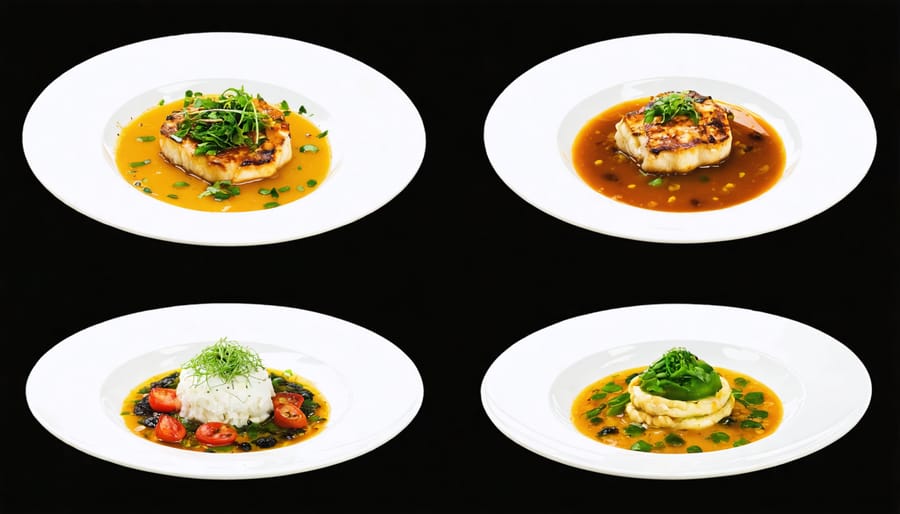
The secret to scroll-stopping food photos lies in the details: fresh garnishes, strategic steam capture, and thoughtful prop selection create visual stories that engage viewers. Whether you’re shooting with a DSLR camera or the latest smartphone, these foundational techniques will help you develop a distinctive style while building a compelling portfolio of food imagery.
Start your food photography journey with these proven fundamentals, and watch as your culinary captures evolve from simple snapshots to professional-grade visual content that makes viewers hungry at first glance.
Essential Equipment for Food Photography
Camera and Lens Selection
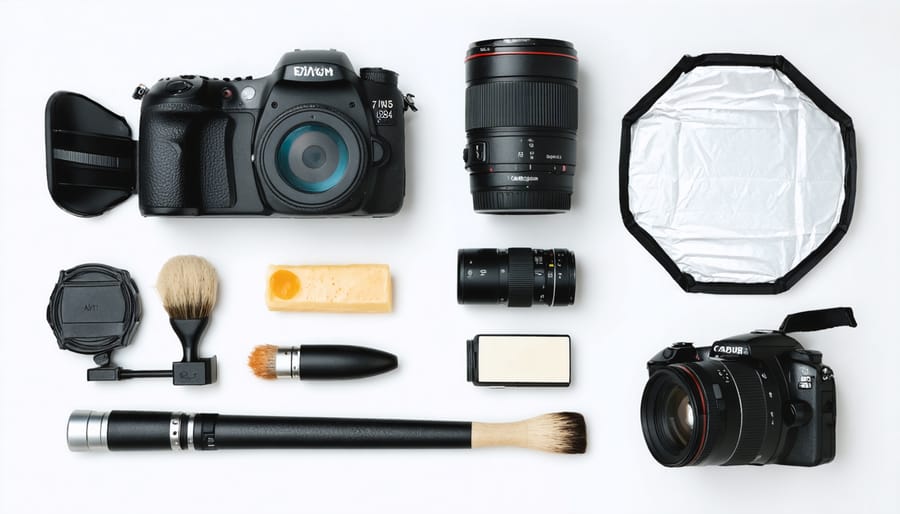
While you don’t need top-of-the-line equipment to start food photography, having the right gear can significantly impact your results. For beginners, any modern DSLR or mirrorless camera will serve you well, but what’s crucial is choosing the right lens for food shots.
A macro lens is your best friend in food photography, with the 100mm macro being particularly versatile. This lens allows you to get incredibly close to your subject, capturing those mouth-watering details like the texture of a crusty bread or the steam rising from a hot drink. If you’re on a budget, a 50mm f/1.8 (often called the “nifty fifty”) is an excellent alternative that offers great value and versatility.
For crop-sensor cameras, consider a 35mm lens, which provides a similar field of view to a 50mm on full-frame cameras. Whatever your choice, look for lenses with a maximum aperture of f/2.8 or wider – this will help you achieve those beautiful blurred backgrounds that make food photos pop while maintaining sharpness on your subject.
Lighting Tools and Props
To create stunning food photos, you’ll need a few essential lighting tools and props. Start with a basic lighting setup: a diffused natural light source or a softbox for artificial lighting. A reflector is invaluable for bouncing light back onto shadowy areas – even a white foam board works great for beginners.
For backgrounds, collect a variety of surfaces like wooden boards, marble tiles, or textured papers. Matte finishes work best as they prevent unwanted reflections. Keep a selection of neutral-colored fabrics for tablecloths and napkins, which can add depth to your compositions.
Essential food styling tools include tweezers for precise placement, small spray bottles for adding freshness to produce, and cotton swabs for cleaning plate edges. Kitchen basics like olive oil (for adding shine), glycerin (for creating fresh-looking droplets), and toothpicks (for subtle adjustments) are must-haves in your kit.
Consider investing in various sizes of plates and bowls in neutral colors, particularly white, as they make food colors pop. Small props like vintage cutlery, fresh herbs, and raw ingredients can help tell your food’s story and add visual interest to your compositions.
Mastering Natural Light
Finding the Perfect Window
Natural light is the secret weapon of food photography, and finding the perfect window can transform your shots from ordinary to extraordinary. The ideal window for food photography faces north or south, as these directions provide consistent, indirect light throughout the day without harsh shadows or direct sunbeams that can overexpose your images.
The best time to shoot is typically during mid-morning or mid-afternoon when the light is soft and diffused. Position your setup about 2-3 feet away from the window, and observe how the light falls on your subject. If the light appears too harsh, try hanging a sheer white curtain or using a white diffuser to soften it.
Consider the weather conditions too – overcast days can be perfect for food photography as clouds act as a natural diffuser, creating even lighting across your subject. On bright, sunny days, you might need to move further from the window or use additional diffusion to control the contrast.
Don’t limit yourself to just one window in your home. Scout different locations throughout the day and note how the light changes. Some photographers even keep a “light journal” to track the best times and spots for shooting. Remember that seasons affect light quality too – winter light tends to be cooler and more dramatic, while summer light is generally warmer and more intense.
When natural light isn’t available, you can recreate window light using artificial lighting solutions, but nothing quite matches the organic quality of natural window light.
Diffusion and Reflection
Natural light is your best friend in food photography, but sometimes it needs a little help to create that perfect shot. This is where diffusers and reflectors come into play – they’re like magic wands that help you control and shape natural light to your advantage.
A diffuser is essentially a translucent material that softens harsh sunlight. Think of it as turning a spotlight into a soft box. When shooting near a window, place a diffuser between your food and the light source to create even, flattering illumination that reduces harsh shadows. A simple white bedsheet or parchment paper can work as a DIY diffuser when you’re starting out.
Reflectors, on the other hand, bounce light back onto your subject, filling in shadows and adding dimension to your shots. While professional reflectors are great, you can achieve similar results with white foam board or even aluminum foil mounted on cardboard. Position your reflector opposite the main light source to bounce light back onto the shadowed side of your food.
Experiment with the distance and angle of both tools. Moving a diffuser closer to your subject creates softer light, while positioning it farther away maintains more contrast. For reflectors, the closer they are to your subject, the stronger the fill light will be. Try using both tools together – diffuse the main light and use a reflector to add subtle highlights that make your food pop.

Composition Techniques That Sell
Angle Selection
The angle you choose can dramatically impact how appetizing your food looks in photos. For overhead shots (90 degrees), position your camera directly above the dish – this angle works particularly well for flat layouts, bowls, and table spreads. It’s perfect for capturing intricate plating details and showing off colorful ingredients.
Side angles (45 degrees) are ideal for taller dishes, layered foods, and anything with height. Think stacked pancakes, burgers, or towering desserts. This perspective helps viewers appreciate the depth and construction of the dish while still showing the surface details.
For more dramatic presentations, try shooting at eye level (0 degrees). This angle works wonderfully for drinks, ice cream cones, or anything where you want to emphasize height and vertical layers. It’s also great for capturing steam or movement in the shot.
Remember to experiment with multiple angles for each dish – what works for a pizza might not work for a soup. Some foods look best when photographed from several angles combined, telling a complete story of the dish’s appearance and composition.
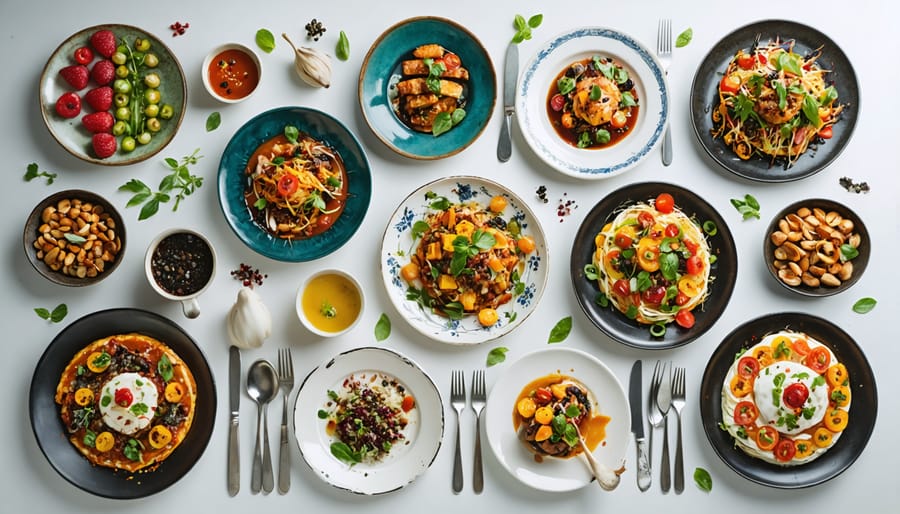
Plating and Arrangement
The way you arrange food on the plate can make or break your photograph. Start by selecting a plate or surface that complements your food without overshadowing it. White plates are classic choices as they create a clean canvas, but don’t shy away from textured surfaces or darker plates when they enhance your subject.
Consider the rule of thirds when placing your main subject, and leave some negative space to prevent the composition from feeling cluttered. Work with odd numbers when arranging multiple elements – groups of three or five items often create more visually appealing compositions than even numbers.
Layer your ingredients to create depth and interest. Start with your base components and build upward, adding height through thoughtful stacking. For instance, when photographing a salad, let some ingredients peek through others rather than mixing everything together.
Pay attention to color contrast and balance. If you’re shooting a monochromatic dish, add visual interest through garnishes or props that complement the main color. Fresh herbs, microgreens, or a sprinkle of spices can add that perfect pop of color and texture.
Remember that less is often more in food photography. Don’t feel compelled to fill the entire plate – strategic empty space can make your composition more elegant and focused. Keep your arrangements natural and avoid over-styling, as viewers should still feel the food is approachable and appetizing.
Background and Props
The right background and props can transform an ordinary food photo into a mouth-watering masterpiece. Start with neutral backgrounds like wooden boards, marble slabs, or textured linens that complement rather than compete with your food. Light-colored surfaces generally work best as they reflect light and create a clean, professional look.
When selecting props, less is more. Choose items that enhance your story – vintage cutlery, classic napkins, or fresh ingredients used in the dish. Ensure props are proportionate to your food; oversized plates can make portions look small, while tiny garnishes might get lost in the frame.
Consider the color theory when combining elements. Complementary colors can make your food pop, while analogous colors create harmony. For example, a rustic wooden board pairs beautifully with earthy dishes, while sleek slate can elevate modern cuisine.
Keep your prop collection simple but versatile. Basic items like neutral plates, textured napkins, and a few carefully chosen serving pieces will serve most of your needs. Remember, props should support your food’s narrative, not steal the spotlight.
Camera Settings for Food
Aperture and Depth of Field
Aperture and depth of field play crucial roles in creating mouthwatering food photos. Your aperture setting (f-stop) determines how much of your food is in sharp focus, which can dramatically impact the final image’s mood and visual appeal.
For most food shots, you’ll want to experiment with wide apertures (low f-numbers like f/1.8 to f/4) to create that beautiful background blur that makes your main subject pop. This technique works particularly well when photographing individual dishes or specific ingredients, drawing the viewer’s attention exactly where you want it.
However, don’t fall into the trap of always shooting wide open. Sometimes, you’ll want more of your scene in focus, especially when capturing full table settings or showing multiple dishes. In these cases, try using smaller apertures (higher f-numbers like f/8 to f/11) to keep everything crisp and clear.
A helpful tip is to consider your subject’s depth. For flat foods like pizza or cookies, you might get away with a wider aperture, but for tall items like layered cakes or stacked burgers, you’ll need a smaller aperture to ensure the entire dish remains sharp.
Remember to take test shots at different apertures when you’re starting out. This hands-on practice will help you develop an intuition for which settings work best for different types of food and compositions. Pay special attention to what remains in focus and how the background blur affects your image’s overall impact.
Focus and Sharpness
Achieving sharp, crystal-clear food photos is essential for making your dishes look appetizing and professional. Start by using a tripod to eliminate camera shake, particularly crucial when shooting in lower-light conditions or with slower shutter speeds. Even the steadiest hands can introduce subtle motion blur that detracts from image quality.
For handheld shots, maintain a shutter speed of at least 1/125th of a second, and enable your camera’s image stabilization if available. When using a tripod, turn off image stabilization as it can actually create unwanted movement.
Focus on the most important element of your dish – typically the closest edge or the most textural detail. For example, when photographing a stack of pancakes, focus on the dripping syrup or the topmost pancake’s surface. Use single-point autofocus for precise control, or switch to manual focus for absolute accuracy.
Consider your depth of field carefully. While a wide aperture like f/2.8 creates beautiful background blur, it might leave crucial elements out of focus. For most food shots, an aperture between f/5.6 and f/8 provides enough depth to keep the entire dish sharp while still maintaining some background separation.
Review your images at 100% zoom on your camera’s LCD screen to confirm sharpness before wrapping up your shoot. Pay special attention to the focal point and ensure all critical elements are crisp and well-defined.
Quick Post-Processing Tips
Even the best food photos can benefit from some simple post-processing adjustments. Start by adjusting your white balance to ensure your food colors look natural and appetizing. Increase contrast slightly to make your dishes pop, but avoid overdoing it as this can make the food appear artificial.
Brighten selective areas using the dodge tool to highlight key ingredients or textures, and use the burn tool sparingly to add depth to shadows. Adjust vibrance rather than saturation to enhance colors naturally – this helps maintain realistic food tones while making them more appealing.
For a professional touch, remove any distracting elements using the spot healing brush. Small crumbs or spots on plates can be easily eliminated, creating a cleaner final image. Consider using selective sharpening on the main subject to make textures more prominent while keeping background elements softer.
Finally, crop your image thoughtfully to improve composition if needed, but always save your original file separately before making any permanent changes. Remember, subtle adjustments often yield the most professional results in food photography.
Food photography is an exciting journey that combines technical skill with creative expression. By following these fundamental tips – from selecting the right equipment and mastering lighting to understanding composition and camera settings – you’ll be well on your way to capturing mouth-watering images. Remember that great food photography doesn’t happen overnight; it requires practice, experimentation, and patience. Start with the basics we’ve covered, and don’t be afraid to try new techniques or break conventional rules as you develop your style. Take time to study other food photographers’ work for inspiration, but focus on developing your unique perspective. With consistent practice and application of these principles, you’ll soon see significant improvement in your food photography skills. Keep shooting, stay curious, and most importantly, have fun with the process!