Transform ordinary shots into mind-bending creative effects by mastering the art of camera lens filters. Attach a circular polarizer to eliminate reflections and dramatically enhance color saturation in landscape photography. Stack neutral density filters to achieve silky-smooth waterfall effects and dreamy long exposures even in bright daylight. Create your own unique effects by experimenting with vintage filters, prisms, or even everyday items like plastic wrap and vaseline on UV filters.
A world of creative possibilities exists beyond standard photography techniques, and lens filters serve as your gateway to artistic expression. Whether you’re shooting portraits through a soft-focus diffusion filter or capturing ethereal landscapes with graduated ND filters, these physical modifications to your lens can produce results that digital editing simply cannot replicate. From subtle enhancements to dramatic transformations, lens filters empower photographers to craft their unique visual signature in-camera, preserving authenticity while pushing creative boundaries.
Essential Creative Lens Filters Every Photographer Should Know
Prism and Fractal Filters
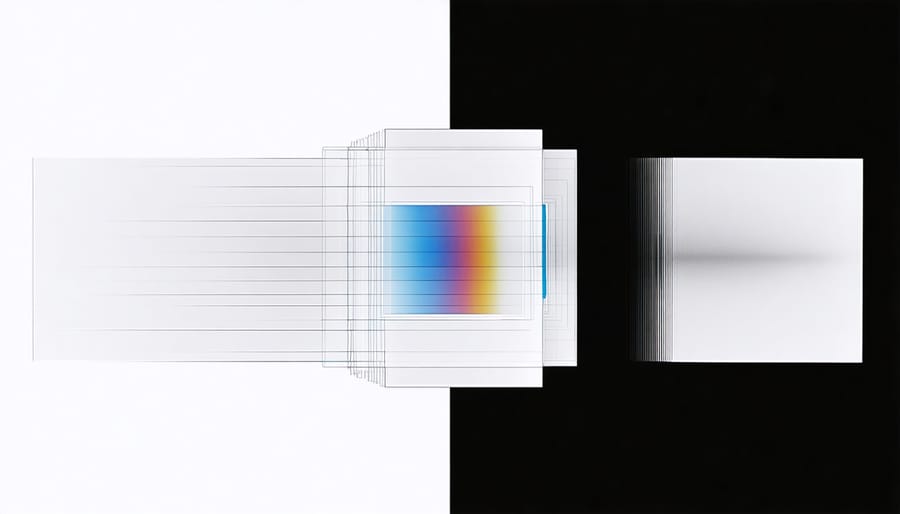
Prism and fractal filters open up a whole new dimension of creative possibilities, allowing photographers to venture into surrealist photography techniques with stunning results. These specialized filters work by bending and fragmenting light before it reaches your camera sensor, creating ethereal, dreamlike effects that can transform ordinary scenes into otherworldly compositions.
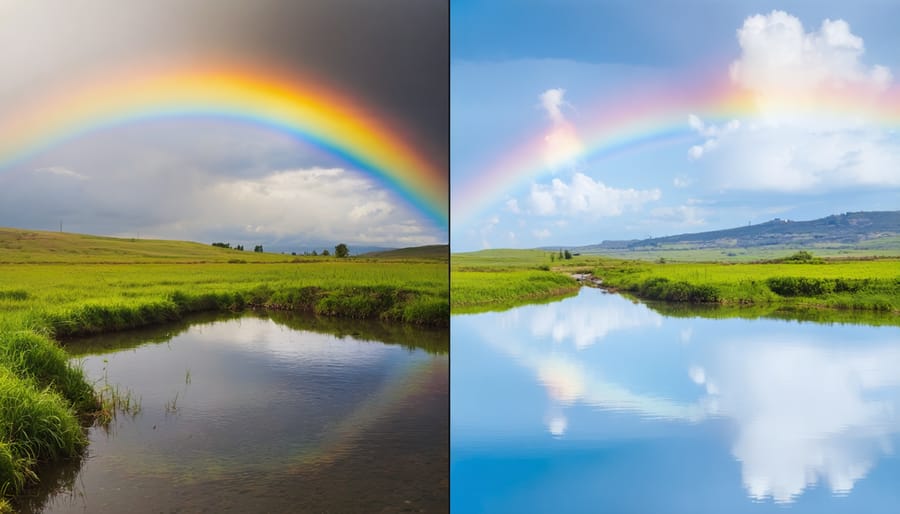
Prism filters typically consist of triangular or multifaceted glass elements that split light into rainbow patterns and create mesmerizing reflections. By rotating the filter or adjusting its position, you can control how light fragments across your frame, adding a magical quality to portraits or turning city lights into kaleidoscopic displays.
Fractal filters, on the other hand, feature intricate geometric patterns that repeat at different scales, creating complex light artifacts and symmetrical reflections. These filters are particularly effective when shooting bright light sources, turning simple points of light into elaborate patterns that can serve as creative foreground elements or dramatic overlay effects.
For best results, try using these filters during golden hour or when photographing artificial light sources. Position your subject near bright highlights or experiment with backlit scenarios. Remember that small adjustments in filter angle can dramatically change the effect, so take time to experiment and find the sweet spot that matches your creative vision.
Color Effect Filters
Color effect filters offer photographers a powerful tool for manipulating mood and atmosphere in their images. Understanding color theory in photography is essential when working with these creative filters, as each hue can dramatically alter the emotional impact of your shots.
Warming filters, such as the popular 81-series, add golden tones that create a cozy, inviting atmosphere perfect for portraits and sunset scenes. Their subtle orange cast can transform harsh daylight into flattering, golden-hour illumination. Conversely, cooling filters like the 82-series introduce blue tints that enhance the crisp feeling of winter landscapes or create moody, cinematic effects in urban photography.
For more dramatic effects, bold colored filters can completely transform your image’s mood. A red filter can turn a typical cityscape into an otherworldly scene reminiscent of dystopian cinema, while green filters can enhance natural forest scenes by emphasizing foliage tones. Purple filters are particularly effective for creating dreamy, ethereal effects in fashion and fine art photography.
Remember that colored filters work by selectively blocking certain wavelengths of light, so they will reduce your overall exposure. Consider opening up your aperture or adjusting your shutter speed to compensate. Many photographers find it helpful to start with subtle effects and gradually experiment with more intense colors as they become comfortable with the technique.
Special Effects Filters
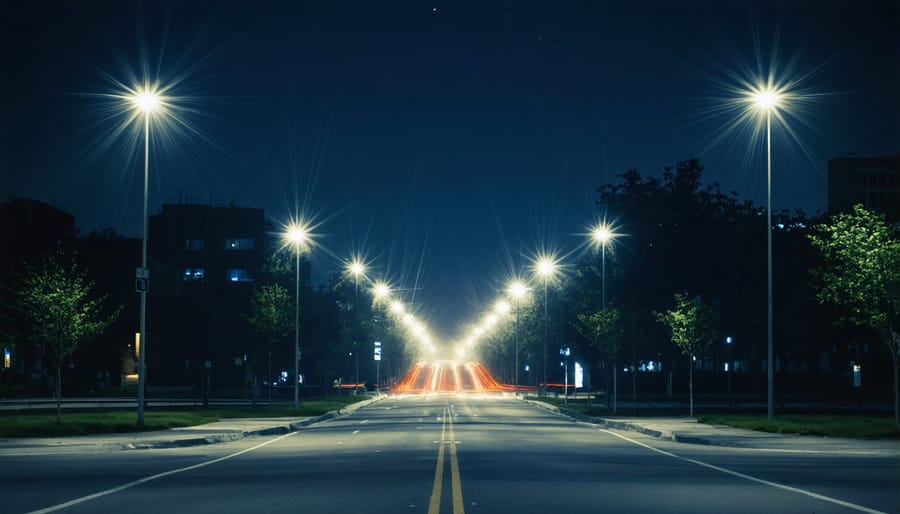
Special effects filters open up a world of creative possibilities, transforming ordinary scenes into magical moments. Star filters, for instance, add a sparkly burst effect to light sources, turning street lamps and holiday decorations into dazzling displays. These filters work by using a fine grid pattern that splits light into points, creating a star-like effect with varying numbers of points depending on the filter design.
Soft focus filters have long been favorites in portrait photography, lending a dreamy, ethereal quality to images. Unlike simple diffusion, these filters maintain sharp details while adding a subtle, glowing effect that’s particularly flattering for skin tones and helps create romantic atmospheres in landscape photography.
Other creative options include prism filters, which create rainbow effects and light leaks, and kaleidoscope filters that split your image into fascinating geometric patterns. For the more experimentally minded, color gradient filters can add dramatic sunset effects or cool-to-warm transitions across your frame.
DIY enthusiasts might enjoy creating their own effects using household items. A piece of plastic wrap lightly coated with petroleum jelly can create a dreamy soft focus effect, while shooting through crystal or glass can produce interesting light patterns and distortions. Just remember to protect your lens with a clear filter when trying DIY techniques.
The key to using special effects filters effectively is moderation. While these tools can create stunning results, they’re best used intentionally to enhance specific creative visions rather than as a default setting.
DIY Creative Filter Techniques
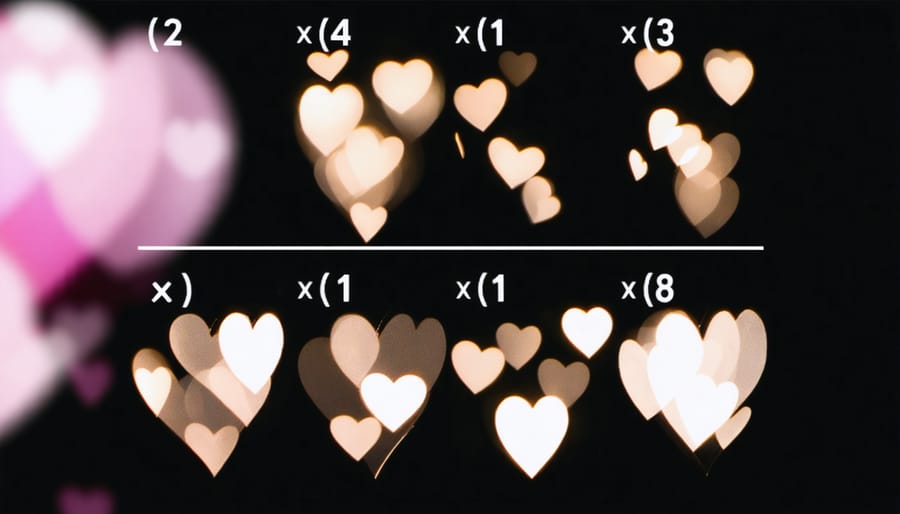
Homemade Bokeh Filters
Creating custom bokeh filters is a delightful way to add whimsy and personality to your photography, especially when shooting in low-light conditions with a wide aperture. These DIY filters can transform ordinary background lights into hearts, stars, or any shape you can imagine.
To make your own bokeh filter, you’ll need black cardstock paper, a craft knife or scissors, and tape. Start by measuring the diameter of your lens and cut a circle from the cardstock slightly larger than this measurement. Create a smaller circle in the center (about 1-2cm wide) and cut your desired shape into it. Common shapes include hearts, stars, triangles, and crosses, but you can experiment with any design that inspires you.
The key to success lies in the size and precision of your cut-out shape. If it’s too large, the effect will be subtle; too small, and it might be difficult to see. A good starting point is making the shape approximately 12-15mm across. Secure the filter to your lens with tape or rubber bands, ensuring it doesn’t interfere with your lens’s focusing mechanism.
For best results, shoot with a wide aperture (f/1.8 to f/2.8) and ensure there are light sources in the background. Christmas lights, city lights, or even sunlight filtering through trees work beautifully. Position your subject closer to the camera and the lights further away to maximize the bokeh effect.
Remember that these filters work best in low-light situations and may require some exposure compensation to maintain proper lighting on your subject. Don’t be afraid to experiment with different shapes and sizes until you find the perfect combination for your creative vision.
Everyday Objects as Filters
Sometimes the most creative lens filters are hiding in plain sight around your home. Cellophane wrapping can create dreamy, colorful effects when stretched across your lens, with different colors producing unique moods – try red for warm, dramatic scenes or blue for ethereal, moonlit effects. Just secure it with a rubber band, being careful not to scratch your lens.
Vaseline smeared lightly around the edges of a UV filter (never directly on your lens!) creates a sought-after soft-focus effect perfect for portraits and dreamy landscapes. The thickness of application determines the intensity of the effect, so start subtle and build up gradually.
Old stockings or pantyhose stretched over your lens create a classic diffusion effect that softens harsh light and smooths skin tones. Black stockings work best as they’re less noticeable in the final image. For more experimental effects, try shooting through plastic wrap with water droplets, or hold a prism in front of your lens to create rainbow flares and reflections.
Clear plastic CD cases can simulate a tilt-shift effect when held at an angle, while shooting through textured glass (like shower doors) creates atmospheric, abstract patterns. Even ordinary items like sandwich bags or drinking glasses can become creative tools when used thoughtfully.
Remember to always protect your lens – use a UV filter as a base when experimenting with these techniques, and ensure any items you use are clean and free from debris that could damage your equipment. Start with simple effects and gradually explore more complex combinations as you become comfortable with these DIY techniques.
Advanced Filter Techniques for Stunning Results
Filter Stacking
Filter stacking is a powerful technique that opens up a world of creative possibilities by combining multiple filters to achieve unique effects that wouldn’t be possible with a single filter. When done correctly, stacking filters can help you capture truly distinctive images that stand out from the crowd.
The key to successful filter stacking lies in understanding which combinations work well together and which ones to avoid. A popular combination is using a neutral density (ND) filter with a polarizing filter. This setup allows you to achieve both motion blur effects from the ND filter while maintaining the polarizer’s ability to reduce reflections and enhance color saturation.
However, there are important considerations to keep in mind. Each additional filter you stack will reduce the amount of light reaching your sensor and potentially impact image quality. As a general rule, try to limit yourself to stacking no more than two or three filters at once. Beyond this, you risk introducing unwanted vignetting, loss of sharpness, or internal reflections between the filters.
When stacking filters, always place the thinner filters closest to the lens, followed by thicker ones. For instance, if combining a polarizer with a graduated ND filter, place the polarizer first, then the graduated ND. This arrangement helps minimize vignetting and makes it easier to adjust individual filters.
Some creative combinations to try include:
– Circular polarizer + warm-tone filter for enhanced sunset shots
– ND filter + diffusion filter for dreamy long exposures
– Color gradient + polarizer for dramatic landscape photography
– Star filter + soft focus filter for unique night photography effects
Remember to use high-quality filters when stacking, as any imperfections will be magnified when multiple filters are combined. Keep your filters clean and free from fingerprints, as dirt and smudges become more noticeable with multiple layers of glass in front of your lens.
Long Exposure with Filters
Long exposure photography with neutral density (ND) filters opens up a world of ethereal possibilities, transforming ordinary scenes into dreamlike imagery. By significantly reducing the amount of light entering your lens, ND filters allow you to use extended shutter speeds even in bright daylight conditions.
One of the most popular applications is creating silky-smooth water effects in landscape photography. Whether you’re shooting waterfalls, ocean waves, or flowing rivers, a 10-stop ND filter can stretch your exposure time to several seconds or even minutes, turning turbulent waters into a mystical, fog-like appearance.
But water isn’t the only subject that benefits from long exposure techniques. Try capturing moving clouds to create dramatic streaks across the sky, or photograph busy city streets where passing vehicles transform into ribbons of light. For more abstract results, experiment with intentional camera movement during long exposures – gentle panning or rotation can turn ordinary scenes into artistic interpretations.
Stacking multiple filters can push creativity even further. Combine an ND filter with a polarizer to manage reflections while maintaining long exposure effects, or add a color filter for mood enhancement. When shooting sunsets, try using a graduated ND filter alongside a standard ND to balance exposure between bright skies and darker foregrounds.
Pro tip: Start with exposures around 1-2 seconds and gradually increase duration as you become more comfortable with the technique. Remember that sturdy tripod support is essential for sharp results, and using your camera’s live view mode can help with composition when working with very dark filters.
Night Photography Filter Effects
Night photography presents unique challenges and opportunities for creative filter use. While many photographers pack away their filters after sunset, the right filter choices can transform your nocturnal images into stunning works of art.
Star filters are particularly effective for night photography, creating dramatic starbursts around light sources like street lamps, car headlights, and city lights. A cross-screen filter with 4 or 6 points can turn ordinary urban scenes into magical nightscapes, though be selective with their use to avoid overwhelming the composition.
One often-overlooked technique involves using neutral density (ND) filters for long exposures at night. While it might seem counterintuitive to reduce light when it’s already dark, ND filters enable ultra-long exposures that can create ethereal effects with moving clouds or traffic trails. Mastering light and shadow becomes especially crucial when working with these extended exposures.
Color temperature filters offer creative possibilities for night shots. A warming filter can enhance the golden glow of city lights, while cooling filters can emphasize the mysterious blue hour. For creative effects, try combining a slight diffusion filter with city lights to create a dreamy, cinematic atmosphere.
Light pollution filters are essential for astrophotography, helping to reduce the orange glow from artificial lighting while maintaining the natural colors of stars and nebulae. These specialized filters are particularly valuable for urban photographers who can’t always travel to dark-sky locations.
Remember to keep your filters clean and free from fingerprints, as any smudges become particularly noticeable when shooting bright lights against dark backgrounds. Consider using a filter stack with care, as multiple filters can introduce unwanted reflections in night scenes.
Common Filter Mistakes (And How to Avoid Them)
Even experienced photographers can stumble when using creative filters. Here are the most common mistakes I’ve encountered and the solutions to help you avoid them:
Fingerprints and Smudges: The number one enemy of filter photography is dirty glass. Always handle filters by their edges and keep a microfiber cloth handy. Even small smudges can create unwanted artifacts in your images, especially when shooting towards light sources.
Wrong Filter Size: Nothing’s more frustrating than ordering a filter that doesn’t fit your lens. Double-check your lens thread size (marked with “ø” on your lens) before purchasing. If you use multiple lenses, consider investing in a larger filter with step-up rings rather than buying multiple sizes.
Stacking Issues: While combining filters can create interesting effects, stacking too many can lead to vignetting and reduced image quality. When using multiple filters, pay attention to your composition techniques and check the edges of your frame for dark corners.
Poor Quality Filters: Budget filters might seem attractive, but they often introduce color casts and reduce image sharpness. Invest in quality filters for lenses you use frequently. For experimental effects, cheaper filters might suffice, but don’t compromise on neutral density or polarizing filters.
Wrong Rotation Position: Polarizing and graduated filters need proper orientation to work effectively. Practice rotating your filter while looking through the viewfinder to find the optimal position. With graduated filters, ensure the transition line aligns with your horizon or the area where you want the effect to begin.
Filter Flare: When shooting towards light sources, filters can introduce unwanted flare. Using a lens hood (when possible) and keeping your filters spotlessly clean can help minimize this issue. Sometimes, slightly adjusting your shooting angle can also eliminate unwanted reflections.
These simple fixes will help you achieve cleaner, more professional results with your creative filter work. Remember, proper maintenance and careful technique are just as important as the filter quality itself.
Creative lens filters open up a world of possibilities for photographers willing to experiment and push their artistic boundaries. Whether you’re using traditional glass filters, crafting DIY solutions, or exploring unconventional materials, these tools can transform ordinary scenes into extraordinary images. Remember that while technical precision matters, the most compelling results often come from playful experimentation and breaking conventional rules. Start with basic filters to master the fundamentals, then gradually expand your creative toolkit as you develop your unique style. Most importantly, don’t be afraid to make mistakes – they often lead to unexpected discoveries and innovative techniques. The journey of exploring creative lens filters is as rewarding as the stunning images you’ll create along the way. So grab your camera, choose a filter, and start experimenting with these magical tools that can elevate your photography to new heights.