Selecting the perfect f-stop transforms ordinary night scenes into breathtaking low-light masterpieces. Start with f/2.8 or wider for astrophotography to capture maximum starlight, while maintaining critical sharpness. Switch to f/8-f/11 for cityscapes to achieve pin-sharp details from foreground to background, using longer exposures to compensate for reduced light. Balance your f-stop with ISO and shutter speed using the exposure triangle to master night photography in challenging conditions. Night photography demands technical precision, but understanding these fundamental aperture choices unlocks endless creative possibilities, from star trails to light painting. Whether capturing the Milky Way or urban landscapes, your f-stop choice becomes the foundation for exceptional nighttime images that stand out from the crowd.
Understanding F-Stop in Low Light
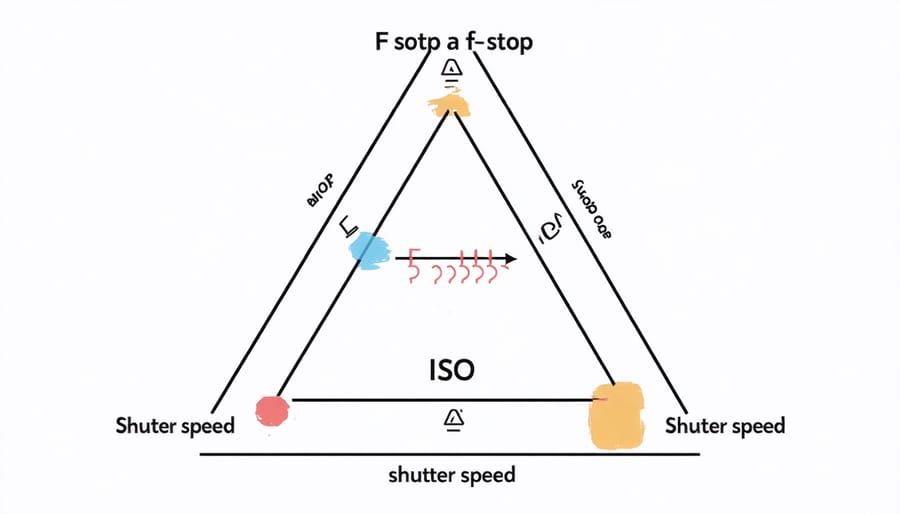
The Exposure Triangle at Night
The exposure triangle becomes particularly crucial when mastering night photography techniques. In low-light conditions, finding the right balance between aperture, ISO, and shutter speed requires careful consideration and often involves some compromise.
When shooting at night, your f-stop choice directly impacts how much you’ll need to adjust the other two settings. A wider aperture (lower f-number) lets in more light, allowing you to keep your ISO lower and avoid excessive noise, or use faster shutter speeds to prevent motion blur. For example, shooting at f/2.8 instead of f/5.6 gives you two additional stops of light, which could mean the difference between a clean ISO 800 shot and a noisy ISO 3200 one.
However, remember that wider apertures reduce depth of field, which can be challenging when focusing in the dark. You’ll often need to decide whether to prioritize light gathering with a wide aperture or maintain deeper depth of field with a narrower one and compensate with higher ISO or longer exposure times. This balance becomes your creative tool for achieving the desired effect in your nighttime images.
Depth of Field Considerations
When shooting at night, balancing depth of field with light gathering becomes a critical consideration. While wider apertures like f/1.8 or f/2.8 let in more light, they create a shallow depth of field that might not be ideal for capturing expansive night scenes. For cityscapes or star-filled landscapes, you’ll typically want more of the scene in focus.
Consider using mid-range apertures like f/5.6 or f/8 when you need both adequate light and sharp focus throughout your image. To compensate for the reduced light, you can extend your shutter speed or increase ISO. However, if you’re photographing specific subjects against a night background – like a portrait or detailed foreground element – a wider aperture might be preferable to create separation between your subject and the background.
For starscapes, many photographers find f/2.8 to be a sweet spot, offering enough depth of field to keep stars sharp while gathering sufficient light to avoid excessive ISO noise. When shooting city lights, try stopping down to f/8 or f/11 to capture crisp light points and maintain sharpness across the frame, using a tripod to support longer exposures.
Optimal F-Stop Settings for Different Night Scenes
Cityscapes and Urban Lights
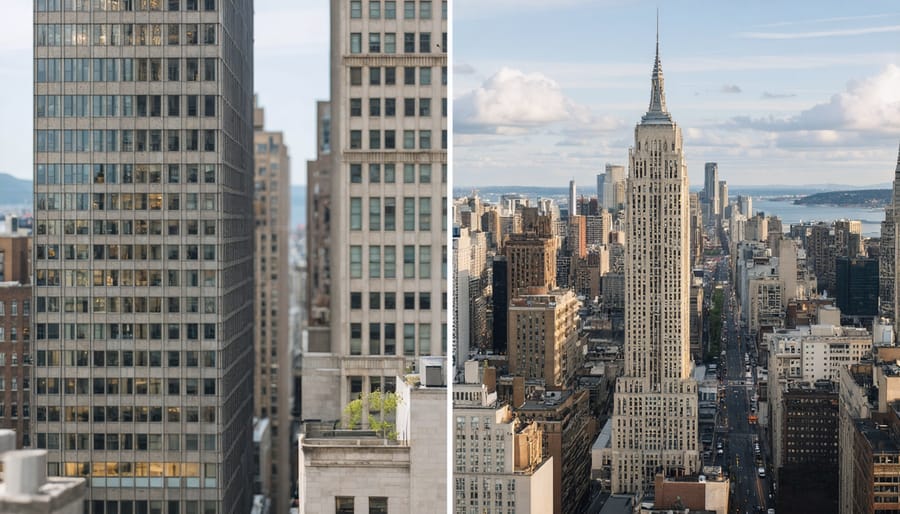
When photographing cityscapes at night, choosing the right f-stop is crucial for capturing sharp, detailed images with stunning light trails and illuminated buildings. For most urban night scenes, start with f/8 to f/11 – this sweet spot offers excellent depth of field while maintaining image quality. If you’re shooting from an elevated position trying to capture an entire skyline, consider stopping down to f/13 to ensure both near and distant buildings remain sharp.
For scenes with dramatic lighting and when trying creative night photography ideas like starburst effects around street lights, push your f-stop to f/16. However, be mindful that extremely narrow apertures like f/22 can introduce diffraction, potentially reducing overall image sharpness.
When photographing street level scenes with neon signs and shop fronts, you might want to open up to f/5.6 or f/6.3. This slightly wider aperture allows more light in while still maintaining good depth of field for your main subjects. Remember to always use a sturdy tripod, as these settings will require slower shutter speeds to achieve proper exposure.
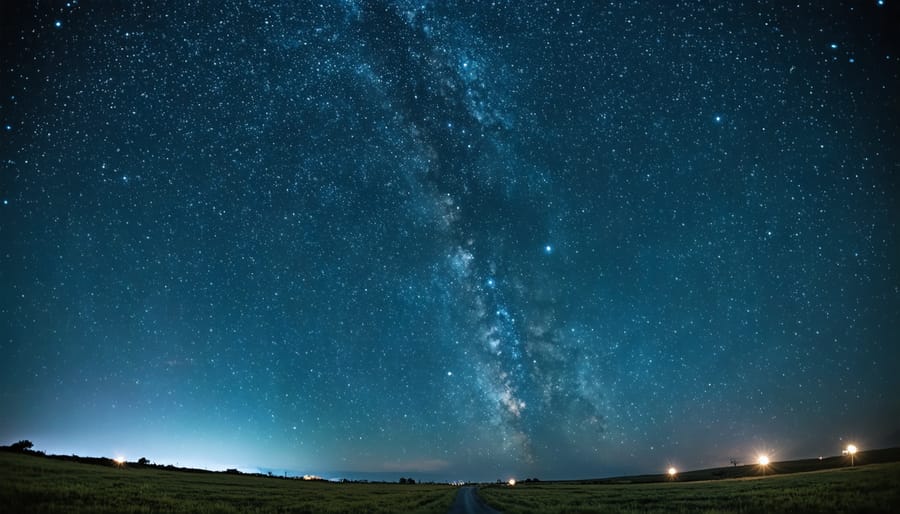
Star Photography and Milky Way
For capturing stunning star photos and the Milky Way, selecting the right f-stop is crucial. Generally, you’ll want to use the widest aperture your lens allows – typically f/1.4 to f/2.8. This maximum aperture setting helps gather as much light as possible from the dim stars and cosmic features during your exposure.
If your lens’s widest aperture is f/4 or higher, you can still capture great star photos, but you’ll need to compensate with longer exposure times or higher ISO settings. However, be aware that extremely wide apertures like f/1.4 might introduce some spherical aberration, causing stars to appear less sharp toward the edges of your frame.
For most Milky Way photography, f/2.8 offers an excellent balance between light gathering capability and overall image sharpness. If you’re including foreground elements in your composition, consider stopping down slightly to f/3.2 or f/3.5 to increase your depth of field while still maintaining adequate light collection.
Remember that the darker your shooting location and the clearer the sky, the more flexibility you’ll have with your f-stop selection. Always test your settings and review your results on location to find the optimal balance for your specific situation.
Light Trails and Moving Subjects
Capturing light trails and moving subjects at night requires a careful balance of aperture settings. For classic light trails from car headlights or cityscapes, start with f/8 to f/11 to maintain sharp details while allowing enough light for the extended exposure times needed. These middle-range apertures provide excellent depth of field and keep both the moving elements and static background in focus.
When photographing fast-moving subjects like carnival rides or fireworks, consider opening up to f/5.6 or f/4 to allow more light in while maintaining reasonable shutter speeds. This approach helps freeze portions of the movement while still capturing the desired motion blur effect.
For creative shots of star trails or light painting, stick to f/8 or narrower to ensure pinpoint clarity in your light sources. Remember that smaller apertures (higher f-numbers) will require longer exposure times, so a sturdy tripod is essential. If you’re working in extremely low-light conditions and want to minimize exposure time, you can open up to f/2.8 or wider, but be mindful of potential softness in parts of your image due to the shallow depth of field.
Architecture and Monuments
When photographing architecture at night, start with an f-stop between f/8 and f/11 to ensure sharp details across the entire structure. These aperture settings provide excellent depth of field, crucial for capturing both the building’s intricate features and its surrounding environment. For modern glass buildings that reflect city lights, consider stopping down to f/16 to create striking starbursts from bright light sources.
Position your camera on a sturdy tripod and use mirror lock-up to minimize vibrations. If you’re shooting historic buildings with dramatic lighting, f/5.6 to f/8 can work well to separate the subject from the background while maintaining overall sharpness. For capturing entire cityscapes, f/11 is often ideal, offering edge-to-edge clarity.
Remember that narrower apertures like f/16 require longer shutter speeds, so factor in any movement like flags or trees. In situations with limited light pollution, you might need to open up to f/4 or f/5.6 to gather more light while still maintaining acceptable sharpness. For shots including both near and far elements, like a courtyard leading to a building, focus stack multiple images at f/8 to ensure complete sharpness throughout the frame.
Common F-Stop Mistakes and Solutions
Avoiding Star Trails
When capturing the night sky, one of the biggest challenges is preventing star trails unless they’re intentionally part of your composition. The key lies in understanding the “500 Rule” and selecting an appropriate f-stop that allows enough light while maintaining sharp stars.
The 500 Rule states that to avoid star trails, your shutter speed should be no longer than 500 divided by your lens’s focal length. For example, with a 24mm lens, your maximum shutter speed should be about 20 seconds (500 ÷ 24 = 20.8). This means you’ll need to compensate with a wider aperture to gather enough light in this shorter exposure time.
For sharp, pinpoint stars, aim to use the widest aperture your lens allows while maintaining acceptable image quality – typically between f/1.4 and f/2.8. However, if your lens’s maximum aperture is f/4 or smaller, you may need to increase your ISO to compensate for the reduced light gathering capability.
Keep in mind that using extremely wide apertures like f/1.4 can introduce chromatic aberration and softness around the edges of your frame. Finding the sweet spot often means stopping down slightly from your lens’s maximum aperture – try f/2 or f/2.8 for optimal results. This approach balances the need for light gathering with image quality while keeping your stars as sharp points of light rather than trails.
Managing Lens Diffraction
When shooting night photography with smaller apertures (higher f-numbers), you might encounter a phenomenon called diffraction, which can reduce image sharpness. Diffraction occurs when light waves bend around the edges of your aperture blades, causing slight blur, particularly noticeable at f/16 and beyond.
To manage diffraction while maintaining enough depth of field for night scenes, aim to find your lens’s “sweet spot” – typically between f/8 and f/11. This range often provides the best balance between sharpness and depth of field. If you need to shoot at smaller apertures, consider focus stacking multiple images taken at a wider aperture instead.
For night cityscape shots where you want both foreground and background sharp, try this approach: Calculate your hyperfocal distance at f/8 or f/11, focus at that point, and test your results. If you’re not getting the desired depth of field, rather than stopping down further and risking diffraction, consider taking multiple shots at different focus points.
Keep in mind that modern high-resolution sensors make diffraction more noticeable. When shooting stars or distant night scenes where depth of field isn’t crucial, consider using wider apertures like f/4 or f/5.6. These settings not only avoid diffraction but also allow more light to reach your sensor, enabling faster shutter speeds or lower ISO settings.
Remember, slight diffraction is often preferable to motion blur or excessive noise from high ISO settings. Test your specific lens to understand its diffraction limitations and work within those constraints.
Professional Tips and Techniques
Focus Stacking at Night
Focus stacking at night can be a game-changer for capturing sharp, detailed images from foreground to background. While traditional night sky image stacking typically involves combining multiple exposures at the same aperture, focus stacking takes this technique further by blending shots taken at different focus points.
Start by setting up your camera on a sturdy tripod and composing your scene. Take multiple shots of the same composition, adjusting your focus point for each frame. Begin with the nearest element (often f/8 works well for foreground details), then gradually shift focus toward infinity for the stars. Typically, 3-5 shots are sufficient, but complex scenes might require more.
A few essential tips for successful focus stacking at night:
– Use manual focus and Live View for precise focusing
– Maintain consistent exposure settings across all shots
– Work quickly to minimize star movement between frames
– Keep your ISO and shutter speed constant
– Use a remote trigger or timer to avoid camera shake
In post-processing, combine your images using software like Photoshop or dedicated focus stacking programs. The result? Tack-sharp images with perfect focus throughout the entire frame, from nearby rocks to distant stars. This technique is particularly valuable for nightscape photography where both foreground interest and stellar clarity are crucial.
Lens-Specific Considerations
Different lenses behave uniquely in low-light conditions, and understanding these characteristics is crucial for successful night photography. Fast prime lenses with maximum apertures of f/1.4 or f/1.8 are typically the go-to choice for night shooting, offering excellent light-gathering capabilities and superior performance in dark conditions.
However, shooting wide open isn’t always the best choice. While a 50mm f/1.4 lens might tempt you to shoot at its maximum aperture, many lenses perform better when stopped down slightly. At f/2 or f/2.8, you’ll often find improved sharpness and reduced chromatic aberration while still maintaining enough light transmission for effective night photography.
Ultra-wide lenses present their own considerations. A 14mm f/2.8 might not seem as “fast” as a 50mm f/1.4, but for star photography and nightscapes, the wider field of view often compensates for the smaller maximum aperture by allowing longer exposure times without star trails.
Zoom lenses typically have variable maximum apertures (like f/3.5-5.6), making them more challenging for night photography. If you’re using a zoom, consider maintaining a wider focal length where possible to retain the largest available aperture. For the sharpest results, most zoom lenses perform best around f/5.6-f/8, but this may require longer exposures or higher ISO settings to compensate for reduced light transmission.
Keep in mind that each lens has a “sweet spot” – usually 2-3 stops down from its maximum aperture – where it delivers optimal sharpness. Test your lenses to find this optimal setting for your specific gear.
Mastering f-stops for night photography is a journey that combines technical knowledge with creative vision. Remember that the key to success lies in finding the right balance between aperture, ISO, and shutter speed for your specific shooting situation. Start with the recommended f-stops we’ve discussed – f/2.8 or wider for starry skies, f/8 to f/11 for cityscapes, and adjust based on your creative goals and lighting conditions. Don’t be afraid to experiment and break these guidelines when artistic vision calls for it. Practice is essential – spend time in different nighttime environments, take notes on your settings, and learn from both your successes and mistakes. With time and patience, you’ll develop an intuitive understanding of how to use f-stops effectively in your night photography, creating compelling images that capture the magic of after-dark scenes.