Transform flat, uninspiring food shots into scroll-stopping images by mastering the interplay between natural light, composition angles, and styling techniques that professional food photographers use daily. A quality food photography workshop compresses years of trial-and-error into intensive hands-on sessions where you’ll photograph actual dishes, receive immediate feedback, and walk away with portfolio-worthy images alongside the technical knowledge to recreate them consistently.
The difference between free YouTube tutorials and a structured workshop lies in personalized instruction tailored to your specific challenges. When you’re struggling with harsh shadows on that pasta dish or can’t figure out why your desserts look flat, an experienced instructor identifies your exact problem in real-time, whether it’s your camera settings, light positioning, or prop selection. You’ll learn the reasoning behind each decision—why a 45-degree angle works for layered cakes, how to manipulate white balance for warm, appetizing tones, or when to switch from aperture f/2.8 to f/5.6 for proper depth of field.
The investment typically ranges from $200 for local half-day sessions to $2,000+ for multi-day intensive programs with industry professionals. Evaluate workshops based on class size (smaller groups mean more personalized attention), whether you’ll photograph real food versus staged setups, the instructor’s commercial portfolio, and what equipment and props are provided versus what you need to bring. The best workshops balance technical camera instruction with food styling fundamentals, teaching you not just how to operate your gear but how to arrange garnishes, control steam, and work quickly before dishes lose their visual appeal.
What Makes Food Photography Different From Other Genres
Food photography occupies a unique space in the photography world, presenting challenges you simply won’t encounter when shooting landscapes, portraits, or product photography. The most obvious difference? Your subject has a shelf life—and it’s ticking from the moment it leaves the kitchen.
Unlike a product that maintains its appearance indefinitely or a model who can hold a pose, food begins deteriorating the instant it’s plated. Steam stops rising from hot dishes within minutes. Ice cream melts under studio lights. Salad greens wilt. That perfectly glossy sauce develops a skin. You’re essentially racing against entropy, which means you need to work efficiently and decisively. There’s no luxury of spending an hour tweaking your composition when your subject might become visually unappetizing in fifteen minutes.
The lighting requirements also set food photography apart. You’re not just illuminating a subject—you’re trying to trigger an emotional, almost visceral response in viewers. The right lighting reveals texture that makes people imagine the crunch of crispy skin or the softness of whipped cream. Poor lighting turns the same dish into something flat and unappetizing. Managing highlights and shadows becomes critical because you need to showcase dimension while avoiding harsh reflections on sauces or glazes. These dessert photography techniques illustrate how precise lighting control can make or break an image.
Then there’s the creative challenge of storytelling within severe constraints. You’re typically working in a confined space with limited styling options. Every element in frame must contribute to appetite appeal without overwhelming the hero dish. A misplaced prop can distract, while the right garnish or background texture completes the narrative.
Food photographers also navigate a unique collaboration dynamic, working closely with chefs, food stylists, and sometimes art directors—all while that timer keeps counting down. You need technical mastery combined with creative vision and the ability to make quick decisions under pressure. It’s this combination of artistry, technical skill, and time management that makes food photography both challenging and incredibly rewarding to master.
What Actually Happens in a Food Photography Workshop
Hands-On Shooting Sessions: Learning by Doing
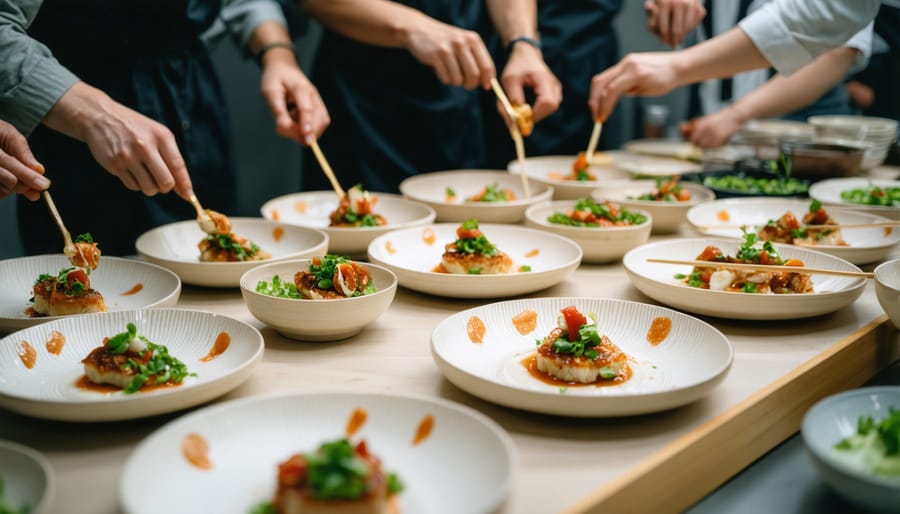
The real magic of a food photography workshop happens when you step away from theory and start shooting. These hands-on sessions form the backbone of your learning experience, giving you the chance to work with beautifully styled dishes while instructors guide you through the creative process.
Most workshops provide a variety of prepared dishes for you to photograph, ranging from simple breakfast setups to elaborate plated desserts. You’ll experiment with different angles—overhead flat lays, 45-degree perspectives, and tight detail shots—discovering which approach best showcases each dish’s unique characteristics. For instance, you might find that a stack of pancakes tells its story best from a side angle that emphasizes height and texture, while a colorful Buddha bowl shines from directly above.
What sets these sessions apart from practicing at home is the immediate feedback loop. As you compose your shots, instructors circulate the room, reviewing your work and offering targeted suggestions. They might point out that your lighting is creating unwanted shadows on the plate’s rim or suggest adjusting your white balance to make those roasted vegetables look more appetizing. This real-time guidance accelerates your learning far beyond what you’d achieve through trial and error alone.
You’ll also have the freedom to experiment with props, backgrounds, and styling elements provided by the workshop. Try that dark moody setup you’ve admired on Instagram, or test whether a linen napkin works better than that cotton one. This safe environment for experimentation, combined with professional feedback, helps you quickly identify what works and what doesn’t, building your confidence and visual intuition.
The Technical Foundation: Lighting and Camera Settings
Understanding light is everything in food photography, and workshops dedicate substantial time to this crucial element. You’ll learn to harness natural window light—often the most flattering for food—by reading its direction, quality, and color temperature throughout the day. Instructors demonstrate how to position your subject relative to the light source, typically favoring side or backlighting to create depth and highlight textures like crispy crusts or glossy sauces.
Artificial lighting receives equal attention, with hands-on sessions teaching softbox placement, diffusion techniques, and working with one light to achieve professional results. You’ll practice controlling shadows with reflectors and black cards—essential tools that shape how viewers perceive dimension and appetite appeal.
Camera settings get demystified through real-time shooting. Workshops explain why apertures between f/2.8 and f/5.6 work beautifully for selective focus on hero ingredients, while f/8 suits flat-lay compositions. You’ll understand shutter speed considerations for steam capture and ISO management to preserve detail in dark chocolate or golden pastries. Instructors typically encourage shooting in manual mode and RAW format, explaining white balance adjustments that prevent unappetizing color casts—because nobody wants blue pasta or green chicken.
Styling Secrets Professional Food Photographers Use
Professional food photographers know that exceptional images often come down to thoughtful styling choices rather than expensive equipment. In workshops, instructors reveal the subtle techniques that transform ordinary dishes into magazine-worthy subjects.
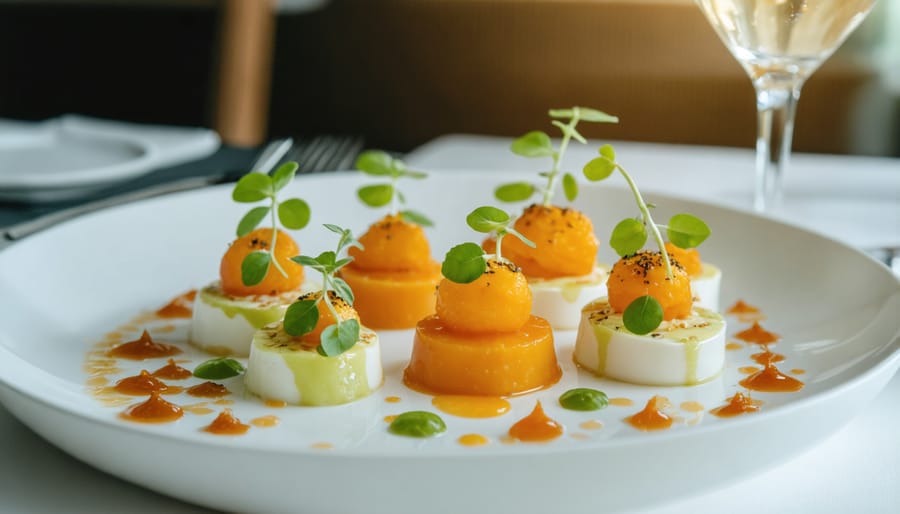
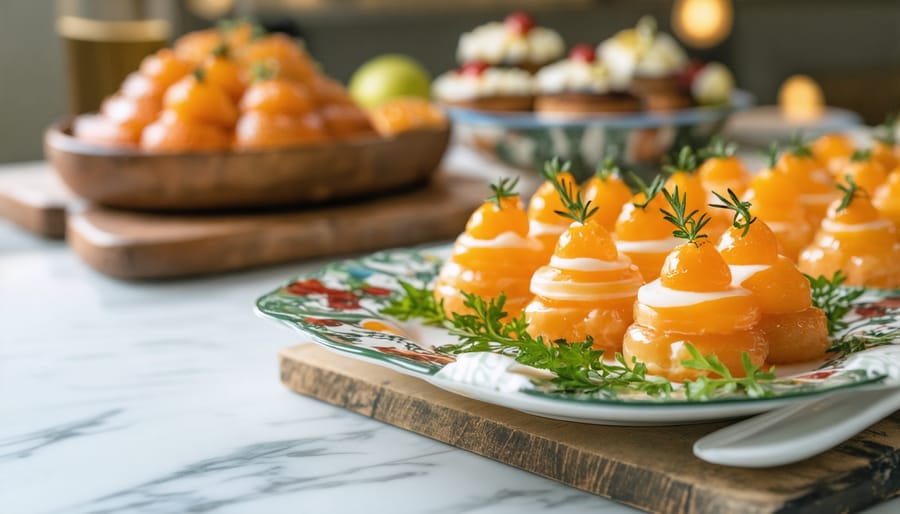
Plating strategies form the foundation of food styling. You’ll learn the “rule of odds,” where arranging three or five elements creates more visual interest than even numbers. Workshops teach height variation through strategic stacking and how negative space prevents compositions from feeling cluttered. Instructors demonstrate garnishing techniques, like strategically placed herb sprigs or drizzled sauces that guide the viewer’s eye through the frame.
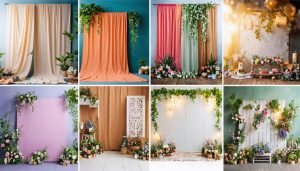
Prop selection receives considerable attention. The right cutting board, vintage fork, or linen napkin can establish context and mood without overwhelming the hero dish. Many workshops provide collections of props for hands-on experimentation, teaching you to identify pieces that complement rather than compete. You’ll discover how backdrop ideas and surface textures contribute to storytelling.
Color harmony principles guide decisions about complementary and contrasting hues. Workshops often include practical exercises where you’ll see how a pop of red tomato energizes neutral tones or how monochromatic schemes create sophisticated elegance. Small tricks like lightly brushing oil on food for sheen or using partially melted ice cream become part of your styling toolkit, helping you capture that perfect moment before natural deterioration occurs.

The Gear You’ll Need (And What the Workshop Provides)
Essential Camera Equipment for Food Photography
You don’t need the most expensive gear to create stunning food images, but having the right tools certainly helps. Most food photography workshops welcome participants using any camera system, from entry-level DSLRs to mirrorless cameras and even advanced smartphones.
For those investing in dedicated equipment, a camera with manual control capabilities is essential. Full-frame sensors offer advantages in low-light situations and shallower depth of field, but crop-sensor cameras work beautifully too. Popular choices include the Canon EOS R series, Nikon Z cameras, or Sony’s Alpha lineup, though many workshops have students achieving excellent results with older DSLR models.
Lens selection matters more than the camera body. A 50mm prime lens (f/1.8 or f/1.4) serves as an affordable workhorse for food photography, offering natural perspective and beautiful background blur. For more versatility, a 24-70mm zoom covers everything from overhead flat-lay compositions to tighter detail shots. However, macro lenses truly shine in food photography workshops. A 100mm macro lens lets you capture intricate textures like sugar crystals on pastries or condensation on cold beverages. Learning these macro photography secrets transforms ordinary food shots into captivating visual stories.
Regarding camera settings, workshops typically teach shooting in manual mode. Expect to work with apertures between f/2.8 and f/5.6 for selective focus, or f/8 to f/11 when everything needs sharpness. ISO stays low (100-400) when using natural light or strobes, and shutter speeds vary based on your lighting setup. Shooting in RAW format gives maximum editing flexibility later.
Beyond the Camera: Lighting and Styling Tools
Great food photography extends far beyond the camera itself. Most workshops provide access to essential tools that transform harsh lighting into something beautiful and flattering. Reflectors bounce light back onto your subject, filling in shadows and adding dimension to your dish. White foam boards are workshop staples, while silver and gold reflectors create different moods. Diffusers soften direct light sources, preventing those unflattering hot spots on glossy sauces or shiny surfaces.
Many of the lighting techniques used in other photography genres translate perfectly to food styling. Workshops typically supply various backgrounds like wooden boards, marble tiles, and textured fabrics that complement different cuisines. You’ll learn how these surfaces affect your composition and storytelling.
Props matter enormously. Quality workshops stock vintage cutlery, linens, ceramic plates, and garnishing tools. You’ll discover how a worn wooden spoon or rustic bowl adds narrative to your images. Some workshops encourage bringing your own props to develop your signature style.
The hands-on experience with professional-grade equipment helps you understand what’s worth investing in for your own kit. You’ll leave knowing whether that expensive diffuser is essential or if a simple white sheet achieves similar results for your specific needs.
Choosing the Right Workshop for Your Skill Level
Beginner-Friendly vs. Advanced Workshops
Before registering for any food photography workshop, honestly evaluate your current skill level to ensure you’re neither overwhelmed nor underwhelmed. Most workshops clearly indicate their target audience, but understanding what each level entails helps you make the right choice.
Beginner-friendly workshops typically assume you have basic camera operation knowledge but little experience with food styling or lighting. You’ll learn fundamental concepts like white balance, aperture settings for depth of field, and simple natural light techniques. These sessions often cover prop selection basics and introduce compositional rules like the rule of thirds. For example, a beginner workshop might walk you through photographing a single plated dish from start to finish, explaining each decision along the way.
Advanced workshops assume you’re comfortable with manual camera settings and have photographed food before. They dive deeper into complex lighting setups using reflectors and diffusers, advanced styling techniques like creating steam or working with challenging ingredients, and post-processing workflows specific to food imagery. You might tackle difficult scenarios like photographing dark chocolate on dark surfaces or capturing action shots of pouring sauce.
Look for workshop descriptions mentioning prerequisites or required equipment. If a workshop asks you to bring specific lenses or assumes knowledge of terms like “fill light” without explanation, it’s likely intermediate or advanced.
In-Person vs. Online: Which Format Works Better
In-person workshops offer immediate, personalized feedback that’s invaluable when perfecting food styling or troubleshooting tricky lighting scenarios. When you’re arranging herbs on a plate and the instructor can physically adjust your setup while explaining why, that hands-on guidance accelerates learning significantly. You’ll also benefit from networking opportunities—chatting with fellow participants during coffee breaks often leads to lasting connections and collaborative projects.
However, online workshops have evolved beyond simple webinars. Many now include live interactive sessions where instructors review your work in real-time through screen sharing. The convenience factor is undeniable: you can learn from world-renowned food photographers without travel expenses or time off work. Plus, you’re shooting in your own kitchen with your actual equipment and light conditions, making lessons immediately applicable.
The main limitation of virtual learning is the lack of tactile experience. You can’t physically feel how different surfaces affect your composition or observe subtle lighting nuances as easily through a screen. Conversely, in-person workshops require significant time and financial investment, though the immersive environment often justifies the premium. Consider hybrid options that combine online theory with occasional in-person meetups for practical application.
Questions to Ask Before Signing Up
Before investing your time and money, ask these essential questions to ensure you’re choosing the right workshop. Start with instructor credentials: What’s their background in food photography? Have they worked with commercial clients or publications? Request to see their portfolio—real-world experience matters more than theoretical knowledge.
Inquire about group size and instructor-to-student ratio. Smaller groups (ideally 6-10 participants) mean more personalized feedback and hands-on attention. Ask specifically how much camera time you’ll get versus demonstration time. Some workshops are heavily lecture-based, which might not suit hands-on learners.
Understanding the equipment situation is crucial. Will cameras and lighting gear be provided, or do you need your own? If you’re traveling, knowing what’s available can save you from lugging heavy equipment.
Post-workshop support can extend your learning significantly. Does the instructor offer follow-up critiques of your work? Is there a private community group where participants can share images and ask questions? Some workshops include monthly online sessions or email support for a specified period.
Finally, request a detailed schedule breakdown and ask about the curriculum specifics. Generic descriptions like “lighting techniques” aren’t helpful—you want to know if they’ll cover natural light, artificial setups, or both, and whether styling fundamentals are included.
Real-World Results: What You’ll Actually Take Away
Immediate Skills You Can Apply Right Away
One of the most valuable aspects of attending a food photography workshop is walking away with techniques you can implement the moment you get home. Let’s talk about the immediate wins that can transform your food images overnight.
The rule of thirds becomes your best friend in food photography. Rather than centering your dish, imagine dividing your frame into nine equal sections with two horizontal and two vertical lines. Positioning your main subject along these lines or at their intersections creates naturally balanced, eye-catching compositions. Many workshop instructors also introduce the concept of negative space—that intentional emptiness around your subject that gives your viewers’ eyes room to breathe and makes the food the undeniable star.
Lighting might seem intimidating, but workshops teach you to start simple. Natural window light remains the most accessible and flattering option for food. You’ll learn to position your setup perpendicular to a window, using a simple white foam board or reflector on the opposite side to bounce light back and eliminate harsh shadows. This single setup works for about 80 percent of food photography situations.
Styling principles you’ll grasp quickly include the concept of odd numbers—three cookies photograph more appealingly than two or four—and adding height variation to create visual interest. Workshops typically demonstrate how strategically placed crumbs, drizzles, or garnishes suggest the food’s texture and flavor while making the scene feel authentic rather than sterile. These aren’t complicated techniques requiring expensive equipment; they’re thoughtful approaches that immediately elevate your work from snapshot to professional-looking imagery.
Long-Term Development: Building Your Food Photography Style
A food photography workshop isn’t just a one-day event—it’s the launchpad for your creative journey. Think of it as establishing the foundation of a house. You’re not just learning to click the shutter; you’re developing visual literacy that will mature and evolve long after the workshop ends.
The real value emerges in the weeks and months following your workshop experience. The lighting principles you practice during hands-on exercises become second nature when you’re shooting at home. That feedback you received on composition starts echoing in your mind as you frame each shot. You’ll find yourself naturally recognizing how different surfaces affect light or how color combinations can make or break an image.
Workshops also accelerate your style development by exposing you to diverse approaches. Perhaps you’re drawn to moody, dramatic lighting after seeing one instructor’s work, or maybe you gravitate toward bright, airy compositions demonstrated by another photographer. This exposure helps you identify what resonates with you aesthetically, rather than spending years figuring it out through trial and error alone.
Building a professional portfolio requires consistency and vision—two elements that workshops help cultivate. Many participants report that workshop projects become cornerstone pieces in their portfolios. That carefully styled dessert shot or that perfectly lit pasta dish often represents a breakthrough moment worth showcasing to potential clients or publications. The structured environment pushes you to create work at a higher standard than you might achieve independently, giving your portfolio immediate credibility.
Investing in a food photography workshop represents a commitment to your craft that pays dividends far beyond the classroom. Unlike passive online learning, workshops accelerate your growth through immediate feedback, hands-on practice, and the collective wisdom of instructors and fellow participants. If you’ve been plateauing in your skills or struggling with specific challenges like lighting difficult dishes or creating consistent styling, a well-chosen workshop can provide the breakthrough you need.
Before selecting a workshop, clarify your goals. Are you building a food photography business, enhancing your restaurant’s marketing materials, or simply pursuing a passionate hobby? Your objectives should guide your choice between beginner fundamentals, advanced technique workshops, or specialized sessions focusing on areas like editorial food photography or social media content creation.
To maximize your investment, arrive prepared. Review the pre-workshop materials, charge your equipment, and bring questions based on your current challenges. During the session, don’t just photograph—actively observe how instructors problem-solve. Notice their decision-making process when adjusting props, modifying light, or repositioning elements. Take notes on techniques rather than relying solely on memory.
After the workshop, implement what you’ve learned immediately. The real value emerges when you apply new skills to your own projects. Set aside time within the first week to practice specific techniques covered in class. Consider this your laboratory phase—experiment, make mistakes, and refine your approach. Many photographers find that workshop concepts truly solidify only after several weeks of deliberate practice. Remember, the workshop is the catalyst, but your continued commitment determines the ultimate results.