Ever wondered how photographers capture those stunning close-ups where a dewdrop looks like a crystal palace or an insect’s eye reveals intricate geometric patterns invisible to the naked eye? That’s the captivating world of macro photography, where the ordinary transforms into the extraordinary through extreme magnification.
Macro photography is the art and technique of capturing subjects at life-size magnification or greater, typically defined as a 1:1 reproduction ratio or higher. In practical terms, this means photographing small subjects so they appear as large or larger on your camera’s sensor than they are in real life. A tiny 5mm ant, for instance, could fill your entire frame, revealing details most people never see: individual hairs, compound eye structures, and textural elements that seem almost alien in their complexity.
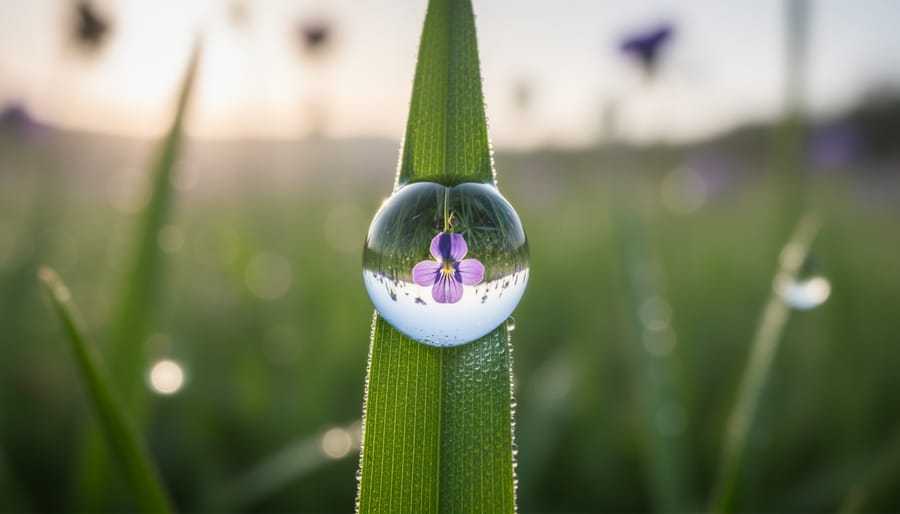
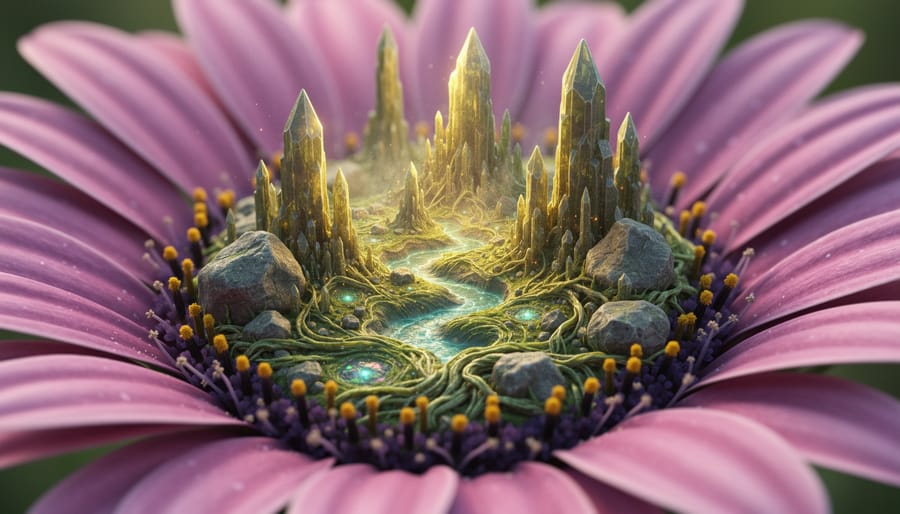
This specialized form of photography opens up an entirely new universe right in your backyard or kitchen. A simple flower petal becomes a landscape of color gradients and delicate veins. Water droplets transform into perfect spheres that act as tiny lenses, refracting the world behind them. Even household items like fabric fibers, food textures, or everyday objects reveal surprising beauty under macro magnification.
While macro photography does require specific equipment and techniques, it’s more accessible than many photographers initially believe. Understanding the fundamentals of magnification ratios, working distances, and depth of field challenges will help you start capturing these miniature worlds with confidence. Whether you’re drawn to nature’s intricate details or abstract close-up compositions, macro photography rewards patience and curiosity with images that stop viewers in their tracks.
What Macro Photography Actually Means
The 1:1 Magnification Ratio Explained
The 1:1 magnification ratio is the technical benchmark that defines true macro photography, but don’t let the numbers intimidate you. Here’s what it means in practical terms: when you photograph a subject at 1:1 magnification, it appears life-size on your camera’s sensor. If you’re photographing a 10mm beetle, that beetle’s image will measure exactly 10mm across on your sensor.
Think of it this way: imagine looking at a ladybug through your camera’s LCD screen after capturing it at 1:1. The ladybug’s representation on that sensor is exactly as large as the actual ladybug sitting on your hand. It’s a direct, one-to-one correspondence between reality and the captured image.
This becomes clearer with everyday examples. A standard postage stamp measures roughly 25mm tall. At 1:1 magnification, that stamp would fill most of a full-frame sensor, which measures 36mm across. Or consider a dime, which is about 18mm in diameter. At true macro magnification, you could capture incredibly fine details like the texture of the metal or individual wear marks that are invisible to the naked eye. This level of magnification opens up an entirely new world of photographic possibilities.
Macro vs. Close-Up Photography: What’s the Difference?
Here’s the truth: not all close-up photography is technically macro photography, though you’ll often hear the terms used interchangeably. True macro photography captures subjects at a magnification ratio of 1:1 or greater, meaning the subject appears life-size or larger on your camera’s sensor. A 10mm beetle would occupy 10mm on the sensor itself.
Close-up photography, on the other hand, refers to any magnification less than 1:1. You might be shooting at 1:2 (half life-size) or 1:4, which still creates compelling images of small subjects but doesn’t meet the technical definition of macro.
Does this distinction really matter? For everyday shooting, not necessarily. Both approaches create beautiful, detailed images that reveal hidden worlds. However, understanding the difference becomes important when you’re shopping for equipment. A lens marketed as “macro” should achieve 1:1 magnification, while one labeled for “close-up” work might not. This affects your investment decisions and helps set realistic expectations for what you can capture.
The good news? Whether you’re shooting true macro or close-up, you’re developing similar skills in composition, lighting, and patience. Start wherever your current gear allows, and let your creative vision guide your journey into photographing the small and extraordinary.
The Intricate Details Macro Photography Captures
Nature’s Hidden Architecture
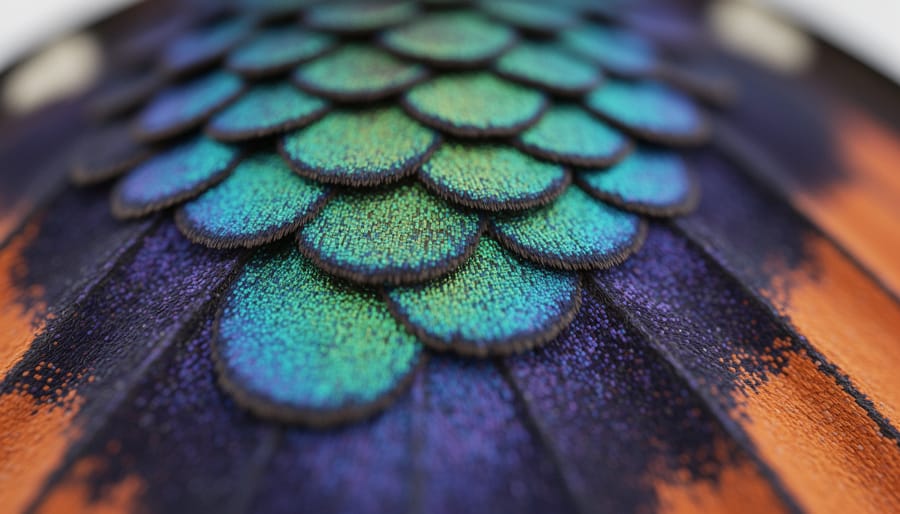
Nature offers some of the most captivating subjects for macro photography, revealing a hidden universe that exists just beyond our normal vision. When you photograph a butterfly’s wing up close, you’ll discover intricate scales arranged like roof tiles, each catching light differently. A common daisy transforms into an architectural marvel, its petals radiating from a complex center dotted with hundreds of tiny florets.
Insects become particularly otherworldly at macro scale. The compound eyes of a dragonfly resemble alien technology, while a ladybug’s spotted shell reveals textures and imperfections invisible to the naked eye. Even humble subjects like moss or tree bark expose fascinating patterns—miniature forests and canyons that could pass for distant planets.
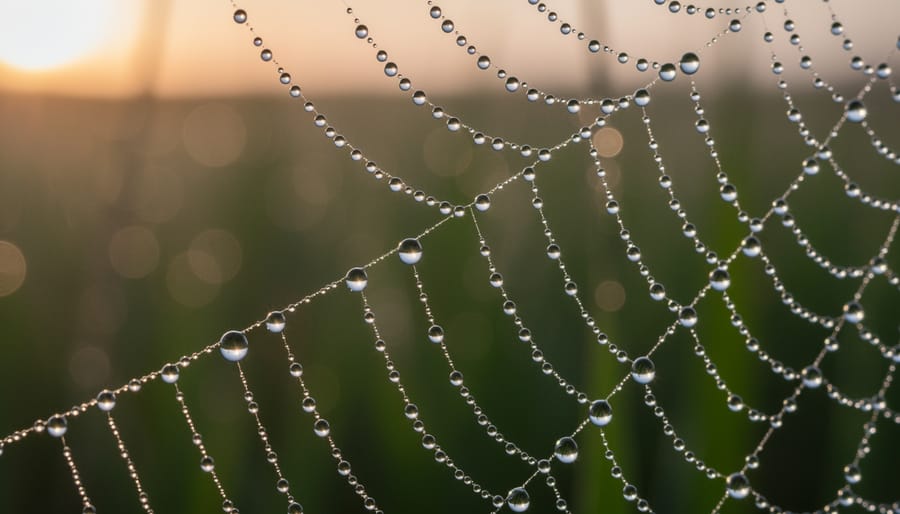
Water droplets present endless creative possibilities. A single drop on a leaf can act as a natural lens, capturing an upside-down world within its curved surface. Morning dew transforms spider webs into jeweled necklaces, each droplet perfectly spherical and luminous.
The beauty of nature macro photography lies in accessibility. You don’t need exotic locations; your backyard, a local park, or even houseplants provide abundant subjects. Start with stationary subjects like flowers or seed pods to practice your technique before moving to more challenging insects. The key is slowing down and truly observing—what seems ordinary at first glance often reveals extraordinary detail through your macro lens.
Everyday Objects Transformed
One of the most exciting aspects of macro photography is discovering that everyday items around your home harbor entire hidden worlds. That fabric on your couch? Up close, it becomes an intricate textile landscape with shadows and depth you’ve never noticed. The surface of a strawberry transforms into a miniature mountain range dotted with seeds that look like alien pods.
Take your morning coffee, for example. Through a macro lens, the foam reveals delicate bubble patterns that resemble honeycomb structures or abstract art. The circuit board inside an old smartphone becomes a futuristic cityscape complete with metallic skyscrapers and tiny pathways. Even something as simple as table salt crystals can look like transparent geometric sculptures when magnified.
Jewelry macro photography particularly showcases this transformative power, revealing the craftsmanship in metalwork, the fire within gemstones, and details invisible to the naked eye.
The beauty of this approach is accessibility. You don’t need exotic subjects or expensive travel. Start with items from your kitchen, workspace, or backyard. A paperclip, a feather, a coin, or morning dew on a leaf all become fascinating subjects. This perspective shift changes how you see the world, training your eye to find extraordinary beauty in ordinary places. It’s photography that makes you stop, look closer, and appreciate the craftsmanship and complexity surrounding you daily.
What You Need to Start Capturing Macro Images
True Macro Lenses
True macro lenses are purpose-built for extreme close-up work, delivering native 1:1 magnification without requiring accessories. This means the lens projects your subject onto the camera sensor at life-size—a 10mm insect appears as 10mm on the sensor. What sets these lenses apart is their optical design: they’re specifically engineered to maintain sharpness and contrast at minimum focusing distances, where regular lenses struggle.
The most common focal lengths are 60mm, 100mm, and 180mm, each with distinct advantages. A 60mm macro works beautifully for product photography and flat subjects like stamps or coins, where working distance isn’t critical. The 100mm hits the sweet spot for most macro work—it’s versatile enough for flowers and food while providing comfortable working distance for skittish insects. If you’re serious about photographing butterflies or dragonflies, the 180mm (or 150mm) becomes invaluable. That extra reach means you can shoot from farther away without casting shadows or scaring your subjects.
Here’s practical advice: your first macro lens should probably be a 100mm. It’s the most adaptable option, giving you breathing room with live subjects while remaining manageable for tabletop setups. You’ll appreciate that working distance when lighting becomes tricky—and trust me, it always does.
Budget-Friendly Alternatives
You don’t need to spend hundreds of dollars to start exploring macro photography. Three affordable accessories can transform your existing lenses into capable macro tools, each with distinct advantages and limitations.
Extension tubes sit between your camera body and lens, increasing the distance between the lens and sensor to enable closer focusing. They’re lightweight, preserve image quality since they contain no glass elements, and cost as little as $15 for manual versions or $100-150 for versions maintaining autofocus. The trade-off? You’ll lose infinity focus and some light reaches the sensor, requiring longer exposures.
Close-up filters screw onto your lens’s front like a magnifying glass, offering the simplest solution at $20-80. They maintain autofocus and don’t affect exposure, though image quality can suffer, particularly at frame edges. Higher-quality multi-element filters minimize this issue.
Reversing rings mount your lens backward, often producing surprisingly sharp results for under $15. This budget champion requires manual operation for everything and works best with prime lenses around 50mm. Many photographers capture stunning macro images using these humble tools before investing in dedicated lenses.
Supporting Equipment That Makes a Difference
While a great lens is essential, the right supporting equipment can dramatically improve your macro photography results. Think of these tools as your stability and lighting partners.
A sturdy tripod becomes crucial when shooting at extreme magnifications. Even the slightest camera shake at 1:1 reproduction gets amplified, turning a potentially sharp image into a blurry disappointment. Choose one that allows low-angle positioning, as many fascinating macro subjects live close to the ground. In the field, I’ve found that a tripod transforms my hit rate from maybe 30% sharp images to well over 80%.
Lighting presents unique challenges in macro work. Natural light works beautifully for stationary subjects like flowers, but often you’ll need supplemental illumination. Ring flashes provide even, shadowless light perfect for scientific documentation, while small LED panels offer continuous lighting that lets you preview your results. Experimenting with different macro lighting solutions helps you develop your signature style.
Finally, focusing rails give you precise control over your focal plane. These devices mount between your camera and tripod, allowing millimeter-by-millimeter adjustments. When your depth of field measures just a few millimeters, this precision becomes invaluable for achieving perfect focus exactly where you want it.
The Unique Challenges of Shooting Macro
Depth of Field: Your Biggest Challenge and Creative Tool
Here’s the truth about macro photography: when you get close enough to photograph a bee’s eye or a dewdrop on a petal, your depth of field shrinks to mere millimeters. At 1:1 magnification, even shooting at f/16, you might have only a few millimeters of your subject in sharp focus. This razor-thin plane of sharpness is simultaneously your biggest technical challenge and one of your most powerful creative tools.
The physics are unavoidable. As magnification increases, depth of field decreases dramatically. That beautifully detailed ladybug you’re photographing? You’ll need to choose whether to focus on its head or its wing spots, because getting both sharp in a single frame is nearly impossible.
So how do photographers work with this limitation? First, aperture selection becomes critical. While f/16 or f/22 gives you more depth of field than f/2.8, stopping down too far introduces diffraction, which softens your image. Most macro photographers find their sweet spot between f/8 and f/16, balancing sharpness with adequate depth.
Second, your focus point matters more than ever. Position your camera parallel to your subject’s most important features. Photographing a butterfly? Align your sensor plane with its wings rather than shooting at an angle.
For subjects requiring front-to-back sharpness, many photographers turn to focus stacking. This technique involves taking multiple shots at different focus distances, then blending them in post-processing software. It’s time-consuming but delivers impressive results when you need that extra depth without compromising image quality.
Stability and Working Distance
At macro magnifications, the tiniest vibrations become magnified problems. A slight hand tremor that’s invisible in regular photography can blur your entire subject when you’re shooting at 1:1 magnification or greater. Think of it this way: if you’re photographing a ladybug’s eye and your camera shifts just a millimeter, that movement might represent half your frame. This is why even experienced photographers often struggle when first attempting macro work.
Working distance, the space between your lens and subject, adds another layer of complexity. Most macro lenses require you to get surprisingly close to your subject, sometimes just a few inches away. This proximity creates several challenges simultaneously. First, you might literally block the light falling on your subject with your lens or camera body, creating unwanted shadows. Second, you might startle living subjects that are sensitive to movement nearby. Third, that narrow gap makes precise focusing extremely difficult, as even breathing can shift your position enough to lose focus.
Here’s practical advice that makes a real difference: invest in stabilizing equipment like a sturdy tripod with a geared head for fine adjustments. When shooting handheld is necessary, brace yourself against solid objects or use your elbows tucked against your body for support. Consider using a remote shutter release or your camera’s self-timer to eliminate vibration from pressing the shutter button. For lighting challenges caused by limited working distance, ring lights or twin flash systems designed for macro work provide illumination that works around your lens rather than being blocked by it.
Getting Started: Your First Macro Shots
Best Subjects for Practicing
When you’re starting your macro photography journey, choosing subjects that stay perfectly still makes all the difference. Begin with flowers, particularly roses or daisies, which offer intricate petal textures and natural color gradients. They’re ideal for practicing depth of field control since you can experiment with isolating stamens against soft, blurred petals. Plus, if you lose focus or bump your tripod, the flower will be right where you left it.
Household objects are your next best friend. Try photographing water droplets on a leaf, the threading on a screw, or the weave of fabric. These everyday items teach you lighting fundamentals because you can control the environment completely. Move your subject near a window, add reflectors, and see how shadows transform texture. Kitchen items like sliced citrus fruits or coffee beans provide repetitive patterns that help you understand composition at close range.
Textured surfaces deserve special attention too. Tree bark, weathered wood, or even rust on metal reveal hidden landscapes when magnified. These subjects excel at teaching you how different lighting angles create drama and dimension. Side lighting, for instance, makes texture pop dramatically. The beauty here is patience isn’t required—you can return to the same subject repeatedly, building confidence with each session before tackling unpredictable subjects like insects.
Simple Techniques That Improve Your Results
You don’t need fancy equipment or years of experience to see immediate improvements in your macro shots. Start with natural light whenever possible—position your subject near a window or shoot outdoors during the soft light of early morning or late afternoon. Harsh midday sun creates unwanted shadows and blown-out highlights that can ruin an otherwise compelling image.
Camera shake becomes your biggest enemy at high magnifications, where even the slightest movement blurs details. Use a tripod or rest your camera on a stable surface. If you’re shooting handheld, tuck your elbows against your body and take a breath before pressing the shutter. Many photographers find success shooting from a beanbag or even a rolled-up jacket for added stability.
Switch to manual focus for precise control over exactly where sharpness falls. Autofocus often struggles with macro subjects, hunting back and forth without finding the right spot. Take multiple shots at slightly different focus points—this technique, called focus bracketing, gives you options when reviewing your images later. Even professionals rarely nail perfect focus on the first attempt, so don’t get discouraged. Shoot generously, experiment with different angles, and you’ll quickly develop an intuition for what works.
The miniature world has always been here, quietly existing just beyond the reach of our everyday perception. Macro photography simply gives you the tools and perspective to finally see it. Whether you’re working with a smartphone and a clip-on lens or a dedicated macro setup, the journey into close-up photography is one of discovery that never really ends.
Here’s the beautiful truth: you don’t need thousands of dollars in equipment to start. Some of the most captivating macro images come from photographers who began with basic gear and boundless curiosity. That flower in your backyard, the water droplets on your window after rain, the texture of everyday objects – they’re all waiting to reveal their hidden details to you.
Start small. Pick one subject that intrigues you and spend time with it. Notice how light transforms it throughout the day. Experiment with different angles. Make mistakes, because those mistakes teach you about depth of field, focus, and composition faster than any tutorial ever could. As you grow more comfortable, explore advanced macro techniques that will expand your creative possibilities.
The world becomes a different place when you start seeing it through a macro lens. Ordinary transforms into extraordinary. So grab whatever camera you have, get close to something interesting, and press the shutter. Your creative journey into the microscopic magnificent begins right now.