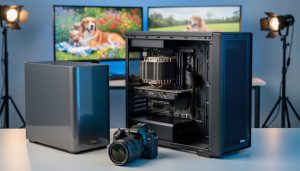
Your current photo editing setup works perfectly until you export that first 4K video project and watch your computer grind to a halt for 45 minutes. If you’re among the growing number of photographers expanding into video, you’ve likely discovered that video files demand entirely different storage solutions than the RAW photos you’re used to handling.
The challenge isn’t just about having enough space. A 10-minute 4K video can easily consume 40GB, but the real problem surfaces when you try editing that footage directly from your storage drive. Choppy playback, dropped frames, and endless buffering turn what should be a creative process into an exercise in frustration. Meanwhile, the fear of losing days or weeks of work to a drive failure keeps you up at night.
A properly configured NAS with the right RAID setup solves both problems simultaneously. It delivers the sustained read/write speeds necessary for smooth timeline scrubbing and real-time effects rendering, while automatically protecting your footage across multiple drives. But here’s where most photographers get stuck: the technical specifications read like a foreign language, and the price tags range from a few hundred to several thousand dollars.
The good news? You don’t need enterprise-level infrastructure to edit video smoothly from network storage. What you need is understanding which specific hardware components actually impact video editing performance, which RAID configurations make sense for your workflow, and how to optimize your setup without overspending on features that won’t improve your editing experience.
Understanding the Video Editing Bottleneck
When Sarah, a wedding photographer, first decided to add video to her services, she assumed her trusty consumer-grade NAS would handle the transition just fine. After all, it had been storing her RAW photo files without issue for years. Her first reality check came when she tried editing a 4K wedding highlight reel directly from the NAS—her timeline stuttered, previews took forever to generate, and she ended up copying everything to her local drive anyway.
Here’s what makes video editing fundamentally different from photo storage: it’s not just about capacity, it’s about sustained performance. When you’re working with photos, you typically open one file at a time, make your edits, and save. Your NAS handles these brief bursts of activity without breaking a sweat. Video editing, however, demands something entirely different—continuous, high-speed data streams flowing between your NAS and editing workstation.
Modern video files are massive. A single minute of 4K ProRes 422 HQ footage weighs in around 5GB. If you’re shooting in 6K or 8K RAW formats, multiply that several times over. But size alone isn’t the challenge. When you scrub through your timeline or play back multiple layers of footage with effects applied, your editing software needs to read hundreds of megabytes per second consistently. Any hiccup in that data stream translates directly to dropped frames and stuttering playback.
Most consumer NAS devices fail this test because they’re optimized for occasional file access, not sustained throughput. That cute 2-bay NAS with a single gigabit Ethernet connection might peak at 115 MB/s theoretically, but real-world performance often sits closer to 70-80 MB/s—barely enough for basic 4K editing, and nowhere near sufficient for multicam projects or higher resolutions. Add in network storage bottlenecks, and you’ll quickly understand why your workflow grinds to a halt.
RAID Configurations That Actually Work for Video
RAID 0: Maximum Speed, Maximum Risk
RAID 0 is the speed demon of storage configurations, and it’s exactly what it sounds like: zero redundancy, maximum performance. Here’s how it works: your data gets split (striped) across two or more drives simultaneously, so when you’re reading or writing a large 4K video file, multiple drives work together like a relay team instead of one drive doing all the heavy lifting.
In real-world testing, RAID 0 can deliver read speeds approaching 400-500 MB/s with just two consumer-grade drives, nearly doubling single-drive performance. For reference, editing 4K ProRes footage requires around 200-250 MB/s, so RAID 0 easily handles even demanding codecs with headroom to spare.
But here’s the critical caveat: RAID 0 offers absolutely no data protection. If a single drive fails, you lose everything on the entire array. It’s like building a bridge where removing any plank collapses the whole structure.
So when does RAID 0 make sense? Think of it as a high-performance workspace, not a filing cabinet. It’s perfect for scratch disks where your editing software stores temporary render files and cache data. Many professionals use RAID 0 for active project files they’re currently editing, while simultaneously backing up that footage to a redundant array like RAID 5 or RAID 10.
The golden rule: never use RAID 0 as your only copy of anything you can’t afford to lose. Treat it as a performance booster for disposable or duplicated data, and you’ll enjoy the speed benefits without the sleepless nights.
RAID 5: The Tempting Middle Ground
RAID 5 sits in that sweet spot on paper: you get decent storage efficiency, some speed improvements, and protection against a single drive failure. I’ll be honest, when I first set up my NAS for video work, RAID 5 looked like the perfect compromise between cost and performance. Reality had other plans.
Here’s what the spec sheets don’t emphasize: RAID 5 has a significant write penalty. Every time you save a file, the system needs to calculate and write parity data across multiple drives. For photographers working with still images, this barely registers. But when you’re rendering a 4K timeline or saving frequent autosaves from Premiere Pro, those write penalties add up quickly. You’ll notice sluggish performance during exports, and scrubbing through footage can feel like dragging through mud.
The rebuild times are genuinely scary. When a drive fails (and eventually, one will), rebuilding a RAID 5 array with today’s multi-terabyte drives can take days. During that reconstruction period, your array is vulnerable, your performance tanks, and if another drive fails, you’re looking at potential data loss. With the intense workload of video editing already stressing your drives, this risk becomes very real.
That said, RAID 5 isn’t completely useless for video work. If you’re primarily working with proxy files and only accessing your NAS for archive storage or occasional retrieval, it can work acceptably. Some editors use RAID 5 arrays specifically for holding finished projects and camera originals while editing happens on faster local storage.
RAID 6: Better Protection, Similar Performance Issues
RAID 6 takes the dual-parity approach, meaning it can survive two simultaneous drive failures instead of just one. For photographers and videographers with irreplaceable client footage, this extra safety net sounds like a dream come true. And honestly, if data protection is your absolute priority, RAID 6 delivers peace of mind that RAID 5 simply can’t match.
But here’s the reality check: RAID 6 amplifies the same performance bottlenecks that make RAID 5 problematic for video editing. Think of it this way: instead of calculating one parity block per write operation, your NAS now calculates two. That’s double the computational overhead, which means even slower write speeds during timeline scrubbing and rendering.
In real-world terms, editing 4K footage from a RAID 6 array often feels sluggish during multicam sequences or when applying effects in real time. The read performance remains decent for simple playback, but the moment you’re making changes and the system needs to write data, you’ll notice the lag. One videographer I spoke with described it as “constantly waiting for the system to catch up with my creative flow.”
If your primary concern is archival storage rather than active editing, RAID 6 makes excellent sense. But for your working video library, the performance trade-offs typically outweigh the added redundancy benefits.
RAID 10: The Video Editor’s Sweet Spot
If you’re looking for the goldilocks zone between performance and safety, RAID 10 is where most video editors eventually land. It combines the speed advantages of RAID 0 with the redundancy of RAID 1, giving you the best of both worlds without the complexity of RAID 5 or 6.
Here’s how it works: RAID 10 stripes data across mirrored pairs of drives. In a four-drive setup, drives are paired (1+2, 3+4), with each pair mirrored for redundancy. Your data is then striped across these pairs for speed. The result? You can lose one drive from each mirrored pair and still keep working without missing a beat. That’s real peace of mind when you’re juggling client deadlines.
The speed is tangible. You’ll typically see read speeds around 400-500 MB/s with four spinning drives, or over 1,000 MB/s with SSDs. For editing 4K footage, that translates to smooth timeline scrubbing and faster exports. The downside? You’re sacrificing 50 percent of your total capacity for redundancy. With four 4TB drives, you get 8TB usable space.
Let’s talk costs. A basic RAID 10 setup with four 4TB drives runs around $400-500 for the drives alone, plus your NAS enclosure. It’s not cheap, but consider what you’re getting: speed that keeps pace with your creative flow and protection that lets you sleep at night.
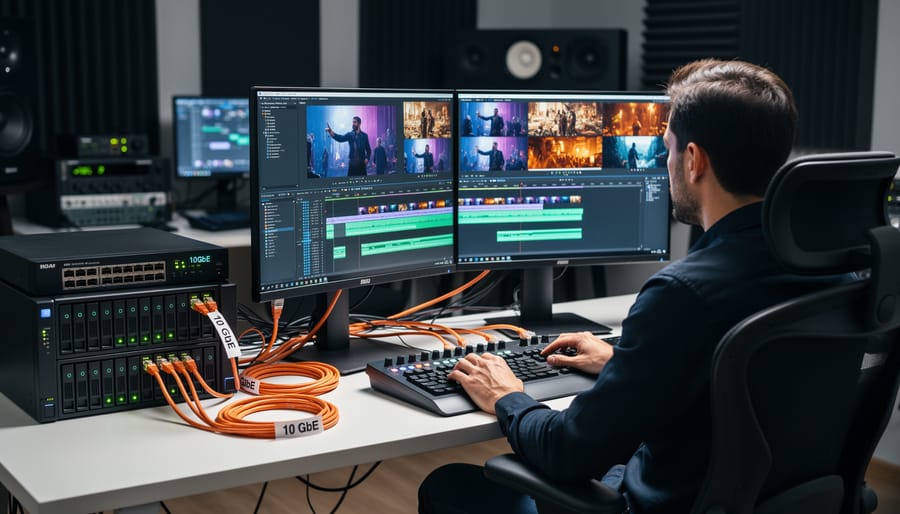
Professional photographer Sarah Chen runs exactly this configuration in her studio. She uses a Synology DS920+ with four 4TB Western Digital Red drives in RAID 10. “I edit client sessions directly off the NAS,” she explains. “Between the RAW photo bursts and 4K video clips, I need both speed and security. RAID 10 delivers both without making me choose.”
NAS Hardware Specifications That Matter
Network Connectivity: Your Hidden Bottleneck
Here’s the thing about network speeds that catches most video editors off guard: even if your NAS has blazing-fast drives, your network connection might be strangling your entire workflow.
Let’s break down the math. Standard Gigabit Ethernet (1GbE) theoretically delivers 125MB/s, but in the real world, you’re looking at around 110MB/s after overhead. That sounds reasonable until you realize that 4K footage at 400Mbps requires about 50MB/s of sustained bandwidth. Add color grading, effects processing, and timeline scrubbing, and you’re quickly bumping against that ceiling. Try working with 4K 60fps or 6K footage, and 1GbE becomes a slideshow.
This is where understanding network storage performance becomes critical. Upgrading to 10 Gigabit Ethernet transforms the experience, delivering real-world speeds around 1000-1100MB/s. Suddenly you can edit multiple 4K streams simultaneously or work with RED or ProRes RAW files without constantly waiting for frames to catch up.
But what about 2.5GbE as a middle ground? It’s an attractive option, offering theoretical speeds of 312MB/s and real-world performance around 280MB/s. For single-stream 4K editing in H.264 or H.265, it works beautifully and costs significantly less than 10GbE. However, if you’re working with high-bitrate codecs like ProRes 422 HQ (which can hit 220MB/s for 4K) or planning to future-proof for 8K, you’ll outgrow it quickly.
The practical takeaway? Match your network to your footage. Shooting 1080p or basic 4K? 2.5GbE handles it. Working with multicam 4K or professional codecs? Invest in 10GbE now and save yourself the frustration later.
CPU and RAM: When They Actually Matter
Here’s the truth about NAS processors: for most video editing workflows, you’re not actually editing on the NAS itself. You’re pulling files to your workstation, editing locally, then sending them back. In this scenario, the NAS CPU barely breaks a sweat, and even budget processors handle the task fine.
The CPU only becomes critical when you’re asking your NAS to do heavy lifting beyond simple file storage. Running Plex Media Server and transcoding 4K footage on the fly? You’ll want at least an Intel processor with Quick Sync or equivalent hardware transcoding capabilities. Planning to use the NAS for thumbnail generation, automated backups, or running virtual machines alongside your storage duties? That’s when processing power matters.
RAM requirements follow similar logic. For basic file serving to a single editor working with proxy workflows, 4GB of RAM suffices. However, if you’re running multiple services, working with cache-heavy applications, or supporting several simultaneous users accessing the same project files, consider 8GB as your baseline and 16GB for professional multi-user environments.
Here’s where RAM genuinely shines: caching frequently accessed files. Many NAS systems use RAM to cache small files and metadata, which dramatically speeds up browsing through folders packed with video clips. If you’re constantly scrubbing through dozens of files looking for specific shots, that extra RAM translates to noticeably snappier performance. For most solo editors working straightforward projects, though, spending extra on maxed-out RAM provides diminishing returns compared to investing in faster drives or better network infrastructure.
Drive Selection: SSD vs HDD Reality Check
Let’s address the elephant in the room: all-SSD NAS arrays sound amazing in theory, but they’ll make your wallet weep. A 4-bay NAS filled with 4TB enterprise SSDs will run you around $2,000-$2,500 just for drives, versus $400-$500 for equivalent HDDs. That’s a tough pill to swallow, especially when you’re already investing in cameras and lenses.
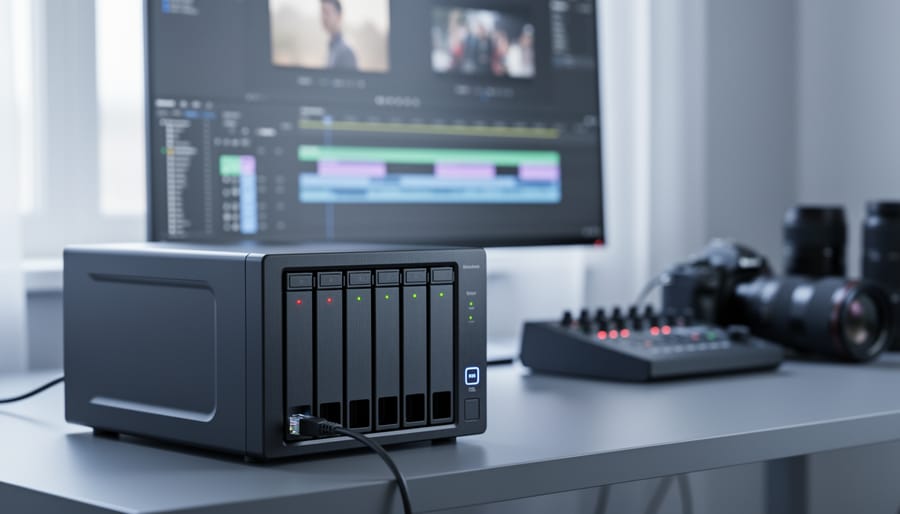
Here’s the practical reality most working photographers and videographers use: hybrid storage. Think of it as creating storage neighborhoods where your drives live based on how often you need them. Active projects that you’re currently editing sit on SSDs for lightning-fast access, while completed work migrates to HDDs for cost-effective long-term storage.
A sensible hybrid setup might look like this: two 2TB SSDs in RAID 1 for active projects ($400-$500 total), paired with four 8TB HDDs in RAID 10 for your archive ($800-$1,000). You’re looking at roughly $1,300-$1,500 total versus $4,000+ for an all-SSD equivalent capacity. That’s a massive difference that you could redirect toward better lighting or another lens.
The workflow becomes straightforward. When you start a new project, it lives on the SSD pool. Once you’ve delivered the final files and know you won’t be making immediate revisions, you move it to HDD storage. Most NAS systems make this process simple with scheduled tasks or drag-and-drop operations.
For truly cold storage like annual archives or projects you rarely revisit, consider exploring archival storage solutions that offer even better cost-per-terabyte ratios. The key is matching storage speed and cost to how frequently you actually access the data.
Optimizing Your Workflow for NAS-Based Editing
The Proxy Workflow Advantage
Here’s the reality: even the fastest NAS setup can struggle with 4K footage if you’re feeding raw files directly into your timeline. That’s where proxy workflows become your secret weapon, transforming a modest NAS into a surprisingly capable editing powerhouse.
Think of proxies as lightweight stand-ins for your high-resolution footage. You edit using these smaller files, and your software automatically relinks to the originals for final export. This approach works beautifully with NAS storage because you’re dramatically reducing the bandwidth demands between your network and editing station.
Creating proxies is straightforward in most editing applications. In DaVinci Resolve, right-click your clips in the media pool, select “Generate Proxy Media,” and choose ProRes Proxy or H.264 at quarter resolution. Premiere Pro users can navigate to the Ingest Settings during import and select “Create Proxies” with your preferred codec. Final Cut Pro X handles this through transcoding to ProRes Proxy during import.
The key is establishing a consistent workflow. Store both your original files and proxies on your NAS in clearly labeled folders. I recommend a structure like “Project/Originals” and “Project/Proxies” to keep everything organized. When you’re ready for color grading, which demands precision similar to your color accuracy workflow for photography, simply toggle back to the original high-resolution files.
The beauty of this system? You can edit 4K or even 6K footage over a basic gigabit connection without stuttering playback. Your timeline stays responsive, your creative flow remains uninterrupted, and your NAS doesn’t need enterprise-grade specifications to deliver professional results.
Cache and Scratch Disk Strategy
Here’s the reality that trips up most editors: your NAS might be perfect for storing finished projects, but it’s usually the wrong place for cache files and scratch disks. These temporary files need lightning-fast read/write speeds, and even a well-configured NAS over 10GbE can’t match a local NVMe SSD.
The golden rule is simple: keep active cache files local. Configure your editing software to place cache, preview renders, and scratch disks on your computer’s internal SSD, not the NAS. In Premiere Pro, navigate to Preferences and set your Media Cache Database and Files to a dedicated folder on your fastest local drive. DaVinci Resolve users should do the same in Preferences under Media Storage. This single change can eliminate stuttering playback and sluggish timeline scrubbing.
For preview renders, there’s a smart middle ground. Generate proxies and render previews locally while actively editing, then archive them to the NAS when you’re done for the day. This keeps your local drive from filling up while maintaining speed when it matters most.
One workflow trick I’ve found invaluable: create a dedicated local scratch drive separate from your system drive. A 1TB or 2TB NVMe SSD costs under $150 and provides breathing room for multiple projects. When a project wraps, move those cache files to the NAS alongside your footage, or simply delete them since cache can always be regenerated from your source files.
Think of it this way: your NAS is the library where everything lives permanently, but your local SSD is the workbench where the actual crafting happens.
Project Organization for Network Performance
Smart file organization makes the difference between a NAS that hums along and one that grinds to a halt. Create a dedicated project folder structure on your NAS with separate subfolders for footage, proxies, renders, and exports. Keep all assets for a single project together rather than scattered across multiple network locations, which forces your editing software to make separate network requests that multiply latency.
For backup workflows, schedule your main backups during off-hours rather than while editing. Many NAS systems let you create snapshots that don’t interrupt your work, giving you versioning protection without performance hits. Consider a tiered approach: working files stay on the NAS for active projects, completed projects move to slower archival storage, and critical footage gets an offsite copy as part of your long-term backup strategy. This keeps your high-performance NAS focused on what it does best while protecting your work comprehensively.
Real-World NAS Setup Examples
Budget-Conscious: The 1080p/4K Hobby Setup
For hobbyists editing 1080p footage or occasional 4K projects, a 4-bay NAS offers the sweet spot between performance and budget. You’re looking at a total investment of around $800-1,200, including the NAS unit and drives.
A reliable option is pairing a Synology DS423+ or QNAP TS-464 with four 4TB or 6TB drives in RAID 5. This configuration gives you decent redundancy (you can lose one drive without data loss) while maintaining 12-18TB of usable storage. Expect real-world transfer speeds of 80-110 MB/s over a gigabit network connection, which comfortably handles 1080p editing and proxies for 4K work.
The reality check: you won’t be scrubbing through raw 4K footage at full resolution directly from this setup. Instead, you’ll create proxy files on your computer’s SSD for smooth editing, then reconnect to the high-resolution files for final rendering. It’s an extra step, but one that works seamlessly in Adobe Premiere Pro or DaVinci Resolve.
This configuration shines for photographers branching into video work. You get ample space for both RAW photos and video projects, automated backups, and the ability to access files from multiple devices. It’s not a professional video editing powerhouse, but for weekend projects and growing your skills, it’s genuinely capable without the professional price tag.
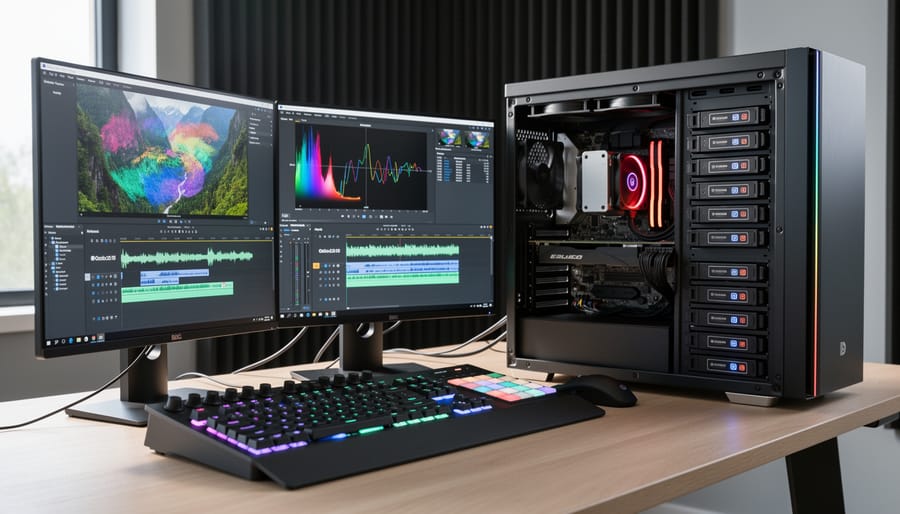
Professional: The 4K/6K Workhorse
This is where most professional photographers serious about video will land. You’re shooting 4K regularly, occasionally 6K, and you need a system that keeps pace without making you mortgage your house.
The foundation here is 10GbE connectivity—and yes, you’ll feel the difference immediately. Scrubbing through 4K timelines becomes responsive rather than painful. Your NAS should support RAID 10, which gives you both speed and redundancy by mirroring striped drives. You’ll need four drives minimum, but the performance-to-safety balance is ideal for professional work.
Here’s a smart approach: implement hybrid storage using NVMe SSD cache drives in your NAS. This dramatically accelerates your active projects without requiring all-SSD storage. Keep current projects on the cached volume, and archive completed work to the HDD array. A typical setup might include four 8TB enterprise HDDs in RAID 10, plus dual NVMe SSDs for caching.
Budget around $2,500-3,500 for the NAS itself, and don’t forget workstation power protection—power failures during transfers can corrupt footage. Real-world performance should deliver sustained reads around 800-1000 MB/s, enough for multiple 4K streams or single 6K playback with color grading.
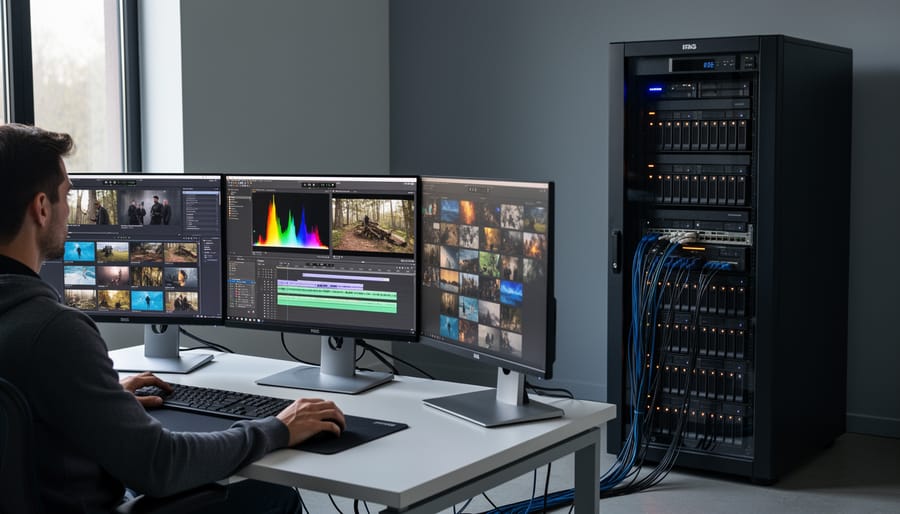
High-End: The Multi-User Studio Solution
When you’re running a professional studio with multiple editors simultaneously working on 6K or 8K RED, ARRI, or Sony Venice footage, consumer-grade solutions simply won’t cut it. You need enterprise infrastructure that treats video editing like the mission-critical operation it is.
The foundation here is all-flash arrays rather than spinning drives. Think systems like the QNAP TBS-h574TX or Synology FlashStation FS6400, which use NVMe SSDs in RAID 10 configurations. These deliver sustained read speeds exceeding 3,000 MB/s, enough for four editors working on 8K RAW footage simultaneously without stuttering. Yes, the upfront cost is significant—we’re talking $15,000 to $40,000—but the productivity gains justify it when editor downtime costs you billable hours.
Network infrastructure matters just as much as the storage itself. Deploy 10GbE or even 25GbE connections with redundant network paths. Use link aggregation so if one connection fails, your team doesn’t lose work. Consider setting up separate networks: one for editorial traffic and another for backups and archive operations.
Real-world example: A commercial production house in Los Angeles runs dual Synology FlashStations in high-availability mode. If one unit fails, the other takes over automatically within seconds. They’ve experienced zero unplanned downtime in two years. For studios where every hour counts, that reliability becomes priceless.
Troubleshooting Common NAS Video Editing Issues
Even with a well-configured NAS setup, video editors occasionally run into hiccups that can slow down their workflow. The good news? Most of these issues have straightforward solutions once you understand what’s causing them.
Dropped frames during playback are probably the most frustrating problem you’ll encounter. If your 4K timeline starts stuttering, first check your network utilization. Open your computer’s activity monitor and look at network speeds while playing back footage. Are you actually getting the throughput you expect? I’ve seen countless situations where someone set up a 10GbE connection but forgot to configure jumbo frames, effectively limiting their connection to a fraction of its potential speed. Enable jumbo frames (typically 9000 MTU) on both your NAS and computer’s network adapter to see immediate improvement.
Connection drops or timeouts often point to network switch issues rather than the NAS itself. If you’re using a managed switch, verify that energy-efficient Ethernet features are disabled. These power-saving modes can introduce latency that wreaks havoc during intensive editing sessions. Also check that your switch supports the full bandwidth you need. A basic gigabit switch will bottleneck a 10GbE connection, creating intermittent performance problems.
When you experience slow file browsing or project loading despite good playback performance, your NAS cache settings might need adjustment. Many NAS systems aggressively cache data, which helps with sequential reads but can slow down random access patterns common when opening projects with hundreds of clips. Try increasing the file cache allocation in your NAS settings, particularly if you’re working with proxy workflows.
For Mac users experiencing beach balls when accessing NAS shares, SMB protocol tweaking often helps. Navigate to your SMB connection settings and try disabling packet signing, which adds overhead without much benefit on private networks. Similarly, ensure you’re using SMB3 rather than older protocols, as it handles video files more efficiently.
Finally, if you notice performance degradation over time, schedule regular disk scrubbing and monitor your RAID array health. Degraded drives don’t always fail immediately but will gradually slow down your entire array, making every operation feel sluggish.
Setting up a proper NAS and RAID configuration for video editing isn’t just a technical upgrade, it’s a fundamental shift in how you work. When your storage infrastructure matches your workflow demands, editing transforms from a frustrating exercise in waiting for progress bars to a fluid creative process where your only limitation is imagination, not bandwidth.
The right setup is genuinely an investment that pays dividends every single day. Think about it: even saving just 15 minutes per editing session adds up to hours each week, days each month. That’s time you could spend shooting, refining your craft, or actually enjoying the creative work you love instead of staring at spinning wheels and stuttering playback.
But here’s the thing, there’s no universal “best” configuration. A wedding photographer editing 4K footage once a week has completely different needs than a content creator churning out daily videos. Someone working solo can optimize differently than a small studio with multiple editors accessing shared libraries. Generic advice often misses these crucial distinctions.
Take an honest look at your specific workflow. How much footage do you typically work with? What resolution and codec? Do you need simultaneous multi-user access? What’s your realistic budget, both now and for future expansion? These questions matter more than chasing the latest benchmarks.
Ultimately, the goal isn’t building the most impressive storage system on paper. It’s creating infrastructure that disappears into the background, letting you focus entirely on the creative decisions that actually matter. When your tools work seamlessly, you stop thinking about technical limitations and start thinking purely about the story you’re telling.