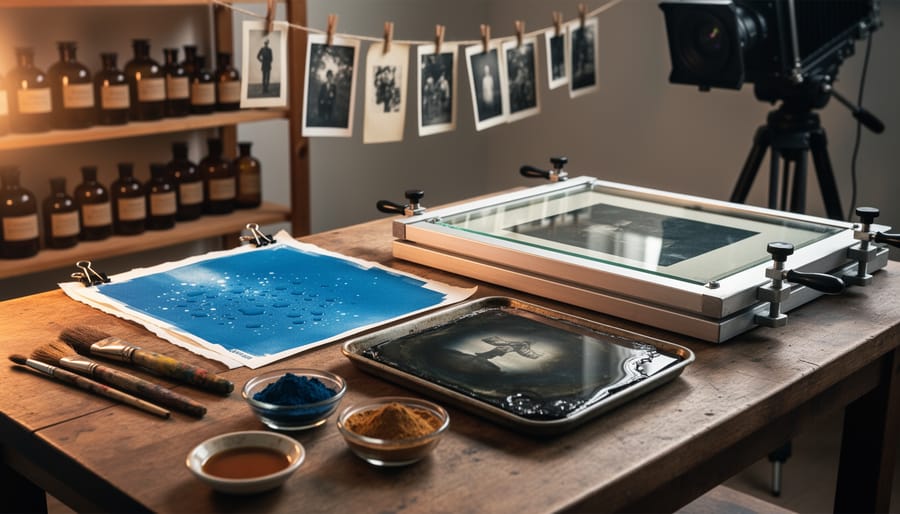
Explore cyanotypes to create distinctive cyan-blue prints using simple chemistry and sunlight, requiring only light-sensitive solution, paper, and UV exposure—a perfect entry point that produces results in minutes without needing a traditional darkroom. Master wet plate collodion for glass or metal plates that capture extraordinary detail and tonal range reminiscent of Civil War-era photography, though this demands dedicated workspace, precise chemical handling, and shooting while the plate remains wet. Experiment with gum bichromate printing to layer pigmented emulsions that deliver painterly, customizable color control impossible through traditional darkroom printing, allowing you to build depth through multiple coats and achieve truly unique artistic effects.
Alternative processes liberate you from standard photographic conventions, connecting you directly to chemistry, light, and materials in ways digital workflows cannot replicate. These historical techniques—ranging from accessible options like lumen prints made by placing objects on expired photo paper in sunlight, to complex methods like platinum printing that requires expensive metals and exacting ratios—offer distinct aesthetic qualities and hands-on engagement that transforms your relationship with image-making. Whether you’re drawn to the unpredictable organic textures of botanical prints, the archival permanence of carbon transfer, or the luminous depth of salt prints, alternative processes reward patience and experimentation with one-of-a-kind photographs that carry the evidence of their making in every fiber and chemical reaction.
What Are Alternative Processes in Film Photography?
Alternative processes in film photography refer to techniques that fall outside the conventional methods most photographers use today. While standard film development typically involves commercial C-41 or black-and-white processing followed by enlarger-based printing, alternative processes encompass a diverse range of historical and experimental techniques that produce unique, often unpredictable results.
These methods earned the “alternative” label simply because they’re not the mainstream approach. When Kodak and other manufacturers standardized film processing in the 20th century, older techniques like cyanotypes, platinum prints, and gum bichromate printing became specialized rather than standard practice. Similarly, as digital photography dominated the market, even traditional home film developing became less common, pushing experimental processes further into niche territory.
What distinguishes these techniques is their hands-on, often unpredictable nature. Instead of feeding film through automated machines or clicking “develop” in software, you’re mixing chemistry from scratch, coating paper with light-sensitive emulsions, and controlling every variable manually. A cyanotype, for example, uses iron salts and sunlight to create distinctive blue-toned images on paper or fabric. Wet plate collodion requires coating glass plates with emulsion and exposing them while still wet, just as photographers did in the 1850s.
The beauty of alternative processes lies in their imperfections. Each print becomes truly one-of-a-kind, bearing the marks of your hands, environmental conditions, and creative choices. These aren’t just nostalgic throwbacks; they’re legitimate artistic tools that offer textures, tones, and characteristics impossible to replicate digitally. For photographers seeking to slow down, experiment, and create tangible art with distinctive visual qualities, alternative processes open entirely new creative possibilities.
The Most Accessible Alternative Processes to Start With
Cyanotype: The Blue Print That Started It All
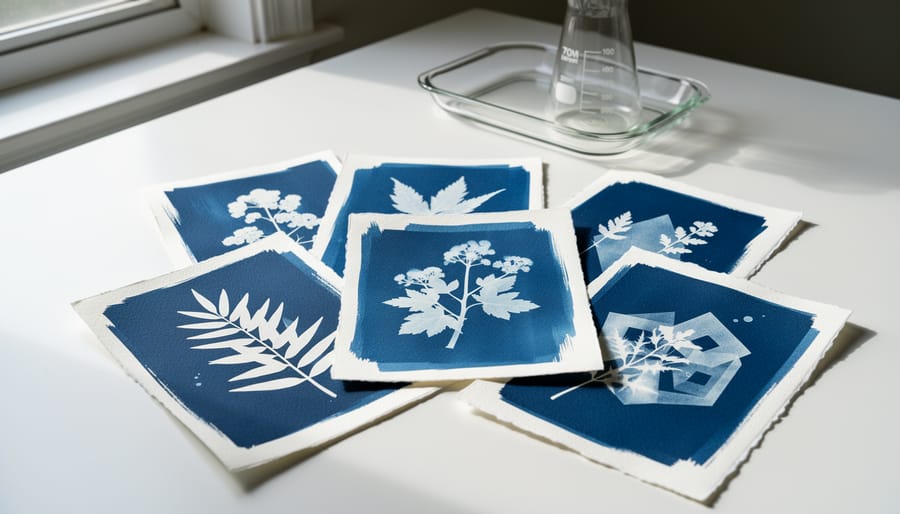
If you’ve ever seen architectural blueprints or vintage botanical prints with that distinctive Prussian blue color, you’ve encountered cyanotype. Developed in 1842 by Sir John Herschel, this process has endured because it’s beautifully simple and remarkably forgiving, making it the perfect entry point into alternative photography.
The magic happens with just two chemicals: ferric ammonium citrate and potassium ferricyanide. Mix them together, brush the solution onto paper or fabric, let it dry in darkness, then place your negative or objects directly on the surface. Expose it to UV light (sunlight works perfectly), and wherever light hits, those iron compounds transform into that iconic cyan-blue color. A simple water rinse reveals your final image, with unexposed areas washing away to leave white.
What makes cyanotype so beginner-friendly is its room for error. The chemicals are relatively safe, inexpensive, and stable. Your coating can wait days before exposure, and the process forgives slight variations in timing or mixing ratios. You can even create photograms by placing objects like leaves, lace, or keys directly on the sensitized surface, requiring no camera or darkroom at all.
This accessibility doesn’t mean limited creativity. Contemporary artists push cyanotype far beyond those blue tones through toning techniques that shift colors to browns, purples, or even near-blacks, proving that sometimes the oldest processes offer the freshest possibilities.
Van Dyke Brown Printing: Rich Tones Without the Complexity
Once you’ve mastered cyanotypes, van dyke brown printing is a natural next step. Named after 17th-century Flemish painter Anthony van Dyck (the spelling variations are historical quirks), this process produces gorgeous chocolate-brown to warm sepia tones that evoke vintage photographs from the mid-1800s.
The chemistry is slightly more involved than cyanotype, using ferric ammonium citrate, tartaric acid, and silver nitrate. That silver component makes van dyke prints more light-sensitive than cyanotypes, which means you’ll get shorter exposure times—typically 5 to 15 minutes depending on your light source. You’re basically building on everything you learned with cyanotypes: coating paper, contact printing with negatives, and washing. The main difference is that van dyke requires a fixing bath (sodium thiosulfate, the same fixer used in traditional darkroom work) to stabilize the image.
The results are worth the extra effort. Van dyke prints have rich midtones and deep shadows that give portraits and landscapes an elegant, timeless quality. Many photographers appreciate that the process offers more neutral density range than cyanotypes, making it ideal for images with subtle gradations. The warm tones also pair beautifully with textured papers, adding another dimension to your creative possibilities.
Lumen Prints: Creating Images Without a Darkroom
Lumen printing offers one of the most accessible entry points into alternative photography processes—no darkroom, no chemicals, and no special equipment required. This technique uses expired black and white photographic paper exposed directly to sunlight, creating unique images through a simple contact printing process.
The beauty of lumen printing lies in its unpredictability. Unlike traditional darkroom work where you develop the latent image, lumen prints reveal themselves during exposure as the sun’s UV rays interact with the aged silver halides in expired paper. Place objects like flowers, leaves, feathers, or transparent materials directly onto the paper, weight them down with glass, and leave everything in direct sunlight for anywhere from 15 minutes to several hours. The paper transforms before your eyes, developing rich colors ranging from deep purples and burgundies to golden yellows and soft pinks.
Here’s the catch: these colors are fugitive. Once you bring your print inside, it will continue to change. Some photographers embrace this ephemeral quality, documenting their prints through scanning or photography. Others stabilize them using a brief fixer bath, though this typically shifts the colors toward sepia tones. The process rewards experimentation—different paper brands, varying sun intensity, and exposure times all produce distinct results, making each lumen print truly one-of-a-kind.
Advanced Alternative Processes Worth the Investment
Wet Plate Collodion: The Victorian Era’s Instagram
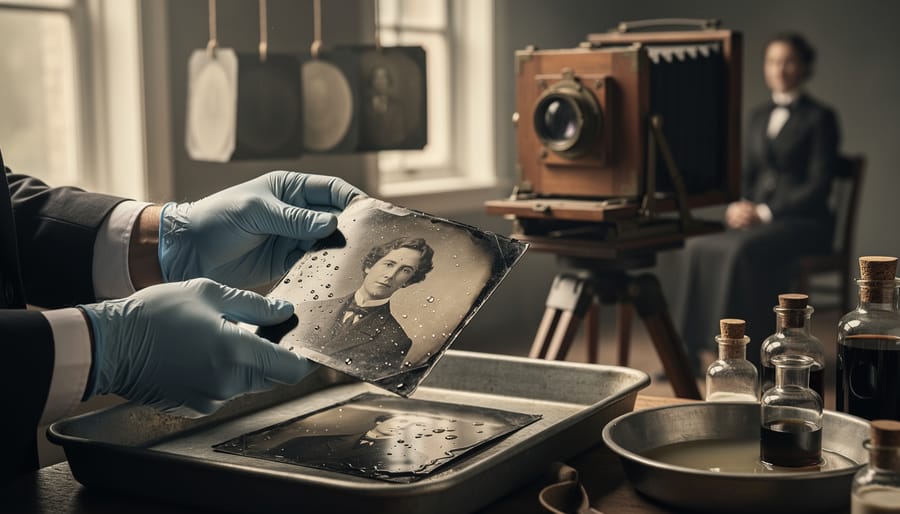
If you thought modern photography was instantaneous, wet plate collodion will flip that script entirely. Invented in 1851 by Frederick Scott Archer, this process demands you prepare, shoot, and develop your image while the plate is still wet—typically within a 10-15 minute window. Miss that deadline, and your chemistry dries into an unusable mess.
The process begins by coating a glass or metal plate with collodion (a syrupy mixture of nitrocellulose dissolved in ether and alcohol), then sensitizing it in a silver nitrate bath. You’ve got to load this dripping plate into your camera immediately, make your exposure, and rush back to develop it before the collodion dries. It’s equal parts chemistry experiment and performance art.
What you get in return is absolutely worth the chaos: images with incredible sharpness, ethereal quality, and that signature Victorian aesthetic—slightly dreamlike with rich blacks and creamy highlights. The unpredictability adds character too. Light leaks, uneven coating, and chemical streaks become features rather than flaws, giving each plate a handcrafted authenticity that digital filters can only imitate.
Equipment-wise, you’ll need specialized gear: collodion and silver nitrate solutions, developing trays, a portable darkbox (since you’re working wet), and preferably a large format camera. Many practitioners build portable darkrooms or convert vans into mobile studios for location work.
Why the renaissance? In our age of infinite digital captures, wet plate’s demanding nature forces intentionality. Each shot matters. You’re creating unique objects, not files. Plus, there’s genuine magic in watching your subject appear in the developer tray minutes after capture—Instagram could never.
Platinum and Palladium Printing: Archival Quality at a Price
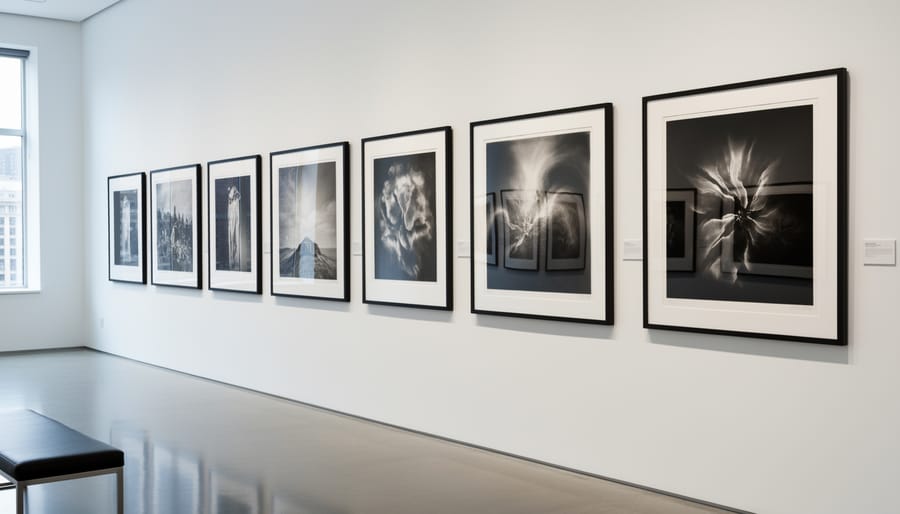
If you’re seeking the absolute pinnacle of photographic permanence and tonal beauty, platinum and palladium printing represents the gold standard—quite literally, given the precious metals involved. These processes produce images with an extraordinary range of delicate grays and a matte surface quality that feels almost three-dimensional. Museums favor platinum prints because they’re among the most stable photographic objects ever created, with properly made prints lasting centuries without fading.
The catch? This archival excellence comes at a premium. Platinum and palladium are expensive metals, making each print cost anywhere from $10 to $50 or more in materials alone, depending on paper size. You’ll hand-coat specialized watercolor paper with light-sensitive solutions containing these noble metals, then contact-print your negative under UV light. The chemistry demands precision—temperature, humidity, and coating consistency all affect your results significantly.
For photographers committed to fine art printing or museum-quality portfolios, the investment proves worthwhile. The learning curve is steep, requiring careful measurement and consistent technique, but the resulting prints possess an unmatched elegance. Many practitioners start with palladium, which costs slightly less than platinum while offering similar characteristics. Consider taking a workshop before diving in independently—the material costs make trial-and-error learning particularly expensive, and experienced guidance helps you avoid costly mistakes while mastering this refined alternative process.
Gum Bichromate: Where Photography Meets Painting
Gum bichromate printing transforms photography into something closer to watercolor painting, making it perfect if you’re drawn to both mediums. This process uses gum arabic mixed with watercolor pigments and light-sensitive dichromate salts, giving you exceptional control over your image’s final appearance.
What makes gum printing particularly exciting is the ability to choose any color you want. Unlike cyanotypes that give you blue or Van Dyke browns that deliver sepia tones, gum bichromate lets you work with the entire watercolor spectrum. You can print a portrait in rich burgundy, a landscape in olive green, or experiment with unexpected color choices that shift your image’s emotional impact.
The real magic happens through multi-layer printing. You coat your paper with the gum mixture, expose it through a large-format negative, wash away the unexposed areas, then repeat the process with different colors. Each layer adds depth, tonal range, and complexity. Some practitioners build up ten or more layers to achieve painterly effects with incredible subtlety.
This technique requires patience and careful registration between layers, but it rewards you with images that genuinely blur the line between photography and fine art painting. The soft edges and hand-crafted quality make each print uniquely yours.
What You Actually Need to Get Started
Setting Up Your Alternative Process Workspace
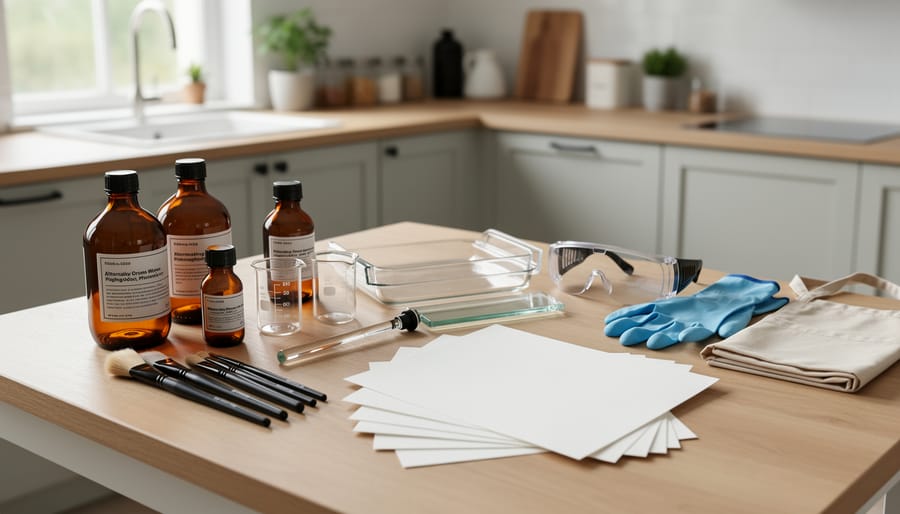
The beauty of alternative processes is that you don’t need a professional lab to get started. Many techniques can be practiced right at your kitchen table, though some require more dedicated space. Your workspace needs depend on which processes you’re exploring.
For contact printing methods like cyanotypes or Van Dyke browns, a spare room or corner of your home works perfectly. You’ll need a flat surface for coating paper, access to running water for processing, and a window or UV light source for exposing. Good ventilation is essential when working with chemicals, even relatively safe ones. Open windows and a small fan can make a significant difference in air quality.
If you’re planning to work with more involved techniques like wet plate collodion or platinum printing, consider setting up a darkroom with proper ventilation systems. These processes often require dim amber safelighting rather than complete darkness.
Temperature control matters too. Most alternative processes work best between 65-75°F. Your workspace should also accommodate safe chemical storage, away from food preparation areas and out of reach of children and pets. Start simple and expand your setup as you discover which processes capture your interest.
Chemical Safety and Handling Essentials
Working with alternative photographic processes means handling chemicals that demand respect and careful attention. While these techniques are wonderfully rewarding, proper safety practices aren’t optional—they’re essential for protecting yourself and those around you.
Start with the basics: always work in a well-ventilated space. Open windows, use fans, or invest in a small exhaust system if you’ll be printing regularly. Many alternative processes use chemicals that release fumes, and fresh air circulation makes a significant difference. A bathroom with an exhaust fan can work for occasional printing sessions, though a dedicated workspace is ideal for regular practice.
Personal protective equipment is non-negotiable. Nitrile gloves protect your skin from chemical absorption—and unlike latex, they resist most photographic chemistry. Safety goggles prevent splashes from reaching your eyes, particularly when mixing powdered chemicals or handling acids. An apron or old clothing you don’t mind staining rounds out your basic protection. The principles of chemical handling apply whether you’re developing film or coating paper with liquid emulsion.
Disposal matters too. Never pour photographic chemicals down the drain without checking local regulations. Silver-based processes require special handling, and many communities offer hazardous waste collection days. Some chemicals can be neutralized before disposal—research each specific process you’re using. Keep accurate labels on all containers, store chemicals away from food preparation areas, and maintain a first-aid kit nearby. These simple precautions let you focus on creativity rather than worry.
Common Mistakes and How to Avoid Them
Even experienced photographers encounter hiccups when starting with alternative processes. The good news? Most problems have straightforward solutions once you know what to look for.
Uneven coating ranks among the most common frustrations. When applying emulsion to paper or fabric, streaks and puddles often appear if you work too slowly or use too much material. The fix is simpler than you might think: use a foam brush or glass rod, work quickly in one continuous motion, and apply thinner layers than you initially imagine necessary. Think of it like spreading butter on warm toast—a light, swift touch works better than heavy pressure. Practice on scrap paper first, and always prepare more coating solution than needed so you’re not rushing to stretch the last drops.
Exposure miscalculations plague nearly everyone at first. Unlike modern photography where instant feedback guides you, alternative processes require patience and record-keeping. Start by creating a test strip with varying exposure times—say, 2, 4, 8, and 16 minutes—on a single piece of coated paper. Document everything: the UV index that day, your light source distance, and paper type. Build a personal exposure notebook rather than relying solely on general guidelines you find online, since variables like humidity and coating thickness significantly affect results.
Chemical contamination might seem mysterious until you realize how easily it happens. A single drop of fixer in your developer tray can ruin an entire batch. The solution involves discipline: use separate trays clearly labeled for each chemistry, never reuse measuring cups between chemicals, and always wash your hands between steps. Consider using different colored trays for different chemicals as a visual reminder.
Temperature fluctuations also cause unpredictable results. Many alternative processes perform best at specific temperatures, typically around 68-70 degrees Fahrenheit. If your workspace varies wildly, invest in an inexpensive thermometer and adjust chemical dilutions accordingly. Cold chemistry works slower; overly warm solutions can fog your materials.
Remember, every mistake teaches you something valuable about the process. Keep notes, stay patient, and don’t discard those “failed” prints—they often reveal beautiful accidents worth exploring further.
Why Photographers Choose Alternative Processes Today
In an era where smartphone cameras can capture 108-megapixel images and AI can perfect every pixel, why would photographers choose to work with processes invented over a century ago? The answer lies in what these techniques offer that digital cannot replicate.
For many practitioners, alternative processes provide aesthetic qualities impossible to achieve digitally. Cyanotypes deliver that distinctive Prussian blue that feels both vintage and contemporary. Van Dyke browns create rich, warm sepia tones with an organic quality that digital filters only approximate. Each print carries unique imperfections—subtle variations in coating, unexpected chemical reactions, and delicate edge effects that make every image one-of-a-kind.
Beyond aesthetics, these processes demand a slower, more intentional approach to image-making. There’s no spray-and-pray shooting when you’re coating paper by hand and exposing under UV light. You carefully consider composition, pre-visualize the final image, and commit to each frame. This meditative quality attracts photographers exhausted by the instant gratification cycle of digital photography.
“Working with alternative processes forces me to slow down,” explains workshop instructor Maria Chen, who teaches platinum printing. “You can’t rush chemistry. You learn patience, and that mindset carries over into how you shoot.”
The hands-on nature of analog photography through alternative processes also provides a tangible connection to photographic history. You’re using the same basic chemistry and techniques as pioneers like Anna Atkins and Edward Curtis. There’s something profound about placing your hands in the same chemical baths they used, experiencing photography as craft rather than just button-pushing.
For photographers seeking creative differentiation in an oversaturated visual world, alternative processes offer a genuine point of distinction that algorithms cannot easily replicate.
The beauty of alternative processes lies not in perfection, but in the unexpected. Those uneven tones, light leaks, and unique textures aren’t flaws—they’re signatures that make each print unreplicably yours. Digital photography offers precision and control, but these historical techniques provide something entirely different: tangible connection to your materials, slower creative rhythms, and results that feel genuinely handmade.
Start small. Choose one technique that resonates with your interests, gather the essential supplies, and embrace the learning curve. Your first cyanotype might be blotchy, your initial wet plate collodion might have coating streaks, but each attempt teaches you something invaluable about chemistry, light, and patience.
Join online communities, visit workshops when possible, and document your experiments. Keep detailed notes about exposure times, chemistry ratios, and environmental conditions—this practical record becomes your personalized guide. Remember, even contemporary masters of these processes still encounter surprises and happy accidents.
Alternative photography isn’t about abandoning modern tools; it’s about expanding your creative vocabulary with techniques that connect you to photography’s roots while producing imagery impossible to replicate digitally.