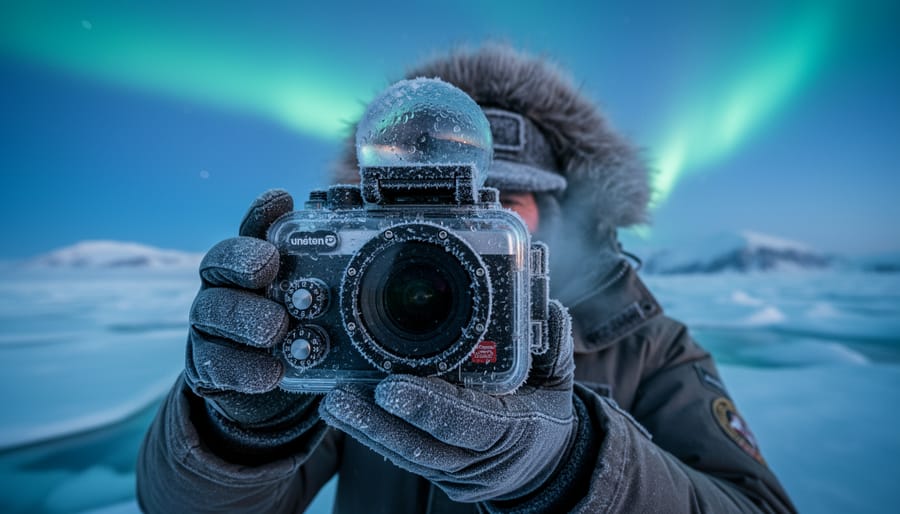
Seal your camera in a waterproof housing before stepping onto the ice—moisture from your breath alone can freeze internal components within minutes at -30°C. Arctic environments demand this level of protection because standard gear warranties don’t cover cold-weather failures, and a single condensation incident can destroy thousands of dollars in equipment. Keep spare batteries inside your jacket against your body heat, as lithium-ion cells lose up to 40% of their capacity in sub-zero temperatures, often dying completely before you capture your first shot.
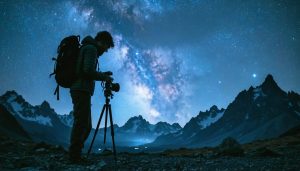
Master environmental photography in extreme conditions by understanding how polar light behaves differently than anywhere else on Earth. The Arctic offers unprecedented photographic opportunities—endless golden hours during summer, dancing auroras in winter, and crystalline landscapes that seem otherworldly—but only if your equipment survives long enough to capture them.
The challenge extends beyond simple cold protection. You’re working in an environment where the sun barely rises for months, where white snow tricks your camera’s meter into underexposing every frame, and where a momentary equipment failure means missing unrepeatable wildlife encounters with polar bears or Arctic foxes. Professional expedition photographers spend years learning these lessons through expensive mistakes.
This guide cuts through that learning curve by combining gear survival tactics with creative techniques specific to polar regions. You’ll discover how to prevent lens fogging during temperature transitions, why your autofocus fails on flat white landscapes, and which camera settings actually work when photographing the Northern Lights. Whether you’re planning your first trip to Svalbard or refining your approach for commercial Arctic work, understanding these fundamentals separates compelling polar portfolios from folders full of disappointing, underexposed ice shots.
The Brutal Reality: What Extreme Cold Does to Your Camera
Battery Life in Subzero Temperatures
Cold weather is ruthless on camera batteries. When temperatures plummet below freezing, you can expect your battery life to drop by 40-60% compared to normal conditions. At temperatures around -20°F (-29°C), some batteries may only deliver 20-30% of their rated capacity. This happens because chemical reactions inside batteries slow dramatically in the cold, reducing their ability to generate power.
Lithium-ion batteries, which power most modern cameras, handle cold better than older nickel-based batteries, but they still struggle. The good news is that battery performance returns once they warm up again, so keeping spares in an inside pocket close to your body heat makes a huge difference. I’ve witnessed photographers go through four or five batteries during a single Arctic morning shoot when they’d normally use just one.
Consider bringing at least triple your usual battery count for Arctic shoots. Battery grips that hold two batteries simultaneously can help since the camera’s internal heat may keep them slightly warmer. Some photographers also use USB-powered battery warmers or hand warmer packets wrapped around spare batteries. Remember, a “dead” cold battery often springs back to life once you’ve warmed it against your body for a few minutes.
Condensation: The Silent Killer
Condensation poses one of the most insidious threats to your camera gear in arctic conditions, and it strikes precisely when you think you’re safe. Here’s what happens: after shooting in minus 30-degree temperatures, you step into your heated tent or vehicle. Within minutes, warm air meets your frozen equipment, and moisture forms everywhere—inside your lens, on your sensor, within your camera body’s electronic components.
I learned this lesson the hard way during a northern lights shoot in Yukon. After an hour outside, I walked into a warm cabin and immediately pulled out my camera to review shots. Water droplets appeared instantly across my LCD screen and viewfinder. Worse, moisture had seeped into places I couldn’t reach.
The damage isn’t always immediate. Water on electronics can cause short circuits, while internal condensation creates fog that ruins image quality and potentially leads to mold growth. This same principle applies to all forms of extreme weather photography where temperature differentials exist.
The solution? Keep your gear sealed in your camera bag when transitioning between environments. Let it warm gradually, still enclosed, preventing that critical moment when cold surfaces meet warm, humid air.
Essential Camera Gear for Arctic Conditions
Camera Bodies That Can Take the Cold
Not all cameras are created equal when it comes to surviving Arctic conditions. The difference between a camera that works at -40°F and one that shuts down at 20°F can make or break your expedition.
The flagship professional bodies from major manufacturers consistently prove their worth in polar regions. The Nikon Z9 and Canon EOS R3 both carry operational temperature ratings down to -10°C (14°F), but real-world testing shows they perform reliably much colder. I’ve personally shot with the Z9 at -35°C without issues, though battery life does take a noticeable hit. Weather-sealing on these bodies goes beyond simple gaskets—we’re talking extensive protection at every button, dial, and port interface.
For those shooting DSLR systems, the Nikon D850 and Canon 5D Mark IV remain Arctic workhorses. Their proven mechanical shutters handle temperature swings better than some early mirrorless designs, though newer mirrorless bodies have largely closed this gap. The D850 particularly shines because its robust weather-sealing has been tested by polar researchers and wildlife photographers in Svalbard and Antarctica for years.
Sony’s A1 and A7R V deserve mention for mirrorless shooters, with operating specs down to -10°C. However, their smaller bodies cool faster, so extra insulation becomes critical. Many Arctic photographers wrap thin neoprene around the grip area for both warmth and additional protection.
The key specification to examine is the lower operational temperature limit in manufacturer specs, but take these with context. A camera rated to -10°C typically functions colder, but performance degrades gradually. Electronic viewfinders may lag, autofocus slows, and LCD screens become sluggish—annoying but usually not fatal to your shooting.
Lenses and Focal Lengths for Polar Landscapes
Choosing the right glass for Arctic conditions can make or break your polar photography experience. The extreme environment demands both optical excellence and practical considerations you might not face elsewhere.
For sweeping polar landscapes, a wide-angle lens in the 16-35mm range is essential. These focal lengths capture the vast, overwhelming scale of ice sheets and dramatic skies that define Arctic scenery. I’ve found that wider perspectives really convey the feeling of standing at the edge of the world, surrounded by endless white expanses. A 24-70mm zoom offers versatility when you need to compress distant elements or isolate specific features like ice formations.
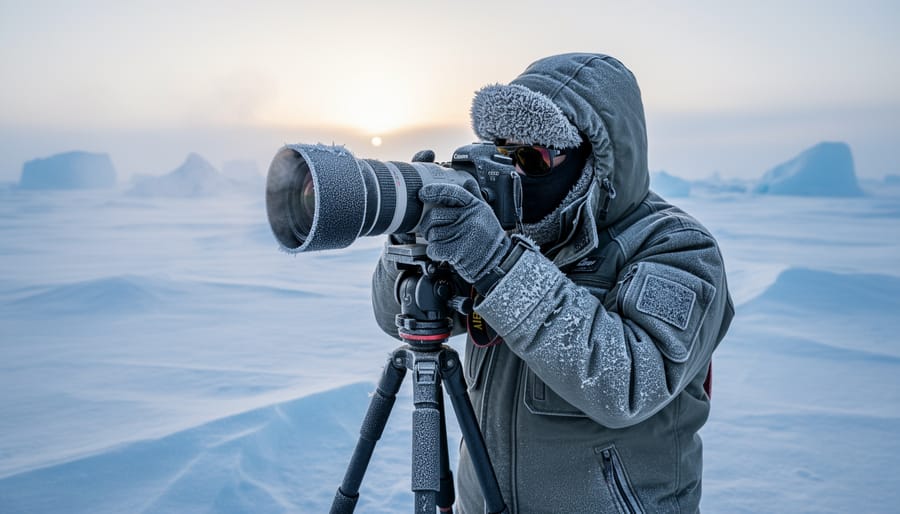
Telephoto lenses between 70-200mm or even 100-400mm become crucial for wildlife encounters and distant landscape details. Polar bears, Arctic foxes, and seabirds require safe shooting distances, making these longer focal lengths non-negotiable. Remember that wildlife photography in these regions often means working from a boat or at considerable distances for safety.
The cold presents unique technical challenges for lenses. Condensation is your enemy when moving between heated shelters and frigid outdoors. Always allow gear to acclimate gradually in a sealed camera bag before exposing it to temperature changes. Autofocus systems can slow down or fail in extreme cold, so practice manual focusing beforehand. Keep spare batteries warm, as cold drains them quickly, leaving even the best lens useless without power to operate focus motors.
Prime lenses often perform better than zooms in extreme cold due to simpler mechanical systems, though modern weather-sealed zooms have proven remarkably reliable. Whatever you choose, test your gear in cold conditions before your expedition.
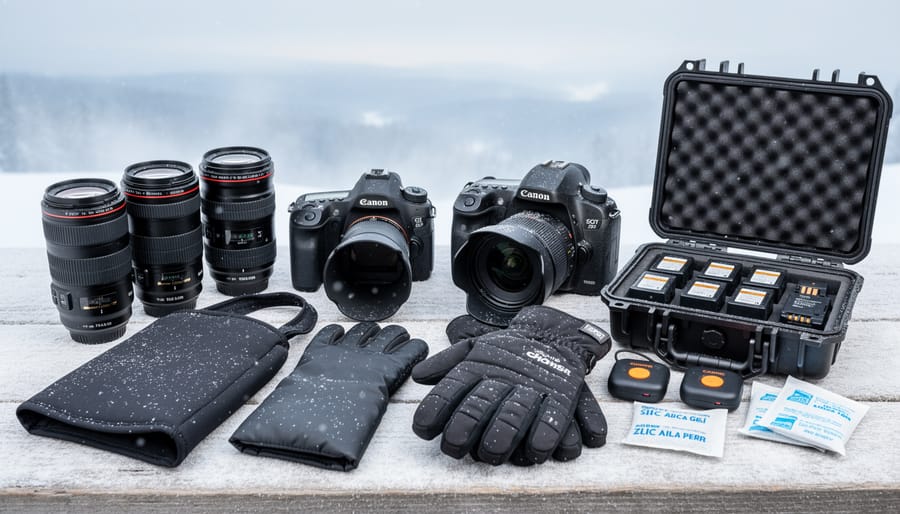
Critical Accessories You Can’t Skip
Cold weather is merciless to photography gear, so protecting your investment requires specific accessories. Battery warmers or insulated pouches are essential—lithium batteries can lose 40% of their capacity in freezing temperatures. Keep spare batteries in an inner jacket pocket close to your body heat, rotating them throughout the shoot.
Anti-fog lens cloths treated with special coatings prevent the frustrating condensation that occurs when moving between temperature extremes. Pack several, as they’ll become your best friends during long shooting days.
Memory card reliability matters more in extreme cold. Choose cards rated for low temperatures and bring double your usual capacity—you can’t pop into a store for replacements on the tundra. Professional photographers often carry weather-sealed card cases with built-in desiccant packets.
Hard-shell protective cases designed for extreme conditions aren’t optional. Look for cases with pressure equalization valves and customizable foam interiors. These cases protect against impacts during travel and create a stable environment when moving gear between heated spaces and sub-zero conditions, preventing dangerous condensation buildup on sensitive electronics.
Protecting Your Gear from Arctic Extremes
The Body Heat Strategy
Your body generates enough heat to keep batteries functional in subzero temperatures, and smart photographers have been using this natural advantage for decades. The key is keeping spare batteries in an inside pocket, close to your torso, where your core body heat maintains them at operational temperatures. I learned this the hard way during a Svalbard shoot when my camera died after just twenty shots—the battery indicator showed full charge, but the cold had rendered it useless. The battery warmed up in my jacket and worked perfectly again within minutes.
Layer your clothing strategically with this in mind. Wear a base layer, then add a mid-layer with zippered chest pockets for easy battery access without exposing yourself to wind chill. Some photographers swear by small hand warmer packets tucked alongside batteries in their pockets, though your body heat alone usually suffices.
For memory cards and other small components, keep them in the same warm zone. When swapping batteries or cards, work quickly to minimize exposure time. Consider a battery grip that holds two batteries—while one works in the camera, the other stays somewhat insulated by the grip itself. Rotate batteries regularly: when one drops below fifty percent, swap it with a warm spare and tuck the cool one inside your jacket to recharge its temperature, not its power.
Managing Temperature Transitions
Temperature transitions pose one of the biggest threats to your camera gear in arctic conditions. When you bring cold equipment into a warm tent or vehicle, condensation forms instantly on every surface—inside and outside your camera body and lenses. This moisture can freeze when you head back out, potentially causing serious damage.
Here’s the protocol I follow religiously: Before entering a warm space, seal your camera and lenses in gallon-sized ziplock bags while they’re still cold. Squeeze out excess air and seal tightly. This creates a barrier where condensation forms on the outside of the bag rather than on your gear. Leave equipment sealed for at least two hours after bringing it inside—longer for larger items like telephoto lenses.
For overnight stays, I keep my camera gear in an unheated vestibule or vehicle rather than bringing it into heated sleeping areas. This minimizes temperature swings and protects against condensation cycles. Similar strategies apply when protecting camera gear in extreme environments of any kind.
When heading back outside, reverse the process. Remove gear from bags only after it’s had time to gradually cool down in a transition space. Rush this step, and you’ll deal with fogging that can take hours to clear in subzero temperatures.
Emergency Field Repairs and Workarounds
When your camera freezes up at negative thirty degrees, you need solutions now, not later. The most common issue you’ll face is a frozen shutter that refuses to fire. If this happens, bring the camera inside your parka against your body for five to ten minutes. Your body heat will gradually warm the mechanism without causing the condensation damage that happens with rapid temperature changes.
Unresponsive LCD screens are another frequent problem in extreme cold. While the screen may appear dead or sluggish, your camera is likely still functioning. Switch to the optical viewfinder if available, or learn to navigate your camera’s menu system blind. Practice this before your trip so muscle memory takes over.
For batteries that die prematurely, keep spares in an interior pocket close to your skin. When one dies, swap it with a warm one and pocket the cold battery. Often, once it warms up, it’ll regain partial charge for later use.
If your lens refuses to focus due to frozen lubricants, switch to manual focus mode. The focus ring might feel stiff, but gentle persistence usually works better than force. In a pinch, gaffer tape wrapped around barrel seams can prevent moisture infiltration, though this is a last resort rather than a preventive measure.
Mastering Arctic Light: Timing and Technique
The Extended Magic Hour
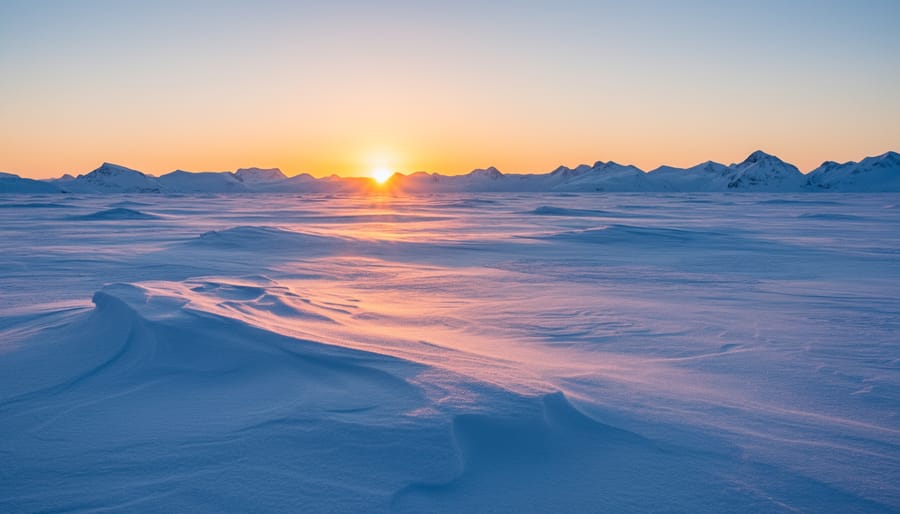
In the Arctic, conventional wisdom about golden hour goes out the window. During summer months, the sun barely dips below the horizon, creating a prolonged twilight that photographers dream about. This extended magic hour can last for hours, giving you unprecedented flexibility to compose shots without racing against fading light. Conversely, winter brings its own challenges and opportunities, with perpetual twilight or darkness punctuated by brief windows of dim sunlight.
The quality of Arctic light differs dramatically from temperate zones. The low sun angle means light travels through more atmosphere, producing softer shadows and rich, warm tones even at midday. In summer, plan your shooting schedule around the sun’s circular path across the sky. The best light often occurs when the sun is lowest, typically between 10 PM and 2 AM, depending on your latitude. During spring and autumn equinoxes, you’ll experience more traditional golden hours but with extended duration.
Color temperature shifts dramatically with seasons and time of day. Summer twilight hovers around 8,000-12,000K, creating intensely blue tones that require white balance adjustments. Winter light, filtered through ice crystals and snow, can range from 6,000K to 15,000K. Set your camera to RAW format for maximum post-processing flexibility when mastering unique lighting conditions like these.
Consider bracketing your exposures and white balance settings. The reflective properties of snow and ice can fool your camera’s metering system, so checking your histogram frequently becomes essential for proper exposure in these extreme environments.
Exposure Challenges in Snow and Ice
Snow and ice present one of the trickiest exposure scenarios you’ll encounter in photography. The problem is simple: all that brilliant white surface reflects an enormous amount of light back at your camera, and your light meter doesn’t know you’re photographing snow. It just sees bright, and tries to render it as middle gray, leaving you with dingy, underexposed images that look more like concrete than pristine arctic landscapes.
The solution is exposure compensation, and in snow environments, you’ll typically need to overexpose by 1 to 2 stops. I usually start at +1.3 and adjust from there based on conditions. Overcast days with fresh snow might need the full +2 stops, while partially shaded scenes require less compensation.
Your histogram becomes your best friend here. In high-key arctic scenes, you want that histogram pushed firmly to the right side without actually clipping. That’s the sweet spot where snow looks white and bright but still retains texture and detail. Check your histogram religiously after every few shots, especially when light conditions change.
The real challenge is preserving detail in both the brightest snow and any darker subjects, like a person or wildlife. Modern cameras handle this better than ever, but you’ll still hit limits. When possible, shoot in RAW format to maximize your recovery options in post-processing. If you notice blown highlights in critical areas, dial back your compensation slightly or consider graduated neutral density filters for scenes with extreme tonal ranges between sky and snow.
Composition in the Arctic Wilderness
Finding Subjects in a White Desert
The challenge of photographing in the Arctic isn’t just surviving the cold—it’s finding something to photograph when everything looks white. But here’s the secret: even the most featureless landscape contains visual anchors if you know where to look.
Start by hunting for texture. Snow isn’t uniform—wind creates subtle patterns, called sastrugi, that catch light beautifully during golden hour. These rippled formations add depth and dimensionality to otherwise flat compositions. Similarly, ice pressure ridges create dramatic diagonal lines that draw the viewer’s eye through your frame.
Shadows become your best friend in monochromatic environments. During the low-angle Arctic sunlight, even small features cast long, dramatic shadows that reveal landscape contours invisible at midday. A single ice formation can transform into a compelling subject when its shadow stretches across pristine snow.
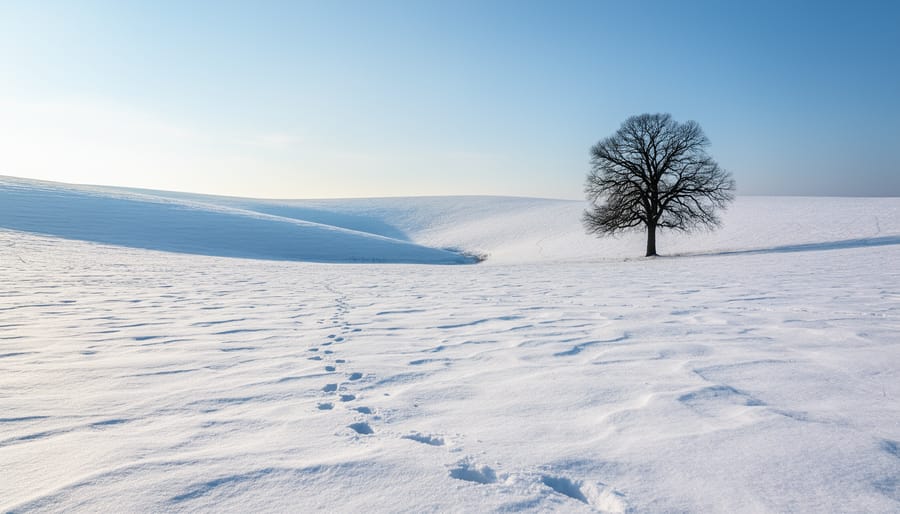
Wildlife obviously stands out against white backgrounds, but don’t overlook smaller details. Bird tracks, fox trails, or even a patch of exposed tundra vegetation creates visual interest and tells a story about life in extreme conditions.
Human elements work exceptionally well too. A bright-colored tent, a distant researcher, or expedition equipment provides both scale and a splash of color that makes compositions pop. These elements also help viewers connect emotionally with the harsh environment you’re documenting, transforming abstract white landscapes into relatable scenes.
Using Scale and Perspective in Polar Environments
The Arctic presents a unique challenge when it comes to scale. Without familiar reference points like trees or buildings, vast ice sheets and endless tundra can appear flat and dimensionless in photographs. The key to conveying this breathtaking enormity lies in strategic composition.
Including a human figure, your expedition tent, a snowmobile, or even wildlife creates an instant sense of scale that transforms your image. A tiny dot of a person against a towering glacier tells the story far more effectively than the glacier alone. Position these elements thoughtfully in your frame—often placing them in the lower third emphasizes the landscape’s dominance while maintaining visual interest.
Atmospheric perspective becomes your ally in polar environments. The thin, clear Arctic air creates unique layering effects where distant mountains and ice formations fade to lighter tones. This natural phenomenon helps separate foreground from background, adding depth to otherwise monochromatic scenes. Look for opportunities when fog, blowing snow, or low clouds create graduated tones that guide the viewer’s eye through your composition.
Similar principles apply to mountain photography in extreme conditions, where scale and atmospheric effects play crucial roles. Shoot during optimal light when shadows emphasize texture and dimension on snow and ice. Side-lighting particularly enhances the contours of pressure ridges and sastrugi, transforming potentially bland snowscapes into dramatic, three-dimensional subjects that truly capture the Arctic’s magnificent scale.
Personal Survival Meets Photography
Operating Cameras with Arctic Gloves
Operating a camera in arctic conditions presents a genuine challenge: your hands freeze quickly, yet precise control is essential for composition and settings. I’ve watched photographers struggle with this balance until finding their ideal glove system.
The layered approach works best for most situations. Start with thin merino wool or synthetic liner gloves that allow finger dexterity for adjusting dials and focusing rings. When you’re not actively shooting, slip insulated mitts over the liners. This system lets you expose your hands briefly for critical adjustments while maintaining core warmth. I recommend keeping chemical hand warmers in the mitts between shots.
Trigger mitts offer an elegant middle ground. These specialized mittens feature a fold-back flap that exposes your thumb and index finger, giving you enough control for basic operations without fully removing the mitt. They’re particularly useful during wildlife photography when you need to react quickly but can’t risk completely cold hands.
For touchscreen cameras and phones, invest in gloves with conductive fingertips. Not all touch-compatible gloves work equally well in extreme cold, so test them beforehand. Some photographers prefer attaching adhesive screen protectors designed for stylus use, which respond better to gloved touches.
Keep a spare pair of liner gloves in an inside pocket. If your primary pair gets wet from snow or condensation, having dry backups prevents the miserable choice between frostbite and missing shots.
Recognizing When to Stop Shooting
Your best photograph isn’t worth your fingers or your life. Learning to recognize when conditions have become too dangerous is perhaps the most crucial skill in Arctic photography.
Hypothermia’s early warning signs are subtle but critical. Watch for uncontrollable shivering, fumbling hands that struggle with camera controls, confusion about settings you normally adjust without thinking, and slurred speech when communicating with companions. Frostbite appears as numbness in extremities, waxy-looking skin, or a burning sensation that paradoxically feels cold. Your nose, cheeks, ears, fingers, and toes are most vulnerable.
The “rule of fives” provides a practical framework: in minus 30°C with moderate wind, exposed skin can develop frostbite in as little as five to ten minutes. Check your face and hands every five minutes, take warming breaks every thirty minutes, and never shoot alone for more than two hours without returning to heated shelter.
Establish decision points before you head out. Set specific temperature thresholds (like minus 40°C as an absolute limit), wind speed maximums, and predetermined turnaround times. If you’re debating whether it’s too cold, it probably is. Professional Arctic photographers often use the “two-thirds rule”: plan to use only two-thirds of your anticipated safe time outdoors, reserving one-third as a safety buffer for unexpected delays or worsening conditions. Your memory card can always accommodate more photos tomorrow, but frostbite is permanent.
Real-World Arctic Photography Scenarios
Let’s walk through some real situations you’ll encounter in the Arctic and how to handle them photographically. These scenarios reflect what actually happens when you’re out there, camera in hand, working in one of Earth’s most challenging environments.
Aurora photography presents unique timing challenges. You might wait hours in -30°C conditions, then suddenly have a five-minute window of incredible activity. Start with ISO 1600-3200, f/2.8 or wider, and 8-15 second exposures depending on aurora movement. Fast-moving auroras require shorter exposures to maintain definition. I learned this the hard way when my first attempts at 20-second exposures turned vibrant curtains into blurry green smudges. Keep your camera on a tripod with a remote release, and have spare batteries in your inner jacket pocket. Switch them out every 15 minutes because even fresh batteries drain quickly in extreme cold.
Wildlife encounters demand different approaches. Photographing polar bears from a safe distance requires telephoto lenses, typically 400mm or longer. Use shutter speeds above 1/1000s to freeze movement, especially if you’re shooting from a moving zodiac where camera shake compounds the challenge. For Arctic foxes and reindeer that tolerate closer proximity, a 70-200mm works beautifully. The key consideration is always lighting. The low Arctic sun creates long shadows and extreme contrast. Expose for highlights on white animals and be prepared to recover shadow detail in post-processing.
Expedition documentation tells broader stories beyond singular subjects. Here’s where your wide-angle lens earns its keep. Capture camp setups, team interactions, and environmental context using f/8-f/11 for depth of field. These narrative images benefit from including human elements for scale and emotional connection. A researcher collecting ice cores or a guide navigating pressure ridges adds powerful context that pure landscape shots cannot convey.
Environmental storytelling requires patience and planning. Documenting ice formations, glacial calving, or climate change evidence means returning to locations multiple times. Bracket your exposures when shooting bright ice against darker water or sky. The dynamic range often exceeds what single exposures can capture, even with modern sensors. Include elements that communicate scale and change. Photographing the same glacier from identical positions across seasons creates compelling before-and-after narratives that resonate with viewers far beyond simple beauty shots.
Arctic photography stands as one of the most demanding yet rewarding pursuits in the photographic world, requiring you to balance meticulous technical preparation with genuine artistic vision. Success in these frozen landscapes doesn’t come from gear alone or talent alone, but from the intersection of both.
Everything we’ve covered, from protecting your equipment with cold-weather housings and backup batteries to understanding the unique light qualities of polar regions, forms the foundation of a successful Arctic shoot. Your camera and lenses are only as effective as your preparation allows them to be. Remember that backup systems aren’t optional in environments where equipment failure could mean missing once-in-a-lifetime shots or worse, compromising your safety.
Beyond the technical considerations, Arctic photography offers something profound: the chance to document one of Earth’s most pristine and vulnerable ecosystems. This privilege comes with responsibility. Respect wildlife distances, follow leave-no-trace principles, and consider the environmental impact of your presence. The landscapes you photograph today may look dramatically different in coming decades, making your images not just art but historical documentation.
Yes, Arctic photography demands significant investment in specialized gear, extensive planning, and physical endurance in harsh conditions. But standing before an ice field under the aurora, or capturing the raw power of a polar landscape, you’ll understand why photographers return to these extremes again and again. The Arctic doesn’t just test your skills; it transforms your perspective on what photography can achieve and the stories it can tell.