Shoot a series of the same subject at different step intervals—start with your calculated distance, then photograph at half that distance and double that distance. Compare the resulting stacks side-by-side in your editing software to see where detail breaks down or overlap becomes excessive. This simple test reveals whether your math matches your real-world needs far better than any formula alone.
Document your aperture, focal length, and magnification ratio for each successful test. Keep a simple spreadsheet or notebook entry showing which settings produced sharp results for different subject types—flowers need different approaches than insects or jewelry. These records become your personal reference library, eliminating guesswork on future shoots and saving hours of trial-and-error in the field.
Use focus stacking calculators as starting points, not gospel. Online tools provide mathematically correct step distances, but they can’t account for your specific lens characteristics, sensor resolution, or how much depth overlap you prefer in your workflow. Run calculator outputs through physical testing with subjects similar to what you typically photograph.
Examine your stacked images at 100 percent magnification in problem areas—edges, fine details, and areas of maximum depth. Inconsistent sharpness, halo artifacts around objects, or visible banding between focus planes signal that your step distance needs adjustment. Most photographers discover they need 20-30 percent more overlap than calculators suggest, particularly at higher magnifications where even minor focusing errors compound quickly.
The difference between mediocre and exceptional focus stacking lies in personalized testing. Generic advice breaks down when your specific equipment, subjects, and quality standards enter the equation.
What Is a Stacking Test (And Why It Matters More Than Your Gear)
Here’s the truth: a stacking test isn’t some advanced technique reserved for those with five-figure camera setups. It’s simply the process of photographing the same subject multiple times while systematically changing the distance between each shot—what we call the step size. Think of it as a dress rehearsal for your actual focus stack, where you discover the ideal spacing before committing to a hundred-frame sequence.
Why does this matter more than your gear? Because I’ve seen photographers with $8,000 macro setups produce unusable stacks, while someone with a budget camera and extension tubes nails it perfectly. The difference wasn’t the equipment—it was knowing their step size.
Here’s a real-world scenario that happens constantly: You’re photographing a butterfly wing at high magnification. You take 80 shots, spend 45 minutes processing them, and the final image shows visible banding—those annoying blurry stripes between sharp areas. Your camera was rock-solid, your lighting was perfect, and you were keeping your shots sharp throughout the sequence. The problem? You moved too far between frames, creating gaps in focus coverage that no software can fix.
Conversely, moving too little between shots creates its own problems. Take 200 frames when 50 would suffice, and you’ve quadrupled your processing time. Worse, some stacking software actually performs poorly when given excessive overlap, introducing artifacts that wouldn’t exist with proper spacing.
A stacking test solves this by letting you shoot the same subject three or four times with different step sizes—maybe 0.1mm, 0.2mm, and 0.3mm intervals. You process each test stack separately and compare the results. One will show banding. Another might be perfect. The third reveals you’re wasting time with unnecessary frames.
This fifteen-minute investment saves hours of frustration and teaches you something invaluable: the relationship between magnification, aperture, and step size for your specific setup. Once you know that your 90mm macro at f/8 needs 0.25mm steps at 1:1 magnification, you can confidently tackle any similar subject without guesswork.
The Step-Size Problem Nobody Warns You About
Here’s the frustrating reality most focus stacking tutorials gloss over: the most critical decision in your entire workflow happens before you even press the shutter button. How far should you move your focus point between each frame?
If you’ve ever taken a focus stack only to discover massive gaps in sharpness when you processed it, or conversely, shot 200 frames when 30 would have sufficed, you’ve experienced this problem firsthand. The step-size question isn’t just academic. Get it wrong, and you’ll either waste hours capturing redundant images or end up with unusable results that no stacking software can salvage.
The typical approach photographers take is surprisingly arbitrary. Many simply guess, moving the focus ring “a little bit” between shots and hoping for the best. Others pluck numbers from online forums or YouTube videos, using the same step size someone recommended for completely different equipment. I’ve seen photographers religiously use 2mm increments because that’s what worked in a tutorial, never questioning whether it applies to their own setup.
Here’s what makes this so tricky: the optimal step size isn’t universal. It changes dramatically based on your aperture, your focal length, your magnification ratio, and even your sensor size. A step size that works perfectly for shooting a flower at 1:1 magnification with a macro lens at f/8 will be completely wrong for stacking a landscape at f/11 with a wide-angle lens.
Think about it this way: at high magnification, your depth of field might be measured in millimeters. Move too far between frames, and you’ll create bands of blur that destroy the final image. At lower magnifications, being too conservative means capturing five times more frames than necessary, dramatically slowing your workflow and increasing processing time.
The solution isn’t to memorize different step sizes for every possible scenario. Instead, you need a systematic approach to determine what works for your specific situation.
How to Run Your First Stacking Test
Setting Up Your Test Subject
Your choice of test subject significantly impacts how well your stacking results translate to real-world shooting. Start by selecting a target that closely resembles what you actually photograph. If you shoot products, use a representative item with varied textures and depth. Macro photographers should choose subjects with similar detail characteristics to their typical work, whether that’s coins, flowers, or insects.
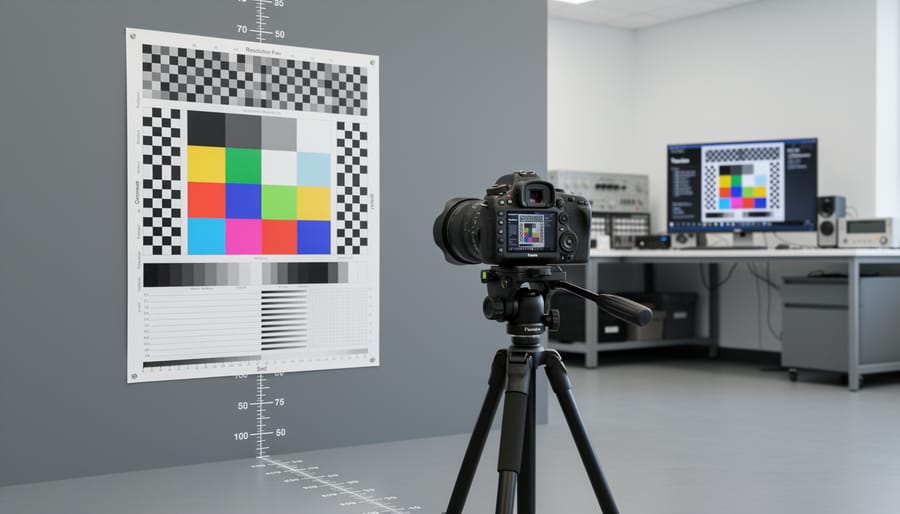
For initial testing, flat targets like printed charts work well because they provide clear, repeatable results that help you understand your lens characteristics. However, don’t stop there. Angled subjects reveal how your technique handles dimensional transitions, which is where many stacking issues become apparent. A simple book positioned at 45 degrees can expose problems that flat test target methodology might miss.
Position your subject at the working distance you’ll typically use. Testing at 6 inches when you normally shoot at 12 inches wastes time and produces misleading data. The depth of field behavior changes dramatically with distance, so matching real conditions matters.
Consider lighting setup considerations carefully. Use continuous lighting or flash settings identical to your actual workflow. Inconsistent lighting between test and application creates unnecessary variables. If you shoot outdoors with natural light, test near a window or outside during similar conditions.
Remember, the goal is gathering actionable data, not creating perfect images. Your test subject should challenge your technique enough to reveal potential problems without introducing complexity that makes results difficult to interpret.
Shooting the Test Sequence
Once you’ve chosen your subject and determined your theoretical step size, it’s time to shoot your test sequences. The goal here is to create multiple passes of the same subject using different step sizes, so you can directly compare the results and identify the sweet spot for your setup.
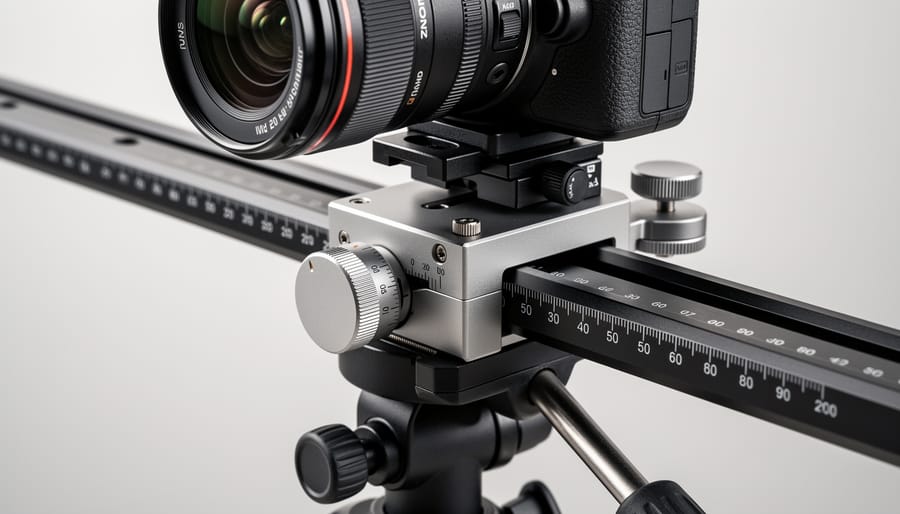
Start by setting up your camera on a sturdy tripod or rail system, ensuring everything is locked down tight. Any movement between sequences will invalidate your test, so stability is paramount. Choose your aperture and focal length for this session, then commit to those settings for all passes. Changing these variables mid-test defeats the entire purpose.
For your first sequence, use the step size calculated from your stacking calculator or online tool. Shoot enough frames to cover your subject from front to back, noting exactly how many images that requires. Next, shoot a second pass using half that step size, effectively doubling your frame count. Then shoot a third pass using 1.5 times your original step size, which will reduce your frame count. Document everything meticulously: write down the step size, number of frames, and any observations in a notebook or phone.
If you’re using a manual rail, consistency is critical. Move the rail the same distance for each frame, checking your measurement each time. It’s tedious, but accuracy matters more than speed during testing. For automated rails, program each step size as a separate sequence and let the rail do the work. This eliminates human error and makes testing remarkably faster.
Between each complete pass, review your images on the camera’s LCD to verify you’ve captured the entire depth range. Missing the front or back of your subject means starting over, and nobody wants that.
Evaluating Your Results
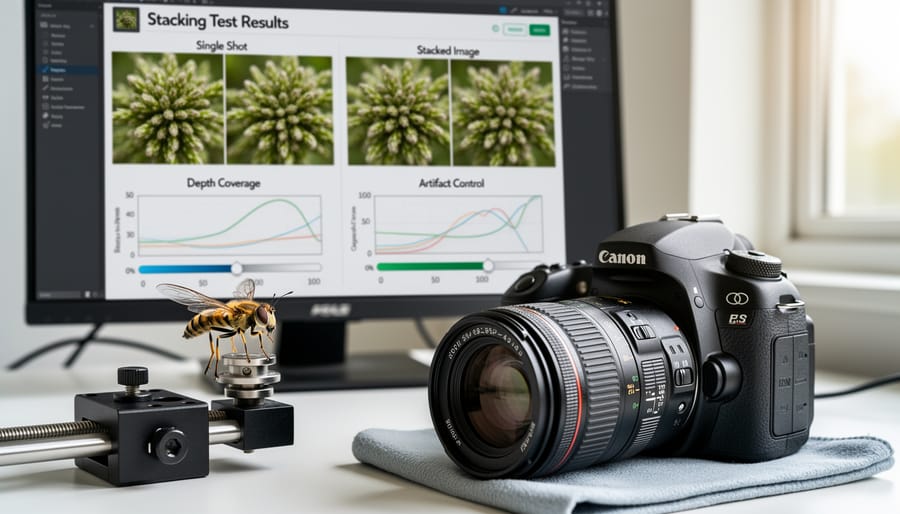
Once you’ve captured your test sequences, it’s time to examine the results and find your ideal overlap setting. This evaluation process is where you’ll discover exactly what works for your specific setup.
Start by importing all your test sequences into your focus stacking software. Process each sequence separately, keeping track of which overlap percentage produced which result. Most stacking programs will reveal problems immediately during the merge process, so pay attention to any warnings about insufficient overlap or alignment issues.
When examining your stacked images at 100% magnification, look for three key indicators. First, check for complete sharpness throughout the entire focus range. Zoom in on the transition zones between slices, especially in areas with complex textures or fine details. If you see soft spots or blurry bands where one focus slice should have met the next, your overlap was too conservative.
Second, watch for ghosting or halo artifacts around edges. These typically appear as subtle doubling or strange outlines and indicate either too much movement between shots or processing issues. While some ghosting relates to technique rather than overlap, excessive artifacts in high-contrast edges might suggest you’re using too many slices, giving the software more opportunities to make alignment errors.
Third, look for banding, those dreaded visible transitions that look like steps in sharpness. Banding means your overlap wasn’t sufficient to create smooth transitions between focus planes.
The sweet spot is the minimum overlap percentage that gives you complete coverage without artifacts. In my experience shooting products, I’ve found this often lands around 30-40% overlap for most setups, but your results will vary based on your specific equipment and magnification. Once you identify this percentage, you’ve got a reliable starting point for future shoots with similar subjects.
Step-Size Calculators: The Shortcut That Actually Works
What Information You’ll Need to Input
Before you can run an effective stacking test, you’ll need to gather some key specifications about your gear. Don’t worry—this information is easier to find than you might think, and understanding what each piece means will help you make smarter decisions in the field.
Start with your focal length, which you’ll find printed right on your lens barrel (like 100mm or 50mm). This directly affects your depth of field and how many images you’ll need to stack. Next is your aperture setting—the f-number you choose while shooting. Remember that smaller apertures (like f/16) give you more depth per shot but introduce diffraction, while larger apertures (like f/4) stay sharper but require more images to cover the same range.
Your camera’s sensor size matters too. Most cameras fall into categories like full-frame (36x24mm) or APS-C (approximately 24x16mm). Check your camera’s manual or manufacturer website if you’re unsure. This specification influences your actual depth of field since crop sensors effectively increase magnification.
For macro work, you’ll need either your magnification ratio (like 1:1 for life-size reproduction) or your working distance—how far the front of your lens sits from your subject. Your lens manual typically lists maximum magnification, and you can measure working distance with a simple ruler during setup.
Finally, decide on your overlap percentage. Most photographers use 25-50% overlap between frames to ensure smooth transitions. Higher overlap means more images but greater certainty that you won’t have gaps in focus. Starting with 30% overlap provides a good balance for testing purposes.
Understanding the Calculator’s Output
When you run your subject data through a focus stacking calculator, you’ll typically receive three key pieces of information that serve as your workflow foundation. The calculator will tell you the depth of field for each individual shot at your chosen settings, the recommended step size (how far to move the focus point between frames), and the total number of shots needed to cover your subject completely.
The depth of field per shot shows you how much of your subject will be acceptably sharp in a single frame. For example, if you’re shooting a 2-inch tall flower at f/8 with a macro lens, the calculator might indicate that each shot covers just 0.15 inches of depth. This immediately reveals why stacking is necessary and helps you visualize the challenge you’re tackling.
The recommended step size determines how you’ll advance through your focus range. You might see a suggestion to move 0.12 inches between shots. This figure typically includes a slight overlap, usually around 20-30%, to ensure no thin slices fall between your focused areas. Think of it like roof shingles: you overlap them to prevent gaps where rain might leak through.
The estimated shot count gives you a practical roadmap. If your calculator suggests 18 shots, you know roughly what you’re committing to before you start clicking. This helps with planning, especially when working with subjects that might move or lighting conditions that might change.
Here’s the crucial part: these numbers are educated starting points, not commandments carved in stone. Real-world factors like lens quality, aperture diffraction, magnification accuracy, and even how your specific stacking software handles alignment can all influence optimal settings. The calculator gets you in the ballpark quickly, but your stacking test reveals what actually works for your specific gear and shooting situation.
Why You Still Need to Test (Even With a Calculator)
Here’s the reality: focus stacking calculators are incredibly helpful tools, but they’re not crystal balls. They give you a scientifically sound starting point based on optical theory, but the real world of photography is messier than formulas can predict.
Calculators rely on theoretical models that assume your lens performs perfectly. But every lens has aberrations—slight imperfections in how it focuses light. These aberrations vary across the frame and at different apertures. A calculator might tell you that 15 slices will cover your depth, but if your lens has significant field curvature, you might need 18 or 20 slices to avoid soft spots in the final composite.
Then there’s diffraction. Most calculators account for this to some degree, but the sweet spot between maximizing depth of field and avoiding diffraction softness varies by lens and sensor combination. Your specific gear might perform differently than the theoretical baseline.
Stacking software adds another variable. Different programs handle slice alignment and blending with varying degrees of sophistication. Zerene Stacker and Helicon Focus, for example, use different algorithms that can produce noticeably different results from the same source images. The calculator doesn’t know which software you’re using or how you’ve configured its settings.
This is why adopting a systematic testing approach matters so much. Use the calculator to ballpark your slice count and step distance, then shoot a test stack with your actual subject, lens, and lighting conditions. Review the processed result at 100 percent magnification. Do you see gaps in sharpness? Reduce your step distance. Is everything sharp but processing took forever? You might be able to increase steps slightly and save time on future shoots.
Think of calculator results as your educated first guess, not your final answer.
Common Stacking Test Mistakes and How to Avoid Them
Even experienced photographers stumble into predictable traps when running stacking tests. The good news? Once you know what to watch for, these mistakes are easy to sidestep.
The most common error is testing at a different magnification than you’ll actually use in your final images. Let’s say you test your macro lens at 1:2 reproduction but then shoot at 1:1 in the field. The step distance that worked perfectly in your test will give you gaps in your actual image stack. Always test at the exact magnification ratio you plan to shoot. If you photograph insects at various magnifications, you’ll need separate tests for each working distance.
Another frequent misstep involves changing your lighting setup between the test and the actual shoot. Different light sources have varying depths of field characteristics due to how they interact with your aperture. If you test with continuous LED lighting but then shoot with flash, your overlap might not match expectations. Keep your lighting consistent, or better yet, test with the same setup you’ll use in production.
Many photographers also rush through tests without recording settings properly. You might remember that “around f/8 worked well,” but three weeks later when you’re in the field, that vague recollection won’t help. Document everything: aperture, focal length, magnification, subject distance, lighting type, and the step distances that produced clean results. Keep a spreadsheet or dedicated notebook.
Finally, there’s the subject mismatch problem. Testing with a flat ruler doesn’t tell you much about photographing a three-dimensional orchid or textured mineral specimen. Your test subject should have similar depth characteristics to what you’ll actually photograph. If you shoot jewelry, test with jewelry. If you photograph flowers, use flowers or similarly dimensional objects.
Remember, a stacking test is only valuable if it reflects your real shooting conditions. Take the time to set up properly, and you’ll save countless hours troubleshooting failed stacks later.
Real-World Testing Examples
Let me show you how two photographers tackled stacking tests in very different scenarios, and how their systematic approach saved hours of frustration.
Sarah, a macro enthusiast, was preparing to photograph tiny wildflower stamens at 2:1 magnification. She knew from experience that guessing step distances at this magnification was futile—the depth of field becomes paper-thin. She started her stacking test with a single flower specimen under consistent LED lighting.
Her initial test used her 90mm macro lens at f/8, ISO 200, with a motorized rail set to 0.1mm steps. She captured 30 frames across a 3mm range. After processing in her stacking software, she immediately noticed the first issue: banding artifacts in the petals. The steps were too coarse. She refined the test to 0.05mm steps and reshot the same specimen. This second attempt revealed smoother transitions, but she discovered another problem—slight subject movement from air currents created misalignment in frames 18-22.
Sarah’s solution? She added a windbreak and reduced her test range. Her third iteration used 0.05mm steps across just 2mm, which perfectly covered her subject with 40 frames. She documented these settings in a notebook: “2:1 macro, f/8, 0.05mm steps = clean stacks.” This 20-minute testing session became her baseline for an entire wildflower project.
Compare this to Marcus, a product photographer shooting watches at approximately 0.3x magnification. His stacking tests had different priorities—consistency across dozens of products and reasonable processing times. He wasn’t chasing extreme magnification, just front-to-back sharpness on three-inch objects.
Marcus set up his product turntable with a sample watch and conducted his stacking test at f/11. He started conservatively with 15 frames, manually adjusting focus between shots. The processed result showed gaps—the crown wasn’t sharp in any individual frame. He increased to 25 frames with smaller focus adjustments, which gave complete coverage but took noticeably longer to process.
His refinement came from examining where sharpness actually mattered. By studying the 25-frame stack, Marcus realized he could reduce frames to 18 by starting focus closer to the watch face and ending at the case back, skipping unnecessary foreground. He tested this abbreviated sequence on three different watches to confirm consistency.
The key takeaway from both examples? Neither photographer got it perfect on the first attempt, and both invested relatively small amounts of time testing before committing to full production. Sarah’s methodical documentation meant she could replicate success across hundreds of flowers. Marcus’s practical testing saved him from processing unnecessary frames across commercial shoots. Their stacking tests weren’t academic exercises—they were strategic investments that paid immediate dividends in workflow efficiency and image quality.
Here’s the truth about focus stacking success: it has nothing to do with luck, and you don’t need to empty your wallet on the latest gear. What separates consistently sharp stacks from frustrating misses is understanding how your specific combination of camera, lens, and subject distance behaves.
The good news? You can figure this out this week. Start by running a simple stacking test with your most-used focal length. Use a DOF calculator to get your baseline step size recommendation, then photograph a flat, detailed subject like a ruler or textured surface at different intervals. Compare the results, note where you see gaps or excessive overlap, and adjust accordingly.
Yes, it takes an hour or two upfront. But consider the alternative: spending entire shooting sessions with unusable stacks, or constantly second-guessing your settings in the field. That initial time investment transforms into confidence. You’ll know exactly how many shots you need, how much to advance your focus rail, and when you can trust your setup to deliver.
Run your first test this week. Your future self, staring at perfectly sharp stacks instead of blurry disappointments, will thank you.