Transform your photography expertise into engaging video content on Skillshare by mastering three essential elements: professional-grade footage, compelling storytelling, and strategic course structure. Set up a dedicated filming space with consistent lighting and sound treatment, ensuring your technical demonstrations remain clear and professional across all lessons. Structure your virtual photography workshops into digestible 5-10 minute segments, each focusing on a specific technique or concept that builds upon previous lessons. Whether teaching advanced composition techniques or basic camera operations, maintain a steady progression that keeps students engaged while delivering measurable learning outcomes.
Creating successful Skillshare photography courses demands more than just technical knowledge—it requires a carefully crafted blend of educational value and production quality. Modern creators must balance professional video production with authentic teaching moments, transforming complex photographic concepts into accessible, engaging content that resonates with both beginners and advanced practitioners. This comprehensive guide will walk you through the essential steps of producing compelling photography education content that stands out in today’s competitive online learning marketplace.
Essential Video Equipment for Workshop Recording
Camera Selection and Setup
Selecting the right camera for your Skillshare workshop is crucial for delivering high-quality content. While you don’t need the most expensive equipment, aim for a camera that captures clear video in at least 1080p resolution. Modern mirrorless cameras and DSLRs are excellent choices, offering superior image quality and manual controls. Even recent smartphones with good cameras can work well, especially when starting out.
For optimal workshop recording, set your camera to manual mode to maintain consistent exposure throughout your videos. Choose an aperture between f/2.8 and f/4 to achieve a pleasant background blur while keeping yourself in sharp focus. Set your shutter speed to double your frame rate (e.g., 1/60 for 30fps recording) to achieve natural-looking motion.
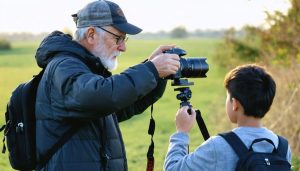
Position your camera at eye level and frame yourself using the rule of thirds. If you’re demonstrating hands-on techniques, consider using two cameras: one for your face and another for close-up shots of your work. Ensure your main camera has sufficient battery life and storage space for extended recording sessions.
Essential camera settings to check before recording:
– White balance: Set to match your lighting conditions
– ISO: Keep as low as possible while maintaining proper exposure
– Focus mode: Use face-detection autofocus if available
– Picture profile: Choose a neutral setting for easier post-production
Test your setup with short recordings before filming your entire workshop to ensure everything looks and sounds as intended.
Audio Equipment Essentials
Clear audio is just as crucial as good video when creating Skillshare content. Your viewers need to hear your instructions clearly, making microphone selection a top priority. For most instructors, a quality lavalier (lapel) microphone will be your best friend. These small, clip-on mics provide excellent voice capture while staying discreet on camera.
The Rode Wireless GO or similar wireless lavalier systems offer fantastic mobility and professional-grade sound. If you’re recording at a desk or fixed position, a USB condenser microphone like the Blue Yeti can deliver studio-quality audio. For those on a budget, even a smartphone lavalier mic can significantly improve your audio quality compared to built-in camera microphones.
Remember to consider your recording environment. Soft surfaces like curtains or acoustic panels can help reduce echo, while recording in smaller spaces often yields better results than large, empty rooms. Always monitor your audio through headphones while recording to catch any unwanted background noise or technical issues.
For post-production cleanup, invest in a basic audio interface if you’re using XLR microphones, and familiarize yourself with noise reduction tools in your editing software. A simple pop filter can also make a world of difference in reducing harsh consonant sounds and breathing noise.
Test your audio setup before every session, and always record a few seconds of room tone – it’s invaluable for editing later.
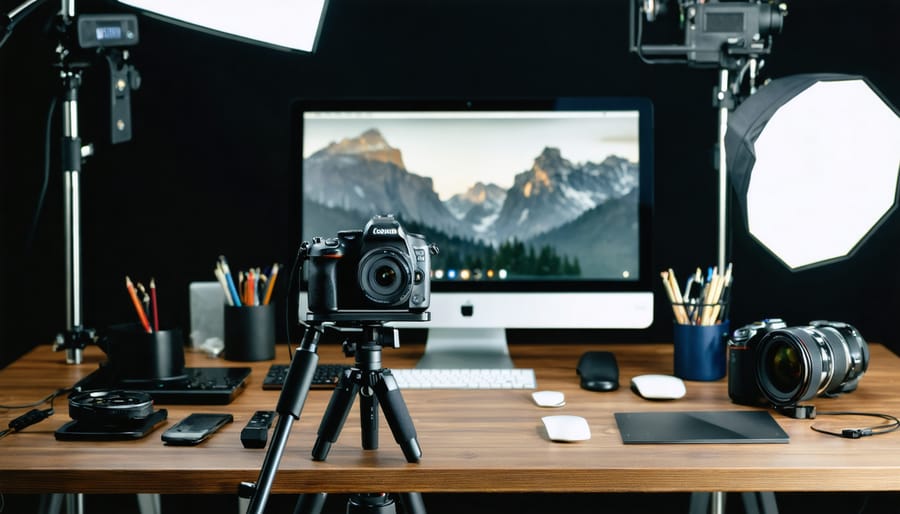
Setting Up Your Workshop Space
Lighting Configuration
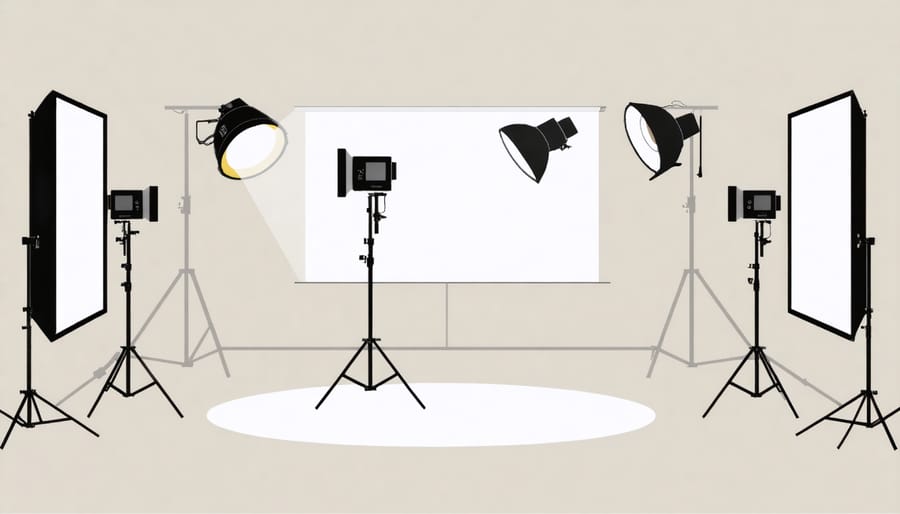
Proper lighting can make or break your Skillshare video quality, so let’s focus on creating a professional setup that won’t break the bank. Start with a three-point lighting arrangement: your key light, fill light, and backlight.
Position your key light at a 45-degree angle to your subject, about eye level or slightly higher. This main light source should be your brightest, ideally a softbox or LED panel with diffusion. For online teaching, aim for soft, even lighting that eliminates harsh shadows on your face.
Your fill light, positioned opposite the key light, should be about half the intensity to gently illuminate shadows. A simple bounce card or a second, dimmer light works perfectly here. The backlight, placed behind you, creates separation between you and the background, preventing that dreaded “floating head” effect in video.
For demonstrating hands-on techniques, consider adding a dedicated task light. Position it to eliminate hand shadows that might obscure important details. LED strip lights under overhead cabinets work great for tabletop demonstrations.
Natural light can be fantastic, but ensure consistency by filming at the same time of day or blocking windows with diffusion material. If you’re on a budget, clamp lights with daylight-balanced bulbs and white shower curtains for diffusion can create surprisingly professional results.
Remember to check your camera’s white balance settings when mixing different light sources, and always record a test clip to verify your lighting looks natural on camera.
Room Layout and Staging
Creating an effective room layout for Skillshare video production requires careful consideration of both technical and practical elements. Start by selecting a space with adequate room for movement and demonstration – ideally, at least 150 square feet for a single-instructor setup or 200+ square feet for online instructor collaboration scenarios.
Position your main teaching area against a clean, uncluttered background. Consider using a neutral-colored wall or a professional backdrop that won’t distract from the instruction. Place your camera approximately 8-10 feet from the teaching space to achieve proper framing while maintaining intimate eye contact with viewers.
Lighting should be arranged in a three-point setup: key light at 45 degrees to your face, fill light on the opposite side to soften shadows, and a backlight to create separation from the background. For demonstrations requiring close-up shots, designate a separate area with dedicated lighting and camera angles.
If featuring student interactions, create distinct zones within the frame – one for instruction and another for student participation. Use tape markers on the floor to indicate optimal positions for both instructor and participants. This helps maintain consistent framing throughout the session while ensuring all important elements remain visible.
Remember to account for equipment placement, ensuring cables are safely secured and out of walking paths. Consider using wireless microphones to allow for unrestricted movement while maintaining clear audio quality.
Filming Techniques for Educational Content
Camera Angles and Movement
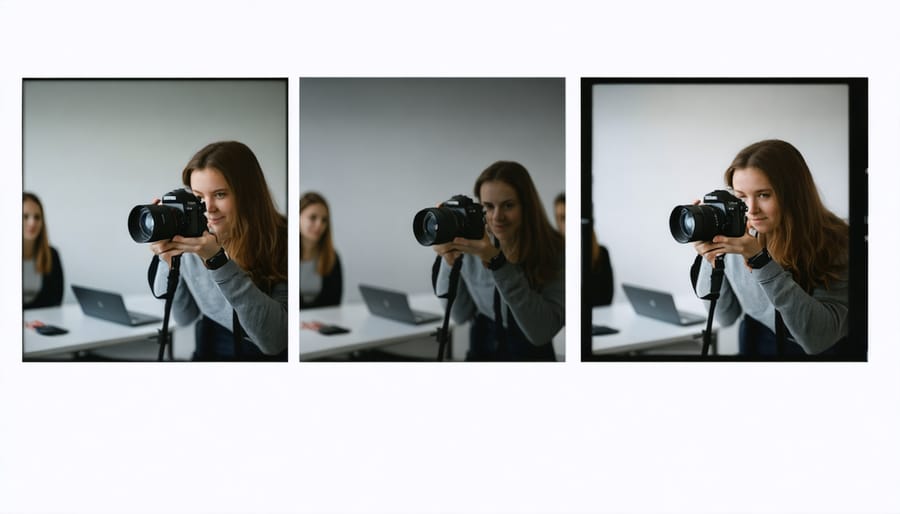
When filming instructional content, mastering camera angles and movement is crucial for maintaining viewer engagement. Start with the classic medium shot, positioning your subject from the waist up – perfect for demonstrating techniques while keeping your presence relatable. For detailed work or close-up demonstrations, switch to tight shots that clearly show intricate movements or small objects.
The rule of thirds remains your best friend in educational content. Position yourself or your subject slightly off-center, leaving space on one side for graphics or text overlays you might add later. When demonstrating processes, use a combination of overhead shots for tabletop work and eye-level angles for face-to-face instruction.
Camera movement should be intentional and smooth. While static shots work well for talking segments, gentle camera movements can add visual interest to your content. Consider using a slider for smooth lateral movements when revealing projects or materials. For workflow demonstrations, a subtle push-in shot can create emphasis and draw viewers’ attention to important details.
Remember to film establishing shots of your workspace or materials before diving into instruction. These wide shots help viewers understand the context and create natural transitions between segments. When possible, capture the same action from multiple angles – this gives you flexibility in editing and helps viewers better understand complex procedures.
Demonstration Shot Planning
When filming photography demonstrations, careful shot planning is essential to ensure your viewers can follow along easily. Start by breaking down your demonstration into clear, logical steps, and plan specific camera angles for each one. For close-up shots of camera settings or technical adjustments, position your camera slightly above and to the side of your hands to maintain visibility while avoiding shadows.
Consider using a two-camera setup: one for your main wide shot showing your entire workspace and shooting position, and another for detailed close-ups. This allows you to seamlessly cut between perspectives without interrupting your flow. When demonstrating techniques like focusing or composition, use picture-in-picture effects to simultaneously show both your actions and the resulting image in your camera’s viewfinder.
Lighting is crucial for demonstration shots. Position your key light at a 45-degree angle to minimize glare on screens or glossy surfaces while maintaining good visibility of controls and settings. Use fill lights to soften shadows, especially when showing detailed adjustments on your camera or equipment.
For software demonstrations, ensure your screen recording captures at 1440p or higher to maintain clarity when viewers pause to study specific settings. When showing post-processing techniques, zoom in on relevant panels and tools while keeping your cursor movements deliberate and easy to follow.
Remember to include establishing shots that show your complete setup, helping viewers understand the context and replicate your shooting environment at home.
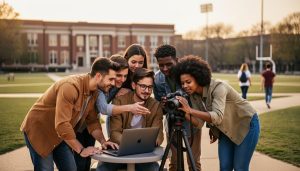
Student Interaction Coverage
Capturing authentic student-instructor interactions is crucial for creating engaging Skillshare videography content. The key lies in positioning your cameras strategically to document both wide-angle classroom views and intimate learning moments. Consider using a two-camera setup: one static camera capturing the overall scene and another mobile camera for close-ups of demonstrations and interactive learning sessions.
To ensure natural interactions, brief your students beforehand about the filming process while encouraging them to act naturally. Position wireless lavalier microphones on both the instructor and selected students to capture clear audio during questions and discussions. Remember to obtain proper consent forms from all participants before recording.
When engaging with photography students, create opportunities for organic teaching moments by incorporating hands-on activities and group discussions. These scenarios often yield the most valuable content for your course videos.
Consider using a roaming camera operator who can anticipate and capture spontaneous teaching moments, student reactions, and breakthrough instances. During editing, these authentic interactions can be woven together to create a more dynamic and relatable learning experience that resonates with your online audience.
Post-Production Best Practices
Content Organization
Organizing your workshop footage into clear, digestible lessons is crucial for creating engaging Skillshare content. Start by mapping out your course structure before filming – this helps ensure you capture all necessary footage in a logical sequence. Break your content into distinct modules, with each segment typically running 5-10 minutes for optimal viewer engagement.
Consider the natural progression of skills and concepts when arranging your lessons. Begin with foundational knowledge and gradually build up to more complex techniques. For example, if teaching portrait photography, start with camera basics before diving into lighting setups and advanced posing techniques.
Create clear transitions between segments by using brief recap moments and preview clips. This helps students connect ideas across lessons and maintains their engagement. Include practice exercises or assignments at strategic points to reinforce learning and encourage hands-on application.
When editing, maintain a consistent pace throughout your lessons. Include a mix of talking-head segments, demonstrations, and real-world examples to keep the content dynamic. Use on-screen text or graphics to highlight key points, but avoid overwhelming viewers with too much information at once.
Remember to bookend each lesson with a clear introduction and summary. This helps students understand what they’ll learn and reinforces key takeaways. Consider creating a short course outline video that students can reference to navigate through your content more effectively.
Engagement Enhancement
Keeping viewers engaged throughout your Skillshare course requires thoughtful editing techniques that maintain interest while effectively conveying information. Start by implementing the rule of thirds in your frame composition and varying your shot types between wide, medium, and close-up views to create visual diversity.
Pacing is crucial – aim to change shots every 4-8 seconds to maintain viewer attention. However, when explaining complex concepts, extend shot duration slightly to ensure comprehension. Use smooth transitions between clips, favoring subtle cuts over flashy effects that might distract from the content.
B-roll footage serves as an excellent tool for maintaining visual interest during voice-overs or explanatory segments. Show your subject matter from multiple angles and include relevant supplementary footage that reinforces your teaching points. For instance, when explaining camera settings, include both shots of adjusting the camera and the resulting images.
Pattern interrupts are vital for online learning. Every 2-3 minutes, introduce something unexpected – whether it’s a change in camera angle, an entertaining demonstration, or a practical example. This helps combat viewer fatigue and reinforces key learning points.
Consider adding lower-third graphics or text overlays to emphasize important information, but keep them clean and minimal. Remember to include progress indicators or chapter markers, allowing students to easily navigate through your content while maintaining a sense of advancement through the course.
As we wrap up our journey through Skillshare videography, remember that creating compelling educational content is both an art and a science. The techniques we’ve explored – from mastering camera settings to perfecting lighting setups – are your foundation for producing professional-quality workshop videos. But don’t feel overwhelmed by trying to implement everything at once.
Start with the basics: ensure your audio is crystal clear, your lighting is consistent, and your compositions are thoughtful. As you grow more confident, gradually incorporate more advanced techniques like dynamic b-roll and sophisticated editing transitions. Remember that even experienced creators were once beginners, and many have found success through our thriving virtual photography community.
The key to success lies in consistent practice and experimentation. Take what you’ve learned here and adapt it to your unique style and teaching approach. Your authentic voice, combined with these technical skills, will help you create content that truly resonates with your audience.
Don’t be afraid to make mistakes – they’re valuable learning opportunities. Review your videos objectively, gather feedback from peers, and continuously refine your approach. With dedication and the knowledge you’ve gained, you’re well-equipped to create engaging educational content that stands out on Skillshare’s platform.
Now it’s time to pick up your camera and start creating. Your future students are waiting to learn from your expertise and unique perspective.