Choosing the right drone transforms your aerial photography from basic snapshots to breathtaking masterpieces. Master three essential factors before investing: flight time capabilities (aim for at least 25 minutes), camera sensor size (1-inch sensors deliver professional-quality images), and intelligent flight modes for cinematic shots. Compare popular drone models based on your specific needs – whether capturing real estate footage, adventure sports, or landscape photography.
Consider your skill level honestly – professional-grade drones offer superior image quality but require significant practice to master. Entry-level models under $500 provide excellent learning opportunities while minimizing financial risk. Factor in additional costs beyond the drone itself: extra batteries ($100-150 each), ND filters for proper exposure, and registration fees where applicable.
Research local drone regulations thoroughly before purchase. Many regions require certification for drones over 250g, while lighter models face fewer restrictions. Weather resistance ratings, obstacle avoidance systems, and return-to-home capabilities directly impact your ability to fly confidently in varying conditions.
Understanding Drone Classifications
Consumer vs. Professional Drones
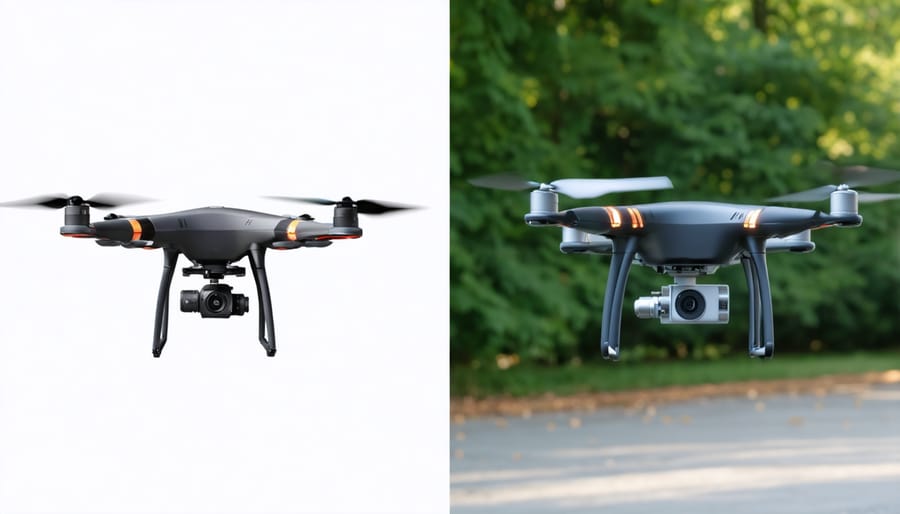
Consumer and professional drones differ significantly in their capabilities, build quality, and price points. Consumer drones typically range from $200 to $1,000 and are perfect for beginners and hobbyists. These models offer user-friendly features like automated flight modes, obstacle avoidance, and decent camera quality, usually ranging from 1080p to 4K resolution.
Professional drones, on the other hand, start around $1,000 and can exceed $10,000 for specialized models. They offer superior build quality, longer flight times, and advanced features like higher payload capacity, replaceable lenses, and professional-grade camera sensors. These drones often support RAW photo formats and provide manual camera controls essential for professional photography and videography.
Key differences also include flight characteristics – consumer drones typically have shorter range and flight times (20-30 minutes), while professional models can stay airborne for up to 40 minutes and maintain connection at greater distances. Professional drones also tend to have better wind resistance, more sophisticated stabilization systems, and redundant safety features. However, they require more skill to operate and often need additional licenses or certifications for commercial use.
Size and Portability Considerations
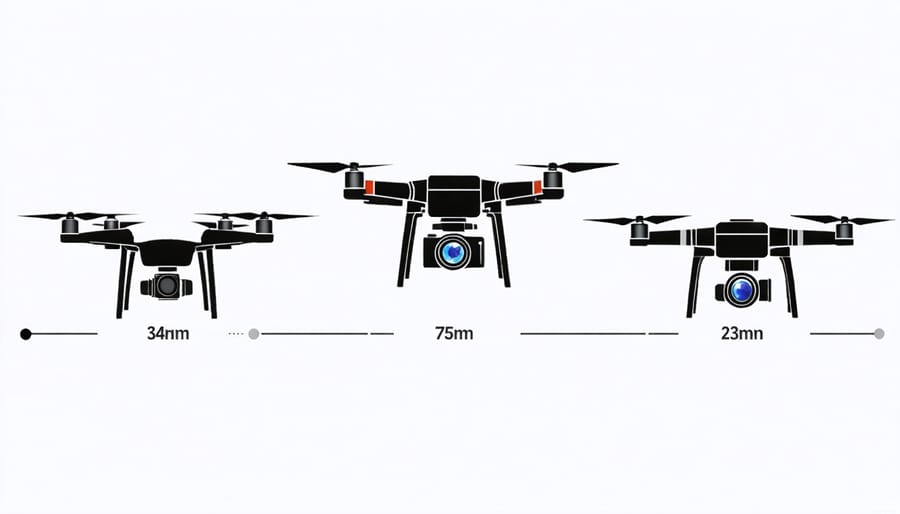
When choosing a drone, size plays a crucial role in both functionality and convenience. Larger drones (typically 350mm to 500mm in diagonal length) offer superior stability and wind resistance, making them ideal for professional aerial photography. However, they require dedicated carrying cases and might be challenging to transport to remote shooting locations.
Mini drones (around 250mm) strike an excellent balance between performance and portability. They easily fit in a camera backpack alongside your other gear, making them perfect for travel photography or hiking adventures. Some even feature foldable designs that reduce their footprint by up to 50% when packed.
Micro or nano drones (under 150mm) are incredibly portable but often compromise on camera quality and flight stability. While they’re great for practicing or indoor flying, they might not meet the needs of serious photographers.
Consider your typical shooting locations and travel habits when choosing a size. If you frequently shoot in urban areas or need to travel light, a compact folding drone might be your best bet. For dedicated aerial photography sessions where image quality is paramount, the extra bulk of a larger drone could be worth the trade-off.
Essential Camera Features
Sensor Size and Resolution
When it comes to aerial photography, camera sensor performance plays a crucial role in determining the quality of your shots. Most consumer drones come equipped with either a 1/2.3-inch or 1-inch sensor, while professional models might feature Micro Four Thirds or even larger sensors. The larger the sensor, the better your drone will perform in challenging lighting conditions and the more detail it can capture.
Resolution is equally important, but don’t be swayed solely by megapixel counts. A 12MP sensor with good light sensitivity often produces better results than a 48MP sensor crammed onto a tiny chip. For most aerial photography needs, anything between 12MP and 20MP provides an excellent balance of detail and file manageability.
Consider how you’ll use your footage: if you’re primarily sharing on social media, a 12MP sensor will more than suffice. However, if you’re planning to print large formats or need the flexibility to crop heavily in post-production, you might want to opt for higher resolutions.
Pay attention to the sensor’s ISO performance as well. Since drones often shoot in challenging lighting conditions, especially during golden hour or in overcast weather, good low-light performance can make the difference between a usable shot and a noisy mess.
Gimbal Stabilization
A stable shot is the foundation of great aerial photography techniques, and this is where gimbal stabilization becomes crucial. A gimbal is a pivoted support system that allows rotation around multiple axes while keeping your drone’s camera steady, counteracting the natural movement and vibration of flight.
Modern drones employ sophisticated stabilization features that typically offer 3-axis control: pitch (up and down), roll (side to side), and yaw (rotation). This technology ensures your footage remains smooth and professional-looking, even in challenging conditions like light winds or during complex maneuvers.
When evaluating gimbal quality, pay attention to the angular vibration range (typically measured in degrees) – the smaller the number, the better the stabilization. Professional-grade drones often offer ±0.01° of accuracy, while consumer models might range from ±0.02° to ±0.05°.
Consider whether the drone offers mechanical stabilization, electronic stabilization, or both. Mechanical stabilization, while generally more expensive, provides superior results and is essential for professional-quality footage. Electronic stabilization can complement mechanical systems but shouldn’t be relied upon as the sole stabilization method for serious photography work.
Remember that some entry-level drones might only offer 2-axis stabilization, which can be adequate for casual use but may leave your footage vulnerable to yaw movements.
Video Capabilities
Video capabilities are often a make-or-break feature when choosing a drone, especially if you’re planning to create content or capture special moments. Most modern drones offer 4K video recording, but there’s more to consider than just resolution.
Frame rates play a crucial role in determining the type of footage you can capture. Look for drones that offer at least 30fps (frames per second) at 4K resolution for smooth, standard footage. If you’re interested in slow-motion effects, seek out models that can shoot at 60fps or even 120fps at lower resolutions like 1080p.
Video codecs and bitrates directly impact your footage quality and editing flexibility. H.264 is the standard codec found in most drones, while H.265 (HEVC) offers better compression and quality but requires more processing power. Professional users should look for drones that support higher bitrates (100Mbps or more) and flat color profiles like D-Log, which provide more latitude for color grading in post-production.
Storage considerations go hand-in-hand with video capabilities. High-quality 4K footage consumes significant space, so ensure your drone supports fast, high-capacity SD cards. Some professional models offer internal storage as a backup.
Pay attention to stabilization features like 3-axis gimbals, which are essential for smooth footage. Electronic Image Stabilization (EIS) can help, but mechanical stabilization typically produces better results, especially in challenging conditions.
Flight Performance Factors
Battery Life and Range
When it comes to drone battery life, manufacturers’ claims often paint an optimistic picture that doesn’t quite match real-world conditions. While a drone might advertise 30 minutes of flight time, you’ll typically experience 20-25 minutes under normal conditions. Factors like wind resistance, flying style, and payload (such as cameras and accessories) can significantly impact battery performance.
For the best experience, plan your flights conservatively and always carry spare batteries. A good rule of thumb is to land when you have 25-30% battery remaining, giving you a safe margin for unexpected situations. Professional pilots often follow the “rule of thirds”: one-third battery for the outward journey, one-third for capturing footage, and one-third for the return flight.
Range capabilities vary significantly between models, with consumer drones typically offering 2-5 miles of transmission distance. However, remember that most regions require maintaining visual line of sight with your drone, making the actual practical range much shorter. Weather conditions, interference from buildings or electronics, and local regulations all affect your effective flying range.
To maximize battery life:
– Avoid flying in strong winds
– Minimize aggressive maneuvers
– Keep your batteries at optimal temperature
– Regularly calibrate your battery system
– Monitor battery health through your drone’s app
Consider investing in a drone with intelligent return-to-home features, which automatically brings the aircraft back when battery levels are critical. This safety feature can prevent costly accidents and lost drones due to battery depletion.
Wind Resistance and Stability
When it comes to drone photography, wind resistance and stability are crucial factors that can make or break your aerial shots. Most consumer drones are designed to handle light to moderate winds, typically between 10-20 mph, but their performance can vary significantly based on their size and design.
Larger drones generally offer better wind resistance due to their weight and more powerful motors. However, they’re also more expensive and less portable. Smaller drones, while more convenient to carry, may struggle in windy conditions, leading to shaky footage and reduced flight time as they work harder to maintain position.
Pay attention to the drone’s wind speed rating when making your purchase. Professional-grade drones often feature advanced stabilization systems that help maintain steady shots even in challenging lighting conditions and moderate winds. Look for features like 3-axis gimbals, which provide superior image stabilization by compensating for drone movement in multiple directions.
It’s worth noting that wind conditions typically worsen with altitude. A drone that performs well at ground level might struggle at higher elevations where winds are stronger. For best results, consider a drone with GPS positioning and return-to-home features, which help maintain stability and ensure safe recovery if conditions become too challenging.
Remember that even the most capable drones have their limits. Always check weather forecasts before flying and be prepared to postpone your shoot if conditions aren’t favorable. This not only ensures better image quality but also protects your investment from potential damage or loss.
Smart Features and Control Systems
Autonomous Flight Modes
Autonomous flight modes have revolutionized drone photography, making complex shots accessible even to beginners. These pre-programmed patterns act like a virtual camera operator, allowing you to focus on composition while the drone handles the flying.
The most common autonomous modes include Orbit, where your drone circles a point of interest while maintaining consistent distance and height – perfect for revealing shots of buildings or landscapes. Follow Me mode uses GPS or visual tracking to keep your subject centered as they move, ideal for action sports or vehicle tracking shots.
Waypoint navigation lets you plot a custom flight path by setting multiple coordinates. This is invaluable for repeatable shots, real estate photography, or complex reveal sequences. The Cable Cam mode simulates a traditional camera dolly, creating smooth linear movements between two or more points in space.
Many modern drones also feature intelligent return-to-home functions and obstacle avoidance systems that work in conjunction with these autonomous modes. For beginners, QuickShots provide instant cinematic moves like Dronie (flying backward and upward) or Helix (spiral ascent), which would be challenging to execute manually.
Before relying on autonomous modes, always test them in a safe, open area and maintain visual line of sight with your drone. Remember that while these features are powerful, understanding manual controls remains essential for those unexpected moments when automation might not be the best choice.
Controller Options and App Integration
Today’s drones offer two primary control methods: traditional radio controllers and smartphone integration, with many models combining both for enhanced functionality. The standard controller typically provides better precision and tactile feedback, featuring dedicated joysticks for flight control and customizable buttons for camera operations. Look for controllers with comfortable grips, clear button layouts, and an ergonomic design that won’t cause fatigue during longer flights.
Smartphone integration has become increasingly sophisticated, offering features beyond basic flight control. Most major drone manufacturers provide dedicated apps that transform your phone into a powerful command center. These apps typically display real-time flight telemetry, camera settings, and live video feed. They also enable advanced photography features like automated flight paths, object tracking, and panoramic shots.
When evaluating controller options, consider the transmission range and reliability. Higher-end systems often use OcuSync or similar technologies that provide more stable connections and longer range compared to standard Wi-Fi systems. Some controllers also feature built-in screens, eliminating the need for a separate smartphone, though these typically come at a premium.
Pay attention to the controller’s battery life, which should exceed your drone’s flight time. Also, check compatibility with your specific smartphone model and operating system to ensure smooth operation. Some manufacturers offer controller accessories like tablet holders or sun hoods, which can significantly improve the flying experience in bright conditions.
Legal Considerations and Requirements
Before taking your new drone to the skies, it’s crucial to understand and comply with legal requirements. In the United States, all drones weighing more than 0.55 pounds (250 grams) must be registered with the Federal Aviation Administration (FAA). This process is straightforward and can be completed online for a small fee.
For recreational pilots, you’ll need to pass The Recreational UAS Safety Test (TRUST), which is free and available through FAA-approved providers. The test covers basic safety guidelines and airspace rules, and you’ll receive a completion certificate that you should keep with you while flying.
Commercial drone pilots face additional requirements. You’ll need to obtain a Remote Pilot Certificate (Part 107 license) by passing a knowledge test at an FAA-approved testing center. This certification is mandatory if you plan to make money from your drone photography or videography.
Key regulations to remember include:
– Flying below 400 feet altitude
– Maintaining visual line of sight with your drone
– Not flying over people or moving vehicles
– Avoiding restricted airspace near airports
– Operating only during daylight hours
– Not flying under the influence of drugs or alcohol
Many countries have their own specific drone regulations, so if you plan to travel with your drone, research local laws beforehand. Some locations require additional permits or have complete flight restrictions.
Most modern drones come with built-in safety features like geofencing and altitude limits, but it’s your responsibility to stay informed about and comply with current regulations. Consider downloading apps like B4UFLY or AirMap to check airspace restrictions in your area before each flight.
Remember that drone laws continue to evolve as the technology becomes more widespread. Stay current with regulations by regularly checking the FAA website and joining local drone communities for updates and shared experiences.
Choosing the right drone is a journey that requires careful consideration of your specific needs, budget, and intended use. Throughout this guide, we’ve covered the essential aspects that should influence your decision, from understanding basic drone categories to evaluating crucial features like flight time, camera quality, and safety features.
Remember that the best drone for you isn’t necessarily the most expensive or feature-packed model. Begin by clearly defining your purpose – whether it’s casual photography, professional videography, or simply recreational flying. Then, match these requirements with a drone that fits within your budget while offering the key features you need.
For beginners, we recommend starting with a mid-range drone that offers a good balance of features and ease of use. Look for models with reliable GPS, return-to-home functionality, and obstacle avoidance systems. More experienced pilots might want to invest in advanced models with professional-grade cameras and sophisticated flight controls.
Don’t forget to factor in additional costs like extra batteries, propellers, and carrying cases. Also, ensure you’re familiar with local drone regulations and registration requirements before making your purchase.
By taking the time to research and compare different models while keeping these guidelines in mind, you’ll be well-equipped to make an informed decision that leads to countless hours of enjoyable and productive drone flying.