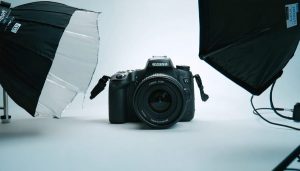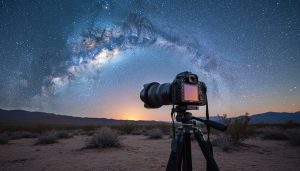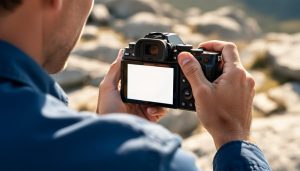
Unlocking the hidden potential of your DSLR camera through astro-modification opens up a spectacular new world of deep-sky photography. By removing or replacing the stock infrared cut filter, your camera becomes 2-3 times more sensitive to the critical H-alpha wavelength (656.28nm) – the distinctive red light emitted by nebulae and other celestial objects. While this modification requires precision and technical expertise, it transforms an ordinary camera into a powerful astronomical imaging tool capable of capturing the intricate details of emission nebulae, star clusters, and galaxies that remain invisible to unmodified sensors.
Before embarking on this modification journey, understand that it permanently alters your camera’s capabilities, requiring specific white balance adjustments for regular daytime photography. Professional modification services typically cost between $200-400, though experienced photographers can perform the process themselves with proper tools and careful attention to dust prevention and sensor protection. Whether pursuing the DIY route or choosing professional services, this investment dramatically enhances your ability to document the cosmos, revealing the true colors and structures of deep-sky objects that have captivated astronomers for centuries.
Why Modify Your Camera for Astrophotography
Understanding IR Filters and Their Limitations
Digital cameras come equipped with internal IR (infrared) filters, also known as hot mirrors, which serve an important purpose in regular photography by blocking unwanted infrared light. However, these stock filters significantly limit the camera’s ability to capture the deep-red wavelengths crucial for astrophotography, particularly when photographing emission nebulae.
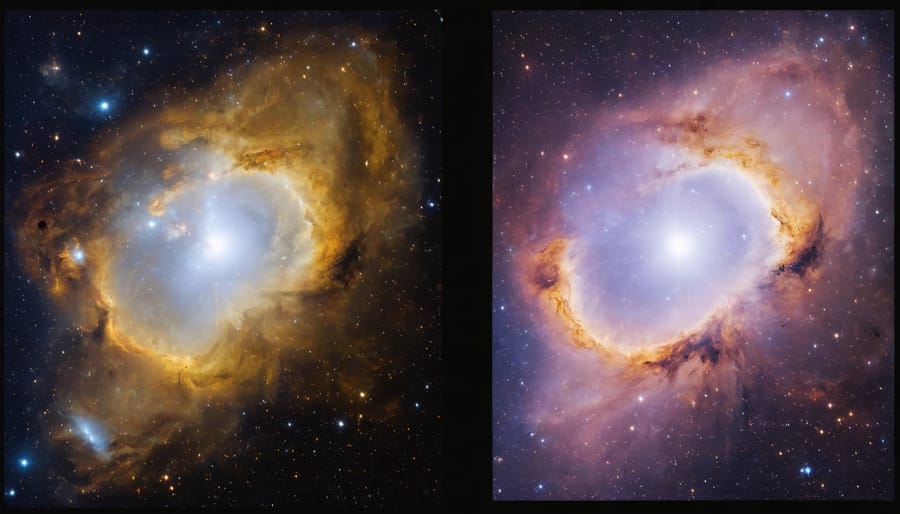
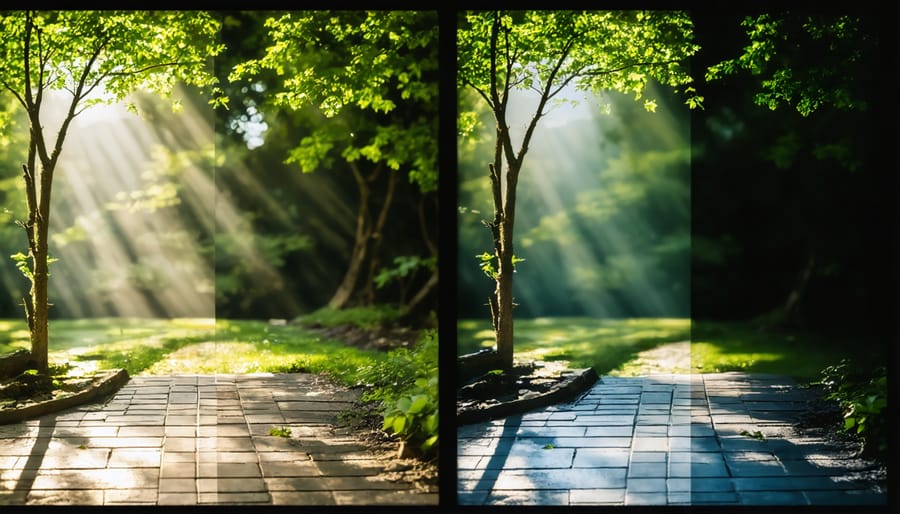
The standard IR filter typically blocks light wavelengths above 650nm, including the important H-alpha wavelength at 656.3nm – a critical spectral line for capturing the vibrant reds in cosmic objects. For context, many beautiful nebulae like the Orion Nebula emit strongly in H-alpha, but your stock camera is only capturing about 25% of this light.
Think of it like wearing sunglasses while stargazing; you’re artificially limiting the amount of light reaching your eyes. By removing or replacing the stock IR filter with one that allows these wavelengths to pass through, your camera becomes significantly more sensitive to the subtle red details in deep-sky objects. This modification can increase your camera’s sensitivity to H-alpha by up to 4 times, resulting in more detailed and colorful astronomical images.
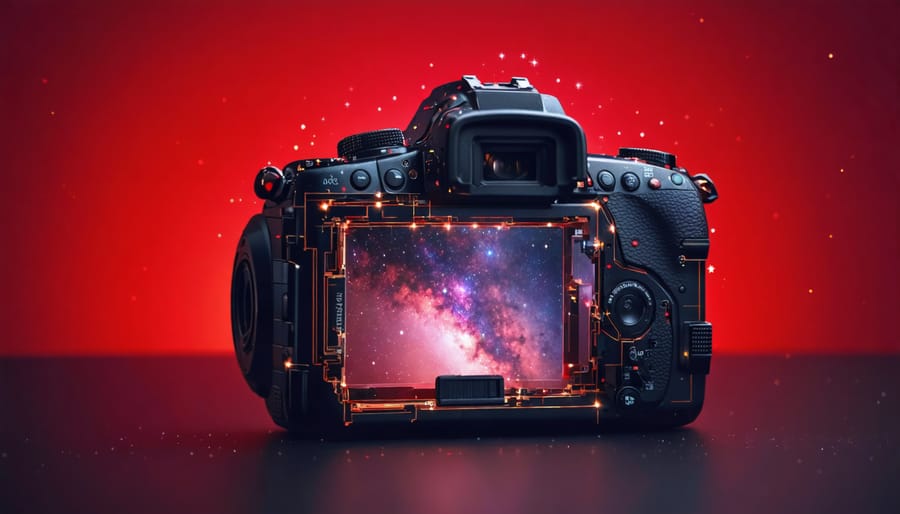
The H-alpha Advantage
H-alpha light, occurring at a wavelength of 656.28 nanometers, is a crucial spectral line that reveals the beauty of deep-sky objects, particularly emission nebulae. Standard digital cameras come with an internal IR cut filter that, while great for everyday photography, unfortunately blocks most of this valuable H-alpha light. By modifying your camera to capture H-alpha wavelengths, you’ll unlock the ability to photograph stunning red nebulae that would otherwise appear faint or invisible.
This modification is particularly powerful for capturing objects like the North America Nebula, the California Nebula, and the iconic Orion Nebula. The enhanced sensitivity to H-alpha allows you to capture the intricate details and delicate structures within these celestial objects with remarkable clarity. You’ll be able to record the subtle variations in hydrogen emissions that give these nebulae their characteristic red glow.
The advantage becomes even more apparent during full moon periods or in light-polluted areas. While regular cameras struggle in these conditions, a modified camera can still capture nebulae effectively by focusing on the specific H-alpha wavelength, cutting through much of the ambient light pollution.
Pre-Modification Considerations
Camera Selection and Compatibility
When selecting a camera for astrophotography modification, not all models are equally suitable. DSLR and mirrorless cameras from major manufacturers like Canon, Nikon, and Sony are typically the best candidates. These cameras offer excellent manual camera control and sensor quality essential for astrophotography.
Entry-level and mid-range Canon DSLRs, particularly those from the EOS series, are popular choices due to their straightforward modification process and well-documented procedures. These cameras also provide excellent advanced camera features that complement astrophotography work.
Before proceeding with modification, verify your camera’s warranty status, as modifications typically void manufacturer warranties. Additionally, check if your camera model has been successfully modified by others in the astrophotography community. This research can provide valuable insights into potential challenges and expected results.
Consider purchasing a used camera specifically for modification, as this reduces financial risk and allows you to keep an unmodified camera for regular photography. Look for cameras with good low-light performance and minimal hot pixels, as these characteristics become even more crucial after modification.
Avoid cameras with integrated sensor cleaning systems or complex weather sealing, as these features can complicate the modification process. Also, ensure your chosen camera supports raw image format, as this provides maximum flexibility in post-processing your astrophotography images.
Professional vs. DIY Modification
When it comes to modifying your camera for astrophotography, you have two main options: professional service or DIY modification. Professional modification typically costs between $300-600 and is performed by specialized companies with extensive experience. These services often include warranty coverage, precise calibration, and dust removal during the process. The main advantage is reliability and peace of mind, knowing your expensive camera is in expert hands.
DIY modification can save you significant money, costing only $50-100 in materials, but carries substantial risks. While many experienced photographers successfully modify their cameras, one wrong move could permanently damage your equipment. The process requires steady hands, technical knowledge, and proper tools. You’ll need to work in a dust-free environment and handle delicate components with extreme care.
Consider your technical expertise and risk tolerance when choosing between these options. Professional modification is recommended for newer, more expensive cameras or if you’re not confident with electronics. DIY modification might be suitable if you have technical experience, are working with an older camera body, or enjoy hands-on projects.
Keep in mind that both approaches will void your manufacturer’s warranty. Professional services often provide their own warranty coverage, while DIY modifications leave you solely responsible for any issues that arise. Whatever route you choose, thoroughly research the process and ensure you’re prepared for the commitment involved.
The Modification Process
Required Tools and Safety Measures
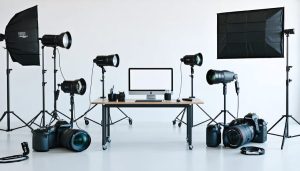
Before starting any camera modification, ensure you have all the necessary tools and understand proper safety protocols. You’ll need a clean, static-free workspace and the following essential items:
– Precision screwdriver set (Phillips and flathead)
– Anti-static wrist strap
– Microfiber cloths
– Isopropyl alcohol (90% or higher)
– Cotton swabs
– Small container for organizing screws
– LED headlamp or desk lamp
– Rubber gloves
– Sensor cleaning kit
– Small blower brush
Safety is paramount when working with sensitive camera components. Always:
– Work in a dust-free environment
– Use proper anti-static protection
– Keep detailed notes of disassembly steps
– Take photos of each stage
– Have proper lighting
– Avoid working when tired
– Keep drinks and food away from workspace
– Store removed components safely
Additionally, research your specific camera model thoroughly and consider having a backup camera before starting. Some modifications may void your warranty, so proceed with caution and ensure you’re confident in your technical abilities before beginning the process.
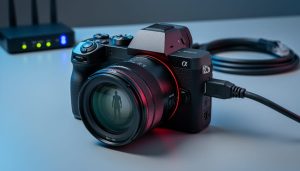
Filter Removal and Replacement
One of the most critical steps in modifying your camera for astrophotography is removing the stock IR-cut filter and replacing it with an astronomy-specific filter. This process requires careful attention to detail and a steady hand.
Start by ensuring you have a dust-free workspace and the necessary tools: precision screwdrivers, plastic tweezers, and a sensor cleaning kit. Put on anti-static gloves to prevent any electrical damage to your camera’s sensitive components.
After removing the camera’s back panel and carefully disconnecting ribbon cables, locate the filter stack assembly. This is typically positioned directly in front of the sensor. The stock filter is usually held in place by a thin frame or clips. Document the original position and orientation of all components as you go – this will be crucial during reassembly.
Using plastic tweezers, carefully lift the retention clips securing the filter. Never use metal tools, as they can scratch the delicate components. Once the clips are removed, gently lift out the stock filter, taking care not to touch the sensor surface. Store the original filter in a clean, safe place in case you ever want to reverse the modification.
Before installing the new astronomical filter, carefully clean both sides using proper sensor cleaning solution and swabs. Handle the new filter only by its edges to avoid fingerprints. Align the new filter exactly as the original was positioned – proper orientation is crucial for optimal performance.
Secure the new filter using the original retention system. Double-check that it’s firmly seated and perfectly aligned with the sensor. During reassembly, ensure no dust has settled on the sensor or filter surfaces. If needed, use a rocket blower to remove any particles before final assembly.
Test the camera before fully reassembling the body by temporarily connecting the necessary components and powering it on. This allows you to verify proper installation before completing the reassembly process.
Sensor Cleaning and Reassembly
Once you’ve completed the sensor modification, proper cleaning and reassembly are crucial for optimal performance. Working in your dust-free environment, use a new sensor cleaning swab and specialized cleaning solution to carefully remove any particles that may have settled during the modification process. Make gentle, single-direction swipes across the sensor surface, being extremely careful not to apply excessive pressure.
When reassembling the camera, ensure all connection cables are properly seated and oriented. Double-check that no cables are pinched or stressed when closing the housing. Follow your documented disassembly steps in reverse order, keeping track of all screws and their specific locations. Some cameras may have screws of different lengths, so referring to your earlier notes is essential.
Before fully securing the camera body, perform a basic function test to ensure all connections are proper. Check that the sensor sits flush and the mounting points align correctly. Once verified, complete the reassembly by securing all screws to their proper torque – tight enough to be secure but not so tight as to strip the threading. Finally, perform a thorough sensor cleaning once more before taking your first test shots.
Post-Modification Setup and Calibration
White Balance Adjustment
After modifying your camera for astrophotography, creating accurate custom white balance profiles becomes crucial for capturing the true colors of celestial objects. Start by photographing a neutral gray card or WhiBal card under various lighting conditions, including daylight and artificial light sources. These reference shots will serve as your baseline for creating custom profiles.
In your camera’s menu, navigate to the custom white balance settings and select the reference image you just captured. Save this as a custom profile, and repeat the process for different lighting scenarios. For astrophotography specifically, you’ll want to create profiles during astronomical twilight and under dark sky conditions.
Remember that post-processing techniques play a vital role in fine-tuning your white balance. When shooting, always capture in RAW format to allow maximum flexibility during RAW image processing. This gives you the freedom to adjust white balance without degrading image quality.
Advanced photographers might want to explore color grading techniques to enhance specific wavelengths of light captured by your modified sensor. Consider creating multiple white balance presets for different types of celestial objects, as nebulae, galaxies, and star clusters often require different color temperature settings for optimal results.
Focus Calibration
After modifying your camera for astrophotography, proper focus calibration is crucial for achieving sharp, detailed images of celestial objects. Start by choosing a bright star or distant light source on a clear night. Set your camera to Live View mode and zoom in digitally to the maximum level for precise focusing. Use your camera’s manual focus mode, as autofocus typically won’t work well for night sky photography.
Turn the focus ring slowly while observing the star’s appearance on your screen. The goal is to make the star appear as small and sharp as possible – when properly focused, it should look like a tiny point of light rather than a fuzzy blob. If your camera has a focus peaking feature, enable it for additional visual feedback.
Consider marking your lens’s infinity focus position once you’ve achieved perfect focus. Some photographers use small dots of paint or tape on the focus ring to mark this sweet spot. However, remember that this position might vary slightly with temperature changes, so always verify your focus during each shooting session.
For more precise focusing, you might want to invest in a Bahtinov mask, which creates a specific diffraction pattern that makes achieving perfect focus much easier. Simply center the mask’s pattern on a bright star and adjust focus until the central spike is perfectly centered between the outer spikes.
Remember to check your focus periodically throughout your shooting session, as temperature changes and slight equipment movements can affect your focus position.
Essential Accessories and Techniques
Specialized Filters
Once you’ve modified your camera for astrophotography, a whole new world of specialized filters becomes available to enhance your celestial photography. These filters are specifically designed to work with modified cameras and can dramatically improve your astronomical images.
Narrowband filters are perhaps the most powerful tools in your arsenal. These filters isolate specific wavelengths of light emitted by nebulae, allowing you to capture stunning details that would otherwise be invisible. The most popular narrowband filters include Hα (hydrogen-alpha), OIII (oxygen), and SII (sulfur), each revealing different aspects of deep-sky objects.
Light pollution filters become even more effective with modified cameras. These filters block artificial light wavelengths while allowing the desired astronomical wavelengths to pass through. The most advanced models can eliminate up to 99% of light pollution without significantly affecting the natural colors of celestial objects.
UV/IR cut filters are essential for modified cameras during daytime use. Since your camera’s original IR filter was removed during modification, these filters help restore normal color balance for regular photography. They’re easily attachable and removable, making your modified camera versatile for both day and night shooting.
Multi-bandpass filters are perfect for one-shot color cameras, combining multiple narrowband wavelengths into a single filter. These are ideal for photographers who want to capture detailed nebula images without the complexity of multiple filter switches.
Remember that filter quality significantly impacts your final images, so invest in reputable brands known for their optical precision.
Advanced Cooling Solutions
Managing sensor heat is crucial for long-exposure astrophotography, as excess heat can introduce unwanted noise and reduce image quality. The most effective cooling solution is implementing a Peltier cooling system, which uses thermoelectric cooling to maintain optimal sensor temperature during extended shooting sessions.
A basic Peltier setup consists of a thermoelectric cooling element, heat sink, and temperature controller. When properly installed, this system can reduce sensor temperature by 20-30°C below ambient temperature, significantly improving image quality during those warm summer nights. However, installation requires careful consideration of power management and condensation prevention.
For a more budget-friendly approach, consider adding copper heat sinks directly to your camera’s body. These passive cooling solutions, while less effective than active cooling, can still help dissipate heat during long exposures. Some photographers also use small USB-powered fans positioned near the camera body to improve airflow.
Humidity control is equally important when implementing cooling solutions. Using silica gel packets near the sensor or installing a small heating element around the sensor chamber can prevent moisture buildup. Remember to monitor your camera’s temperature during use – most modern cameras have built-in temperature sensors that can help you avoid overheating.
For optimal results, begin cooling your camera 30 minutes before starting your imaging session. This ensures stable temperature throughout your shooting period and consistent image quality across all frames.
Modifying your camera for astrophotography opens up a whole new universe of photographic possibilities. Throughout this guide, we’ve explored the intricate process of camera modification, from understanding the technical aspects to implementing the changes safely and effectively. Remember that while the modification journey requires careful attention to detail and patience, the rewards are truly spectacular – deeper reds in nebulae, enhanced hydrogen-alpha details, and overall superior performance in night sky photography.
Whether you choose to tackle the modification yourself or work with a professional service, the key is to proceed with confidence while respecting the complexity of the process. Start by thoroughly researching your specific camera model, gathering the necessary tools and materials, and creating a clean, static-free workspace. Don’t rush the process – take time to document each step and keep track of all components during disassembly.
For those still hesitant about taking the plunge, consider starting with a second-hand camera body for your first modification attempt. This approach minimizes financial risk while providing valuable hands-on experience. Remember that the astrophotography community is incredibly supportive – don’t hesitate to reach out to experienced modifiers for guidance or join online forums for additional insights.
The night sky awaits your modified camera, ready to reveal its hidden wonders in unprecedented detail. With proper preparation, careful execution, and a spirit of adventure, you’re well-equipped to embark on this exciting modification journey. Clear skies and happy shooting!