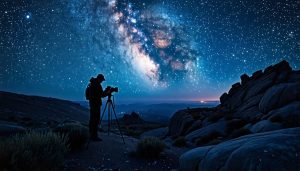
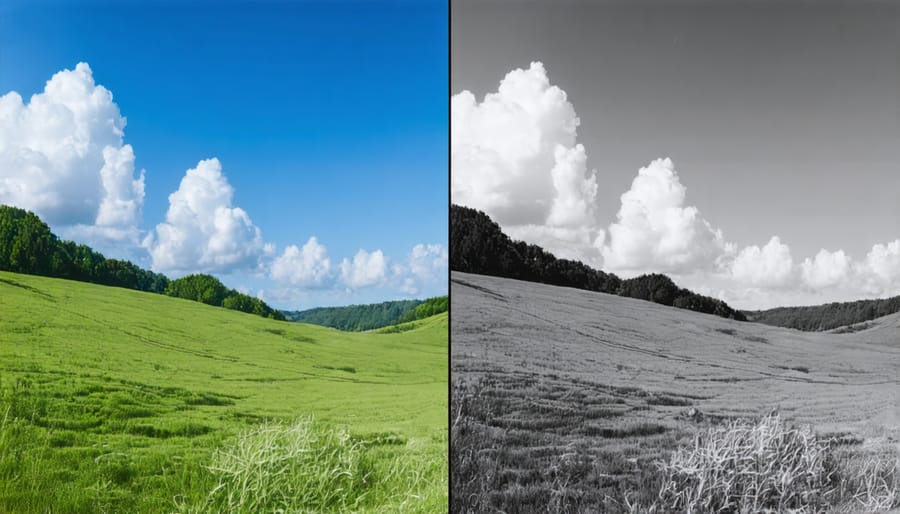
Strip away color to reveal the raw emotion and drama hiding in every scene – transforming ordinary moments into compelling black and white art. Master the interplay of light and shadow by shooting in RAW format and deliberately underexposing by 1/3 stop to preserve highlight detail. Study how different colors translate to grayscale tones before pressing the shutter – red filters dramatically darken blue skies while yellow filters soften skin tones. Train your eye to see contrast, texture, and form by temporarily setting your camera’s LCD to monochrome mode while composing shots.
The timeless power of black and white photography lies not in the absence of color, but in its ability to distill scenes to their emotional and compositional essence. Whether capturing the grace of architecture, the character in a weathered face, or the abstract patterns in nature, working in monochrome forces us to focus on the fundamental building blocks of powerful images – light, shape, and moment.
This guide will equip you with both the technical foundations and creative vision needed to create striking black and white photographs that resonate with viewers on a deeper level than color ever could.
Master Your Camera’s Monochrome Settings
RAW vs. JPEG in Black and White
When shooting black and white, the choice between RAW and JPEG can significantly impact your final image quality and editing flexibility. RAW files contain all the data captured by your camera’s sensor, giving you maximum control during the monochrome conversion process. This means you can fine-tune contrast, recover shadow details, and adjust individual color channels before converting to black and white.
JPEG, while more space-efficient, compresses image data and applies in-camera processing, limiting your editing options. When shooting JPEG in black and white mode, your camera makes decisions about how different colors translate to grayscale tones, which can’t be reversed later.
For the best results, consider shooting in RAW + JPEG. This approach lets you see a black and white preview in-camera via the JPEG while preserving all color information in the RAW file. During post-processing, you can use the color data from your RAW file to create more dramatic contrast by adjusting how specific colors convert to different shades of gray. For instance, darkening blues can make skies more dramatic, while brightening greens can add depth to foliage.
Essential Camera Settings for Monochrome
Getting your camera settings right is crucial for capturing compelling black and white images straight from the start. While you can always convert color photos to monochrome in post-processing, starting with the right settings will help you better visualize and compose your shots.
First, set your camera to shoot in RAW format. This gives you maximum flexibility when editing and ensures you capture all available tonal information. If your camera has a monochrome preview mode, enable it to help you see how the scene will look in black and white while shooting.
ISO settings become particularly important in monochrome photography. Don’t be afraid to push your ISO higher than you might for color shots – grain can actually enhance the mood of black and white images, creating a classic film-like texture. However, be mindful of losing detail in the shadows.
For contrast control, consider using your camera’s built-in contrast settings if shooting JPEG, or adjust the Picture Style/Picture Control settings. A slightly higher contrast setting can help define shapes and textures more clearly in monochrome.
Pay special attention to your exposure settings. The histogram becomes your best friend in black and white photography – aim for a balanced distribution of tones without clipping highlights or shadows. Using exposure compensation of +/- 1/3 to 1/2 stop can help retain detail in particularly bright or dark areas.
Consider using filters, either physical or digital. A red filter can darken skies and make clouds pop, while a yellow filter can add subtle contrast to landscapes. Some cameras offer digital filter simulations that can help you preview these effects while shooting.
Seeing in Black and White
Understanding Tonal Range
Understanding tonal range in black and white photography is like learning to see the world in shades of gray, much like the masters did with their timeless film photography techniques. The key lies in recognizing how different colors translate into grayscale values and using this knowledge to create compelling images.
When shooting in black and white, focus on identifying the brightest highlights and darkest shadows in your scene. These extremes create the foundation of your tonal range. Look for scenes with natural contrast – perhaps where sunlight creates deep shadows against bright walls, or where fog softens the contrast for a more nuanced range of grays.
Train your eye to spot subtle variations in tone by squinting at your subject. This technique reduces the scene to its basic values, helping you preview how it might appear in black and white. Pay particular attention to textures and patterns, as these elements often become more pronounced without color to distract the viewer.
Consider using the zone system as a mental framework – imagining your scene divided into 10 zones from pure black to pure white. This helps ensure you capture detail in both highlights and shadows. Remember, a successful black and white image doesn’t necessarily need to include the entire tonal range; sometimes, a high-key image focusing on lighter tones or a low-key photo emphasizing darker values can be more impactful.
Identifying Strong Compositions
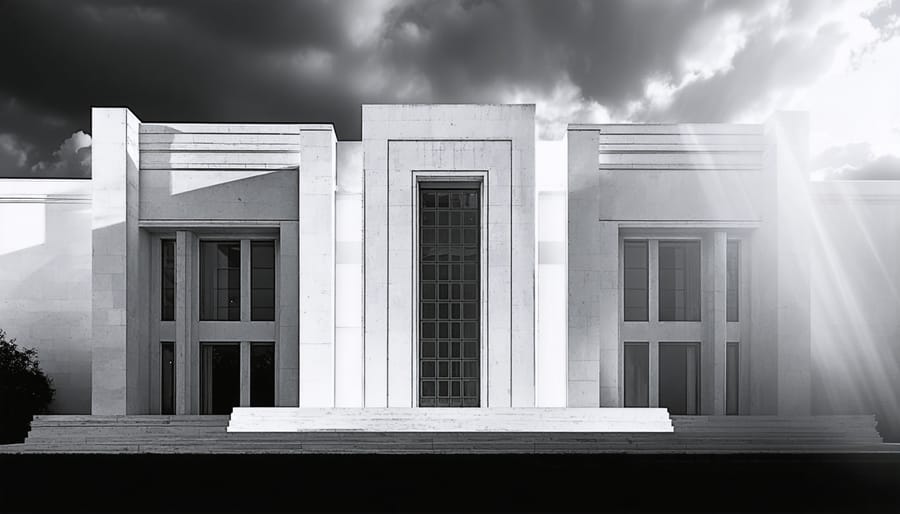
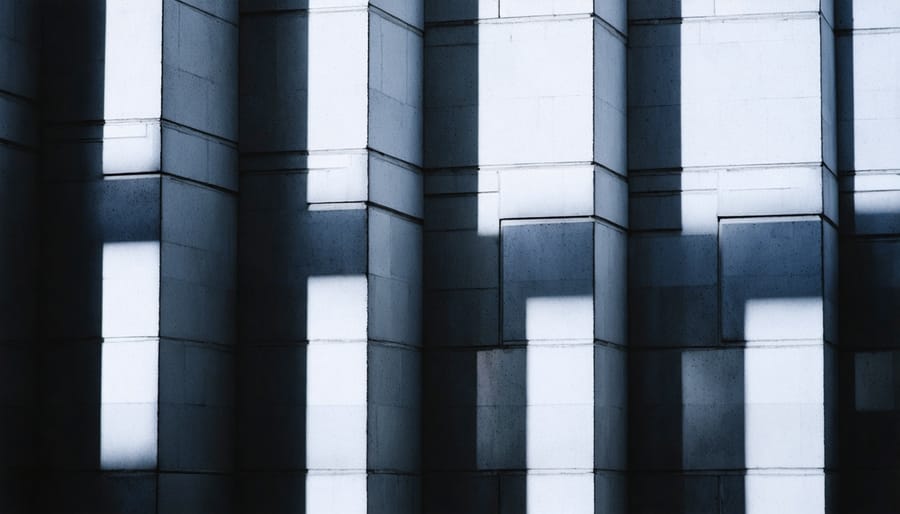
Strong black and white compositions often rely on different elements than their color counterparts. Leading lines, patterns, and textures become particularly prominent when color is stripped away, making them essential tools in your compositional toolkit. This is especially evident in architectural photography, where geometric shapes and repeating patterns create compelling monochrome images.
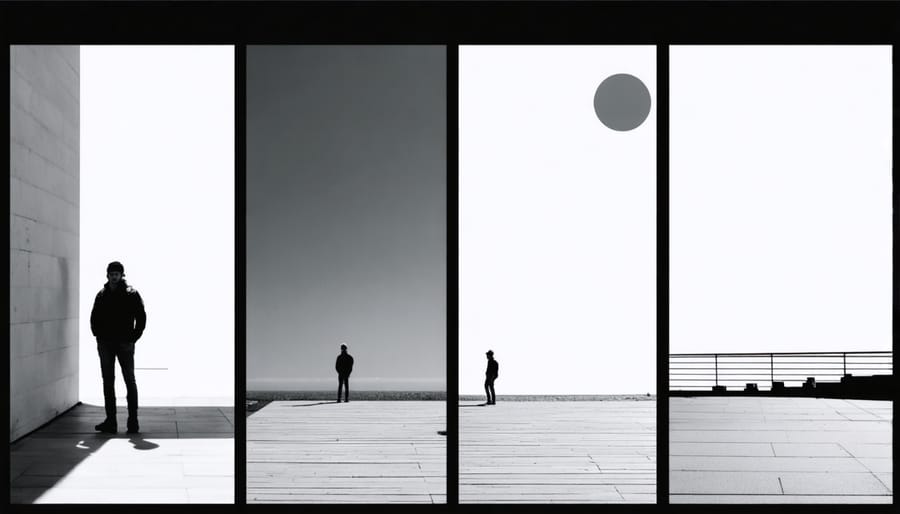
Look for high contrast scenes where light and shadow play against each other dramatically. A sunlit building casting deep shadows, or morning fog rolling through a forest of trees, can create striking compositions that actually benefit from the absence of color. Silhouettes and strong geometric shapes work exceptionally well in black and white, drawing the viewer’s eye through the frame.
Texture is another powerful element – rough stone walls, weathered wood, or rippling water take on new significance when rendered in monochrome. The interplay of different textures can create visual interest that might otherwise be overwhelmed by color. Remember that successful black and white compositions often rely more on the relationship between forms and tones than on the subjects themselves.
Light and Shadow Mastery
Natural Light Techniques
Natural light is a powerful tool in black and white photography, often creating dramatic contrasts and ethereal moods that artificial lighting can’t replicate. Understanding how to harness available light can lead to stunning creative lighting effects without the need for expensive equipment.
Start by observing how light interacts with your subject throughout the day. Early morning and late afternoon offer directional light that creates strong shadows and highlights, perfect for emphasizing texture and form. The harsh midday sun, often considered challenging for color photography, can work wonderfully in black and white, producing deep contrasts and stark shadows.
Overcast days shouldn’t be overlooked – they provide soft, even lighting that’s ideal for capturing subtle tonal gradations. Position your subject near windows or in doorways to create natural light gradients that add depth to your images. Pay attention to how light reflects off surfaces; white walls can act as natural reflectors, while dark surfaces can add dramatic shadows.
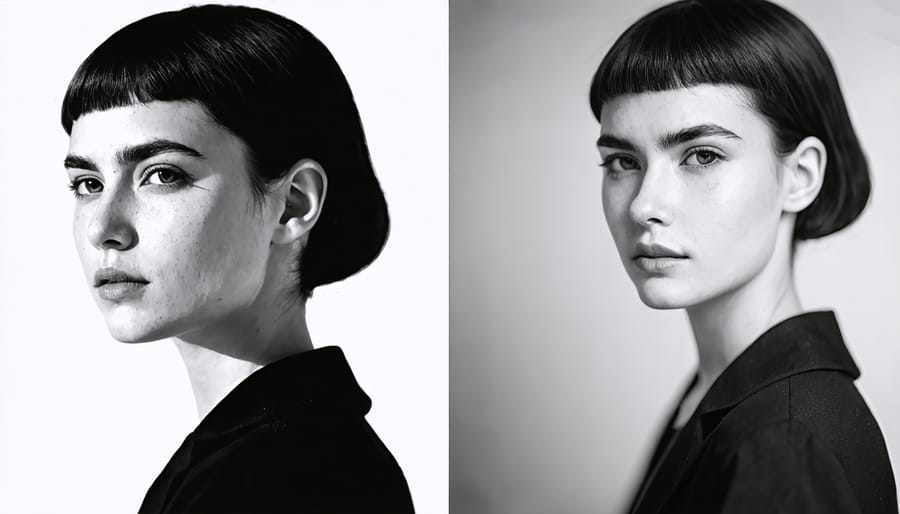
For portraits, placing your subject at a 45-degree angle to a window creates classic Rembrandt lighting, with one side of the face illuminated and the other in gentle shadow. In landscapes, backlighting can create striking silhouettes and rim lighting effects that really pop in monochrome.
Remember to expose for the highlights in high-contrast scenes, as it’s easier to recover shadow detail in post-processing than to restore blown-out highlights.
Creating Dramatic Contrast
In black and white photography, the interplay between light and shadow becomes your primary storytelling tool. Understanding how to create and enhance dramatic contrast can transform an ordinary scene into a compelling visual narrative. Start by identifying scenes with naturally strong contrast – think sunlight streaming through windows, architectural elements casting bold shadows, or the interplay of clouds and sunlight on a landscape.
To maximize contrast in-camera, experiment with dramatic lighting techniques such as side-lighting, which emphasizes texture and form. Position your subject so that light falls across it at roughly a 90-degree angle, creating deep shadows on one side while maintaining bright highlights on the other.
The time of day plays a crucial role in contrast. Early morning and late afternoon offer naturally dramatic lighting conditions, with long shadows and directional light that can add depth to your compositions. In controlled environments, try using a single light source and positioning reflectors strategically to fill shadows to your desired level.
Remember that contrast isn’t just about pure blacks and pure whites – it’s the gradual transition between tones that often creates the most impact. Look for scenes with a full range of tones, from deep shadows through mid-grays to bright highlights. This tonal variety will give your black and white images the depth and dimensionality that makes them truly stand out.
Post-Processing for Impact
Color Channel Adjustments
Color channel adjustments offer powerful creative control when converting your images to black and white. While traditional film photographers used colored filters to adjust contrast, digital photographers can achieve similar effects by manipulating individual color channels during conversion.
Think of each color channel as a virtual filter. By adjusting how different colors translate to various shades of gray, you can dramatically alter the mood and impact of your image. For instance, darkening the blue channel can create dramatic skies with deep, moody tones, while brightening the red channel can soften skin tones in portraits.
In landscape photography, try increasing the yellow and green channels to add depth to foliage while darkening blues to create contrast in the sky. For portraits, experiment with red and orange channels to control skin tone rendering, or boost the blue channel to emphasize clothing textures.
Most editing software provides dedicated tools for this purpose. Look for black and white conversion adjustments or channel mixer panels. Start with subtle changes and gradually refine your adjustments until you achieve the desired tonal separation and contrast in your image.
Remember that each image may require different channel adjustments depending on its color composition and your creative vision.
Dodging and Burning
Dodging and burning, techniques borrowed from darkroom days, remain powerful tools in digital black and white photography. These local adjustments allow you to selectively lighten (dodge) or darken (burn) specific areas of your image, adding depth and drama to your compositions.
Think of dodging and burning as painting with light and shadow. By lightening the areas you want to draw attention to and darkening others to create mood, you can guide your viewer’s eye through the frame. For instance, brightening a subject’s face while darkening the surrounding environment can create striking portraits with dimensional depth.
Start subtle with these adjustments – aim for changes that enhance rather than overwhelm. A helpful approach is to create separate dodge and burn layers in your editing software set to soft light blend mode at low opacity. This gives you precise control and allows for easy adjustments if you go too far.
Pay special attention to natural light patterns in your scene. Emphasize existing highlights and shadows to reinforce the natural dimensionality of your subject, making your black and white images more compelling and lifelike.
Texture and Detail Enhancement
Black and white photography excels at revealing textures that might go unnoticed in color images. To enhance texture, start by using side lighting to create shadows that emphasize surface details. This technique works particularly well with rough surfaces like tree bark, weathered wood, or stone walls.
During shooting, consider using a polarizing filter to reduce glare and increase contrast, which can help reveal subtle textures. When possible, shoot during the golden hours when low-angle sunlight naturally emphasizes surface details.
In post-processing, selective clarity and texture adjustments can dramatically improve detail rendition. Try increasing micro-contrast using tools like Clarity, Structure, or Texture sliders, but be careful not to overdo it – too much enhancement can make images look artificial. The key is to enhance existing textures rather than creating new ones.
For portraits, emphasize skin texture by slightly increasing contrast in mid-tones while maintaining smooth highlights and shadows. With landscape photos, boost local contrast in areas with interesting textures like rock formations or foliage, while keeping other areas more subdued to create visual hierarchy.
Remember that successful texture enhancement often requires a delicate balance – aim for subtle improvements that draw attention without overwhelming the overall composition.
Common Mistakes to Avoid
Even experienced photographers can fall into common traps when shooting in black and white. Being aware of these pitfalls will help you avoid them and create more compelling monochrome images.
One frequent mistake is relying too heavily on the camera’s built-in black and white mode. While this can be useful for visualization, shooting in RAW + JPEG gives you more control over the final conversion and preserves all color information for post-processing flexibility.
Many photographers also make the error of trying to “rescue” a poor color photo by converting it to black and white. Remember that strong black and white images usually start with good composition and lighting – it’s not a fix for mediocre shots.
Failing to consider contrast during composition is another common oversight. Without color to create visual interest, the relationship between light and dark becomes crucial. Look for strong tonal differences and interesting textures that will translate well to monochrome.
Over-processing is a frequent temptation in black and white photography. While dramatic contrast can be effective, pushing the shadows too dark or highlights too bright can result in unnatural-looking images that lose subtle details and gradations.
Many beginners overlook the importance of filters, both during capture and in post-processing. A red filter can darken skies dramatically, while a yellow filter can help separate similar tones. Understanding how different colored filters affect various scenes is essential for achieving desired results.
Another mistake is ignoring the background. In color photography, the subject might stand out naturally against a differently colored background. In black and white, you need to ensure there’s enough tonal separation to make your subject pop.
Finally, don’t forget about the mid-tones. While deep blacks and bright whites create drama, it’s the subtle gradations in between that often give black and white photos their richness and depth. Pay attention to preserving these important middle values during both shooting and editing.
By avoiding these common mistakes, you’ll be better equipped to create black and white images that truly capture your creative vision.
Black and white photography is a timeless art form that continues to captivate viewers and challenge photographers to see the world differently. Throughout this guide, we’ve explored the essential elements that make monochrome images truly striking – from understanding how to pre-visualize scenes in grayscale to mastering the technical aspects of exposure and contrast.
Remember that successful black and white photography isn’t just about removing color; it’s about creating compelling compositions that leverage the interplay of light, shadow, texture, and form. By focusing on these fundamental elements, you can create images that tell powerful stories and evoke strong emotions without relying on color.
The key to improving your black and white photography lies in consistent practice. Start by training your eye to see in monochrome, experiment with different lighting conditions, and don’t be afraid to push the boundaries of contrast in your post-processing workflow. Take time to study the works of master photographers while developing your own unique style and vision.
As you continue your journey in black and white photography, return to these principles regularly. Each shoot is an opportunity to refine your technique and deepen your understanding of the craft. Whether you’re capturing portraits, landscapes, or street scenes, remember that great black and white images are built on strong fundamentals and creative vision.
Now it’s time to grab your camera and put these concepts into practice. The world looks different in black and white – go out and discover it through your lens.