Mastering video lighting transforms amateur footage into professional-quality content instantly. Professional cinematographers know that lighting accounts for 80% of the visual impact in any video production – far more than camera choice or lens selection. Whether you’re shooting interviews, product demos, or creative content, three fundamental principles shape every successful lighting setup: direction, intensity, and color temperature.
The art of video lighting balances technical precision with creative vision. Strategic placement of key lights creates depth and dimension, while thoughtful manipulation of shadows crafts mood and atmosphere. Modern LED technology has revolutionized what’s possible, offering precise control over color and intensity that previously required extensive expertise and expensive equipment.
Understanding video lighting isn’t just about buying the right gear – it’s about grasping how light shapes storytelling. A well-lit scene guides viewers’ attention, evokes emotional responses, and establishes professional credibility. This foundational knowledge transforms every video project, whether you’re working with high-end studio equipment or crafting content with budget-friendly solutions.
Let’s explore how to harness light’s power to elevate your video production, starting with essential techniques that deliver immediate, professional results.
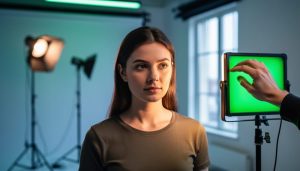
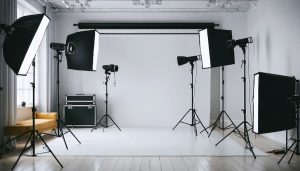
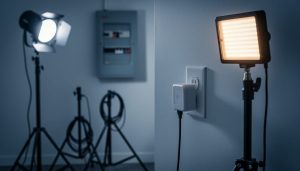
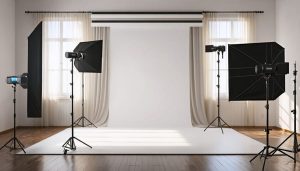
Essential Lighting Equipment for Indoor Video
Key Light Solutions
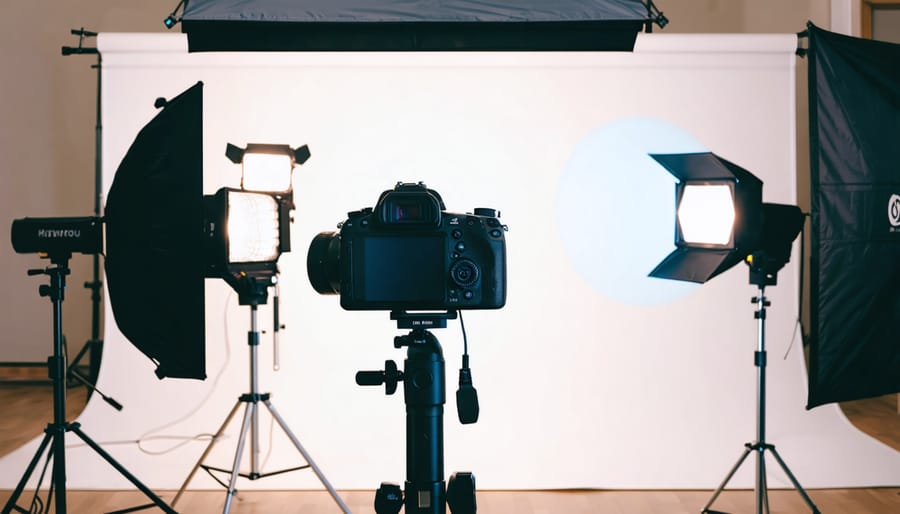
In video production, your key light serves as the primary illumination source, typically positioned at a 45-degree angle from your subject. A powerful LED panel or softbox works excellently as a key light, providing consistent, controllable illumination that flatters your subject while maintaining natural-looking shadows.
For optimal results, position your key light slightly above eye level, angled downward at about 30 degrees. This creates the classic Rembrandt lighting pattern, where one side of the face is well-lit while the other shows graduated shadows, adding depth and dimension to your shot.
Modern LED panels offer significant advantages, including adjustable color temperature and intensity. Look for fixtures with high CRI (Color Rendering Index) ratings above 95 for the most accurate color reproduction. Some popular options include the Aputure 120d II or the ARRI L-Series, though budget-friendly alternatives like the Godox SL-60W can deliver professional results.
Remember that your key light should be roughly three times brighter than your fill light to maintain proper contrast ratios. This creates depth while ensuring your subject remains clearly visible and professionally lit.
Fill and Back Lights
Fill and back lights play crucial roles in creating depth and dimension in your video shots. While your key light does the heavy lifting, these secondary lights work behind the scenes to enhance the overall look of your footage.
Fill lights soften harsh shadows created by your key light, preventing stark contrasts that can be unflattering or distracting. Position your fill light at about half the intensity of your key light, typically at a 45-degree angle opposite the key light. This creates a more natural, balanced appearance while maintaining enough shadow to preserve depth.
Back lights (also called rim lights) separate your subject from the background by creating a subtle glow around their edges. Place these lights behind your subject, slightly elevated and at roughly a 45-degree angle. The goal isn’t to create a dramatic halo effect – unless that’s your artistic choice – but rather to add subtle definition that makes your subject pop from the background.
For both fill and back lights, start with lower intensities and gradually adjust until you achieve the desired effect. Remember, subtlety is key – these lights should enhance your scene without drawing attention to themselves.
Budget-Friendly Alternatives
Creating professional-looking videos doesn’t always require expensive equipment. With some creativity and DIY spirit, you can achieve impressive results using everyday items. Consider using white foam boards as reflectors to bounce light, or create a softbox effect using parchment paper and a desk lamp. For more budget-friendly lighting solutions, try LED shop lights from hardware stores – they’re affordable and surprisingly effective. Clamp lights with daylight-balanced bulbs offer excellent flexibility for under $20 each. Even a well-positioned white sheet can serve as a diffuser, creating soft, flattering light. Chinese lanterns with LED bulbs make great overhead lighting options, while aluminum foil on cardboard creates effective bounce cards for fill light.
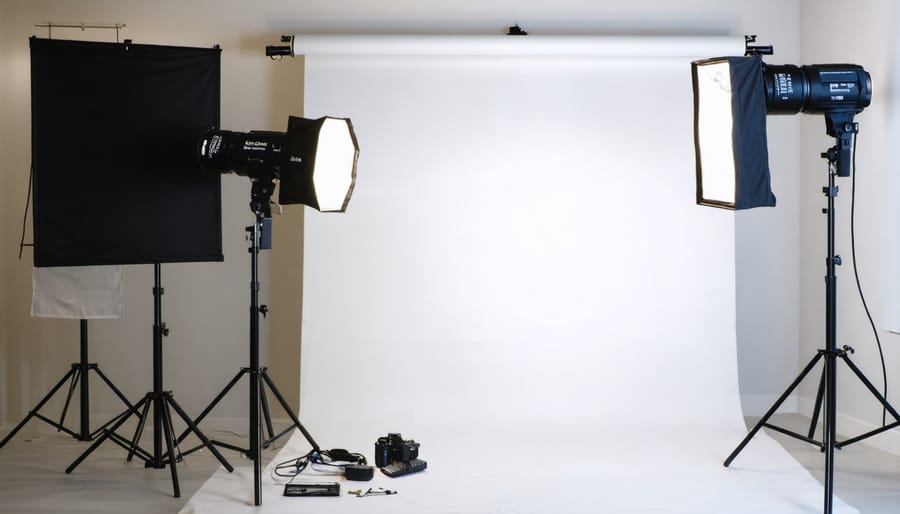

Setting Up Your Three-Point Lighting System
Light Positioning and Angles
Light positioning is the cornerstone of professional-looking video content, and mastering it can dramatically improve your footage quality. The classic three-point lighting setup serves as an excellent foundation, consisting of a key light, fill light, and back light.
Your key light, the primary source of illumination, should be positioned at a 45-degree angle to your subject, slightly above eye level. This creates natural-looking shadows while maintaining clarity. When placing the key light, ensure it’s not too close to avoid harsh shadows or washing out your subject’s features.
The fill light, typically set at half the intensity of your key light, should be positioned on the opposite side, also at roughly 45 degrees. This softer light helps reduce shadows without eliminating them completely, maintaining depth in your image. For a more dramatic look, you can move the fill light further away or reduce its intensity.
Your back light (or hair light) should be positioned behind and slightly above your subject, creating separation between them and the background. This prevents your subject from blending into the background and adds a professional polish to your footage.
Remember to consider the height of your lights – generally, they should be positioned slightly above your subject’s eye level, angled downward at about 15-20 degrees. This creates natural-looking shadows under the chin and nose while maintaining eye clarity.
For interviews or talking-head videos, keep your key light on the same side as your subject’s dominant side (the side they naturally turn toward). This creates a more flattering and engaging look while maintaining professional standards.
Managing Shadows and Contrast
Managing shadows and contrast in video lighting is like conducting a visual orchestra – it’s all about finding the perfect balance. When light hits your subject, it naturally creates shadows, which can either enhance or detract from your final image. The key is learning to control these elements effectively.
Start by identifying your main light source and its intensity. A strong key light will create more defined shadows, which can be great for dramatic effect but might be too harsh for interviews or product shots. To soften these shadows, use diffusion materials like softboxes or silk screens, which scatter the light and create more gradual transitions between light and dark areas.
Fill lights are your best friends when it comes to managing shadows. Position them opposite your key light to gently illuminate shadow areas without completely eliminating them. Remember, the goal isn’t to eliminate all shadows – they’re essential for creating depth and dimension in your shot. Instead, aim for a shadow-to-light ratio that suits your creative vision.
For precise shadow control, flags and gobos are invaluable tools. These light-blocking implements help you shape and direct light exactly where you want it. Place them strategically to prevent light spill or to create intentional shadow patterns that add visual interest to your scene.
When dealing with contrast, the zone system is a helpful concept to keep in mind. Try to maintain details in both the highlights and shadows of your image. If your contrast is too high, consider adding a bounce card to reflect light into shadow areas, or use a scrim to reduce the intensity of harsh light sources.
Remember that shadows and contrast can be powerful storytelling tools when used intentionally. They can create mood, direct attention, and add professional polish to your video production.
Advanced Lighting Techniques

Color Temperature Management
Color temperature can make or break your video’s visual consistency, and understanding how to manage it is crucial for professional-looking results. Measured in Kelvin (K), color temperature determines whether light appears warm (orange/yellow) or cool (blue). Indoor lighting typically ranges from 2700K to 3200K, while daylight sits around 5600K.
The key to consistent lighting is matching your light sources. For instance, if you’re shooting with LED panels set to 5600K but have uncorrected window light streaming in, your footage will show an obvious color mismatch. To maintain consistency, either adjust your artificial lights to match natural light or use gels and diffusers to modify the incoming daylight.
Most modern LED lighting equipment allows precise temperature adjustment, making it easier to maintain consistency. When working with fixed-temperature lights, like tungsten bulbs (3200K) or fluorescent tubes (4000K), use color correction gels to match your primary light source.
A helpful practice is to white balance your camera at the beginning of each shoot using a white card or dedicated gray card. This ensures your camera correctly interprets the color temperature of your lighting setup. Remember that mixed lighting situations require extra attention – you might need to choose a dominant light source and correct others to match, or embrace the creative possibilities of intentional temperature variations for artistic effect.
Diffusion and Light Modifiers
Mastering lighting modifiers is essential for achieving professional-looking video footage. These tools help transform harsh, direct light into softer, more flattering illumination that enhances your subject’s appearance.
Softboxes are particularly effective for creating gentle, wraparound light that minimizes harsh shadows. Think of them as windows that create natural-looking illumination. When positioning a softbox, place it at a 45-degree angle to your subject for the most flattering results. For interviews or talking-head videos, a large softbox positioned slightly above eye level creates beautiful catch lights in the eyes while maintaining natural skin tones.
Umbrellas come in two varieties: reflective and shoot-through. Reflective umbrellas bounce light back onto your subject, creating a broader light spread, while shoot-through umbrellas diffuse light directly. They’re incredibly portable and perfect for run-and-gun shooting situations. However, remember that umbrellas scatter light more than softboxes, which might not be ideal in tight spaces.
Other popular modifiers include scrims, which diffuse light without changing its direction, and grids that help control light spread. For budget-conscious creators, a simple diffusion frame with white fabric can work wonders. Even a white bed sheet can serve as an impromptu diffuser for larger areas.
The key is experimenting with different modifiers and positions until you find the perfect balance for your specific shooting needs. Start with one modifier and gradually build your toolkit as you become more comfortable with lighting techniques.
Working with Natural Light
Natural light is a powerful tool in video production, and working with natural light effectively can create stunning results when combined with artificial lighting. Window light often provides a soft, flattering quality that’s difficult to replicate artificially, making it an excellent base for your lighting setup.
Start by positioning your subject near a window, considering the time of day and sun’s position. Morning and late afternoon light tends to be warmer and more directional, while midday light is typically harder and more overhead. Use diffusion curtains or blinds to control the intensity and spread of incoming light.
When mixing natural and artificial light, match your artificial sources’ color temperature to the window light. If you’re shooting during daylight hours, set your lights to around 5600K. Use light meters or your camera’s white balance settings to ensure consistency across all light sources.
Consider using reflectors or bounce cards to redirect window light and fill shadows. Place artificial lights strategically to complement the natural light – they can serve as fill lights, hair lights, or accent lighting to add depth to your scene.
Remember that natural light changes throughout the day, so monitor your exposure and adjust artificial lights accordingly. For longer shoots, you might need to modify your setup as the sun moves to maintain consistent lighting.
Common Lighting Challenges and Solutions
Dealing with Mixed Lighting
Mixed lighting scenarios can be one of the trickiest challenges in video production, especially when you’re dealing with multiple light sources that have different color temperatures. Imagine filming in an office where sunlight streams through windows while fluorescent lights buzz overhead – without proper management, your footage could end up with an unsightly mix of warm and cool tones.
The key to handling mixed lighting lies in choosing a primary light source and adjusting everything else to match. If you’re working with natural daylight as your main source, you’ll want to either gel your artificial lights to match the cooler daylight temperature (around 5600K) or use LED lights that can be adjusted to daylight color temperature. Conversely, if indoor lighting is your primary source, you might need to use window filters or blinds to control the daylight.
Color temperature meters can be invaluable tools in these situations, helping you measure and match different light sources precisely. However, if you’re working on a budget, most modern cameras have built-in white balance presets that can help you achieve reasonable results.
A practical approach is to use flags, diffusers, or blackout curtains to block unwanted light sources entirely. This gives you more control over your lighting setup and eliminates the headache of dealing with conflicting color temperatures. Remember that your camera’s white balance should be set to match your primary light source, and try to avoid auto white balance as it might shift during your shoot.
For consistent results, consider converting all light sources to one type, either by replacing bulbs or using correction gels. This might require more initial setup time but will save you countless headaches in post-production.
Small Space Solutions
Limited space shouldn’t limit your video lighting possibilities. Whether you’re shooting in a small home office, cramped apartment, or tight studio corner, there are plenty of creative ways to achieve professional-looking results.
Start by maximizing your wall space. Mount lightweight LED panels on walls using removable hooks or stands that can fold flat when not in use. Consider using compact light strips that can be easily attached to shelves or furniture edges, providing subtle fill light without taking up floor space.
Multi-purpose lighting equipment is your best friend in small spaces. Look for lights with adjustable brightness and color temperature, allowing you to achieve different effects without multiple fixtures. Collapsible softboxes and umbrellas are excellent choices as they can be quickly set up and packed away when needed.
Make use of natural light whenever possible. Position your shooting area near windows and use reflectors to bounce light back onto your subject. A simple white foam board can serve as both a reflector and a space-saving solution.
For tight spaces, consider the three-point lighting setup in miniature. Use small LED panels or even powerful desk lamps with diffusion material. Position your key light close to the camera, place a compact fill light at a 45-degree angle, and use a small LED strip or panel for back lighting.
Remember to keep your cables organized and equipment mobile. Invest in rolling stands or mounting solutions that allow quick adjustments. This flexibility helps you adapt your setup quickly while maintaining a clear, safe shooting environment in your limited space.
Mastering video lighting is a journey that combines technical knowledge with creative vision and practical experience. Throughout this guide, we’ve explored the fundamental principles of lighting, from understanding the three-point lighting setup to manipulating different light sources for optimal results. Remember that while equipment is important, it’s your understanding of how to use it effectively that truly makes the difference in your video production quality.
The key to success lies in practicing these techniques consistently. Start with basic setups and gradually experiment with more complex lighting arrangements as your confidence grows. Don’t be afraid to make mistakes – they’re valuable learning opportunities that will help you develop your unique style and approach.
Keep in mind that lighting isn’t just about technical perfection; it’s about creating the right mood and atmosphere for your story. Whether you’re shooting interviews, product videos, or creative content, your lighting choices should always support your narrative goals.
As you continue your lighting journey, remember these essential takeaways:
– Always start with a lighting plan before setting up your equipment
– Understand the characteristics of different light sources and how they affect your subject
– Pay attention to color temperature and how it impacts the overall look of your video
– Use diffusion and modifiers to shape and control your light
– Monitor your highlights and shadows to maintain proper exposure
– Consider the practical aspects of your setup, including power requirements and safety
Most importantly, don’t let perfect be the enemy of good. Start with the equipment you have available and focus on mastering the fundamentals. As your skills develop, you can gradually invest in more advanced lighting tools and techniques.
Remember that every professional cinematographer and videographer started exactly where you are now. With dedication, practice, and the knowledge you’ve gained from this guide, you’re well-equipped to create beautifully lit videos that engage and inspire your audience.