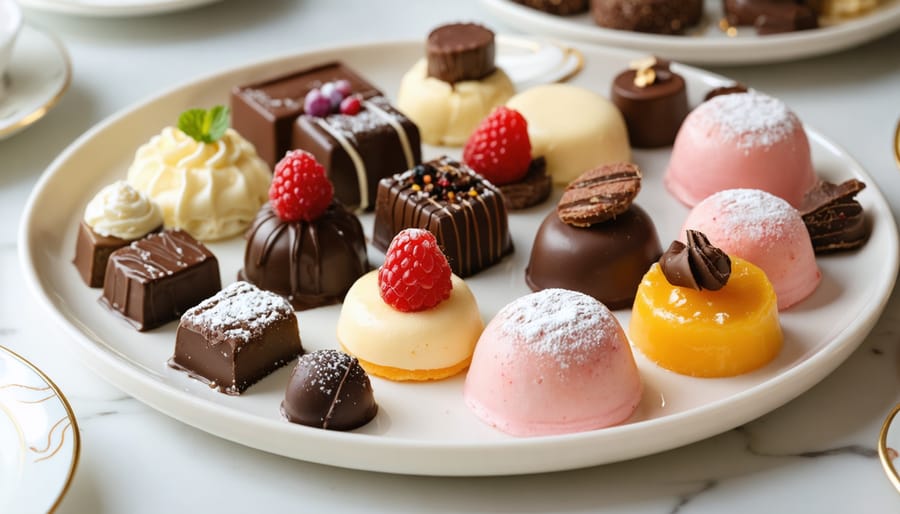
Capturing the perfect dessert photo demands mastery of both technical precision and artistic flair. In the world of food photography, desserts present unique challenges – from rapidly melting ice cream to maintaining the delicate textures of freshly baked pastries. Professional food photographers know that success lies in the delicate balance between timing, lighting, and composition.
A beautifully photographed dessert does more than document appearance – it evokes emotion, triggers cravings, and tells a story of craftsmanship. Whether shooting for a high-end restaurant menu, food blog, or social media campaign, understanding the nuances of dessert photography can transform ordinary sweets into extraordinary visual experiences.
This comprehensive guide dives deep into the essential techniques, equipment, and styling principles that will elevate your dessert photography from amateur snapshots to professional-grade imagery. From managing challenging materials like chocolate and whipped cream to creating the perfect lighting setup for that coveted “golden hour” glow, we’ll explore the specialized skills needed to capture desserts at their most tempting and beautiful.
Get ready to master the art of dessert photography with proven techniques that will help you create images that look good enough to eat.
Essential Equipment for Stunning Dessert Photos
Camera and Lens Selection
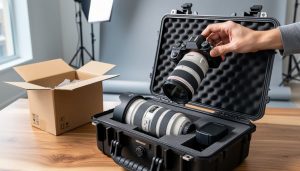
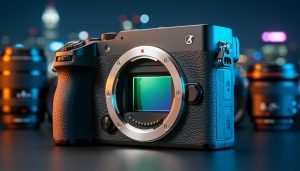
When it comes to capturing the intricate details of desserts, your choice of camera and lens can make a significant difference. While modern smartphones can produce decent results, a dedicated camera system offers superior control and image quality. For professional-quality dessert photography, consider using a full-frame or crop-sensor mirrorless camera or DSLR, which provide excellent low-light performance and depth-of-field control.
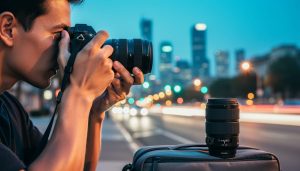
The real magic happens with your lens selection. A macro lens is essential for those mouth-watering close-ups of texture and detail. The 100mm macro is particularly versatile, offering an ideal working distance that won’t cast shadows over your subject. For broader shots of plated desserts, a 50mm or 35mm prime lens with a wide aperture (f/1.8 or wider) creates beautiful background blur while maintaining sharp focus on your subject.
Learning proper macro photography techniques will help you maximize your equipment’s potential. Consider investing in the Canon EF 100mm f/2.8L IS USM Macro or the Nikon AF-S VR Micro-NIKKOR 105mm f/2.8G IF-ED for professional results. For those on a budget, the Tamron SP 90mm f/2.8 Di MACRO offers excellent value without compromising image quality.
Remember that while high-end equipment can enhance your capabilities, mastering the fundamentals of composition and lighting remains crucial for creating stunning dessert photographs.
Lighting Equipment
Proper lighting can make or break your dessert photography, and having the right equipment is crucial for capturing those mouth-watering shots. Natural light remains the gold standard, but you’ll need tools to harness and control it effectively.
A large window is your best friend for natural lighting, but you’ll want to have a diffuser nearby to soften harsh sunlight. A simple white sheet or professional diffusion panel works wonderfully to create that soft, ethereal glow that makes desserts look irresistible.
For artificial lighting, start with a main light source – either a speedlight or a continuous LED light. Continuous lighting is particularly helpful for beginners as it allows you to see exactly how the light falls on your subject before taking the shot. Consider investing in a softbox or umbrella to diffuse your artificial light, creating that coveted soft, window-light effect.
Reflectors are essential for both natural and artificial setups. A 5-in-1 reflector kit gives you versatility with white, silver, and gold surfaces to bounce light back onto your subject, filling shadows and creating highlights where needed. For more precise control, small white foam boards can work wonders for reflecting light into specific areas of your dessert.
Don’t forget about flags and gobos – simple black cards or panels that block and shape light. These help create dramatic shadows and prevent light spill, giving your dessert photos that professional edge.
Composition Techniques That Sell Desserts
Angles and Perspectives
Choosing the right angle for dessert photography can make the difference between an ordinary shot and a mouthwatering masterpiece. For layered desserts like parfaits and tall cakes, a straight-on 90-degree angle captures the intricate layers and height, while a slight 45-degree angle adds depth while maintaining the view of both layers and surface details.
When photographing flat desserts like cookies, tarts, or pies, shoot from directly above (overhead or bird’s-eye view) to showcase intricate toppings, patterns, or decorative elements. This angle works particularly well for composition techniques like knolling, where items are arranged in an organized, geometric pattern.
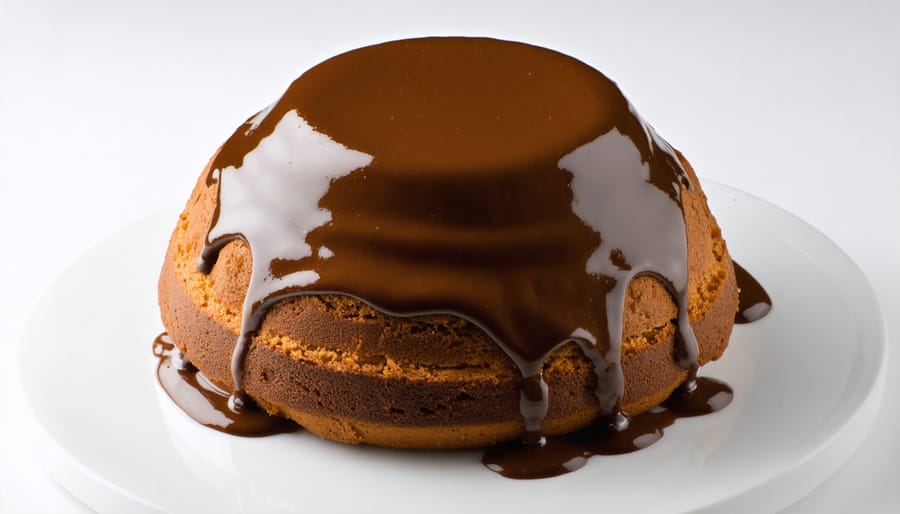
For ice cream and molten desserts, a low angle (25-35 degrees) creates drama and emphasizes the drips, swirls, and texture. This perspective is especially effective when capturing melting elements or sauce pours, as it allows you to showcase the movement and flow of the ingredients.
For plated desserts with multiple components, experiment with a three-quarter view (around 75 degrees). This versatile angle reveals height, texture, and composition while maintaining a natural, approachable feel that viewers can relate to – as if they’re sitting at the table ready to dig in.
Remember to consider your dessert’s hero element when choosing your angle. If it’s a perfectly swirled frosting top, shoot from above. If it’s layers of cream and fruit, opt for that straight-on view that tells the whole delicious story.
Color Theory and Styling
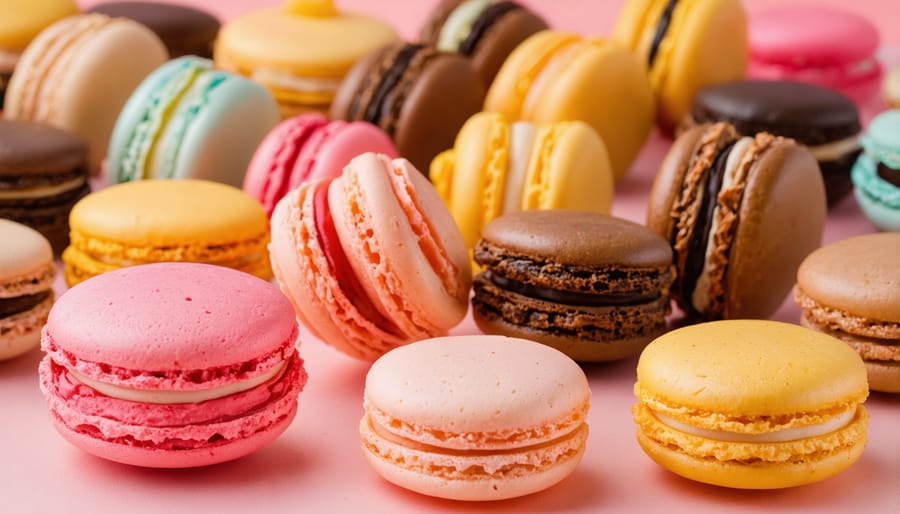
Color plays a vital role in dessert photography, often making the difference between an ordinary shot and one that makes viewers’ mouths water. Understanding color theory helps create visually striking compositions that highlight your desserts’ most appealing features.
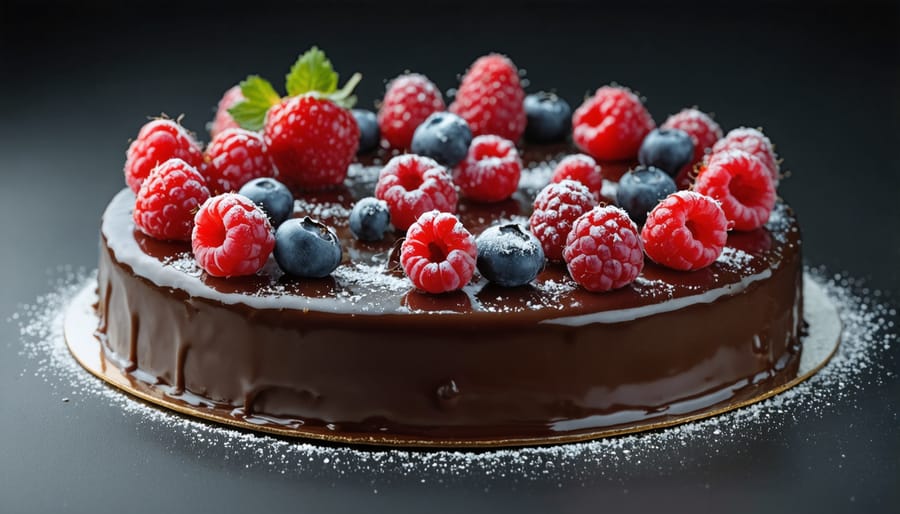
Start by considering complementary colors – those opposite each other on the color wheel. For chocolate desserts, pairing with blue props or backgrounds creates striking contrast, while strawberry-based treats pop against gentle mint-green elements. Analogous colors, which sit next to each other on the color wheel, create harmonious compositions – think vanilla ice cream with honey drizzle on cream-colored linens.
When styling desserts, props should enhance rather than overshadow your subject. Choose items that tell a story – vintage spoons, scattered ingredients, or textured linens can add context and depth. For example, place a chocolate soufflé alongside a few scattered cocoa beans, or garnish a fruit tart with fresh berries that echo those used in the dessert.
Consider the emotional impact of different color schemes. Warm colors like reds, oranges, and yellows stimulate appetite and create an inviting atmosphere, while cool tones can emphasize the refreshing nature of frozen desserts. Neutral backgrounds often work best as they allow the dessert’s colors to shine without competition.
Remember that less is often more – avoid cluttering your frame with too many props or competing colors. The dessert should remain the hero of your image, with supporting elements enhancing its natural beauty rather than stealing the spotlight.
Texture and Detail Focus
The secret to captivating dessert photography lies in showcasing every delectable detail and tantalizing texture. Start by positioning your camera at the optimal angle to capture surface textures – a 45-degree angle often works well for highlighting both the top and sides of pastries, while straight-on shots can emphasize layering in items like mille-feuille or tiramisu.
Understanding macro lighting essentials is crucial when photographing intricate details like sugar crystals, chocolate shavings, or delicate pastry crumbs. Use a macro lens or extension tubes to get incredibly close to your subject, revealing details the naked eye might miss. Side lighting helps create shadows that emphasize texture, while diffused lighting prevents harsh reflections on glazed surfaces.
Focus stacking can be particularly valuable when shooting close-up details, especially with minimal depth of field. Take multiple shots at slightly different focus points and combine them in post-processing for tack-sharp results from front to back. Don’t forget to experiment with selective focus – sometimes leaving certain elements slightly soft can create a dreamy, appetizing effect.
For subjects like ice cream or chocolate, timing is everything. Work quickly and use props like dry ice or glycerin to maintain that fresh, just-served appearance. Remember that texture can be enhanced through careful styling – use tools like forks to create intentional marks in mousses or creams, and consider adding complementary garnishes that provide textural contrast.
Lighting Secrets for Irresistible Dessert Photos
Natural Light Mastery
Natural light is the secret weapon of dessert photography, offering a soft, appetizing glow that makes sweets irresistibly tempting. The best spot for natural light photography is typically near a large window, ideally one that faces north or south to avoid harsh direct sunlight that can create unflattering shadows and blown-out highlights.
Position your dessert setup about 2-3 feet away from the window, allowing the light to fall gently across your subject. Watch how the light interacts with textures like whipped cream, glazed surfaces, or chocolate drizzles – these elements come alive under soft, directional lighting.
For better control, keep a white diffuser handy. A simple translucent curtain or photography diffusion panel between the window and your subject will soften harsh light on bright days. This creates an even, flattering illumination that brings out the subtle details in your desserts without washing them out.
Don’t forget about bounce light! Place a white foam board or reflector opposite your window to fill in shadows and create balanced lighting. This technique is particularly effective for capturing the dimensional qualities of layered desserts like tiramisu or multi-tiered cakes.
Time of day matters significantly. Early morning or late afternoon light tends to be warmer and more flattering, while midday light can be too intense. Cloudy days are actually perfect for dessert photography, providing natural diffusion and even illumination across your sweet subjects.
Artificial Light Setup
Creating professional dessert photos in a controlled studio environment requires careful attention to lighting setup. While natural light has its charm, artificial lighting gives you complete control over your shots, regardless of time or weather conditions.
Start with a single-light studio setup using a softbox positioned at a 45-degree angle to your dessert. This creates a soft, even illumination that highlights textures while maintaining gentle shadows. For chocolate-based desserts, consider using a slightly harder light source to emphasize the glossy finish.
To eliminate harsh shadows, use a white foam board or reflector on the opposite side of your main light. This bounces light back onto your subject, revealing details in darker areas without losing depth. For particularly reflective elements like glazed surfaces or metallic decorations, diffuse your light through a large silk or softbox to minimize unwanted specular highlights.
When photographing ice cream or temperature-sensitive desserts, position your lights farther away to prevent melting. Use gridded lights to control light spill and maintain the cold colors of frozen treats. For layered desserts or tall cakes, consider adding a rim light behind the subject to separate it from the background and create an appetizing glow around the edges.
Remember to match your white balance to your lighting setup to maintain accurate color representation, especially crucial for capturing the subtle hues in pastries and garnishes.
Managing Reflections and Shadows
Managing reflections and shadows on glossy desserts can be the difference between an amateur snapshot and a professional-quality image. Desserts often feature shiny glazes, smooth chocolate surfaces, and reflective garnishes that require careful attention to light control.
Start by identifying potentially problematic reflections using a polarizing filter, which can help minimize unwanted glare while maintaining the natural sheen of your dessert. Position your main light source at a 45-degree angle to reduce harsh reflections while still creating appealing highlights that emphasize texture and dimension.
For particularly challenging surfaces like mirror glazes or chocolate ganache, try using diffusion materials like a white translucent umbrella or softbox. These tools help create soft, controlled highlights that add depth without overwhelming the image. You can also experiment with dramatic lighting techniques to create intentional shadows that add mood and dimension to your dessert photographs.
Don’t forget about bounce cards and flags – these simple tools can help manage reflected light with precision. Place white bounce cards to fill in harsh shadows, or use black flags to block unwanted reflections. For metallic decorations or sugar work, consider using a combination of diffused main light and carefully positioned bounce cards to create controlled highlights that enhance rather than distract from your subject.
Remember that some reflection is desirable – it’s what makes desserts look fresh and appetizing. The key is finding the right balance between highlight and shadow to showcase your dessert’s most appealing features.

Post-Processing for Perfect Dessert Images
Color Grading for Appeal
Color grading is a crucial step in dessert photography that can transform an ordinary shot into a mouth-watering masterpiece. While enhancing colors, it’s essential to maintain the authentic appearance of your desserts – after all, viewers should recognize the treats they’re looking at.
Start by adjusting the white balance to ensure your desserts appear natural under different lighting conditions. Warm tones often work well for baked goods, while cooler tones might better suit ice cream or frozen desserts. When working with chocolate, pay special attention to browns and ensure they appear rich without becoming muddy.
The HSL (Hue, Saturation, Luminance) panel in your editing software is your best friend for dessert photos. Use it to selectively enhance specific colors without affecting others. For instance, boost the reds in strawberries or the yellows in lemon tarts while keeping skin tones and backgrounds natural. Some photographers even explore color to black and white conversion for dramatic effect with certain desserts.
Remember that different desserts require different approaches. Pastries often benefit from slightly increased contrast to highlight textures, while glossy glazes and chocolate ganaches might need reduced highlights to prevent overexposure. When working with ice cream, maintain cool blue undertones while enhancing the warmth of toppings or garnishes.
Keep your editing subtle – oversaturated colors can make desserts appear artificial and unappetizing. A good rule of thumb is to enhance colors by no more than 10-15% from their original state. This ensures your final image remains appetizing while still maintaining that professional polish that makes viewers want to reach through the screen.
Detail Enhancement
Post-processing is where dessert photography truly comes to life, with detail enhancement playing a crucial role in making your sweets look irresistible. Start by adjusting the clarity slider in your editing software, but use it sparingly – around 10-15% is often sufficient to enhance texture without making the image look artificial.
For chocolate desserts, selective dodging and burning can help emphasize the glossy surfaces and deep shadows that make them appealing. Focus on brightening the highlights of glazed surfaces while deepening the shadows in textured areas like cake crumbs or cookie edges.
High-pass sharpening is particularly effective for bringing out the fine details in pastries and bread-based desserts. Create a high-pass layer, set it to overlay blend mode, and adjust the opacity to taste – typically between 15-30% works well for desserts without introducing unwanted noise.
When working with ice cream or frozen desserts, use the texture tools to enhance the crystalline structure while being careful not to overemphasize any ice crystals. The dehaze tool, applied selectively, can help restore contrast in areas where condensation might have softened the image.
For garnishes and toppings, consider using adjustment brushes to selectively increase contrast and vibrance. This technique works particularly well for fresh fruits, mint leaves, or powdered sugar, making them stand out without affecting the rest of the composition.
Remember to maintain natural-looking textures – viewers should almost feel they can reach out and touch the dessert. If you notice any haloing or artificial-looking edges, reduce the intensity of your adjustments until the enhancement looks subtle yet effective.
Mastering dessert photography is a journey that combines technical skill with artistic vision. Throughout this guide, we’ve explored the essential elements that make dessert photos truly captivating, from choosing the right equipment and mastering lighting techniques to styling your shots and perfecting post-processing workflows.
Remember that successful dessert photography requires attention to detail, patience, and practice. The key takeaways include working with natural light whenever possible, investing in macro lenses for stunning detail shots, and maintaining proper temperature control to keep your subjects looking fresh and appetizing. Styling elements like complementary props, thoughtful composition, and careful color coordination can transform a simple dessert photo into an artistic masterpiece.
Don’t be discouraged if your first attempts don’t match your vision. Like any skill, dessert photography improves with experience. Start with simple setups and gradually incorporate more complex techniques as you become comfortable. Keep experimenting with different angles, backgrounds, and lighting setups to develop your unique style.
Consider creating a portfolio of your best dessert photos and sharing them with the food photography community. Learning from feedback and studying others’ work can accelerate your growth. Most importantly, enjoy the creative process – there’s something magical about capturing the beauty of desserts in a way that makes viewers’ mouths water.
With dedication and consistent practice, you’ll soon be creating stunning dessert photographs that showcase these sweet treats in their best light.