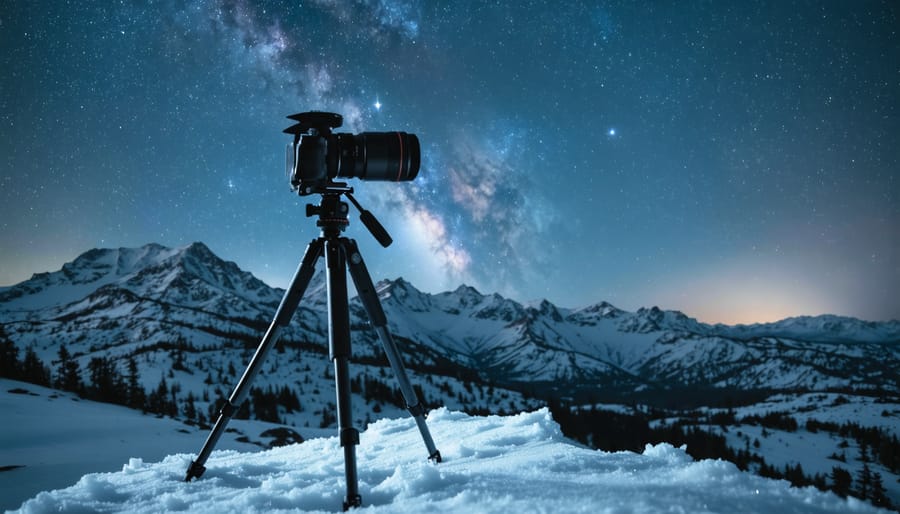
Master your DSLR’s manual mode before venturing into the darkness—automatic settings will fail you when ambient light disappears and your camera struggles to find focus points. Set your aperture to its widest opening (f/2.8 or lower if possible), start with ISO 3200, and experiment with shutter speeds between 15-30 seconds for star-filled skies without trailing. Switch to manual focus using your lens’s infinity mark, then fine-tune by zooming into live view on a bright star or distant light source.
Your DSLR’s mirror mechanism and robust sensor make it ideally suited for wilderness night photography, offering superior battery life and weather resistance compared to mirrorless alternatives—crucial advantages when you’re miles from civilization. The optical viewfinder becomes irrelevant after sunset, but the extended battery performance means you won’t miss that perfect moonrise at hour three of your shoot.
Bring a sturdy tripod that can handle wind gusts, pack extra batteries (cold temperatures drain them 40% faster), and always shoot in RAW format to maximize your ability to recover shadow detail and correct white balance during post-processing. Test your entire setup in your backyard first—discovering your remote shutter release doesn’t work under a star-filled sky two hours from the trailhead turns a promising shoot into a frustrating lesson. The learning curve is steep, but once you understand how your specific DSLR sensor handles high ISO noise and long exposures, you’ll consistently capture the night sky’s brilliance that most photographers never witness.
What Makes DSLRs Different for Night Work in the Wild
Battery Performance When It’s Cold and Dark
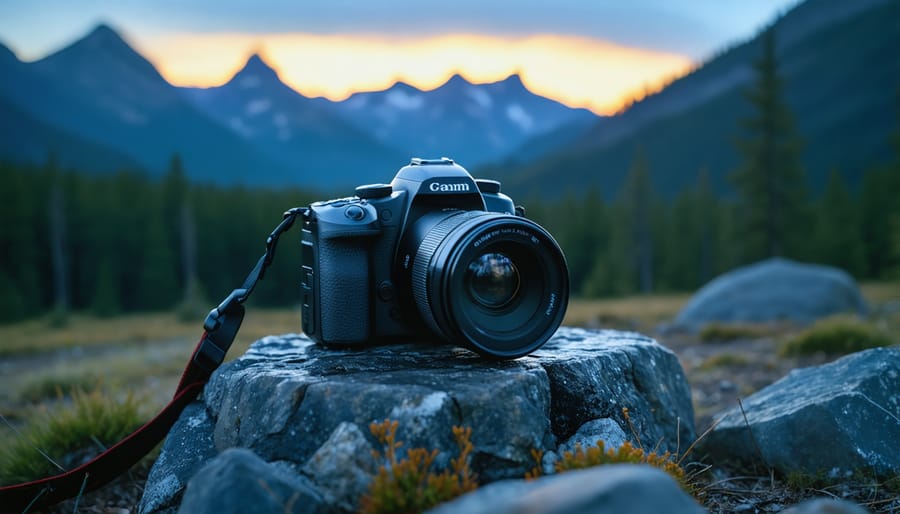
When temperatures drop below freezing during night shoots, your DSLR’s battery performance becomes critical. I’ve personally shot aurora displays at -25°C in northern Canada, and my Canon 5D Mark IV consistently delivered 400-500 exposures on a single charge—far exceeding the manufacturer’s specifications. This endurance comes from the DSLR’s efficient optical viewfinder system, which doesn’t drain power like electronic viewfinders do.
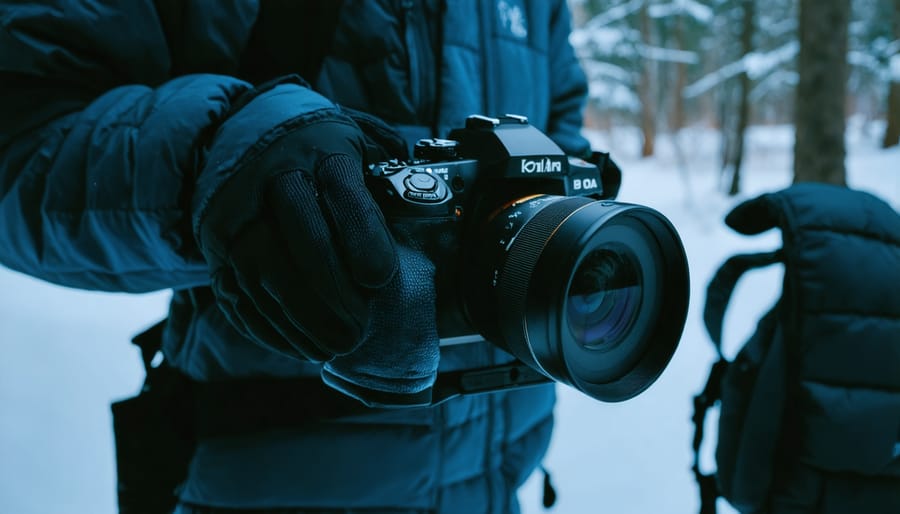
During a recent winter Milky Way expedition in the Rockies, my backup mirrorless camera’s battery died after just 90 minutes at -15°C, while my DSLR continued through a six-hour session. The key advantage? DSLRs consume minimal power when you’re not actively shooting, making them ideal for cold-weather night photography where you’re waiting between long exposures.
Pro tip: Keep spare batteries in an inner jacket pocket close to your body heat, and swap them periodically. Even a “depleted” battery often regains 20-30% capacity when warmed up. I learned this during a star trail shoot in Yukon, where rotating three batteries kept me shooting all night without interruption.
Why an Optical Viewfinder Matters After Sunset
When you’re photographing the Milky Way or setting up for long exposures under starlight, one of the least discussed advantages of a DSLR becomes immediately apparent: the optical viewfinder is a game-changer for preserving your night vision.
Here’s the reality—every time you illuminate your camera’s LCD screen to compose a shot or review settings, you’re flooding your eyes with bright light that can take 20-30 minutes to recover from. That’s precious time lost when you’re trying to spot the perfect foreground element or navigate rocky terrain in darkness. With an optical viewfinder, you’re looking through glass at the actual scene, not a glowing screen that broadcasts your position and compromises your ability to see in the dark.
This matters even more when you’re working in complete darkness, far from light pollution. Mirrorless shooters often find themselves constantly toggling their electronic viewfinders on and off to conserve battery, or squinting at dim LCDs with red filters taped over them. Meanwhile, DSLR users simply raise the camera to their eye and compose naturally, just as they would during daylight.
The practical benefit extends to your shooting companions too. In group photography outings, that one person constantly checking their bright screen becomes the unintentional disruptor. An optical viewfinder keeps you stealthy, considerate, and most importantly, allows you to maintain the dark-adapted vision that’s essential for safely moving through wilderness environments at night.
Essential DSLR Settings for Wilderness Night Scenes
The Exposure Triangle After Dark
The exposure triangle operates under completely different rules after sunset, and understanding these shifts will transform your wilderness night photography. While daylight shooting often prioritizes aperture for depth of field, nighttime demands a recalibration of your priorities.
**Aperture becomes your light-gathering workhorse** at night. In wilderness scenarios, you’ll typically shoot wide open—f/1.4 to f/2.8—to maximize light capture. This isn’t about creative bokeh; it’s about survival mode for your sensor. However, there’s a catch: ultra-wide apertures can introduce coma (star distortion at frame edges) with lower-quality lenses. If you’re shooting the Milky Way, stopping down to f/2.8 or even f/4 often delivers sharper stars, even though it reduces light intake.
**Shutter speed requires nuance** beyond the famous 500 rule (which divides 500 by your focal length to prevent star trails). In reality, modern high-resolution sensors reveal trailing at these speeds. I recommend the **300 rule** for sharper results, or better yet, experiment with your specific camera and lens combination. For a 24mm lens, that’s about 12 seconds maximum before stars start streaking. When photographing landscapes with foreground elements, you might intentionally extend exposures to 30 seconds, embracing slight star movement for atmospheric effect.
**ISO becomes less frightening** than you’d think. Modern DSLRs handle ISO 3200-6400 remarkably well, and noise reduction in post-processing has advanced significantly. In wilderness settings where low-light wilderness techniques matter most, don’t fear pushing to ISO 6400 when atmospheric conditions demand it. A slightly noisy but properly exposed image beats a noise-free underexposed failure every time.
Focus Techniques When Autofocus Fails
Autofocus systems struggle in darkness, often hunting endlessly or simply refusing to lock on. When this happens—and it will—switching to manual focus becomes your most reliable option.
The easiest manual focusing technique uses **live view mode** on your LCD screen. Switch to live view, then zoom in digitally (usually 5x or 10x magnification) on a bright point in your frame. This could be a distant streetlight, a planet like Venus or Jupiter, or a particularly bright star. Slowly adjust your focus ring until the light source appears as a sharp, tight point rather than a fuzzy blob. This method works beautifully for landscapes where you’re focusing on infinity or near-infinity.
For scenes without any bright reference points, consider using the **hyperfocal distance** technique. The hyperfocal distance is the focusing point that maximizes depth of field from half that distance to infinity. At f/2.8 with a 24mm lens, for example, focusing about 20 feet away keeps everything from roughly 10 feet to infinity acceptably sharp. Many photographers place tape markers on their focus rings at common hyperfocal distances for quick reference in the field.
Here’s a practical trick I’ve used countless times: bring a small flashlight or headlamp to illuminate your foreground subject temporarily while you establish focus. Once locked in, switch off autofocus (important!), turn off the light, and shoot. Just remember that even slight bumps to your focus ring will throw everything off, so handle your camera carefully.
In total darkness without any reference points, preset your focus to infinity before losing light completely, or use the distance markings on your lens barrel as guides.
Gear That Actually Matters in Remote Locations
Fast Lenses Worth Carrying Into the Backcountry
When you’re hiking miles into the backcountry, every ounce matters—but skimping on lens speed can mean missing the shot entirely. The ideal night photography lens strikes a delicate balance between maximum aperture and packable weight.
**Prime lenses** are the workhorses of night photography for good reason. A 24mm f/1.4 or 20mm f/1.8 delivers exceptional light-gathering power while remaining relatively compact. I’ve carried the Rokinon 24mm f/1.4 on countless overnight trips—it’s manual focus only, which actually suits night work perfectly since autofocus struggles in darkness anyway, and it weighs just over a pound. For Milky Way shots, it’s sharp wide open and costs a fraction of premium alternatives.
If you prefer native mount options, consider the Nikon 20mm f/1.8G or Canon EF 20mm f/2.8 USM. Both deliver excellent optical quality without the weight penalty of f/1.4 versions. The slightly slower aperture means adding 30-60 seconds to your exposure time—a reasonable tradeoff when your shoulders are thanking you at camp.
**Zoom lenses** sacrifice some speed but offer compositional flexibility. The Tamron 15-30mm f/2.8 has become popular among night photographers who want versatility without carrying multiple primes. At 2.4 pounds, it’s hefty but manageable, especially if it replaces two or three fixed focal lengths in your pack.
For lightweight adventures prioritizing portability, the newer f/4 zooms offer surprising capability—you’ll simply need longer exposures or higher ISO values to compensate.
The Support System You Can’t Skip
A sturdy tripod isn’t optional for night photography—it’s the foundation of sharp images. Look for models rated to support at least twice your camera and lens weight combined. Carbon fiber tripods offer the best balance of stability and portability for wilderness hikes, though quality aluminum options work well if weight isn’t critical.
Here’s what matters in the field: leg locks that won’t slip when temperatures drop, rubber feet with removable spikes for rocky terrain, and a center column hook where you can hang your camera bag for added stability on windy nights. Test your tripod’s legs fully extended—cheap models wobble at maximum height, ruining 30-second exposures.
Remote shutter releases eliminate camera shake from pressing the shutter button. Wired releases are reliable and never need batteries, while wireless options offer flexibility for self-portraits under the stars. Your camera’s built-in timer works in a pinch, but you’ll lose precision timing for capturing meteors or wildlife.
For uneven ground, position one tripod leg pointing toward your subject—this triangle formation provides maximum stability. Sink spiked feet into soft earth or nestle them between rocks. Small sandbags add weight without the bulk, particularly valuable on exposed ridges where wind threatens long exposures.
Keeping Your Vision and Your Gear Working
Night shooting demands you protect both your vision and equipment. Use a red headlamp instead of white light—red wavelengths preserve your night-adapted vision, which takes about 20 minutes to fully develop. Your pupils need to stay dilated to compose shots effectively in darkness.
Cold drains DSLR batteries rapidly, sometimes reducing capacity by 50%. Pack twice as many batteries as you’d normally use and keep spares warm in an inside jacket pocket. Swap them out before they die completely to maintain shooting momentum.
Condensation poses a serious threat when moving between temperature zones. Place your camera in a sealed plastic bag before bringing it from cold outdoors into warm spaces—this prevents moisture from forming directly on sensitive electronics and lens elements. When shooting in extreme weather conditions, use a rain cover or plastic shower cap over your DSLR during extended exposures to guard against dew formation on the lens.
Keep lens tissues handy and occasionally check your front element with your red light—moisture and frost accumulate silently during long exposures, ruining otherwise perfect shots.
Shooting Strategies for Different Wilderness Night Subjects
Capturing the Milky Way Over Wild Landscapes
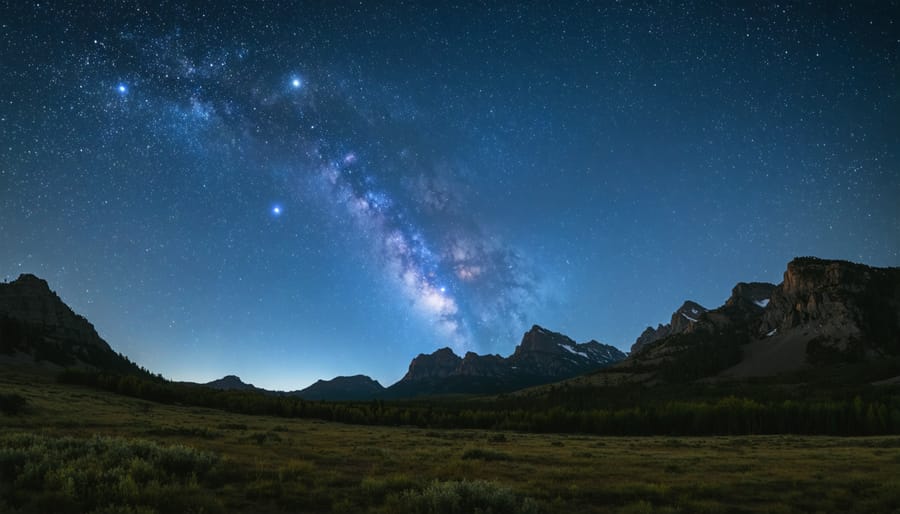
Capturing the Milky Way arcing over a wilderness landscape creates images that stop viewers in their tracks, but timing and preparation make the difference between a mediocre shot and a masterpiece.
Start by planning your shoot around the new moon phase when the galactic core is most visible. Apps like PhotoPills and Stellarium let you preview exactly where the Milky Way will appear relative to your chosen foreground—essential for composing your shot before you arrive. During summer months in the Northern Hemisphere, the galactic core rises in the southern sky, offering the most dramatic display from late May through early August.
Your composition should balance sky and landscape. The rule of thirds works beautifully here: position your horizon in the lower third with an interesting foreground element like a gnarled tree, rock formation, or tent. These anchors give your image depth and scale. Scout locations during daylight so you’re not stumbling around unfamiliar terrain in darkness.
For exposure, start with your widest aperture (f/1.4-f/2.8), ISO 3200-6400, and shutter speed following the 500 rule (500 divided by your focal length). A 20mm lens allows roughly 25 seconds before star trailing becomes noticeable. Take multiple exposures—one focused on the foreground with longer exposure or light painting, and another optimized for the stars. Stack these images in post-processing for maximum detail throughout the frame.
Bring extra batteries, as cold temperatures drain them rapidly, and arrive early to let your eyes adjust to darkness for better manual focusing.
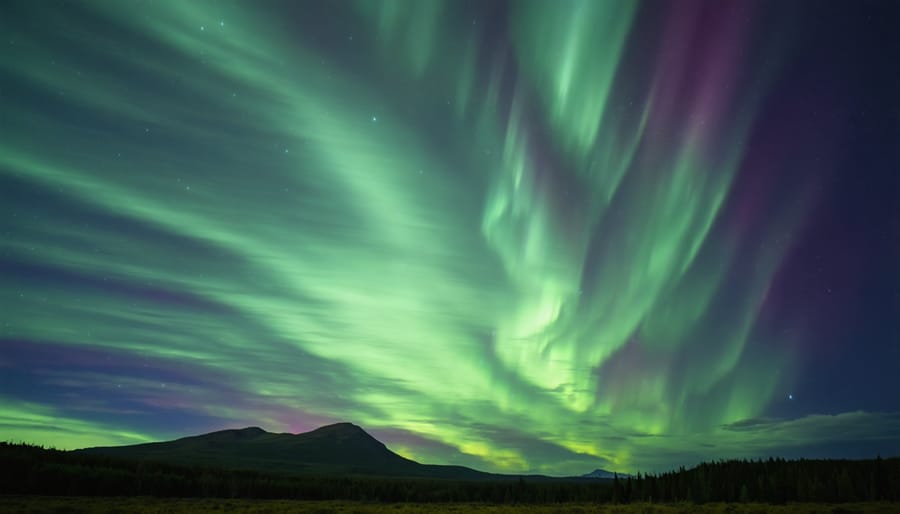
Aurora Photography From Start to Finish
Aurora photography tests your adaptability more than any other night photography scenario. The Northern Lights don’t wait for you to dial in settings—they dance, pulse, and fade on their own schedule.
For faint auroras that appear as subtle green glows on the horizon, start with ISO 3200, f/2.8, and 15-second exposures. These dimmer displays require patience, but they often precede more dramatic shows. I’ve learned to shoot these quieter moments anyway—they make excellent foreground-focused compositions where the aurora adds subtle color rather than dominates the frame.
When the aurora intensifies to vivid curtains with visible movement, you’ll need faster shutter speeds to freeze the motion. Switch to 4-6 second exposures at ISO 1600-3200. During a particularly active display in Iceland, I watched photographers around me miss the best moments because they stuck with their initial 20-second settings, resulting in blurred, amorphous green blobs instead of defined structures.
For explosive displays with rapid pulsing—the kind that make you gasp—push to ISO 6400 and 1-2 second exposures. Yes, you’ll introduce more noise, but capturing sharp detail in these rare moments matters more than pristine image quality.
Compose with patience and flexibility. Position interesting foregrounds—cabins, trees, mountains—then wait for the aurora to fill your frame. Keep shooting continuously during active periods; the aurora’s shape changes dramatically every few seconds, and you’ll want options when reviewing later.
Moonlit Landscapes and Night Wildlife
Moonlight transforms landscapes into ethereal scenes that daytime photography simply can’t capture. A full or nearly-full moon provides surprisingly workable illumination—roughly equivalent to EV -3 to EV 0 depending on moon phase and atmospheric conditions. Start with ISO 1600-3200, apertures around f/2.8-f/5.6, and shutter speeds between 15-30 seconds as your baseline, then adjust based on your histogram.
The key challenge is balancing exposure across your frame. Moonlit foregrounds often read several stops darker than the sky, so consider using graduated neutral density filters or blending multiple exposures in post-processing. Scout locations during daylight to identify compelling compositions, since focusing and framing become significantly harder after dark.
Photographing nocturnal wildlife demands patience and respect for animal behavior. Avoid using flash, which disorients animals and creates unnatural results. Instead, embrace high ISOs (3200-12800) and fast prime lenses (f/1.4-f/2.8). Pre-focus on areas where animals are likely to appear—trails, watering holes, or feeding sites—then wait quietly. Shutter speeds need to stay above 1/200s for moving subjects, which pushes ISO limits. Modern DSLRs handle noise remarkably well, and a sharp, grainy image beats a blurry, clean one every time.
Common Problems and Field-Tested Solutions
Taming Noise Without Losing Detail
Noise is inevitable when shooting at high ISOs, but managing it doesn’t mean sacrificing the crisp detail that makes night skies breathtaking. Here’s the balance: in-camera noise reduction can be helpful, but it comes with trade-offs.
Most DSLRs offer long exposure noise reduction, which takes a second “dark frame” exposure to map and subtract noise. This doubles your shooting time—a 30-second exposure becomes a full minute. In the field, especially when shooting timelapses or working in cold conditions that drain batteries, this isn’t always practical. High ISO noise reduction is less intrusive but can soften fine details like pinpoint stars.
My approach? I typically disable both for night sky work and handle noise in post-processing where I have more control. Software like Lightroom’s noise reduction panel or specialized tools like Topaz DeNoise AI let you selectively reduce noise in the sky while preserving foreground texture and star sharpness. The key is using luminance noise reduction more aggressively than color noise reduction—it maintains detail better.
When shooting the Milky Way, apply noise reduction to the sky using graduated masks, leaving terrestrial elements untouched. This targeted approach keeps your images sharp where it matters most while controlling the grain that high ISOs inevitably produce.
When Weather Fights Your Long Exposures
Mother Nature doesn’t care about your exposure settings. I learned this the hard way during a thirty-second exposure of the Milky Way when a sudden gust turned my supposedly sharp image into an abstract blur. Wind-shake is the silent killer of long exposures—your tripod might be rock-solid, but even moderate breezes can create enough vibration to ruin shots.
The solution starts with weight. Hang your camera bag from your tripod’s center hook to lower the center of gravity and add mass. If you’re shooting near rocks or trees, position your tripod in their lee side for natural windbreaks. Some photographers carry small sandbags for this purpose, though I’ve used my backpack filled with gear to similar effect.
Temperature swings present another challenge entirely. When you move from a cold exterior to check images on your warm LCD screen repeatedly, or when temperatures drop rapidly after sunset, condensation forms on your lens and sensor. The fix? Keep a microfiber cloth handy and work quickly when reviewing shots. Better yet, use a remote trigger and minimize opening your camera. Some photographers wrap hand warmers around their lens barrel to keep glass temperatures above the dew point.
For comprehensive weather protection strategies, consider rain covers that still allow access to essential controls. Even clear nights can surprise you with unexpected moisture, especially near water bodies or in valleys where temperature inversions create fog. Balance protection with functionality—you need quick access to settings when conditions change rapidly.
Your DSLR is more than capable of capturing stunning wilderness night photography—you don’t need the latest mirrorless camera or the most expensive gear to create breathtaking images of star-filled skies, moonlit landscapes, or the aurora dancing overhead. While newer technology offers certain conveniences, what truly separates memorable night photographs from mediocre ones is your understanding of technique, your willingness to scout locations, and your commitment to getting out there and practicing.
Throughout this guide, we’ve covered the essential settings, techniques, and troubleshooting strategies that will serve you well in the field. But knowledge alone won’t improve your photography. The most important step is taking your DSLR out into the darkness and experimenting with these concepts firsthand. You’ll learn more from one night of trial and error under actual stars than from reading a dozen articles.
Remember, even professional photographers started with basic equipment and imperfect conditions. The photographers whose work you admire didn’t wait for perfect gear—they worked with what they had and developed their skills through repetition and persistence.
Here’s your actionable next step: Within the next week, choose one clear night and head to a dark location within an hour of your home. Set your camera to manual mode, dial in the settings we discussed (f/2.8-4, 15-25 seconds, ISO 1600-3200), and take at least fifty shots while adjusting variables between each frame. Review your results at home and note what worked. This single session will teach you more than any article ever could.