Reach for dedicated lens cleaning tissue before grabbing that t-shirt corner or generic paper towel—your optics deserve better. Those seemingly innocent alternatives contain wood fibers and rough textures that create microscopic scratches with each wipe, gradually degrading image quality in ways you won’t notice until it’s too late.
Proper lens tissue differs fundamentally from household paper products through its ultra-fine, scratch-free composition specifically engineered for optical glass. These specialized sheets contain no lint, no rough fibers, and no chemicals that could damage lens coatings—unlike facial tissues or paper towels that leave residue and potentially strip anti-reflective layers.
The investment pays dividends in lens longevity. A single scratched front element can cost hundreds to replace, while a year’s supply of quality lens tissue runs under twenty dollars. Professional photographers understand this math instinctively, which explains why you’ll never catch them using their shirt sleeve, no matter how urgent the smudge.
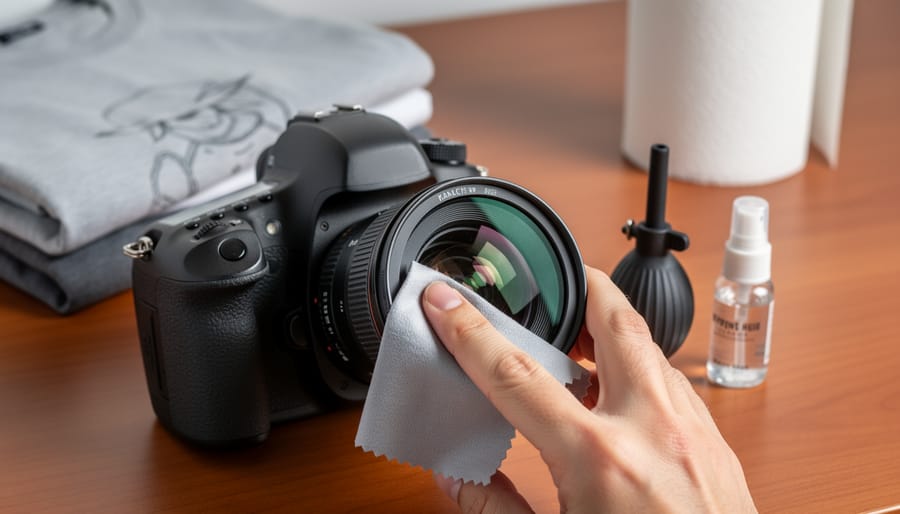
But tissue alone won’t suffice. Effective lens cleaning requires proper technique: start with a blower to remove loose particles, apply cleaning solution to the tissue rather than directly on the glass, and use gentle circular motions from center outward. This methodical approach, combined with appropriate materials, transforms lens maintenance from risky guesswork into reliable routine—protecting your gear and ensuring consistently sharp images.
What Makes Lens Cleaning Tissue Different (And Why It Matters)
Not all tissues are created equal, and when it comes to your expensive lenses, that difference can mean the gap between pristine optics and a scratched surface that permanently affects image quality.
Proper lens cleaning tissue stands apart from everyday alternatives because of its carefully engineered composition. These specialized tissues are made from ultra-fine, tightly-woven optical-grade fibers that are remarkably soft and completely lint-free. Think of it this way: regular tissues, paper towels, or even those soft facial tissues you keep in your pocket contain wood pulp fibers that are relatively coarse at a microscopic level. When you drag these across your lens coating, you’re essentially running tiny branches across a delicate surface.
The fiber composition matters tremendously. Genuine lens tissue uses virgin paper pulp or specially processed materials that produce fibers measuring just a few microns in diameter. These fibers are uniform and gentle enough to safely contact multi-coated lens elements without scratching. Additionally, quality lens tissues undergo specific chemical treatments that eliminate residual oils and contaminants from the manufacturing process, ensuring they won’t leave streaks or deposits behind.
The pH balance is another critical factor often overlooked by photographers reaching for convenient household alternatives. Lens tissue maintains a neutral pH that won’t react with modern lens coatings, which can include fluorine compounds, anti-reflective layers, and hydrophobic treatments worth hundreds of dollars. Regular paper products often contain acids, bleaches, or brightening agents that can gradually degrade these coatings.
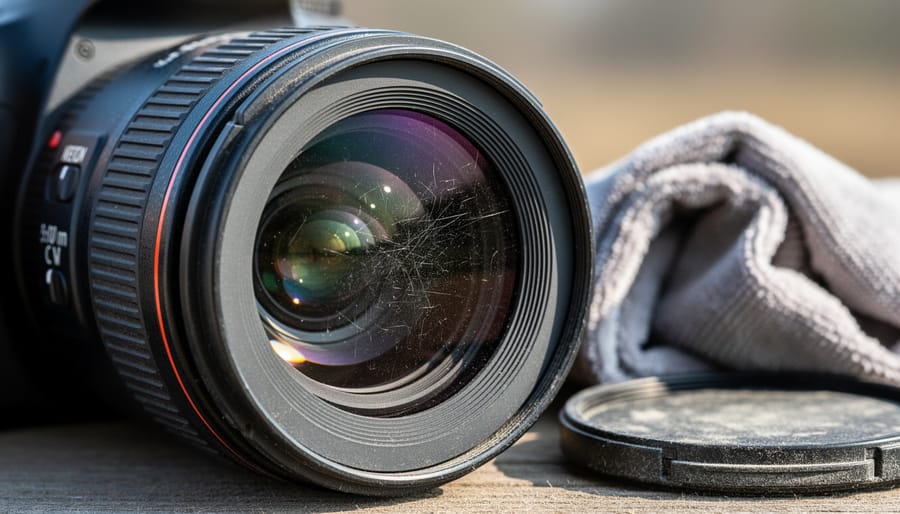
Here’s a real-world example: I once watched a fellow photographer use a paper napkin on his 24-70mm lens at a wedding. Within months, he noticed hazing that no amount of cleaning could fix. The rough fibers had created microscopic scratches that scattered light, reducing contrast permanently.
Coffee filters and toilet paper might seem like budget-friendly alternatives, but they lack the specialized construction of true lens tissue. The few dollars you save aren’t worth risking hundreds or thousands invested in quality glass.
The Real Cost of Using the Wrong Materials
I learned this lesson the hard way during a wedding shoot in Maui. Between the beach ceremony and reception, I noticed some spots on my 85mm prime and grabbed what I thought was a clean microfiber cloth from my bag. Turns out, it had picked up some sand particles. Within seconds of wiping, I’d created a constellation of micro-scratches across my front element that I still see when shooting into direct sunlight today. That moment of carelessness cost me $450 in lens element replacement.
The damage from improper cleaning materials isn’t always immediately visible, which makes it particularly insidious. Paper towels, for instance, contain wood fibers that act like microscopic sandpaper against your lens coatings. A single wipe might not show obvious damage, but those repeated cleanings accumulate. Professional lens repair technician Sarah Chen shared with me that she regularly sees lenses from photographers who’ve worn away anti-reflective coatings entirely, creating visible patches where light transmission has changed.
Clothing fabric, another common improvised cleaning material, poses its own risks. The cotton in your t-shirt traps dust and dirt particles throughout the day, essentially turning your shirt into fine-grit sandpaper. One landscape photographer I spoke with discovered this after six months of using his shirt tail. His coating damage became so severe that his images showed reduced contrast and noticeable ghosting in backlit situations.
Tissues and toilet paper present similar problems, with added concerns about lint transfer and the breakdown of fibers during cleaning. These materials weren’t engineered for optical surfaces. They lack the specific structure needed to lift particles away rather than drag them across delicate coatings. The result is cumulative degradation that diminishes image quality and eventually requires expensive professional restoration or complete lens replacement.
Types of Lens Cleaning Tissue: Not All Are Created Equal
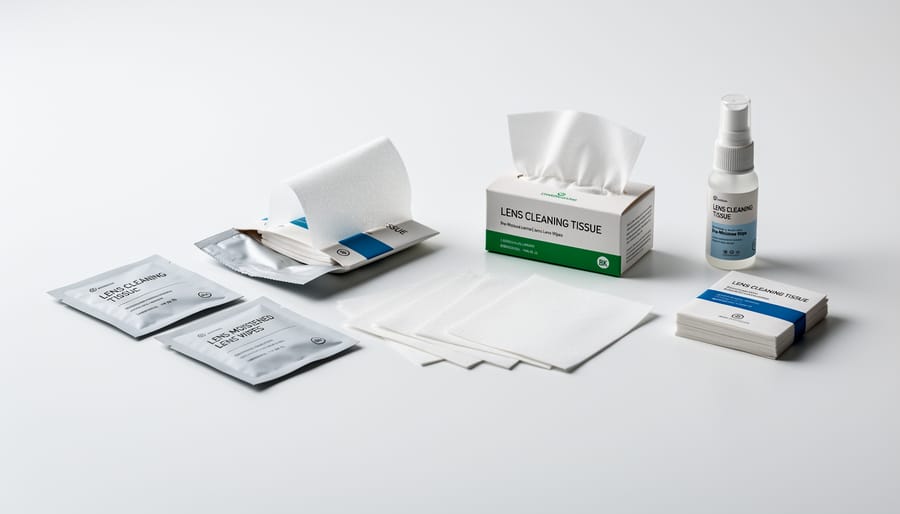
Pre-Moistened vs. Dry Tissues
When you’re standing in the camera store facing rows of lens cleaning options, one of the first decisions you’ll encounter is whether to choose pre-moistened or dry tissues. Both have their place in your gear bag, and understanding when to reach for each will help you clean more effectively while protecting your valuable glass.
Pre-moistened tissues come individually wrapped with a specialized cleaning solution already applied. They’re incredibly convenient for fieldwork since everything you need is in one packet. You simply tear open the wrapper and wipe your lens in a circular motion from center to edge. The pre-measured moisture eliminates the guesswork of how much solution to apply, which is particularly helpful when you’re dealing with stubborn smudges or fingerprints. I’ve found these indispensable during outdoor shoots when juggling equipment makes it impractical to coordinate separate bottles and tissues.
However, pre-moistened options do have drawbacks. They typically cost more per cleaning, and once opened, they dry out quickly if you don’t use them immediately. Storage is also critical since extreme temperatures can degrade both the tissue and solution quality over time.
Dry tissues offer more flexibility and better value for regular maintenance. You control exactly how much cleaning solution to apply, making them ideal for quick dust removal when minimal moisture is needed. They’re also more compact to store and have an essentially unlimited shelf life when kept in their original packaging.
The practical approach? Keep pre-moistened tissues in your camera bag for unexpected situations in the field, while maintaining a supply of dry tissues at home for routine cleaning sessions where you have more control over your environment.
Brand Quality Indicators and What to Look For
When you’re shopping for lens cleaning tissue, knowing what separates quality products from subpar ones can save you from potential lens damage and wasted money. Think of it like buying coffee filters – they might all look similar at first glance, but the differences become obvious once you start using them.
Start by examining the packaging itself. Reputable manufacturers typically seal their tissues in individual packets or protective dispensers that prevent contamination before use. If you find loose sheets in a simple cardboard box, that’s a red flag. Quality tissues should be protected from dust, oils, and moisture until the moment you need them.
Look for clear labeling that indicates the tissue is specifically designed for optical use. Terms like “lint-free,” “optically pure,” or “scratch-free” are good signs, but they should be backed by actual specifications. Many professional-grade tissues will list their material composition, often mentioning rice paper or specially processed cellulose fibers.
Certifications matter more than you might think. While lens tissues don’t require FDA approval like medical products, reputable brands often note compliance with industry standards or testing protocols. Some manufacturers proudly display ISO certifications or mention partnerships with optical companies, which demonstrates they’re serious about quality control.
Pay attention to the manufacturer’s reputation within the photography community. Brands that have been around for decades and are recommended by camera manufacturers typically maintain consistent quality. Reading reviews from fellow photographers can reveal real-world performance issues that marketing materials won’t mention, like tissues that shred easily or leave residue.
Price can be an indicator, but it shouldn’t be your only guide. While extremely cheap tissues often compromise on quality, expensive doesn’t always mean better. The sweet spot usually lies with mid-range products from established optical care brands that balance affordability with reliability.
The Proper Technique: How to Actually Use Lens Cleaning Tissue
Here’s the truth about lens cleaning tissue: it’s remarkably effective when used correctly, but surprisingly easy to misuse. I’ve watched countless photographers grab a sheet and start wiping away, only to create new problems. Let me walk you through the proper technique that will actually protect your investment.
First, preparation matters more than you might think. Never use lens cleaning tissue dry on your optics. This is probably the most common mistake I see, and it can actually scratch your lens by dragging particles across the surface. Think of it like this: you wouldn’t dry-dust a muddy car, right? The same principle applies here. Start by using a blower bulb to remove loose dust and debris. This simple step eliminates about 80 percent of potential scratching hazards right from the start.
Next comes the cleaning solution. Apply a small amount of proper lens cleaning fluid to the tissue, not directly onto the lens. Why? Because you want control over the moisture level. The tissue should be damp, not dripping wet. Too much solution can seep into the lens barrel and cause internal fogging or damage to electronic contacts. I typically fold the tissue once or twice to create a soft pad, which gives you better control and distributes the moisture evenly.
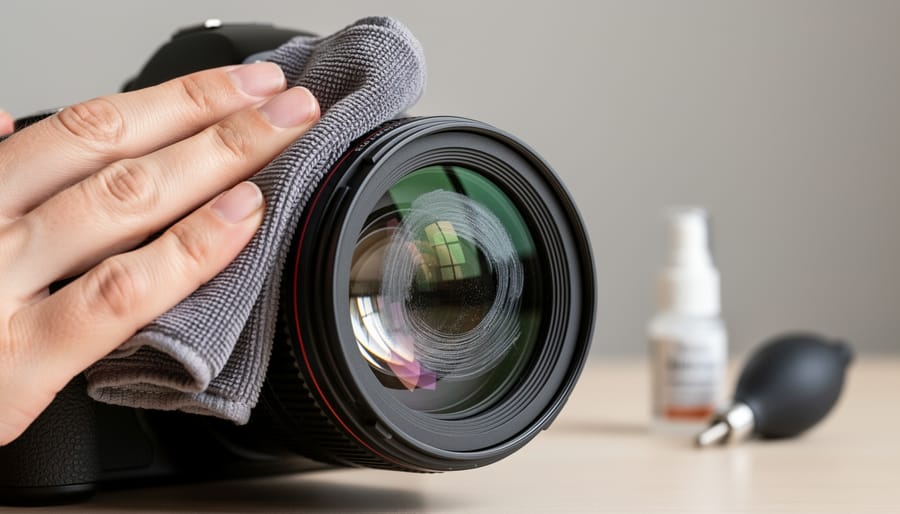
Now for the actual cleaning technique. Using gentle circular motions, start from the center of the lens and work your way outward in a spiral pattern. This method pushes debris away from the optical center rather than concentrating it there. Apply minimal pressure. Your lens coating is tough, but it’s not invincible. Let the cleaning solution do the work, not your elbow grease.
Here’s a pro tip from the expert lens cleaning techniques playbook: use each section of the tissue only once. Fold it to expose a clean area for each pass. This prevents you from redepositing the grime you just removed. It might seem wasteful, but lens tissue is inexpensive compared to lens repair.
The most critical mistake to avoid? Rubbing vigorously when you encounter a stubborn spot. Stubborn marks usually mean they need more solution and patience, not more force. If you’re scrubbing hard, you’re doing it wrong. Sometimes letting the solution sit for five seconds makes all the difference.
Finally, inspect your work under good lighting. Hold the lens at an angle to catch reflections. Any remaining streaks typically indicate either too much solution or not enough, never the tissue itself.
Building Your Complete Lens Cleaning Kit
Think of lens cleaning tissue as one player in your lens care team—effective on its own, but most powerful when working alongside the right supporting cast. A well-rounded cleaning kit ensures you’re prepared for any situation, whether you’re wiping desert dust off your gear or removing stubborn fingerprints in your studio.
Start with the foundation: a rocket blower. This should always be your first line of defense. Before touching any surface with tissue or cloth, blow away loose particles that could scratch your lens. I learned this lesson the hard way during a beach shoot when I skipped this step and dragged sand across my front element—an expensive mistake.
Next, add a soft-bristled lens brush for particles that won’t blow away easily. Use it gently in a circular motion, always moving from center outward. Only after these dry-cleaning methods should you reach for lens cleaning tissue, which works best when paired with proper lens cleaning solution. Never use tissue dry on optical glass—the slight moisture from solution creates necessary lubrication to safely lift away oils and residue.
Your professional cleaning system should also include microfiber cleaning cloths for general maintenance and a lens cleaning pen for quick touch-ups in the field.
For field kits, keep things compact: travel-sized tissue packets, a small cleaning solution bottle, and a blower. Studio kits can be more comprehensive with larger tissue boxes, multiple brushes, and specialized solutions. Store everything in a dedicated pouch to keep tools clean and accessible.
Remember, having the right tools means nothing if you don’t use them in the proper sequence. Patience and the correct order of operations will keep your lenses performing at their peak for years.
When to Clean (And When to Leave Your Lens Alone)
Here’s the truth that might surprise you: most photographers clean their lenses far too often. That tiny speck of dust you’re obsessing over? It’s probably invisible in your final images and poses zero threat to your lens coating.
Think of lens cleaning like washing your car. A light coating of dust doesn’t hurt anything, but scrubbing it every single day will eventually wear down the paint. The same principle applies to your glass. Every cleaning session, even with proper lens tissue, creates microscopic opportunities for wear on those delicate lens coatings.
So when should you actually clean? The real answer is simple: only when you see something that will affect your images. A fingerprint smudge that’s creating haze in your shots? Definitely clean it. Water spots after shooting in the rain? Worth addressing. But a few dust particles that aren’t showing up in your photos at all? Leave them be.
Here’s a practical test I use: look through your viewfinder or at your LCD screen in live view. Can you see the spot affecting your image? If not, resist the urge to clean. This approach is part of good essential camera maintenance that protects your investment long-term.
The exception? Oily residues or sticky substances. These can actually attract more dirt and potentially damage coatings over time, so address them promptly but gently. Remember, your lens is tougher than you think, and sometimes the best cleaning technique is knowing when to put the tissue down.
Your lenses represent a significant investment, often costing hundreds or thousands of dollars. Protecting that investment with proper lens cleaning tissue is one of the simplest yet most impactful decisions you can make as a photographer. Think of it this way: would you use dish soap and paper towels to clean a diamond ring? Your glass deserves the same respect.
The good news is that upgrading your cleaning habits doesn’t require a major financial commitment. A pack of quality lens tissue costs just a few dollars and can last months, making it an incredibly cost-effective insurance policy against scratches, coating damage, and degraded image quality. When you consider that a single scratch can necessitate expensive repairs or lens replacement, the value proposition becomes crystal clear.
Remember the key takeaways: choose lint-free tissue specifically designed for optics, use it with appropriate cleaning solutions, employ gentle circular motions, and never reuse tissues. These simple practices will keep your lenses performing at their best for years to come. Your future self, looking through pristine glass and capturing tack-sharp images, will thank you for making lens care a priority today.