Your local hard drives are maxing out, project files take forever to transfer, and you can’t work on footage while your editor is accessing the same files. These frustrations signal you’ve reached a tipping point that thousands of video professionals face: it’s time for network storage.
Network storage transforms how creative teams work by putting all your video files on a centralized system that multiple users can access simultaneously over your local network. Instead of juggling external drives or waiting hours for file transfers, you’re working directly from a shared pool of storage that everyone on your team can reach at speeds that rival direct-attached drives.
The technology breaks down into three main categories. Network Attached Storage (NAS) devices are dedicated file servers that connect to your router—think of them as intelligent hard drives with their own operating system. Direct Attached Storage (DAS) units connect to a single computer but can be configured for network sharing. Storage Area Networks (SAN) represent enterprise-grade solutions with specialized protocols for maximum performance.
The practical difference comes down to your workflow demands. Editing 4K footage requires sustained read speeds of at least 400-500 MB/s, while 8K RAW formats push that to 1-2 GB/s. Your network infrastructure matters just as much as the storage itself—10 Gigabit Ethernet has become the sweet spot for most professional video workflows, delivering sufficient bandwidth without the complexity of Fibre Channel systems.
Understanding these fundamentals helps you match technology to your actual needs rather than over-buying expensive solutions or under-investing in systems that create new bottlenecks.
Understanding the Bottleneck: Why Local Storage Isn’t Enough Anymore
Remember when a day’s worth of photography fit comfortably on a 32GB memory card? Those days vanished the moment video entered the picture. A single minute of 4K footage at 400 Mbps consumes roughly 3GB of space. Bump that up to 6K RAW cinema files, and you’re looking at 10GB per minute or more. Suddenly, that 2TB external drive you relied on for years fills up after just a few commercial shoots.
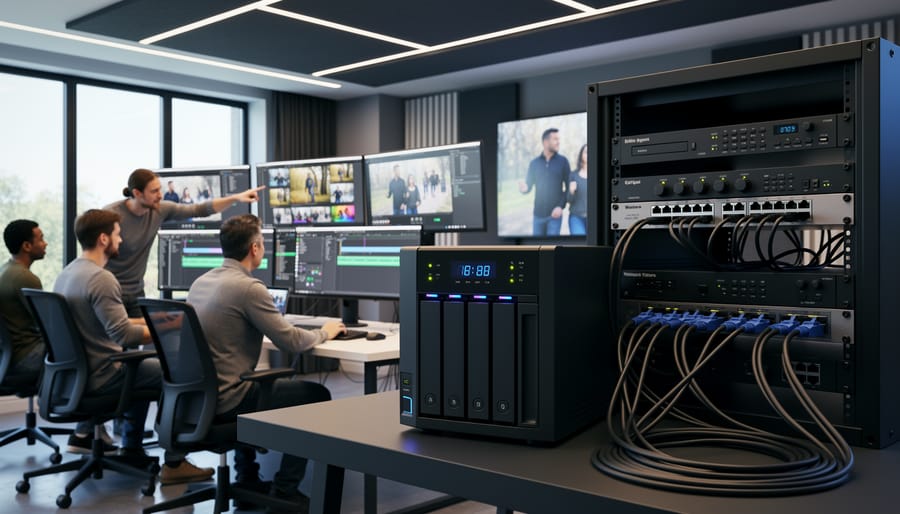
This storage explosion creates a cascade of workflow problems that local storage simply can’t solve efficiently. Let’s say you’re a photography studio that’s expanded into video production for corporate clients. You’ve got three editors working on different aspects of the same project: one handling interviews, another assembling B-roll, and a third color grading. With local storage, each person needs their own complete copy of the project files. That 500GB project just became 1.5TB across three workstations, and coordinating changes becomes a nightmare of thumb drives and Dropbox uploads.
Local storage made perfect sense when you worked solo and projects stayed under 100GB. But modern video production operates differently. Your colorist needs access to the same footage your editor is organizing. Your motion graphics artist requires the latest cut to time animations properly. Remote contractors need secure access without downloading terabytes of data. This is where network storage fundamentally changes the game.
Network attached storage, or NAS, allows multiple users to access the same centralized files simultaneously. Instead of three copies of your project, you maintain one authoritative version that everyone connects to over your local network. Changes save in real-time. Version conflicts disappear. Storage capacity scales without buying new drives for every workstation.
The tipping point typically arrives when you’re managing projects exceeding 250GB regularly, working with more than one editor, or coordinating remote collaboration. A wedding videography business might survive on local drives, but a commercial production house shooting multi-camera 4K interviews absolutely cannot. Beyond capacity and collaboration, network storage offers better redundancy for protecting your equipment and irreplaceable client footage through RAID configurations and automated backups.
The question isn’t whether you need network storage, but rather when your workflow complexity and file sizes demand it.
The Magic Behind High-Speed Network Storage
NAS vs. SAN: What Actually Matters for Video Editors
If you’ve been researching network storage, you’ve probably encountered these two acronyms repeatedly. Here’s the honest truth: for most video editors and photographers, the distinction matters less than you’d think, but understanding the basics will save you from overspending or choosing the wrong solution.
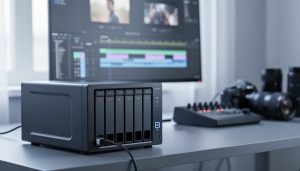
NAS (Network Attached Storage) is essentially a smart hard drive that connects directly to your existing network. Think of it as a dedicated file server that plugs into your router or switch. It’s self-contained, runs its own operating system, and you access files through standard network protocols. For a solo videographer or small team, this is typically the sweet spot. You can have multiple editors accessing the same project files, share massive photo libraries, and everything works through familiar folder structures.
SAN (Storage Area Network), on the other hand, is a specialized high-speed network dedicated solely to storage traffic. It creates a direct connection between storage devices and computers, making the drives appear as if they’re locally attached to your machine. This is where things get expensive and complex. SANs require special network cards, fiber optic cables, and often dedicated IT knowledge to maintain.
Here’s the practical reality: unless you’re running a production house with ten simultaneous 8K timelines, NAS will handle your needs beautifully. Modern NAS devices with 10GbE connectivity deliver speeds that feel nearly instantaneous for 4K editing. I’ve watched three-person teams edit simultaneously from a quality NAS without hiccups.
SAN makes sense when you need absolute maximum performance, have budget exceeding $10,000 for storage infrastructure alone, or require features like block-level replication across multiple facilities. For the vast majority of content creators, that’s overkill. Start with NAS. You can always upgrade later if your workflow genuinely demands it.
The Network Speed Equation: Bandwidth You Actually Need
Let’s talk about network speeds in terms that actually matter to your workflow. Those technical specifications like 1GbE and 10GbE might look intimidating, but they translate directly into how long you’ll wait for files to transfer, and that’s what really counts.
Here’s the reality: A standard 1 Gigabit Ethernet (1GbE) connection, which you’ll find on most consumer routers, can theoretically transfer data at 125 megabytes per second. In practice, you’ll see about 110 MB/s. That means a 50GB 4K video file takes roughly 7-8 minutes to transfer. Not terrible for occasional use, but if you’re moving multiple files daily, those minutes add up quickly.
Step up to 10 Gigabit Ethernet (10GbE), and the game changes completely. That same 50GB file? About 40 seconds. This is where network storage starts feeling more like working directly from a local drive. A 10GbE connection delivers around 1,000 MB/s in real-world conditions, making it the sweet spot for serious video editors working with 4K footage.
For those pushing into higher resolutions, 25GbE and Thunderbolt networking (which can hit 40Gbps) become relevant. These connections can move data at 2,500 MB/s and higher, essential when you’re juggling 6K or 8K RAW files that can easily exceed 100GB per project.
To put this in perspective: editing 1080p ProRes footage requires sustained read speeds of about 25 MB/s, well within 1GbE’s capabilities. Standard 4K at 30fps needs around 100 MB/s, making 1GbE workable but tight. However, 4K RAW at higher frame rates demands 300-500 MB/s, and 8K RAW can require over 1,000 MB/s—territories where only 10GbE and faster connections deliver smooth, frustration-free editing.
Building Your Network Storage System: What You’ll Actually Use
Choosing the Right NAS for Video Editing
Selecting the right NAS for video editing can feel overwhelming, but breaking it down into key specifications makes the decision much clearer. Let’s start with the fundamentals.
Drive bays determine how many hard drives your NAS can accommodate. For video editing, I recommend at least four bays to give you flexibility with RAID configurations while maintaining decent storage capacity. Two-bay units work for solo editors with modest needs, but you’ll outgrow them quickly.
Processor power and RAM directly impact how smoothly your NAS handles multiple video streams. Look for Intel or AMD processors with at least four cores, and don’t skimp on RAM—8GB should be your minimum, though 16GB or more future-proofs your investment. This becomes especially important when you need to protect your editing workstation while maintaining seamless workflow across your network.
Connectivity matters enormously. At minimum, you want dual Gigabit Ethernet ports for link aggregation, but 10GbE is increasingly becoming the standard for professional work. Think of it this way: Gigabit handles 1080p comfortably, while 10GbE lets you work with 4K footage as if it were local storage.
Now, about RAID configurations. RAID 5 uses three or more drives, spreading your data across them with parity protection—if one drive fails, you don’t lose anything. RAID 6 is similar but survives two drive failures, making it safer for larger arrays. RAID 10 combines mirroring and striping for maximum performance and protection, though you sacrifice half your storage capacity.
Budget-wise, here’s what to expect. Entry-level setups (under $800) include four-bay units with basic processors, perfect for 1080p workflows and learning network storage. Prosumer systems ($1,500-$3,000) offer better processors, more RAM, and 10GbE options for serious 4K work. Professional solutions (above $3,000) deliver enterprise-grade reliability, expansion capabilities, and performance that handles multiple simultaneous 4K or 6K streams without breaking a sweat.
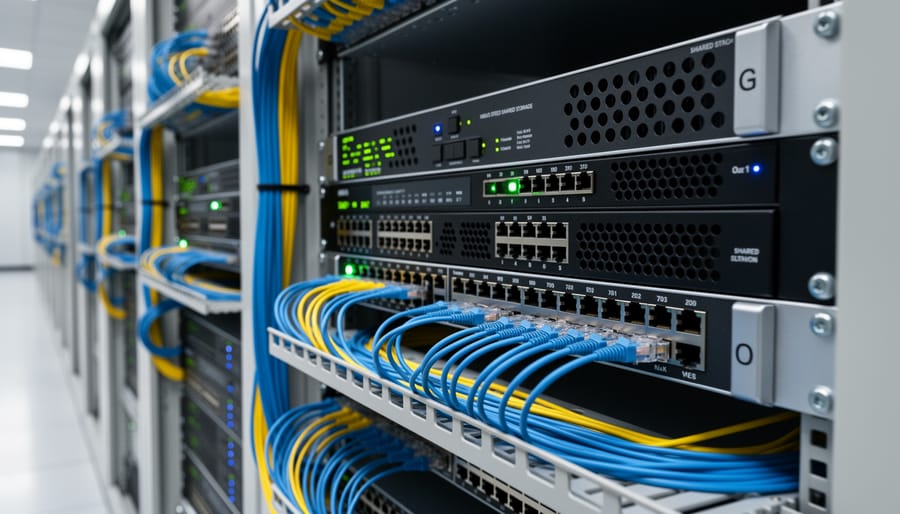
Network Infrastructure That Won’t Slow You Down
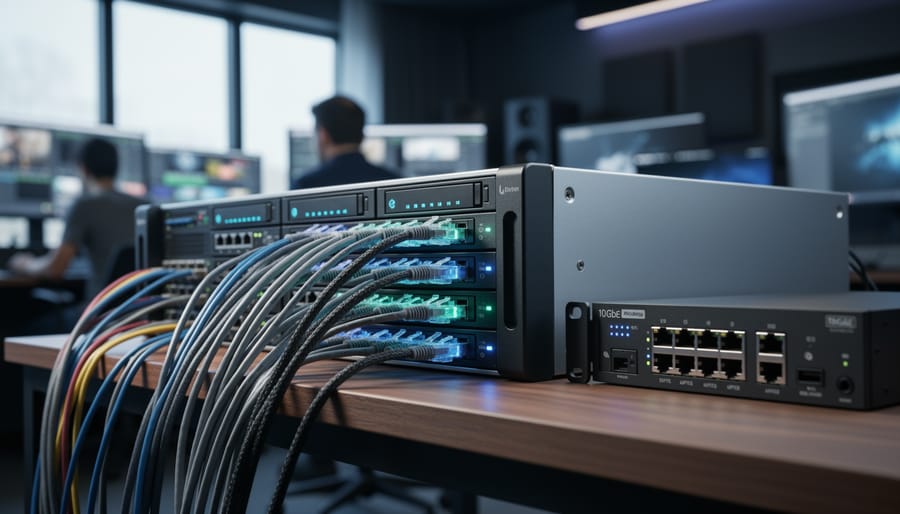
Here’s the truth about network storage: your expensive NAS might be blazing fast, but if you’re running it through bargain-basement networking equipment, you’re essentially trying to push a Ferrari through rush-hour traffic. The network infrastructure connecting your editing workstation to your storage is just as critical as the storage itself.
Let’s start with switches, the traffic directors of your network. Think of an unmanaged switch as a simple power strip for network cables—plug devices in, and they communicate. They’re inexpensive and work fine for basic setups. Managed switches, however, give you control over traffic prioritization, letting you ensure video files get highway lanes while email takes the scenic route. For serious editing workflows, a managed switch with Quality of Service (QoS) features prevents network congestion when multiple editors access large files simultaneously.
Your cables matter more than you’d think. Cat6 cables handle up to 10 Gigabit speeds over shorter distances (around 55 meters), which works for most home studios. Cat6a extends that 10 Gigabit capability to 100 meters with better shielding against interference—ideal if you’re running cables through walls near electrical wiring. Fiber optic cabling is the premium option, offering massive bandwidth and immunity to electromagnetic interference, though it requires specialized network cards and costs considerably more.
Speaking of network cards, your computer’s built-in gigabit Ethernet won’t cut it for 4K or 8K editing. A dedicated 10 Gigabit Ethernet card (or Thunderbolt-to-10GbE adapter for Mac users) transforms your workflow from frustrating to fluid.
Here’s your infrastructure checklist: First, ensure your workstations have 10GbE network cards. Second, invest in a quality managed switch with 10GbE ports. Third, use Cat6a or better cabling for runs under 100 meters. Fourth, match your infrastructure quality to your reliable power infrastructure—protecting your equipment investment. Finally, leave room for expansion because your storage needs will grow faster than you expect.
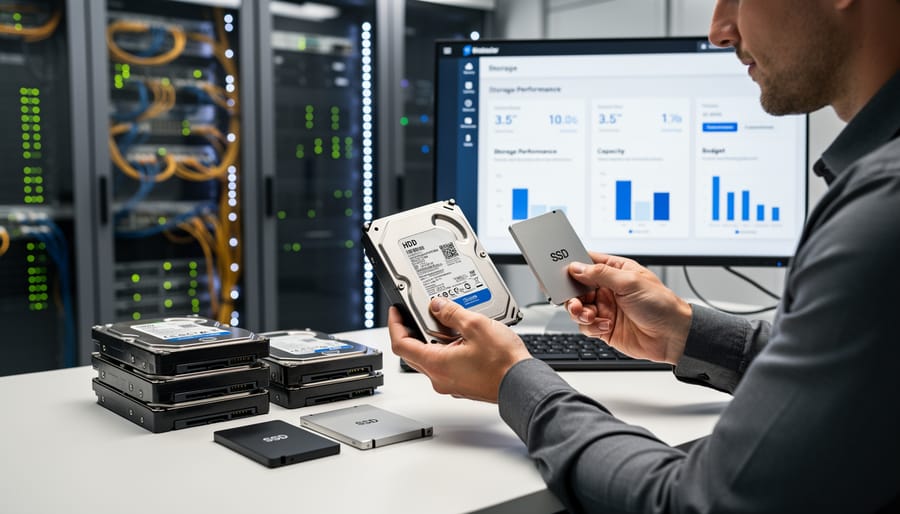
Storage Media: The Drives That Matter
The heart of any network storage system is the drives themselves, and understanding your options helps you balance speed against budget. Traditional HDDs offer the most affordable cost-per-terabyte, typically around $15-20 per TB, making them ideal for archiving finished projects and raw footage you’re not actively editing. They’re reliable workhorses that can last 3-5 years under normal conditions.
SSDs deliver significantly faster performance, crucial when you’re scrubbing through 4K timelines or applying real-time effects. While they cost roughly $50-80 per TB, that speed difference is noticeable the moment you start working. NVMe drives push performance even further, though for network storage, your actual speeds depend on your network infrastructure—a 10GbE connection might bottleneck before you fully leverage NVMe capabilities.
The smartest approach is tiered storage: use SSDs or NVMe drives as a working cache for active projects, then automatically migrate completed work to larger HDD arrays for long-term storage. Many NAS systems offer this functionality built-in. This way, you’re editing at full speed without paying premium prices for storing every frame you’ve ever captured. Consider enterprise-grade drives rated for 24/7 operation if multiple editors access your system daily—the upfront cost pays dividends in reliability.
Making It Work: Optimizing Your Shared Editing Environment

File Management Strategies That Prevent Chaos
Think of your network storage as a shared creative workspace—without clear organizational rules, it quickly becomes a digital disaster zone. The good news? A few strategic habits can transform chaos into seamless collaboration.
Start with a consistent naming convention that everyone on your team follows religiously. Include the project name, date, and version number in every file: “ClientName_ProjectTitle_2024-01-15_v03.mp4” tells you everything at a glance. This might feel tedious initially, but when you’re hunting for specific footage at 11 PM before a deadline, you’ll thank yourself.
Your folder structure should mirror your workflow. Create a master project folder with clearly labeled subfolders: Raw Footage, Proxies, Audio, Graphics, Exports, and Project Files. Within Raw Footage, organize by shoot date or camera angle. This hierarchy prevents the nightmare of duplicate files scattered across random locations.
Speaking of proxies, they’re your secret weapon for network editing. Generate lower-resolution proxy files for everyday editing, storing them on the network while keeping original 4K or 6K files archived until final export. This dramatically reduces bandwidth demands and prevents those frustrating playback stutters.
Metadata tagging might sound like extra work, but it’s invaluable when managing thousands of clips. Most editing software lets you add searchable keywords, scene descriptions, and color labels directly to files. When three editors need “sunset beach footage,” proper metadata means finding it in seconds rather than scrolling endlessly.
Finally, implement a check-in/check-out system or use project locking features in your editing software. This prevents the classic problem of two editors unknowingly working on the same sequence simultaneously, only to discover their changes conflict when saving.
Software Settings for Network Editing
Getting your editing software to play nicely with network storage requires a few strategic adjustments. Think of it like teaching your software where to look for files and how to handle them efficiently.
For Adobe Premiere Pro, head to Preferences and relocate your Media Cache Database to your local drive rather than the network. This seemingly small change can dramatically improve playback performance since cached files load from your speedy internal drive instead of traveling across the network. Set your auto-save location locally too, preventing potential corruption from network hiccups during saves.
DaVinci Resolve users should configure the Project Library on local storage while keeping media files on the network. Within Database settings, enable PostgreSQL for true collaborative editing where multiple editors can work simultaneously. It takes some initial setup, but it’s transformative for team workflows.
Final Cut Pro handles network storage differently through its Libraries system. Create optimized or proxy media stored locally while your original files live on the network. Enable the “Create library backup” option to a separate network location for redundancy.
Across all platforms, disable automatic background rendering when working over the network. Instead, schedule renders during breaks or overnight. This prevents your editing experience from grinding to a halt while the software attempts intensive operations across the network connection.
Backup and Redundancy: Protecting Your Work
Here’s a critical truth many video editors learn the hard way: RAID is not a backup. While RAID arrays provide redundancy within your network storage, they won’t protect you if the entire system fails, gets corrupted, or falls victim to ransomware.
Enter the 3-2-1 backup rule, your safety net for valuable footage. Keep three copies of your data: your working files on network storage, plus two backups on different media types, with one stored off-site. For example, maintain your active project on your NAS, a duplicate on an external drive array, and a third copy in cloud storage or at another physical location.
Modern NAS systems make this easier with automated backup solutions. Schedule nightly backups to external drives or cloud services like Backblaze B2 or Wasabi. Many videographers sync completed projects to cloud storage overnight, ensuring their work survives any local disaster.
Don’t forget about power protection for workstations and your NAS itself. A power surge can corrupt data across your entire network storage system. Invest in quality UPS units to keep everything running smoothly during outages and protect against voltage fluctuations that could damage your equipment or corrupt active file transfers.
Real-World Performance: What to Actually Expect
Let’s talk about what you’ll actually experience when editing video over a network, because the difference between theoretical speeds and real-world performance can be surprising.
With a 1 Gigabit connection, you’re looking at practical transfer speeds around 100-115 MB/s. What does this mean for your workflow? A 50GB 4K project will take roughly 7-8 minutes to transfer. You can comfortably edit 1080p ProRes footage and even work with 4K H.264/H.265 files without major issues. However, expect occasional buffering when scrubbing through RAW 4K footage or working with multiple video layers simultaneously.
Step up to 10 Gigabit, and those same transfers drop to under a minute. This is where network editing truly feels seamless. You can edit uncompressed 4K footage, work with multiple streams of ProRes 422 HQ, and apply color grading in real-time without the stuttering that drives editors crazy. Most professional studios operate at this level because the workflow simply flows.
For those pushing into 25 or 40 Gigabit territory, you’re in the realm of 8K editing and heavy visual effects work where massive file sizes are standard. At these speeds, your network feels almost indistinguishable from local storage.
When things go wrong, here’s your troubleshooting checklist. If transfers are slower than expected, check if other users are saturating the network or if your switch has auto-negotiated down to a slower speed. Stuttering playback usually indicates network congestion or insufficient cache settings in your editing software. Try creating proxies for smoother editing. Random network drops often point to cable issues—yes, even expensive cables can fail—or overheating switches that need better ventilation.
One often overlooked factor: power stability. Network equipment is sensitive to voltage fluctuations, which is why investing in quality battery backup systems protects not just your data, but your entire workflow’s reliability.
The bottom line? Match your network speed to your actual footage format and editing style, not to aspirational specs.
High-speed network storage genuinely transforms collaborative video editing from a frustrating bottleneck into a fluid, professional workflow. When your team is constantly waiting for files to transfer, dealing with version conflicts, or unable to work simultaneously on projects, that’s your signal that networked storage has moved from nice-to-have to essential. The decision really comes down to three key factors: you need at least 10GbE connectivity for smooth 4K editing (higher for 6K or 8K work), compatible switches and network infrastructure that won’t throttle your speeds, and a NAS system with sufficient processing power and the right RAID configuration for both performance and data protection.
Yes, the initial investment requires careful thought and budgeting. Quality network storage systems aren’t impulse purchases, and you’ll need to factor in not just the NAS itself but also network upgrades and possibly professional setup assistance. But here’s the reality: the productivity gains are measurable and immediate. Your team stops wasting billable hours on file transfers. Collaboration becomes seamless rather than a scheduling nightmare. You gain professional-grade capabilities that open doors to larger, more complex projects. For serious video work, whether you’re a growing production house or a dedicated solo professional, the upgrade pays for itself through time saved and opportunities gained.