Invest in a UV or clear protective filter first—it’s the cheapest insurance policy for your expensive glass, absorbing scratches and impacts that would otherwise ruin your lens. Skip the bargain-bin versions though; a poor-quality filter degrades image sharpness more than no filter at all.
Purchase a proper lens hood specific to your lens model, not a generic alternative. Beyond reducing flare and improving contrast, it provides crucial front-element protection during everyday shooting. Many photographers dismiss hoods as unnecessary until they’ve watched one absorb a bump that would have damaged their lens.
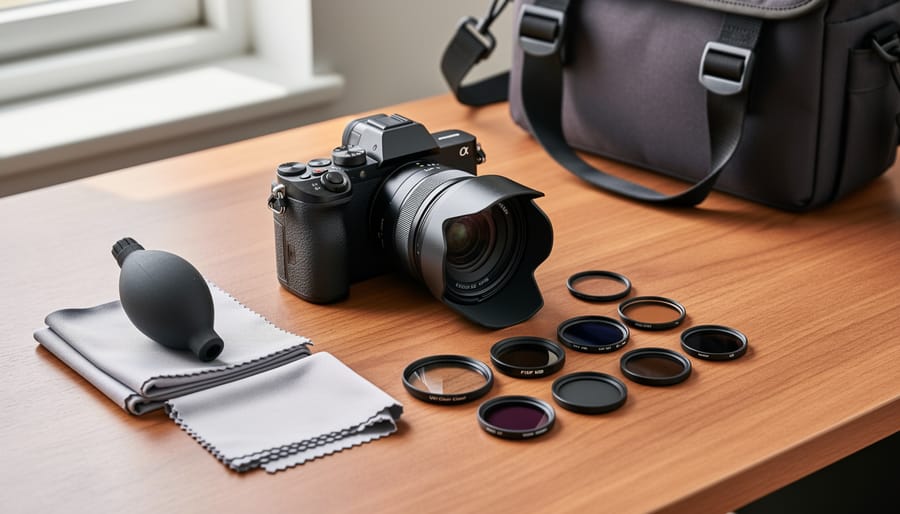
Keep microfiber cleaning cloths and a rocket blower in your bag at all times—never use your shirt or regular tissues, which scratch coatings. Front element dust rarely affects image quality, but fingerprints and smudges dramatically reduce contrast and sharpness, especially when shooting into light.
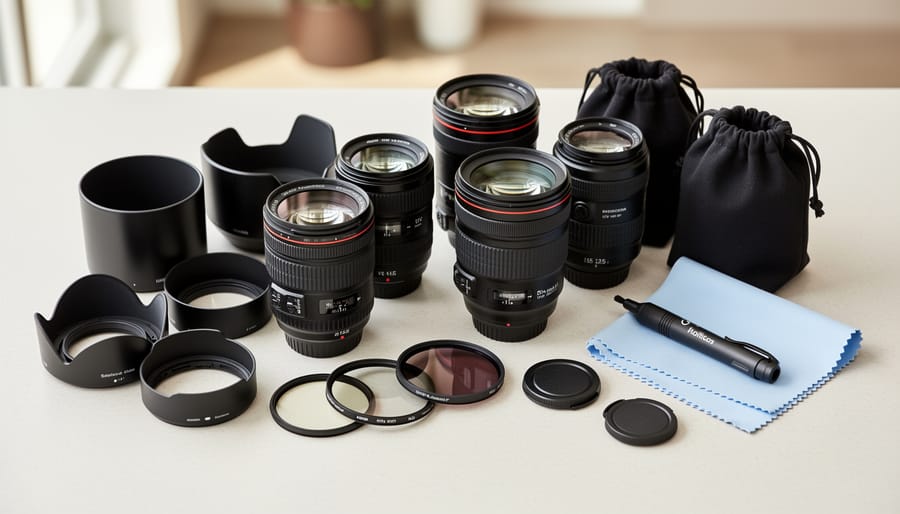
Build your accessory collection strategically rather than buying everything at once. Start with protective gear, then add filters that match your shooting style. Polarizers transform landscape and outdoor photography, while neutral density filters enable creative long exposures. Variable ND filters offer convenience but often introduce color casts and reduced sharpness compared to fixed-strength versions.
The difference between essential photography gear and wasteful purchases comes down to understanding your actual needs. This guide cuts through the marketing hype with real-world testing, helping you identify which accessories genuinely improve your photography and which just empty your wallet.
Understanding Lens Accessories: What They Actually Do
The Three Main Categories of Lens Accessories
Understanding lens accessories becomes much simpler when you break them down into three practical categories. Each serves a distinct purpose in your photography workflow, and knowing the difference helps you invest wisely.
Protective gear forms your first line of defense against the elements and everyday mishaps. Lens caps shield your front and rear glass from scratches and dust when not in use, while lens hoods do double duty by reducing lens flare and providing a bumper against accidental bumps. UV and protective filters offer an additional layer of glass protection, though opinions vary on whether the potential image quality trade-off is worthwhile. During a recent beach shoot, my lens hood saved my front element from wind-blown sand that could have caused permanent scratching.
Creative tools expand your photographic possibilities beyond your lens’s native capabilities. Lens adapters let you mount vintage glass or lenses from different systems, opening up entirely new optical characteristics. Close-up filters and extension tubes transform standard lenses into macro-capable workhorses without the expense of dedicated macro glass. I’ve successfully captured stunning flower details using inexpensive close-up filters that cost a fraction of a true macro lens.
Functional accessories keep your gear safe and performing optimally. Quality lens pouches protect your investment during transport, while proper cleaning kits maintain optical clarity. Lens straps and support collars improve handling, especially with heavier telephoto lenses. These unglamorous items might not spark excitement, but they’re essential for long-term gear maintenance and shooting comfort.
Protective Accessories: Your First Line of Defense
Lens Hoods: More Than Just Sun Shades
If you’ve ever wondered why your lens came with that plastic flower-shaped attachment, you’re not alone. Lens hoods are among the most misunderstood accessories in photography, often dismissed as mere sun shades when they actually serve multiple critical functions. Understanding the lens hood benefits can genuinely transform your image quality.
Let’s start with the basics. Lens hoods come in two primary shapes: cylindrical (or round) and petal (or tulip). Cylindrical hoods work well with telephoto lenses, while petal hoods are designed for wide-angle lenses, with cutouts that prevent vignetting at the corners of your frame. The shape isn’t just aesthetic—it’s calculated based on your lens’s angle of view.
Beyond blocking direct sunlight that causes lens flare and reduced contrast, hoods provide physical protection for your front element. I learned this the hard way during a crowded street festival when my lens bumped into a pole. The hood took the impact, saving my expensive front element from potential damage.
Here’s a common mistake: mounting the hood backward during storage but forgetting to reverse it for shooting. I’ve seen countless photographers wonder why their images look washed out, only to realize their hood was blocking nothing but ego.
Regarding OEM versus third-party options, here’s my real-world testing insight: while third-party hoods cost significantly less, they sometimes don’t fit as snugly or may use thinner plastic that cracks easily. However, brands like JJC and Vello offer solid alternatives at half the price. For professional work, I stick with manufacturer hoods for peace of mind, but for backup bodies or hobbyist use, quality third-party options work perfectly fine.
The bottom line? A lens hood should be on your lens ninety-five percent of the time, not gathering dust in your bag.
UV and Protection Filters: The Great Debate
Few topics spark more heated discussion among photographers than UV and protection filters. Let’s cut through the noise with some straight talk based on extensive field testing.
The fundamental question: do UV filters actually protect your lens? Absolutely. I’ve witnessed a filter take a direct hit from a rogue baseball at a Little League game, completely shattering while leaving the front element pristine. That $80 filter saved a $1,200 lens. However, the reality is that such dramatic saves are relatively rare for most photographers.
The more pressing concern is image quality. Cheap filters can introduce unwanted effects including reduced contrast, color casts, and increased lens flare. During testing, budget filters under $30 consistently showed visible degradation in backlit situations, with ghosting and reduced sharpness at wide apertures. This matters when you’ve invested in premium glass.
After evaluating dozens of options, here’s what actually performs well. The B+W XS-Pro Digital MRC nano filter ranks as the top choice for serious work. It’s pricey at around $90-120 depending on diameter, but the multi-resistant coating virtually eliminates flare issues, and sharpness testing showed zero measurable degradation. The downside is cost, especially if you’re outfitting multiple lenses.
For budget-conscious photographers, the Hoya HD3 represents excellent value at $40-60. Testing revealed minimal impact on image quality, though it does show slight flare in extreme backlighting conditions. Still, it’s leagues better than generic options.
My honest recommendation? Use quality filters on lenses you frequently use in hazardous environments like beaches, construction sites, or around children. For controlled studio work or landscape photography where you’re careful, skip them entirely and use lens hoods for protection instead.
Lens Caps and Rear Caps: When Cheap Is False Economy
I’ll confess something embarrassing: I once lost an $1,800 lens to a fall because a $3 third-party rear cap popped off in my bag. The lens landed element-first on concrete. That expensive lesson taught me that not all lens caps are created equal, and sometimes the cheapest option costs you dearly.
Let’s talk about what actually matters. OEM (original equipment manufacturer) caps from Canon, Nikon, and Sony feature precise tolerances and secure friction-fit mechanisms. Third-party alternatives range from excellent to dangerously loose. The good news? Quality aftermarket options from brands like JJC and Altura Photo often match OEM performance at half the price.
The real-world test is simple: turn your lens upside down and shake it gently. If the cap falls off, it’s inadequate. I’ve tested dozens of caps, and the pattern is clear. Budget no-name caps from generic sellers frequently fail this test, while established third-party manufacturers pass consistently.
Front caps face different challenges. Pinch-style caps are convenient but vulnerable to accidental removal. Center-pinch designs offer better security, though some photographers with larger hands find them awkward. Snap-on caps provide maximum security but slower deployment, making them ideal for protecting lens coatings during storage and transport.
My recommendation? Buy OEM rear caps always since they’re inexpensive insurance. For front caps, quality third-party options work fine if you verify the fit. Keep spare caps in your bag, because Murphy’s Law guarantees you’ll need one eventually.
Creative Accessories: Expanding Your Lens’s Capabilities

Polarizing Filters: When They Transform Your Images
A circular polarizing filter might be the single most dramatic accessory you’ll ever attach to your lens. I’ve watched countless photographers gasp when they rotate one for the first time and see reflections vanish from water or watch a washed-out sky suddenly reveal deep blues and defined clouds. But not all polarizers deliver equally impressive results.
I tested five popular circular polarizers over three months, shooting everything from coastal landscapes to architectural photography through stormy windows. The differences were striking. Budget options like the 30-dollar generic filter introduced noticeable color casts and reduced sharpness at the frame edges. Meanwhile, premium options from B+W and Hoya maintained optical quality while delivering stronger polarizing effects.
The B+W XS-Pro Kaesemann consistently impressed me during field testing. At a mountain lake, it eliminated surface glare so effectively that I could photograph fish swimming three feet below the surface. The multi-resistant coating also proved invaluable when shooting in coastal spray. Yes, it costs around 100 dollars for a 77mm version, but the optical clarity justifies the investment if you’re serious about your landscape photography gear.
For those on tighter budgets, the Hoya HD3 offers remarkable value at roughly 60 dollars. I found minimal quality difference in most shooting situations, though the B+W edges ahead in extreme conditions.
One critical lesson from testing: polarizers reduce light by about 1.5 to 2 stops, so you’ll need to adjust your exposure accordingly. Also, their effect varies with your angle to the sun, working best at 90 degrees. Rotate the filter while looking through your viewfinder to find the sweet spot for each scene.
ND Filters: Controlling Light Like a Pro
Neutral density filters might sound technical, but think of them as sunglasses for your camera lens. They reduce the amount of light hitting your sensor without affecting color, allowing you to use slower shutter speeds or wider apertures in bright conditions.
The big decision here is between fixed and variable ND filters. Fixed ND filters offer consistent, predictable light reduction in specific stops, like 3-stop, 6-stop, or 10-stop versions. They generally provide superior image quality with minimal color cast. Variable ND filters, which twist to adjust darkness levels, offer convenience but often introduce a color shift toward magenta or blue at extreme settings. In testing, I’ve found that quality variable NDs from brands like PolarPro and Breakthrough Photography minimize these issues, while budget options frequently create an unpleasant cross-pattern at their darkest settings.
When do you actually need an ND filter? Landscape photographers use them constantly for those silky waterfall shots or dramatic long-exposure clouds during daylight. Portrait photographers working with fast prime lenses wide open in bright sunlight rely on them to maintain shallow depth of field without overexposing. Video shooters consider them essential for maintaining that cinematic motion blur at the correct shutter speed.
Quality issues to watch for include vignetting on wide-angle lenses, color casts that require post-processing correction, and reduced sharpness from inferior glass. The cheapest filters might save money upfront but can degrade your image quality significantly. In testing multiple brands, filters using multi-coated optical glass consistently outperform resin alternatives, though they cost more. For most photographers, a quality 6-stop fixed ND handles the majority of situations, while serious landscape shooters benefit from adding a 10-stop version for those dreamy, long-exposure seascapes.
Teleconverters and Close-Up Lenses: Quality Trade-Offs
Teleconverters and close-up lenses promise to extend your lens’s capabilities without the hefty price tag of buying new glass. But here’s the reality: these accessories involve optical quality trade-offs that you need to understand before investing.
Teleconverters multiply your focal length, typically by 1.4x or 2x. I’ve tested both Canon and Nikon’s first-party teleconverters extensively, and they perform remarkably well with high-quality telephoto lenses. Pairing a Canon EF 1.4x III with a 70-200mm f/2.8 yields sharp results that rival standalone telephotos in many situations. However, you’ll lose one to two stops of light, and autofocus speed takes a noticeable hit, especially in lower light.
The story changes dramatically with third-party teleconverters or when paired with slower lenses. I tested a budget 2x teleconverter on a consumer-grade 70-300mm lens, and the results were disappointing: soft corners, reduced contrast, and frustratingly slow autofocus. The general rule? Only use teleconverters with fast, professional-grade lenses rated f/2.8 or brighter for acceptable results.
Close-up lenses (essentially magnifying filters) work differently. They screw onto your lens front and enable closer focusing distances. Canon’s 500D close-up lens is excellent for occasional macro work without buying a dedicated macro lens. I’ve achieved surprisingly sharp flower portraits using this approach. However, cheaper close-up filters often introduce chromatic aberration and edge softness.
The verdict? Quality teleconverters from Canon, Nikon, or Sony paired with premium lenses deliver usable results for wildlife and sports photography. Budget alternatives or mismatched combinations will disappoint. For close-up work, invest in reputable brands or consider renting a true macro lens instead.
Functional Accessories: Making Life Easier
Lens Pouches and Cases: Protection on the Move
I’ve tested dozens of lens pouches and cases over the past year, from budget neoprene sleeves to premium leather options, and I can tell you that not all protection is created equal. The right case depends entirely on how you carry your gear and what kind of abuse it takes in the field.
Neoprene pouches like those from LensCoat offer excellent shock absorption and weigh almost nothing, making them perfect for stuffing extra lenses into a camera bag. I’ve dropped a 70-200mm in one from waist height onto concrete, and the lens emerged unscathed. However, neoprene offers minimal crush protection if you’re piling heavy gear on top.
For belt-mounted options, the Lowepro Lens Exchange system has become my go-to during wedding shoots. These rigid cases attach securely to your belt and feature quick-release tops. The real-world benefit? I can swap lenses in under five seconds without setting anything down, crucial when moments matter.
Premium options like Think Tank’s skin series use stretchy, padded fabric that conforms to your specific lens dimensions. They’re pricier but offer superior organization inside a larger bag.
Here’s practical sizing advice: measure your lens with the hood reversed, then add an inch to that length. Too tight means struggling with zipper pulls during rushed lens changes. Too loose lets your lens rattle around, defeating the purpose of protection. Most manufacturers list compatible lenses, but real-world testing shows these recommendations run small for lenses with aftermarket lens feet attached.

Cleaning Kits: What Actually Works
After testing dozens of cleaning products over six months, I’ve learned that expensive doesn’t always mean better, but cutting corners can damage your investment. Modern lens coatings are remarkably durable, yet surprisingly vulnerable to the wrong cleaning approach.
The microfiber cloth remains your first line of defense. I keep several in rotation—one in my camera bag, another at my desk. Here’s what matters: quality microfiber cloths have tightly woven fibers that trap dust rather than pushing it around. The cheap ones from gas stations often contain polyester blends that can scratch. I’ve had excellent results with dedicated photography brands, though premium eyeglass cloths work equally well.
For wet cleaning, avoid anything containing alcohol, ammonia, or harsh solvents. These can strip modern multi-coatings. I tested three popular lens cleaning solutions on older lenses with various coatings. Simple distilled water performed surprisingly well, but dedicated lens cleaners provided better streak-free results. One budget-friendly option consistently matched premium brands in my tests.
Air blowers deserve special mention. The rocket-style blowers effectively remove loose particles without contact. Never use compressed air cans—the propellant can leave residue or freeze coatings.
What to avoid: lens pens work for some photographers but can smear oils on hydrophobic coatings. Paper products, including tissues, contain wood fibers that scratch. And those all-in-one cleaning kits? Most bundle mediocre cloths with questionable solutions. Buy quality items individually instead.
Lens Plates and Collars: For Serious Telephoto Work
When you’re working with telephoto lenses over 200mm, a lens plate or collar becomes essential rather than optional. Here’s why: these lenses shift the center of gravity forward, creating strain on your camera’s lens mount and making stable shooting nearly impossible without proper support.
A quality lens collar (also called a tripod ring) allows you to mount the lens itself to your tripod rather than the camera body. This balances the weight distribution and enables smooth panning for wildlife or sports photography. After testing various models, the difference between stock collars and aftermarket options like those from Really Right Stuff or Kirk is immediately noticeable. Premium collars feature precise machining, smoother rotation, and integrated Arca-Swiss compatibility that eliminates the need for additional quick-release plates.
For serious telephoto work, look for collars with removable feet (helpful when shooting handheld), comfortable rubber grips, and indexed rotation stops at 90-degree intervals. I’ve found that investing in a proper collar system pays dividends during long shooting sessions, particularly when tracking moving subjects or switching between horizontal and vertical orientations quickly. While they represent a significant additional investment, quality collars enhance both the functionality and longevity of expensive telephoto lenses.
How to Choose the Right Accessories for Your Lenses
Choosing the right lens accessories doesn’t have to feel like navigating a maze blindfolded. The key is matching your purchases to your actual shooting needs rather than buying everything that looks appealing on a store shelf. Let me walk you through a practical framework that will save you money and prevent drawer clutter.
Start by honestly assessing your shooting style. A landscape photographer who hikes miles into remote locations has vastly different needs than a studio portrait shooter. If you’re constantly outdoors in challenging weather, protective accessories like weather-sealed lens cases and robust UV filters become priorities. Meanwhile, studio photographers might invest heavily in lens hoods and microfiber cloths instead. I’ve seen too many photographers buy expensive polarizing filters only to realize they primarily shoot indoors where these accessories offer no benefit.
Your lens type matters enormously in this decision-making process. Wide-angle lenses, for instance, are notoriously picky about filter compatibility because thick filter rings can cause vignetting. If you’re shooting with Canon lenses or any premium glass, investing in high-quality filters makes sense since they protect expensive equipment. Conversely, spending $100 on filters for a $200 kit lens represents questionable economics.
Budget-conscious photographers should follow this prioritization sequence. First, secure basic protection through a quality lens cap and rear cap, which typically come included but often get lost. Second, add a UV or clear protective filter for your most-used lenses, especially those you carry outdoors frequently. Third, invest in a proper cleaning kit because dirty optics ruin image quality faster than most beginners realize. Only after these essentials should you consider specialized accessories like polarizing filters, extension tubes, or lens hoods beyond what came in the box.
The biggest purchasing mistake I encounter is buying cheap multi-packs of accessories. Those $25 filter kits containing six different filters rarely deliver acceptable optical quality. They introduce color casts, reduce sharpness, and sometimes cause unwanted flaring. One quality circular polarizer from a reputable manufacturer outperforms five cheap alternatives every time.
Another common error is over-accessorizing new gear. When photographers buy a new lens, they often immediately purchase every compatible accessory, creating redundancy. Do you really need three different lens pouches? Probably not. Wait until you’ve actually used your lens in real shooting situations before investing in specialty items.
Finally, resist the temptation to buy accessories you think you should own rather than ones you’ll actually use. That teleconverter gathering dust represents wasted money that could have funded accessories matching your genuine shooting requirements.
Navigating the world of lens accessories doesn’t have to feel like wandering through an endless maze of gear. The key takeaway here is simple: focus on what genuinely enhances your photography rather than accumulating every accessory on the market. Quality trumps quantity every single time.
Throughout my years behind the camera, I’ve learned that the accessories worth their weight are those that solve actual problems in your workflow. A solid UV or protective filter becomes invaluable when shooting in harsh conditions. A lens hood pays for itself the first time it saves your front element from an accidental bump. That sturdy lens case? It’s insurance for your investment.
The reality is that your shooting style should dictate your accessory purchases. Wedding photographers genuinely benefit from reliable lens pen cleaners and microfiber cloths for quick maintenance between ceremonies. Landscape photographers find real value in quality circular polarizers and ND filters. Sports shooters appreciate well-designed lens pouches for rapid lens changes. But if you’re primarily shooting portraits in controlled environments, you simply don’t need everything mentioned in this guide.
Start with the essentials for protecting your gear, then gradually add accessories as you encounter specific situations where they’d make a difference. Pay attention to build quality for items that face regular wear and tear. Remember, an unused accessory gathering dust in your bag represents both wasted money and unnecessary weight. Invest thoughtfully, choose purposefully, and your lens accessories will genuinely support your creative vision rather than just filling space in your camera bag.