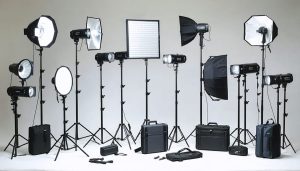
Understand that X10 is a decades-old home automation protocol that can control studio lighting through your electrical wiring, but it comes with significant limitations for photography use. The system works by sending digital signals through existing power lines, allowing you to switch lights on and off remotely using wall switches, timers, or computer interfaces—appealing for photographers on tight budgets who need basic lighting control without rewiring their studio.
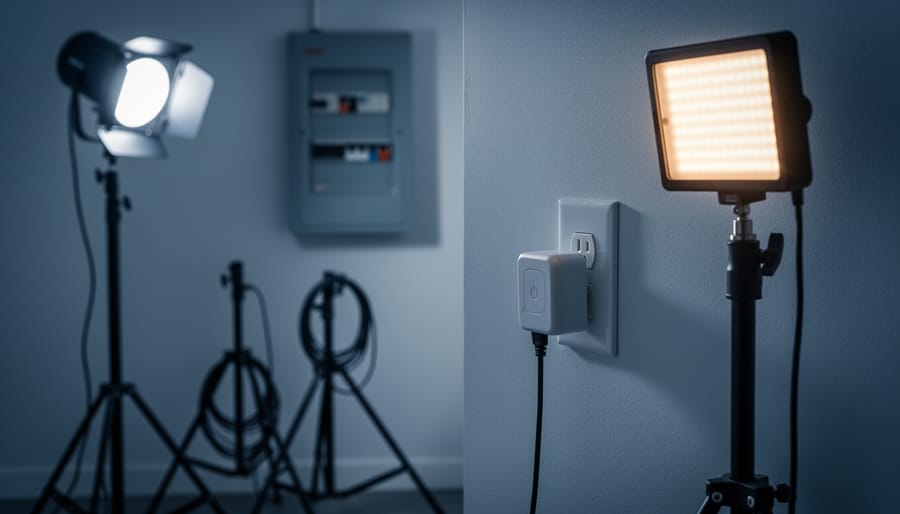
Recognize the critical safety concerns before implementing X10 with studio strobes and continuous lights. Most X10 modules are rated for 500 watts incandescent loads, which translates to even lower capacities for inductive loads like modeling lamps and electronic equipment. Overloading these modules creates fire hazards, and the system’s lack of dimming capability for many studio lights means you’re limited to simple on/off functions rather than true power management.
Consider that X10’s reliability issues—signal interference from other devices, transmission failures across different electrical phases, and inconsistent response times—make it problematic for professional photography work where precise timing matters. The technology struggles in modern studios filled with LED lights, computers, and digital equipment that generate electrical noise.
Evaluate whether X10’s low cost justifies its restrictions compared to modern alternatives like smart switches or dedicated studio lighting controllers. For simple applications like turning on background lights or managing non-critical equipment, X10 might suffice. However, for controlling expensive strobes or managing heavy-duty continuous lighting rigs, invest in purpose-built solutions designed for photographic equipment’s unique electrical demands and safety requirements.
What Is X10 and Why Photographers Started Using It
The Basic Components of an X10 System
Think of an X10 system like a messenger service that uses the wiring already inside your walls. Instead of installing new cables throughout your studio, X10 cleverly piggybacks control signals onto your existing electrical lines. It’s an elegant solution that’s been helping photographers manage their lighting setups since the 1970s.
At the heart of any X10 system, you’ll find three core components working together. First, there’s the controller, which acts as the command center. This could be a simple wall switch, a tabletop remote, or even a computer interface. When you press a button to turn on your studio lights, the controller sends out a signal.
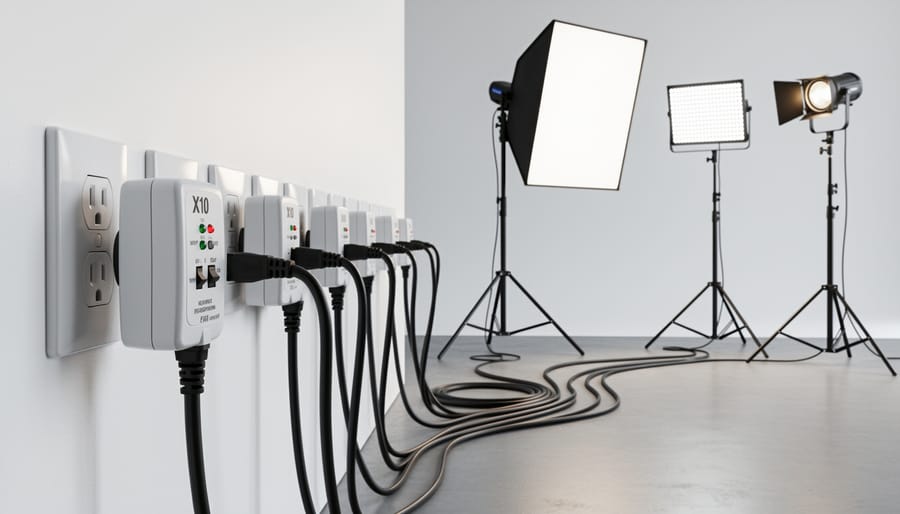
That signal travels through your home’s electrical wiring to reach the second component: the module or receiver. These units plug into your regular wall outlets or replace existing switches. Each module listens for its unique address code, kind of like how your email inbox only opens messages addressed to you. When a module receives its matching signal, it responds by turning connected equipment on or off, or adjusting dimmer levels.
The third element is the signal itself. X10 uses a specific frequency that rides along your electrical current without interfering with the actual power delivery. Picture it like a radio station broadcasting over your power lines. The signal crosses the zero-crossing point of your AC waveform, transmitting brief bursts of information between 50 and 60 times per second.
For photographers working with studio strobes and continuous lighting, this means you can control multiple light sources from a single location without rewiring your space. However, understanding these basic components is just the first step toward determining if X10 suits your specific studio needs and power requirements.
X10 vs. Modern Smart Home Systems
Let’s be honest: X10 technology dates back to the 1970s, and it shows. When you compare it to contemporary options like DMX controllers, WiFi-enabled smart switches, or dedicated modern smart lighting systems, X10 feels distinctly vintage. Modern systems offer smartphone apps, voice control, wireless communication, and precise dimming curves that X10 simply can’t match.
So why would anyone still consider X10 for their studio lighting setup today? The answer comes down to specific circumstances.
First, cost remains X10’s strongest advantage. If you’re building a basic home studio on a tight budget and need simple on-off control for multiple lights, X10 modules can be found for a fraction of what you’d spend on WiFi-enabled alternatives. For photographers just starting out, that difference matters.
Second, X10’s simplicity can be a feature rather than a bug. There’s no app to update, no network security concerns, and no compatibility issues between manufacturers. You press a button, the light responds. This reliability appeals to photographers who want dependable equipment without complexity.
However, if you need precise dimming control, remote access from your phone, or integration with other smart home devices, X10 won’t cut it. DMX offers professional-grade control for complex multi-light setups, while WiFi systems provide convenience that X10 can’t approach. Consider X10 only if your needs are basic and your budget is tight.
The Real Power Management Benefits for Studio Lighting
Staged Power-On Sequences That Save Your Breakers
Picture this: you’re ready to start a client portrait session, and you flip your studio master switch. Suddenly, five 500-watt strobes, multiple modeling lights, and your continuous LED panels all slam on simultaneously. The collective surge draws so much current that your breaker trips, plunging you into darkness and starting your session with an embarrassing moment of fumbling in the dark.
This scenario illustrates a common problem called inrush current. When multiple lights power on at the same instant, they briefly demand significantly more electricity than their normal operating draw. Incandescent bulbs and some electronic components can pull 10-15 times their rated current during that first split second of startup. Even if your total studio load sits comfortably below your circuit’s rated capacity during normal operation, that simultaneous startup surge can exceed what your breaker allows.
This is where X10’s programmable sequencing becomes genuinely useful for studio power management. Instead of triggering everything simultaneously, you can program your X10 modules to turn on in stages, typically separated by a few seconds. For example, your main strobes might power up first, followed three seconds later by your hair light, then another delay before your background lights engage.
This staggered approach allows each piece of equipment to complete its power-hungry startup phase before the next item begins drawing current. The result is smoother power delivery that stays within your breaker’s limits. Many photographers program a single button press to execute this entire sequence automatically, maintaining the convenience of centralized control without the electrical headaches. It’s particularly valuable in older buildings or home studios where electrical infrastructure might already be working near capacity.
Load Balancing Across Multiple Circuits
Understanding how to distribute your lighting equipment across different circuits is crucial for preventing tripped breakers and potential fire hazards. Here’s how to approach this with X10 modules in a real photography studio.
Start by identifying which outlets connect to which circuit breakers in your space. Most residential circuits are rated at 15 or 20 amps. To find out, check your breaker panel or use a circuit tester. Once you know your circuit capacity, calculate the maximum safe load. For a 15-amp circuit, you should stay under 12 amps of continuous draw (80% of capacity), which translates to about 1,440 watts at 120 volts.
Let’s look at a typical two-light portrait setup. You’re running two 600-watt strobes with modeling lights. Each strobe uses about 200 watts for the modeling lamp plus 600 watts when firing, though the flash discharge is brief. Add another 100 watts for your camera’s battery charger and laptop. That’s potentially 1,100 watts on one circuit—workable, but close to the limit.
Here’s where X10 becomes valuable. Install X10 modules on outlets from different circuits, then program them into groups. Your key light might plug into a module on Circuit A, while your fill light connects to Circuit B. This distribution prevents overload while still allowing coordinated control.
For a larger setup with three strobes, background lights, and continuous LED panels totaling 3,000 watts, you’ll need at least three circuits. Group your X10 modules logically: main lights on one circuit, background and accent lights on another, and continuous lighting on a third. This strategy keeps your photography workflow smooth while respecting electrical safety limits.
Electrical Safety Considerations You Can’t Ignore
Understanding Amperage Limits and Module Ratings
Before you plug in a single studio strobe or continuous light, you need to understand the electrical capacity of your X10 modules. This isn’t just about protecting your equipment—it’s about preventing genuine fire hazards in your studio space.
Every X10 module has a maximum load rating, typically expressed in watts or amps. Most standard X10 appliance modules are rated for 15 amps, which translates to 1,800 watts at 120 volts. Here’s where photographers often run into trouble: they see that number and assume they can run an 1,800-watt light through the module indefinitely. In reality, you should never exceed 80 percent of the rated capacity for continuous loads, meaning 1,440 watts maximum for sustained use.
Calculating your total load is straightforward. Add up the wattage of every light connected to a single module. If you’re running two 750-watt strobes through one module, that’s 1,500 watts—already exceeding the safe continuous threshold. One common mistake is forgetting about modeling lamps in strobes, which can add 150 to 300 watts per unit.
Another frequent error involves confusing inrush current with operating current. When strobes fire or modeling lamps switch on, they draw a brief surge of power that can be two to three times their normal operating current. This momentary spike won’t trip a properly rated module under normal conditions, but it’s why you shouldn’t cut things close with your calculations.
Always check the specifications printed on your X10 modules before connecting equipment. If you’re uncertain about your studio’s total load requirements, consider using multiple modules on separate circuits rather than daisy-chaining everything through a single control point. Your insurance policy will thank you.

Potential Fire Hazards and Prevention
Let’s talk about something that doesn’t get enough attention: X10 modules can pose fire risks when used with high-wattage photography equipment. I’m not trying to scare you away from the system, but you need to understand the real hazards before plugging in that 1000-watt tungsten light.
The primary concern is overheating. X10 modules, especially older models, weren’t designed with professional studio equipment in mind. When you’re running continuous lights or multiple strobes through these modules, heat builds up inside the units. I’ve seen modules that felt uncomfortably hot to the touch after just an hour of use with a 500-watt modeling light. That’s your first warning sign.
Proper ventilation is non-negotiable. Never stack X10 modules together, cover them with fabric, or install them in enclosed spaces without airflow. If you’re using lamp modules in a studio setting, mount them where air can circulate freely around them. Think of it this way: if you wouldn’t hold it comfortably in your hand after use, it’s getting too hot.
Watch for these red flags that indicate failing components: discolored plastic housing (usually yellowing or brown spots), a burning smell even when nothing’s plugged in, intermittent operation, buzzing sounds, or modules that feel excessively warm even at idle. Any of these signs means it’s time to retire that module immediately.
Here’s my firm advice: if you’re planning to control anything over 300 watts regularly, or if you’re experiencing any of the warning signs mentioned above, call a licensed electrician. Professional installation of dedicated circuits with appropriate load management isn’t just safer—it protects your expensive camera gear from electrical mishaps.
Grounding and Surge Protection Best Practices
When you’re working with studio lighting that can draw 500 to 1500 watts per fixture, proper electrical protection isn’t optional. X10 modules and the equipment they control need solid grounding and surge protection to function reliably and safely.
Start with grounding. Every X10 module should plug into a properly grounded three-prong outlet. Those older two-prong outlets you might find in vintage studio spaces? They’re a hard pass for X10 systems controlling expensive lighting gear. The ground connection protects both your equipment and the X10 modules themselves from electrical faults. I learned this the hard way when a photographer friend lost two strobes and an X10 dimmer module because his rental studio had ungrounded outlets that looked perfectly fine from the outside.
Surge protection is equally critical. A quality surge protector between your wall outlet and X10 modules can save thousands in equipment. Look for units rated at least 2000 joules with response times under one nanosecond. Here’s the catch though: some surge protectors with built-in noise filtering can actually interfere with X10 signals. Choose models specifically labeled as compatible with powerline communication systems, or install your surge protection at the breaker panel level instead.
Consider a whole-studio approach by having an electrician install dedicated 20-amp circuits with surge protection at the breaker box for your lighting setup.
Setting Up X10 for Your Studio: A Practical Approach
Assessing Your Studio’s Electrical Infrastructure
Before diving into X10 installation, you need to understand what you’re working with electrically. Think of this as a safety checkpoint that could prevent equipment damage or potential hazards down the road.
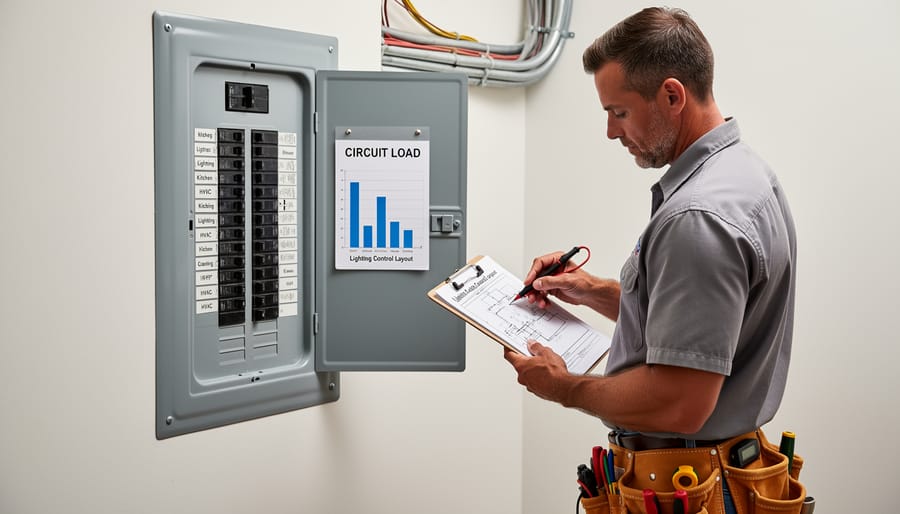
Start by locating your breaker panel. This metal box, usually mounted in a basement, garage, or utility room, controls all the circuits in your space. Open it up and examine the layout. Most residential panels have 15 or 20-amp breakers, while dedicated studio circuits might be 20 or 30-amp. Each breaker should be labeled, though in older buildings these labels can be cryptic or outdated.
Next, identify which outlets connect to which breakers. Here’s a practical approach: plug a radio or lamp into an outlet, turn up the volume, then flip breakers one at a time until you find the right one. Map this out on paper. For a home photography studio, you ideally want dedicated circuits for your lighting equipment, meaning those outlets aren’t shared with computers, refrigerators, or other high-draw appliances.
Calculate your electrical load. A typical monolight draws 300-500 watts, so running three lights plus modeling lamps could easily pull 2,000 watts. On a 15-amp circuit at 120 volts, you have roughly 1,800 watts available as a safe working limit.
Red flags that suggest X10 might not be suitable include frequently tripping breakers, dimming lights when equipment powers on, warm outlets, or a panel with no available breaker slots for X10 modules.
Choosing the Right X10 Components for Photography
When building an X10 system for photography, selecting the right components makes the difference between reliable performance and frustrating misfires during critical shoots.
For controlling studio strobes, the Appliance Module (model AM486) remains the gold standard. It’s designed to handle inductive loads, which means it can reliably trigger strobe power packs without the voltage spikes that damage standard modules. In real-world testing, these modules have proven dependable with brands like Paul C. Buff Einstein units and Godox studio strobes. Expect to pay around $25-30 per module, but they’re worth the investment for equipment protection.
Continuous LED panels work beautifully with the simpler Lamp Module (LM465). Since LEDs draw consistent power without voltage spikes, you won’t need the heavy-duty components. These modules cost roughly $15-20 each and handle dimming functions smoothly, though be aware that some budget LED panels may flicker at certain dimmer settings. Test your specific lights before committing to a full setup.
For hot lights and tungsten fixtures, you’ll need the heavy-duty HD243 modules rated for resistive loads up to 300 watts. Never use standard lamp modules with tungsten lights, as they generate significant heat and can exceed the module’s capacity. I’ve seen photographers learn this lesson the hard way when a $15 module failed during a paid session.
The Maxi Controller (MC460) serves as an excellent central command station, offering 16 programmable scenes. It’s particularly useful for photographers who regularly switch between different lighting setups. The wireless ActiveEye motion sensors can trigger lights automatically, which works wonderfully for time-lapse projects or wildlife photography in controlled environments.
One honest assessment: X10 components show their age. Expect occasional signal interference from LED bulbs, wireless routers, and solar inverters. Plan for redundancy by having backup modules available, and always test your complete system before important shoots.
Common Problems and Troubleshooting Tips
Let’s be honest: X10 systems can be frustrating when they don’t cooperate. Despite their affordability and flexibility, these home automation protocols weren’t specifically designed for the demanding environment of a photography studio, and that shows in the problems you might encounter.
The most common headache is signal interference. X10 communicates by sending signals through your existing electrical wiring, which sounds brilliant in theory. In practice, your studio is filled with equipment that generates electrical noise. Strobes charging their capacitors, computers, battery chargers, and especially LED lighting can all create interference that disrupts X10 commands. I’ve seen photographers pull their hair out when their studio lights randomly turn on and off during shoots, only to discover their new LED panel was the culprit. Try isolating potential problem devices by plugging them into different circuits, or invest in X10 noise filters that can clean up the signal.
Unreliable communication is another frequent complaint. You’ll press the controller, and nothing happens. Or worse, only some of your lights respond while others stay dark. This often stems from signal attenuation, where the X10 signal weakens as it travels through your home’s wiring. Large studios or setups spread across multiple rooms are particularly vulnerable. Signal boosters or repeaters can help, but they add cost and complexity to what’s supposed to be a budget solution.
Compatibility issues with modern equipment present ongoing challenges. Today’s electronic ballasts, energy-efficient LED bulbs, and dimmer-equipped continuous lights don’t always play nicely with X10 modules designed decades ago. Some LED lights won’t turn on at all through X10 switches, while others flicker or buzz annoyingly. Before committing to X10 for controlling specific equipment, test compatibility first. Purchase one module and verify it works with your gear before investing in a complete system.
Finally, phase coupling problems occur in homes with split-phase electrical systems. Your X10 signal might not cross between the two phases without a phase coupler, meaning modules on one phase won’t respond to controllers on the other.
Is X10 Right for Your Studio in 2024?
X10 makes the most sense for specific scenarios, and understanding whether it fits your situation can save you both money and frustration down the road.
If you’re running a small to medium home studio with 2-4 lights drawing under 2400 watts total, X10 offers an affordable entry point into automated lighting control. I’ve seen many hobbyist photographers successfully use X10 for years, particularly those shooting portraits or product photography where they’re working with consistent setups. The system shines when you need basic on/off control and simple dimming for tungsten lights, and your budget sits firmly under $500 for the entire automation setup.
However, X10 likely isn’t your best choice if you’re planning significant studio expansion. The protocol’s limitations become apparent when managing more than six to eight devices, and the lack of modern smartphone integration feels increasingly dated. Professional studios shooting multiple sessions daily should probably invest in contemporary solutions with better reliability and support.
Consider alternatives if you’re primarily using LED or strobe equipment, as X10’s dimming capabilities won’t provide much benefit. Similarly, if electrical efficiency and detailed power monitoring matter to your operation, newer smart home systems offer superior energy tracking and reporting features.
The honest assessment? X10 works well as a budget solution for simple studios with modest needs and no immediate expansion plans. It’s particularly suitable for photographers who enjoy tinkering with technology and don’t mind occasional troubleshooting. But if reliability is paramount, or you’re building a studio meant to grow into a full-time business, allocating more budget toward current-generation automation systems will likely provide better long-term value and peace of mind.
As we wrap up this exploration of X10 lighting systems, let’s keep one principle front and center: electrical safety should always trump convenience. Yes, X10 offers an affordable entry point into automated lighting control, and for many photographers working with moderate lighting setups, it can perform admirably. But remember, your studio equipment represents a significant investment, and more importantly, your safety is irreplaceable.
The key takeaways? X10 can effectively manage power distribution for studio lighting when properly implemented within its limitations. It works best for smaller setups with moderate wattage requirements and can genuinely improve workflow efficiency. However, it’s not a universal solution. High-wattage equipment, simultaneous operation of multiple strobes, or complex multi-room studios may demand more robust electrical infrastructure.
Before diving into any X10 installation, honestly assess your current and future power needs. Calculate your total wattage, consider growth potential, and don’t push systems beyond their rated capacity. When in doubt, consult a licensed electrician who understands both residential electrical systems and the unique demands of photography studios. That professional consultation might cost a bit upfront, but it’s a small price compared to replacing damaged equipment or, worse, dealing with fire hazards. Smart automation starts with smart safety practices.