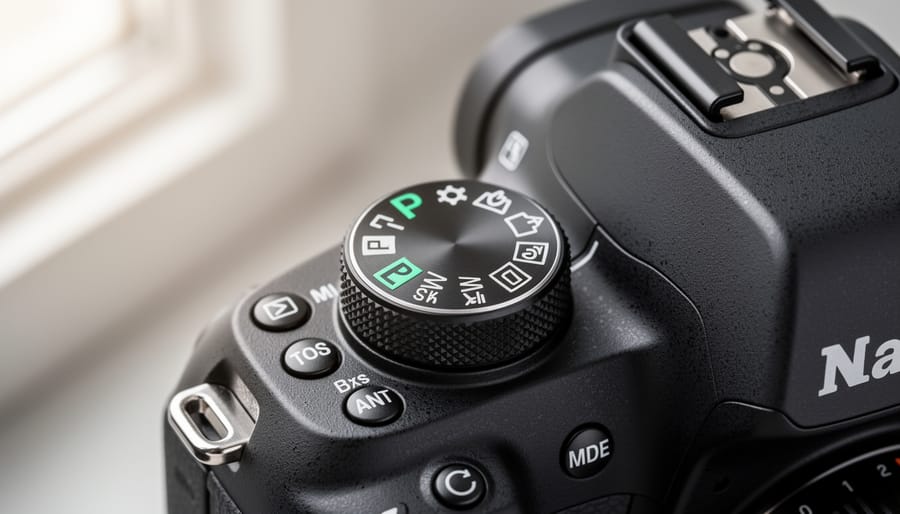
That P on your camera’s mode dial isn’t a cop-out for photographers who can’t handle manual mode—it’s Program mode, an intelligent semi-automatic setting that deserves a place in every photographer’s toolkit. While Auto mode makes all exposure decisions for you and locks you out of creative control, P mode calculates the aperture and shutter speed pairing but leaves you free to override the camera’s choice, adjust ISO, modify exposure compensation, and control every other camera settings that shape your image.
Think of Program mode as your safety net with creative freedom. When a fleeting moment demands you shoot now or lose it forever—a child’s spontaneous laugh, wildlife suddenly emerging, or unexpected perfect light—P mode delivers technically correct exposures while you focus on composition and timing. Professional photojournalists and wedding photographers routinely use it during unpredictable situations where lighting changes rapidly and missing the shot isn’t an option.
The confusion around P mode stems from misunderstanding its purpose. It’s not about being lazy or avoiding learning exposure fundamentals. Rather, it’s about choosing the right tool for the situation. You wouldn’t manually focus when tracking a racing car, and you shouldn’t feel obligated to fiddle with manual exposure settings when the scene demands split-second reactions. Understanding when P mode accelerates your workflow versus when manual control serves your creative vision separates photographers who master their craft from those rigidly following rules that don’t serve the moment.
What P Mode Actually Does (And What It Doesn’t)
The Difference Between P Mode and Full Auto
At first glance, P mode and Full Auto might seem like twins, but they’re actually quite different siblings. The key distinction lies in what you control versus what the camera decides for you.
In Full Auto mode, your camera takes complete command. It sets aperture, shutter speed, ISO, white balance, focus mode, and even determines whether to fire the flash. You’re essentially handing over every creative decision to the camera’s algorithms. While this ensures a technically correct exposure in most situations, it strips away your creative voice.
P mode, however, is far more collaborative. Yes, the camera selects the initial aperture and shutter speed combination, but here’s where it gets interesting. You maintain control over ISO settings, white balance, exposure compensation, metering mode, focus points, and drive mode. Want to deliberately underexpose for a moodier feel? Dial in negative exposure compensation. Prefer warmer tones? Adjust your white balance. Need faster burst shooting? Switch your drive mode. All of these remain firmly in your hands.
Additionally, P mode respects your preferences in ways Full Auto never will. You can use raw file format for maximum editing flexibility, while Full Auto typically forces you into JPEG. Flash behavior in P mode won’t automatically pop up uninvited at a candlelit dinner or concert.
Think of Full Auto as a completely automated taxi ride where you have no say in the route, while P mode is more like having an experienced copilot who handles some technical aspects while you steer the creative direction. This makes P mode an excellent stepping stone before progressing to manual mode, where you control absolutely everything.
Program Shift: Your Secret Weapon
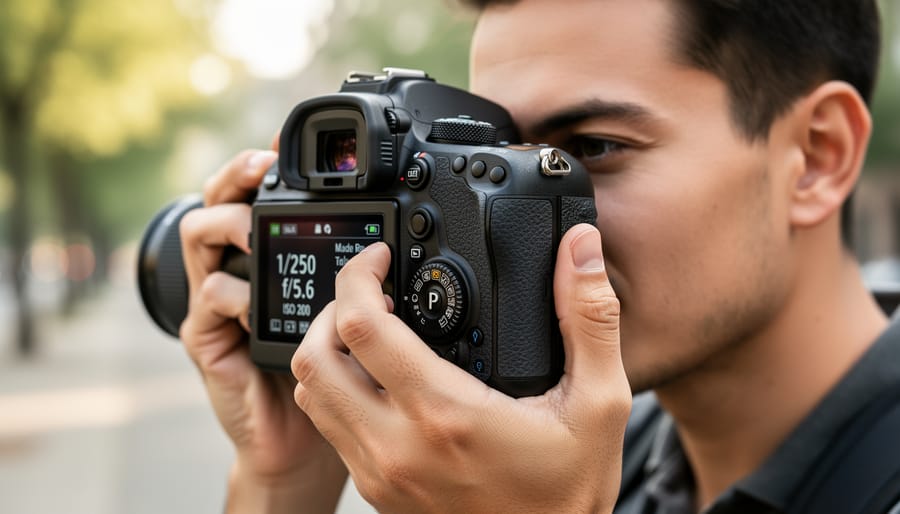
Here’s a feature that transforms P mode from basic to brilliant: program shift. Think of it as having an override button for your camera’s brain. Your camera suggests an exposure combination, say 1/250 at f/5.6, but you can instantly shift to an equivalent exposure like 1/500 at f/4 or 1/125 at f/8, all while maintaining the same overall brightness.
The beauty of program shift lies in its speed. Imagine you’re photographing a street festival and spot a dancer mid-leap. You need a faster shutter speed to freeze the action, but you’re in P mode. Instead of fumbling through menus or switching modes entirely, you simply rotate your camera’s command dial. Within a split second, you’ve shifted to a faster shutter speed while your camera automatically opens the aperture to compensate. The exposure stays perfect, but you’ve gained creative control.
Different camera manufacturers implement this feature slightly differently. On most Canon and Nikon bodies, you’ll rotate the main command dial after half-pressing the shutter button, and you’ll see an indicator appear in your viewfinder showing that program shift is active. Sony cameras typically use the control wheel, while other brands might assign it to a different dial.
The real magic happens when you combine program shift with exposure compensation. You maintain proper exposure relationships while fine-tuning both the technical settings and overall brightness. It’s like having training wheels that you can adjust on the fly, perfect for those transitional moments when you’re building confidence but still want that safety net.
When P Mode Actually Makes Sense
Street Photography: Speed Over Precision
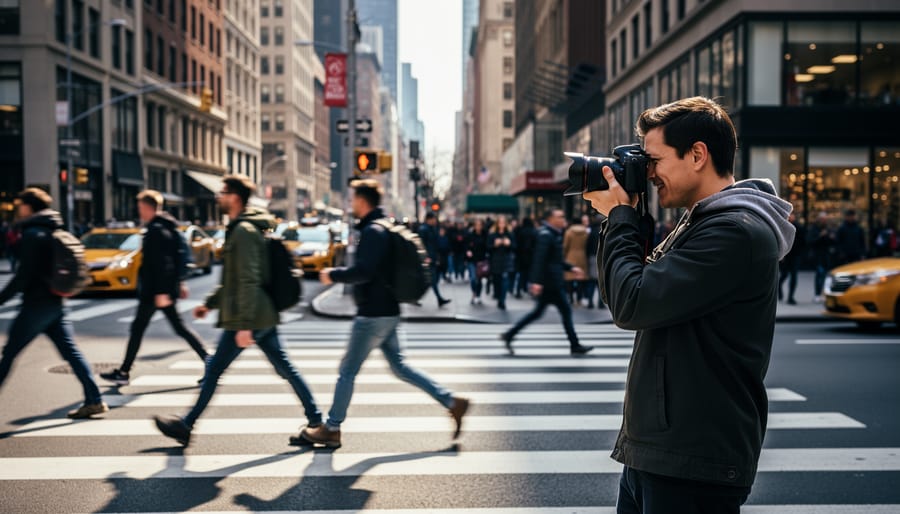
Street photography demands quick reactions when moments unfold in milliseconds. Program mode becomes invaluable here because you can’t always predict when a child will leap through a puddle or when perfect golden hour light will illuminate your subject between buildings.
Consider this scenario: You’re walking through a bustling market where lighting changes drastically every few steps, from bright sunlight to deep shadows under awnings. In aperture or shutter priority, you’d risk underexposed or motion-blurred shots as conditions shift. Program mode automatically adjusts both settings, letting you focus entirely on composition and timing.
Many street photographers keep P mode engaged while walking, then make split-second exposure compensation adjustments when they spot a scene. For instance, if you notice a silhouette opportunity backlit by storefront windows, a quick -1 or -2 exposure compensation dial turn preserves that dramatic effect without fumbling through menu settings.
The real advantage? You’re watching people and light instead of your camera settings. When that decisive moment arrives, whether it’s an elderly couple holding hands or a street performer mid-gesture, P mode ensures technically acceptable exposures while you concentrate on capturing genuine human moments that disappear in seconds.
Event Coverage and Documentary Work
Event photographers face a unique challenge: environments that shift dramatically within seconds. One moment you’re photographing speeches in a dimly lit ballroom, the next you’re capturing cocktail hour on a sunlit terrace. This is where P mode becomes an invaluable tool in the professional’s toolkit.
Documentary shooter Maria Chen explains her workflow: “During a corporate conference, I might move through six different lighting situations in ten minutes. P mode gives me the flexibility to adjust exposure compensation on the fly while the camera handles the technical balance between aperture and shutter speed. I can focus on composition and decisive moments rather than fumbling with dials.”
The key advantage is speed without sacrificing control. When covering a wedding ceremony, you can quickly shift from the bright outdoor processional to the darker indoor reception. P mode adapts immediately, while you retain the ability to dial in exposure compensation based on your creative vision. Many professionals use P mode as their baseline, switching to aperture or shutter priority only when a specific creative effect demands it.
For documentary work where authenticity trumps technical perfection, P mode helps you stay invisible and reactive, capturing genuine moments rather than posed shots that waited for manual adjustments.
Travel Photography: Lightweight Decision-Making
Travel photography presents a unique challenge: constantly changing subjects, lighting conditions, and fleeting moments. When you’re navigating unfamiliar streets, capturing spontaneous scenes, and moving between shaded markets and sun-drenched plazas, Program mode becomes your cognitive ally.
Instead of juggling aperture and shutter speed adjustments while simultaneously watching for that perfect expression or decisive moment, P mode handles the technical baseline. You spot a street musician, raise your camera, and shoot—confident that exposure will be balanced. Seconds later, you pivot to capture architectural details without fumbling through settings.
This mental bandwidth preservation matters more than you might think. After photographing for eight hours straight across different environments—morning temples, afternoon street scenes, sunset vistas—decision fatigue becomes real. P mode lets you focus energy on composition, timing, and storytelling rather than constant exposure calculations.
The practical advantage becomes clear when you’re carrying limited gear through crowded spaces. Quick exposure compensation adjustments in P mode prove faster than switching between Manual or Aperture Priority when moving from dim interiors to bright exteriors. You’re traveling light physically and mentally, capturing authentic moments without the technical overhead that might cause you to miss the shot entirely.
How to Actually Use P Mode Effectively
Setting Your Camera Up Right
Program mode doesn’t mean you can set your camera on autopilot and forget about it. To get the most out of P mode, you’ll want to pair it with smart supporting configurations that keep you in creative control.
Start with ISO settings. While you can leave ISO on auto, this often leads to unnecessarily high values and grainy images. Instead, set a manual ISO appropriate for your lighting conditions—ISO 100-400 in good daylight, ISO 800-1600 in dim interiors. This forces P mode to work within cleaner parameters while still adjusting aperture and shutter speed automatically.
Exposure compensation is your best friend in P mode. When the camera’s meter gets fooled by bright snow or dark backgrounds, use the +/- button to override its decisions. I typically dial in -2/3 stop when photographing my black dog outdoors and +1 stop for backlit portraits. The beauty here is that P mode recalculates the aperture-shutter combination based on your compensation, keeping everything properly balanced.
Don’t overlook metering modes either. Evaluative or matrix metering works well for general scenes, but switch to spot metering when shooting high-contrast situations where you need precision on a specific area. For example, when photographing a sunlit face against a shadowy building, spot metering ensures proper skin tones while P mode handles the technical execution.
These configurations transform P mode from a simple auto setting into a responsive tool that respects your creative intent while handling the technical heavy lifting.
Mastering Program Shift in the Field
Program shift turns P mode from a point-and-shoot convenience into a responsive creative tool. The technique is simple: after your camera selects an exposure combination, you rotate the command dial to shift toward alternative combinations that maintain the same exposure value.
When shooting street scenes with lots of movement, I’ll shift toward faster shutter speeds by rotating the dial. This adjusts the aperture-shutter speed pairing while keeping overall brightness constant. If my camera initially suggests 1/125 at f/5.6, shifting might give me 1/500 at f/2.8, perfect for freezing a cyclist mid-motion without fumbling through menus.
For landscape work where depth of field matters more, shift in the opposite direction. That same initial exposure becomes 1/30 at f/16, bringing foreground flowers and distant mountains into sharp focus. Just remember to stabilize your camera at slower speeds.
The beauty of program shift is its speed. You’re making creative decisions in real-time without leaving P mode. Frame your shot, half-press the shutter to see the camera’s suggestion, then quickly shift if needed. Most cameras reset the shift after you take the photo, so the adjustment is temporary and situation-specific, exactly what dynamic shooting environments demand.
Combining P Mode with Other Controls
P mode becomes even more powerful when you combine it with your camera’s other controls. Think of it as having the camera handle the technical baseline while you fine-tune the creative decisions.
The most useful companion to P mode is exposure compensation. This feature lets you tell the camera to make the image brighter or darker while maintaining the balanced exposure relationship between aperture and shutter speed. For example, when shooting a backlit portrait, you might dial in +1 or +1.5 stops of exposure compensation to prevent your subject from appearing too dark. The camera will adjust both aperture and shutter speed proportionally to achieve this.
Exposure lock is another valuable tool. Half-press your shutter button to lock the exposure reading, then recompose your shot. This technique works beautifully when your main subject isn’t centered or when dealing with tricky lighting situations like stage performances.
Don’t forget about white balance either. While P mode handles exposure, you still control color temperature. Switching from auto white balance to a specific preset like cloudy or tungsten can dramatically change your image’s mood and accuracy, particularly in mixed lighting conditions.
The Limitations You Need to Know
When You Should Switch to Aperture Priority
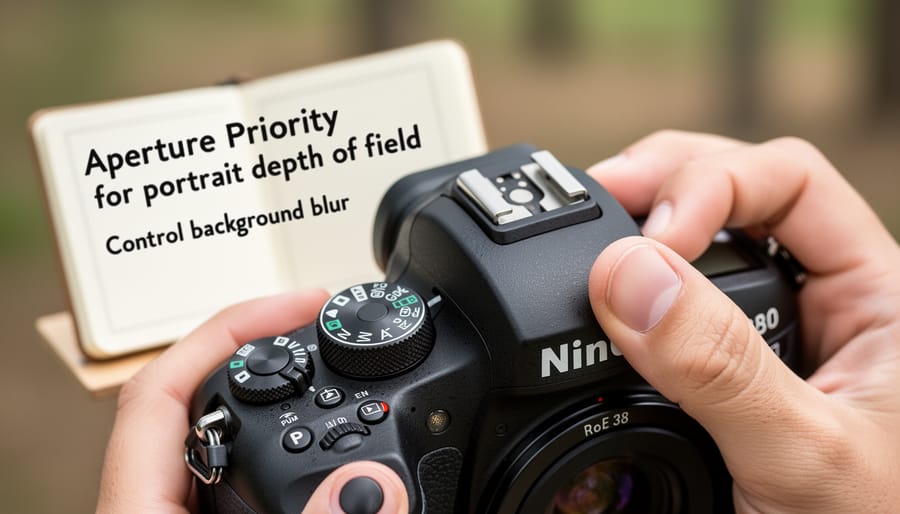
While P mode works wonderfully in many situations, there are times when switching to Aperture Priority makes more sense. The key indicator is when depth of field becomes your primary creative concern.
Portrait photography is the classic example. When you’re photographing people, you’ll likely want that beautiful blurred background (bokeh) that makes your subject pop from the frame. In Aperture Priority, you can set your lens to f/1.8 or f/2.8 and know you’ll get that creamy background separation regardless of changing light conditions. P mode might give you f/5.6 in certain situations, which simply won’t deliver the look you’re after.
Landscape photography presents the opposite scenario. Here, you typically want everything sharp from foreground to background, which requires smaller apertures like f/11 or f/16. By selecting Aperture Priority, you maintain that extensive depth of field even as the golden hour light shifts rapidly.
Product photography and macro work also benefit from aperture control. When photographing small objects or flowers, depth of field becomes razor-thin, and precise aperture selection determines whether your entire subject appears sharp or just a sliver of it. In these scenarios, letting the camera choose the aperture in P mode risks inconsistent results across your shots.
When You Should Switch to Shutter Priority or Manual
While P mode handles most everyday situations beautifully, certain scenarios demand more precise control. When you’re shooting fast action like sports or wildlife, you’ll want to lock in a specific shutter speed to freeze motion or capture intentional blur. P mode might choose 1/125s when you really need 1/1000s to freeze a sprinting athlete or 1/30s to pan with a moving car.
Consider switching to Shutter Priority (S/Tv mode) when you need guaranteed shutter speeds. This is essential for waterfall photography where you want that silky smooth effect at 1-2 seconds, or when shooting handheld in low light and you must stay above 1/60s to avoid camera shake.
Manual mode becomes valuable in controlled environments like studios, or when lighting conditions remain consistent. If you’re photographing a landscape and taking multiple shots for exposure bracketing or panoramas, manual ensures identical exposures across all frames. Similarly, concert photography often benefits from manual settings because stage lighting creates wildly inconsistent meter readings.
Ready to take full control? Learn how to switch to manual mode confidently. The key is recognizing when P mode’s automation helps versus when it hinders your creative vision.
Common Mistakes Photographers Make with P Mode
Ignoring Exposure Compensation
Program mode calculates exposure based on what it thinks is an average scene, but your subject isn’t always average. Snowy landscapes, backlit portraits, or dark interiors will often fool the meter, resulting in gray snow, silhouetted faces, or blown-out backgrounds. The beauty of P mode is that it gives you quick access to exposure compensation without switching modes entirely.
Here’s the fix: keep your thumb on the exposure compensation button. Shooting a bride in white? Dial in +1 or +1.5 stops. Photographing a black dog against dark pavement? Go -1 stop to preserve detail. Many photographers ignore this control because they assume P mode handles everything automatically, but exposure compensation is your creative override.
Think of it this way: the camera sees tonality, but you see the story. A sunset should be rich and saturated, not middle-gray. Make exposure compensation your default adjustment in P mode, checking your histogram after each shot until it becomes second nature.
Not Checking Your Settings Between Shots
Program mode’s biggest weakness is that it doesn’t communicate its decisions to you—it simply makes them. As lighting conditions change throughout a shoot, P mode silently adjusts both shutter speed and aperture, which can create inconsistent results across your image series.
Imagine photographing a family event as someone opens curtains, flooding the room with natural light. P mode might shift from 1/60s at f/4 to 1/250s at f/2.8, altering both motion blur characteristics and depth of field without warning. Your earlier shots show everyone sharp from front to back, while later images have beautifully blurred backgrounds—unintentional creative inconsistency.
The solution is simple but requires discipline: check your settings after every significant scene change or lighting shift. Glance at your camera’s display or viewfinder to confirm the aperture and shutter speed combination makes sense for your subject. If you’re shooting portraits and notice P mode has selected f/8, you might want to switch modes or apply exposure compensation to open up the aperture. This periodic monitoring transforms P mode from an unpredictable automation into a collaborative tool that handles technical adjustments while you maintain creative oversight.
Here’s the truth: P mode isn’t a photography training wheel you should outgrow—it’s a legitimate tool that deserves a spot in your shooting strategy. The best camera setting is always the one that helps you capture the moment, and sometimes that’s Program mode.
Think of your camera’s mode dial as a toolbox rather than a ladder. Manual mode isn’t the “top rung” any more than a hammer is superior to a screwdriver. Each setting serves specific purposes, and experienced photographers understand when to reach for each one. I’ve watched wedding photographers switch to P mode during unpredictable reception lighting, and I’ve used it myself when documenting fast-moving events where I needed reliable exposure without fumbling with dials.
The key is understanding what P mode offers—quick, accurate exposure with creative control over ISO and exposure compensation—and recognizing when those benefits outweigh the advantages of full manual control. Don’t let photography snobbery keep you from using a feature that camera manufacturers specifically designed for efficiency.
Experiment with P mode in different scenarios. Try it during your next family gathering, street photography walk, or travel adventure. You might discover it’s exactly what you need when the moment matters more than the method. Photography is about capturing images that resonate, not proving your technical prowess through unnecessarily complex workflows.