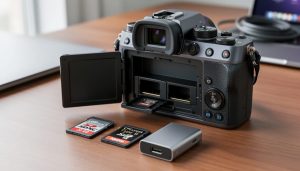
Master the fundamentals of camera tracking before attempting any complex compositing work—your ability to match virtual elements to real-world camera movement determines whether effects look seamless or amateurish. Shoot clean plates (footage without actors or moving elements) at every location, maintaining identical camera settings and positions; this single habit solves 80% of post-production headaches when removing unwanted objects or adding digital elements.
Film visual effects have evolved from exclusive Hollywood territory into accessible tools for creative storytellers at every level. What once required million-dollar budgets and specialized facilities now lives inside affordable software packages, yet the gap between amateur and professional results remains stark. The difference isn’t processing power or expensive plugins—it’s understanding how VFX integration begins during the shoot, not in post-production.
Most photographers transitioning to cinematography approach visual effects backward, attempting to fix problematic footage rather than capturing VFX-ready material from the start. Your existing knowledge of lighting, composition, and exposure gives you a significant advantage, but videography introduces temporal challenges: motion blur, frame rates, and continuity across hundreds of sequential frames. Simple techniques like proper green screen lighting or capturing reference images on location separate convincing effects from obvious fakes.
This guide builds your VFX capabilities systematically, focusing on high-impact techniques that don’t require industrial light and magic. Whether adding subtle enhancements or dramatic transformations, you’ll learn to plan effects during pre-production, capture optimal footage, and execute polished composites that enhance rather than distract from your storytelling vision.
Understanding the Fundamentals of Film Visual Effects

What Counts as Visual Effects in Modern Filmmaking
Visual effects in modern filmmaking encompass far more than massive CGI creatures or exploding spaceships. For photographers transitioning into cinematic work, understanding VFX categories helps you recognize opportunities in your own projects.
**Compositing** involves layering multiple visual elements into a single frame. Think of Marvel’s green screen work, but also consider simpler applications like replacing a blown-out sky in your travel video or removing an unwanted sign from your commercial shoot. Independent filmmaker Philip Bloom regularly demonstrates how basic compositing elevates documentary work without extensive budgets.
**Motion tracking** allows digital elements to follow real-world camera movements. Whether you’re adding text that “sticks” to a moving car or inserting a virtual product into someone’s hand, this technique bridges physical and digital worlds. Apps like Adobe After Effects make motion tracking accessible to solo creators.
**Color grading enhancements** push beyond basic correction into stylized looks—the teal-and-orange blockbuster aesthetic or the desaturated indie drama palette. While traditional in-camera effects remain valuable, digital color work provides creative control that film stocks alone couldn’t achieve.
**CGI elements** range from full 3D characters to subtle enhancements. The Corridor Crew YouTube channel showcases how small teams create impressive effects, proving Hollywood doesn’t monopolize quality VFX. Even adding digital rain, lens flares, or atmospheric particles qualifies as CGI work that enhances your cinematic storytelling without requiring industrial-scale resources.
The Bridge Between Photography and VFX Work
If you’ve mastered the exposure triangle and understand how light wraps around a subject, you’re already halfway to creating compelling visual effects. The skills that make you a competent photographer—composition, lighting ratios, understanding depth of field—translate directly into VFX work. The primary difference? You’re now thinking a few steps ahead during the shoot.
Many photographers assume VFX requires coding knowledge or years of specialized training. In reality, modern software has democratized the process significantly. Tools like Adobe After Effects and DaVinci Fusion use node-based or layer-based workflows that mirror the adjustment layers you’re already familiar with in Lightroom or Photoshop. When you’ve spent hours perfecting a sky replacement in a still image, you’ve practiced the same fundamental concepts needed for rotoscoping and compositing in motion.
The key mindset shift involves shooting with post-production intent. Just as you’d expose to preserve highlight detail knowing you can lift shadows later, VFX work requires similar planning. This means capturing tracking markers, shooting clean plates (empty backgrounds), and maintaining consistent lighting throughout takes—all extensions of the technical discipline photography has already taught you.
Your existing color grading experience from photo editing becomes invaluable when matching CGI elements to real footage. Understanding how color temperature affects mood and realism isn’t new territory; you’re simply applying that knowledge across 24 frames per second instead of a single exposure.
Essential Tools and Software for Integrating VFX
Software Options That Match Your Skill Level
Choosing the right software can feel overwhelming when you’re starting your VFX journey, but the good news is there’s genuinely something for every skill level and budget.
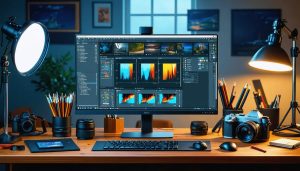
**Adobe After Effects** remains the industry standard for good reason. If you’re already comfortable with Photoshop or Premiere Pro, After Effects will feel familiar—layers, masks, and adjustment controls work similarly. The learning curve is moderate, though mastering advanced features like expressions and 3D compositing takes time. The monthly subscription ($22.99 for individuals, or bundled with Creative Cloud) makes it accessible without a massive upfront investment. The real advantage? Countless tutorials exist for virtually any effect you can imagine, and most professional workflows assume you’re using it.
**DaVinci Resolve Fusion** offers a compelling alternative, especially if you’re already using Resolve for color grading. The node-based workflow differs significantly from After Effects’ layer-based approach, which can initially feel confusing but becomes incredibly powerful for complex composites. The free version includes surprisingly robust VFX capabilities—you’re not getting a crippled demo. The learning curve is steeper due to limited tutorials compared to After Effects, but the price (free, or $295 one-time for Studio) makes it worth the effort.
**HitFilm** splits the difference beautifully for beginners. It combines editing and VFX in one interface, eliminating the need to jump between programs. The free version includes over 400 effects and presets—perfect for learning fundamentals without financial commitment. The interface feels more approachable than professional tools, though you may outgrow it as your skills advance. Paid add-ons ($349 for the full Pro version) unlock advanced features gradually.
**Blender** deserves mention for 3D work and motion tracking. It’s completely free and astonishingly capable, but the learning curve is genuinely steep. If you’re interested in creating 3D elements or particle effects, it’s worth exploring once you’ve mastered 2D compositing basics.
Start with your budget and existing software ecosystem, then commit to one platform long enough to actually learn it—software-hopping wastes more time than choosing imperfectly.
Hardware Requirements That Won’t Break the Bank
Good news: if you’re already editing photos, you probably have a solid foundation to start with VFX work. Most modern photography workstations can handle basic to intermediate visual effects without major upgrades.
Let’s talk real numbers. Your current photo editing rig likely has 16GB of RAM, which works for simple compositing and color grading. However, VFX software like After Effects or Fusion becomes noticeably happier with 32GB, especially when working with 4K footage and multiple layers. If you’re running 8GB or less, that’s your first upgrade priority—RAM gives you the most immediate performance boost per dollar spent.
The GPU matters more for VFX than still photography. While Lightroom and Photoshop can limp along with integrated graphics, real-time playback and effects previews demand a dedicated graphics card. You don’t need a $2,000 workstation GPU; mid-range options like NVIDIA’s RTX 4060 or AMD’s RX 7600 handle most indie filmmaker needs beautifully. These cards accelerate rendering, enable GPU-accelerated effects, and make the workflow far less frustrating.
Storage deserves serious consideration. Video files are massive compared to RAW photos. A single 4K project with source footage, renders, and project files easily consumes 500GB. An external SSD for active projects (2TB runs around $150) keeps your system drive breathing room, while archived projects can live on cheaper mechanical drives. Think of it as building a scalable system rather than a one-time purchase—start modest and expand as your projects demand.
Shooting Techniques That Make VFX Integration Easier
Capturing Clean Plates and Reference Footage
Before you can add stunning visual effects in post-production, you need the right raw materials from your shoot. Think of it like bracketing exposures—you’re capturing extra information that gives you flexibility later.
**Clean plates** are simply empty frames of your scene without actors or moving elements. If you’re filming someone walking through a park and plan to add effects around them, shoot the exact same frame for 5-10 seconds after they leave. Keep your camera locked down on a tripod during this capture. This “empty” footage becomes invaluable when you need to remove objects, fill in gaps, or create composites. Even if you’re not certain you’ll need it, grab that clean plate—it takes thirty seconds and could save hours of painful cleanup work later.
**Tracking markers** help VFX software understand camera movement techniques and perspective. Place high-contrast markers (like bright orange gaffer tape X’s) around your scene at varying depths. These give your software reference points for tracking motion and matching camera movement. For greenscreen work, place markers on the screen itself—just ensure they’re a contrasting color.
**Reference shots** are your insurance policy. Capture a grey card and color checker in the same lighting as your scene. Shoot chrome and grey spheres to record lighting direction and intensity—these spheres capture environmental reflections that help you match CGI elements perfectly. Photograph the set from multiple angles, even areas you think won’t matter.
One real-world tip: shoot reference footage at the same frame rate and shutter speed as your main footage to ensure motion blur matches when integrating effects.
Lighting and Camera Settings for VFX-Ready Footage
Getting your lighting and camera settings right during the shoot saves countless hours in post-production and often makes the difference between seamless VFX integration and footage that screams “amateur compositing.”
Let’s start with lighting. The fundamental rule is simple: match your lighting setup to your intended final environment. If you’re planning to composite someone into a sunny outdoor scene, flooding them with soft, diffused light won’t work—you need directional, hard light that mimics sunlight. The same professional lighting setups you’d use for portrait photography apply here, but with extra attention to consistency. Continuity matters enormously when VFX artists need to rotoscope, track, or composite your footage across multiple shots.
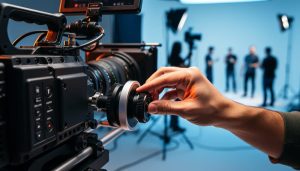
For camera settings, think stability and detail. Shoot at the highest resolution your project allows—4K minimum if possible. Frame rates matter too: stick with 24fps for that cinematic look, or 30fps for smoother motion, but avoid variable frame rates that complicate motion tracking. Your shutter speed should follow the 180-degree rule (shutter speed twice your frame rate), giving natural motion blur that helps VFX elements blend organically.
Camera profiles deserve attention as well. Shoot in log profiles (like Canon Log or S-Log) when you need maximum dynamic range and color grading flexibility. However, standard profiles work fine for simpler VFX work and require less color correction expertise.
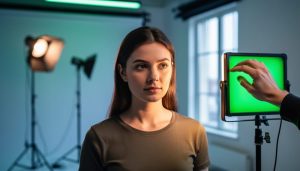
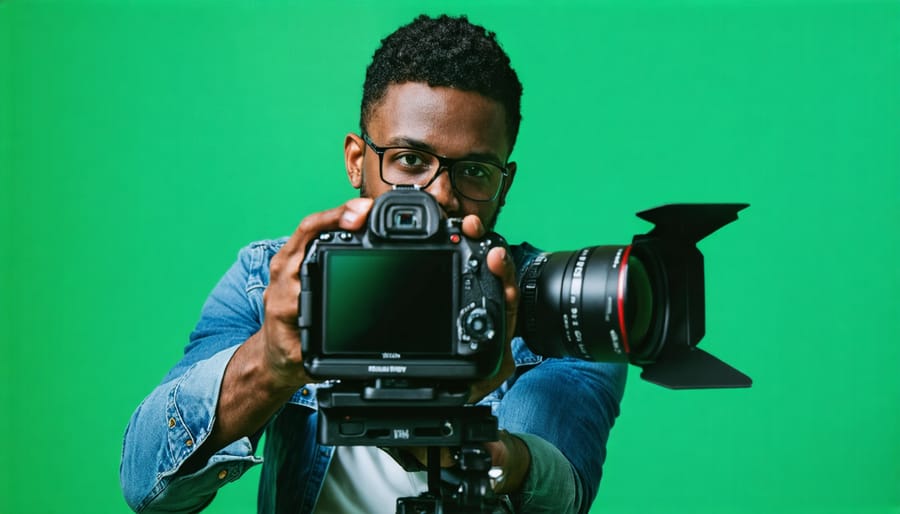
Now, about green screens—they’re not always necessary. Use them when you need clean background replacement or complex mattes. But for simpler effects like adding digital elements to existing footage, shooting against naturally contrasting backgrounds often works better and looks more realistic. Green screens introduce their own challenges: color spill, lighting evenness, and that unnatural glow require careful management during both shooting and post-production.
Core VFX Techniques Every Videographer Should Master
Motion Tracking and Stabilization Basics
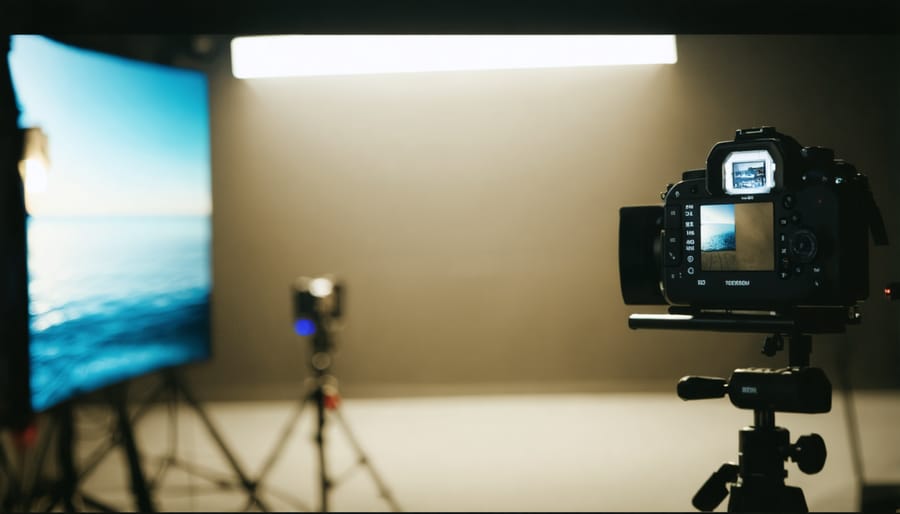
Motion tracking forms the backbone of countless visual effects, allowing you to attach graphics, text, or other elements to moving subjects in your footage. Think of those documentaries where statistics follow a runner across the screen, or music videos with animated text locked to a performer’s movements—that’s 2D tracking at work.
The process is surprisingly straightforward. Your software analyzes specific points in your footage—typically high-contrast areas or distinct features—and records their position across every frame. You then “parent” your graphic element to these tracking points, and it follows along automatically. For example, if you’re creating a product video and want to highlight a specific feature with an arrow or callout text, you’d track a point on that product, and your graphic stays perfectly aligned even as the camera or subject moves.
Most editing software includes basic tracking tools. Adobe After Effects offers robust tracking capabilities, while DaVinci Resolve’s Fusion page provides excellent results for beginners. The key is choosing tracking points with good contrast and detail—corners, edges, or distinctive markings work best.
Stabilization works as tracking’s counterpart, removing unwanted camera shake from handheld footage. I recently salvaged what seemed like unusable concert footage by applying stabilization, transforming jittery clips into smooth, professional-looking shots. The software tracks the overall motion and applies compensating movements to steady the image. While it can’t fix extremely shaky footage, it’s remarkably effective for moderate camera movement, giving your work that polished, intentional look clients expect.
Compositing for Seamless Integration
Compositing is where your VFX elements truly come to life—or fall flat if not done carefully. Think of it as the digital equivalent of a photographic double exposure, but with far more control. At its core, compositing involves layering multiple visual elements to create a single, cohesive image.
The foundation of any composite is the **alpha channel**, which defines transparency information for each pixel. When you render a 3D spaceship or create a muzzle flash, the alpha channel tells your compositing software which parts are solid and which are transparent, allowing clean integration with your background footage.
**Keying** is your next essential skill. Green screen work relies on chroma keying—isolating and removing a specific color to replace it with something else. The key to convincing keying is proper lighting during your shoot. Keep your subject well-separated from the green screen to avoid color spill, and ensure even illumination across the backing.
But here’s where many composites fail: mismatched lighting and perspective. Your added elements must match the scene’s lighting direction, color temperature, and intensity. If your plate footage has warm, late-afternoon sunlight from the right, your CG spaceship needs matching highlights and shadows. Study reference balls shot on location—they’re invaluable for understanding how light behaves in your scene.
Similarly, perspective matching is crucial. Use tracking markers and camera solver tools to ensure your 3D elements align perfectly with the camera’s movement and lens characteristics. Adding subtle environmental interactions—like appropriate reflections, shadows, or atmospheric haze—sells the illusion that everything exists in the same world.
Color Grading as a Visual Effect Tool
Color grading has evolved far beyond simply balancing exposure and white balance—it’s now a powerful visual effects tool that shapes the entire emotional landscape of your footage. When you apply advanced color grading techniques, you’re essentially creating a visual effect that can transport viewers between time periods, establish mood, or craft signature looks that define your work.
The intersection between VFX and color grading workflows is crucial to understand. Composited elements must match your scene’s color palette, which means grading often happens in stages—preliminary grades before VFX work begins, then final color passes afterward. For example, if you’re adding CGI elements to footage shot on a sunny day but want a moody, overcast feel, your color grade bridges that gap while ensuring composited elements blend seamlessly.
Modern color grading software like DaVinci Resolve offers node-based workflows that function similarly to VFX compositing tools, allowing you to isolate specific elements, create masks, and apply targeted adjustments. This means you can selectively enhance practical effects, match different camera angles shot under varying conditions, or create stylized looks like the orange-and-teal blockbuster aesthetic without expensive filters or lighting setups during production.
Common Pitfalls and How to Avoid Them
Why Your VFX Look Fake (And How to Fix It)
You’ve spent hours perfecting your composite shot, but something feels… off. The telltale signs of unconvincing VFX usually boil down to a few key culprits that break the illusion of reality.
**Lighting mismatches** are perhaps the most glaring giveaway. When your CG element appears to exist in completely different lighting conditions than your background plate, our brains immediately flag it as fake. The fix? Before you even shoot, photograph a chrome sphere and a gray sphere on location. These “lighting references” capture the exact quality, direction, and color of light in your scene. When you’re compositing later, match your digital elements to these references. Pay special attention to highlights and shadows—they should align with your practical light sources.
**Scale and perspective issues** happen when inserted elements don’t respect the camera’s lens characteristics. A wide-angle lens distorts differently than a telephoto, and your VFX need to match. Always record your camera settings during principal photography: focal length, sensor size, and distance to subject. Most 3D software can replicate these exact parameters to ensure geometric accuracy.
**Motion blur inconsistencies** instantly expose fake elements. Real cameras capture motion blur based on shutter speed—typically 180 degrees for that cinematic look. If your practical footage shows natural blur but your CG element remains pin-sharp, the disconnect is obvious. Enable motion blur in your 3D renders and match the blur amount to your actual shutter speed. For 2D composites, use directional blur filters that follow your subject’s movement path, adjusting intensity to match the surrounding footage.
Managing Client Expectations and Project Scope
Setting clear expectations upfront saves countless headaches down the road. When discussing VFX with clients, begin by explaining that visual effects work operates in distinct phases—pre-visualization, shooting, and post-production—each requiring specific time commitments. Be honest about turnaround times; even “simple” effects like removing a wire or adding atmospheric fog can take hours per shot when done properly.
Create a detailed shot list during pre-production that specifies exactly which effects you’ll deliver. Use reference images or sample work to align everyone’s vision—what looks “cinematic” to one person might mean something entirely different to another. This visual communication prevents surprises during delivery.
Combat scope creep by documenting every agreed-upon deliverable in writing. When clients request additions mid-project, explain how new effects impact timeline and budget. A helpful framework: categorize requests as “quick wins” (under 30 minutes), “standard work” (2-4 hours), or “complex effects” (full days). This helps clients understand the real cost of changes.
For timeline discussions, build in buffer time—unexpected rendering issues or creative revisions inevitably arise. I typically quote 20-30% longer than my internal estimate, which allows for quality refinement rather than rushed delivery. Remember, managing expectations isn’t about limiting creativity; it’s about ensuring everyone celebrates the same successful outcome.
Building an Efficient VFX Workflow
Project Organization and File Management
Before you start composing green screen shots or tracking camera movements, establish a solid organizational system—trust me, your future self will thank you. VFX projects generate hundreds of files across multiple stages, and without clear structure, you’ll waste hours hunting for that “final_v3_ACTUAL_final” render.
Start with a consistent naming convention that includes project name, scene number, shot identifier, and version number. For example: “ShortFilm_Sc02_Shot05_v003.mov” immediately tells you everything you need. Create a master folder structure with clearly labeled directories: RAW_FOOTAGE, PROJECT_FILES, ASSETS (for 3D models, stock elements), RENDERS, and FINALS. Within each, organize by scene or shot number.
Version control is critical in your post-production workflow. Never overwrite previous versions—disk space is cheaper than recreating lost work. Many professionals use a simple numbering system (v001, v002) with dated backup folders. For collaborative projects, consider cloud-based systems like Frame.io or dedicated VFX tools that track changes automatically.
Keep project notes documenting what changed between versions. When you’re juggling multiple effects shots simultaneously, these simple organizational habits prevent costly mistakes and keep creative momentum flowing smoothly.
Optimizing Render Times Without Sacrificing Quality
Render times can derail even the most exciting VFX project, but smart workflows keep you moving forward. The key is understanding when quality matters and when it doesn’t.
Start by embracing proxy workflows—lower-resolution versions of your footage that render in a fraction of the time. Think of proxies like shooting in JPEG for quick client previews while keeping RAW files for final delivery. Most compositing software lets you toggle between proxy and full resolution instantly, so you can work at lightning speed during the creative phase and switch to full quality only for final renders.
Adjust your render settings based on purpose. Preview renders don’t need motion blur, full anti-aliasing, or maximum sample rates. A 720p preview at medium quality often reveals composition issues just as well as a 4K render that takes hours. Save those processor-intensive settings for your final output.
Consider rendering in passes—separating lighting, shadows, and effects layers. If you only need to tweak color grading, you won’t need to re-render complex particle simulations. Real-world example: a commercial VFX artist might render their background plate, foreground elements, and atmospheric effects separately, allowing quick adjustments without starting from scratch.
Finally, render overnight or during downtime. Strategic scheduling transforms tedious waits into productive workflows.
Taking Your VFX Skills Further
Learning Resources Worth Your Time
Start with **Corridor Crew’s YouTube channel**, where industry professionals break down VFX from blockbuster films and share accessible tutorials that bridge theory and practice. Their “VFX Artists React” series demonstrates what works (and what doesn’t) in real productions, giving you invaluable insight into professional thinking.
For structured learning, **Andrew Kramer’s Video Copilot** offers free After Effects tutorials that have trained countless professionals. His practical approach focuses on achievable effects rather than overwhelming complexity. When you’re ready to invest, **FXPHD’s courses** provide industry-standard training across multiple software platforms, with separate tracks for compositing, motion graphics, and 3D integration.
The **Creative COW forums** remain an essential community where beginners and veterans share solutions to specific problems. Unlike generic Facebook groups, discussions here are searchable and solution-focused, saving you hours of troubleshooting.
Don’t overlook **Film Riot’s YouTube channel** either—they specialize in achieving professional results with limited budgets, perfect for photographers transitioning into VFX work. Their weekly challenges encourage experimentation without the pressure of client deliverables.
Building a VFX Portfolio That Attracts Clients
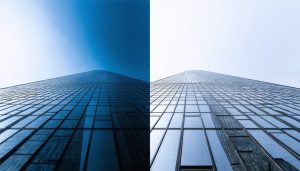
Your VFX portfolio is your visual resume, and presentation matters as much as the work itself. Start with before-and-after comparisons that demonstrate your problem-solving abilities—show the raw footage alongside the finished shot to highlight your technical skills. Create breakdown reels that reveal your process layer by layer, from raw plates to final composites. These breakdowns are particularly valuable because they show potential clients exactly what you can deliver.
Focus on quality over quantity. Five polished shots that showcase diverse techniques—tracking, rotoscoping, compositing, color grading integration—will outperform twenty mediocre examples. Include personal projects that demonstrate creativity alongside client work that proves reliability. For each piece, provide brief context: What challenge did you solve? What tools did you use? Keep descriptions concise but informative.
Consider your target market. If you’re pursuing wedding videography clients, showcase romantic, subtle enhancements rather than sci-fi explosions. Host your portfolio on platforms like Vimeo or Behance where video quality remains high, and ensure your reel loads quickly—clients rarely wait past the first few seconds.
The journey from photographer to VFX-capable visual storyteller doesn’t require a complete career overhaul—it’s a natural evolution that builds on skills you’ve already mastered. Your understanding of composition, lighting, and visual narrative gives you a significant advantage when stepping into visual effects work. While Hollywood blockbusters might seem worlds away from your current workflow, the fundamental principles remain surprisingly accessible.
Start small and celebrate incremental progress. Adding a simple sky replacement to enhance a real estate video or incorporating subtle particle effects into a product showcase represents meaningful growth. These foundational techniques not only boost your creative confidence but also immediately expand your commercial appeal to clients seeking more dynamic content. As one wedding videographer discovered, learning basic motion tracking to add elegant text animations increased her booking rate by nearly thirty percent within six months.
The commercial opportunities are tangible and growing. Brands increasingly seek content creators who can deliver polished, effects-enhanced videos without the price tag of specialized production houses. Your photography expertise already positions you as someone who understands visual quality—adding VFX capabilities makes you uniquely valuable in today’s content-driven marketplace.
Don’t wait for the perfect moment or the complete skill set. Choose one technique from this guide and experiment with it on your very next project. Whether it’s a simple color grade enhancement or your first attempt at compositing, taking that initial step transforms theoretical knowledge into practical experience. The creative possibilities awaiting you are worth the learning curve—start today, and watch how VFX transforms both your artistry and your business opportunities.

