**Transform Your Photography Studio with Smart Wireless Control**
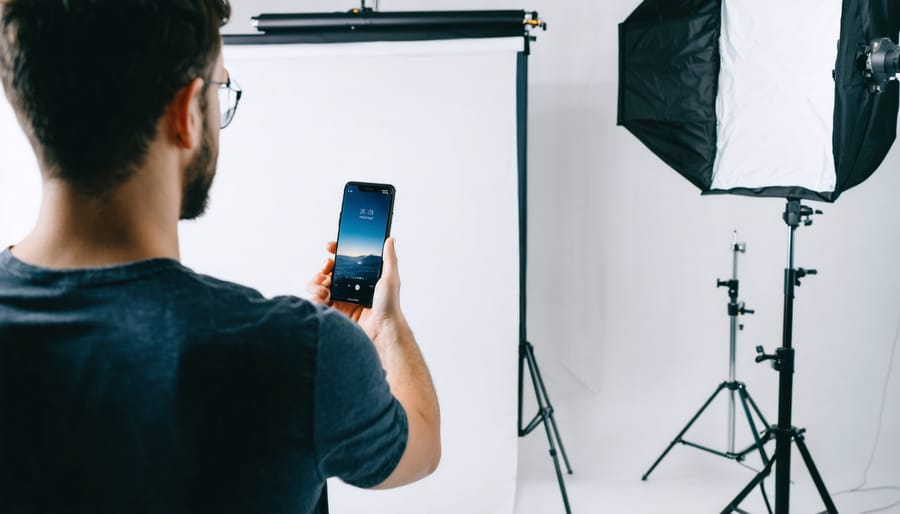
Picture this: You’re mid-shoot, your model is perfectly posed, and the lighting is *almost* right. Instead of breaking the moment to manually adjust multiple stands, you tap your phone and fine-tune every light’s intensity without moving an inch. This is the promise of Z-Wave lighting for photographers.
Z-Wave is a wireless communication protocol that lets you control compatible smart lights, switches, and dimmers through a central hub—typically using a smartphone app or voice commands. Unlike photography-specific systems like PocketWizard (which control flashes and strobes), Z-Wave manages your studio’s ambient and continuous lighting: overhead LEDs, softbox arrays, practical lights, and even colored accent lights that set your scene’s mood.
Here’s what makes Z-Wave particularly intriguing for photography: it operates on a mesh network where each device extends the signal range, creating reliable coverage across large studios. It works independently from your Wi-Fi network (using radio frequencies around 900MHz), so streaming music or transferring files won’t interfere with your lighting adjustments. You can create custom scenes—like “Product Photography” or “Portrait Setup”—that recall specific lighting configurations instantly.
However, Z-Wave isn’t specifically designed for photographers, which means understanding its practical applications and limitations is crucial before investing. Whether you’re outfitting a dedicated studio space or creating a flexible home shooting environment, knowing how Z-Wave integrates into real photography workflows will help you decide if it’s the right solution for your needs.
What Z-Wave Lighting Actually Is (And Why Photographers Should Care)
The Mesh Network Advantage in Multi-Room Studios
Z-Wave’s mesh network topology is particularly valuable when you’re working with multiple shooting spaces spread across a building. Unlike traditional point-to-point wireless systems, each Z-Wave device acts as both a receiver and a signal repeater. This means your lighting control signal hops from device to device until it reaches its destination, automatically finding the most reliable path.
Here’s how this works in practice: Imagine you have a main studio, a product photography corner, and a client meeting room on different floors. When you trigger a lighting scene from your smartphone, the signal doesn’t need to reach every light directly. Instead, it might jump from a smart switch in the hallway to a dimmer in the stairwell, then finally to your studio lights. Each powered Z-wave device (not battery-operated sensors) strengthens and extends the network.
The signal typically penetrates standard interior walls with ease, though concrete, metal studs, and brick can weaken transmission. Most Z-Wave devices have a range of 30-50 feet indoors before needing a hop to the next device. In practical terms, you’ll want at least one powered Z-Wave device every 30 feet or so to maintain reliability.
The real advantage? If one device fails or loses power, the network automatically reroutes around it within seconds. For photographers juggling time-sensitive shoots across multiple rooms, this self-healing capability means your lighting control stays responsive even when things aren’t perfect.
Z-Wave vs. WiFi-Based Smart Lighting: What’s the Difference?
When you’re deep into a tethered shooting session, transferring hundreds of RAW files to your laptop, the last thing you need is your studio lights fighting for bandwidth. This is where Z-Wave and WiFi-based wireless lighting control systems differ dramatically.
WiFi smart bulbs operate on the same 2.4GHz or 5GHz frequencies your computer uses for image transfers. During active shoots, this creates network congestion that can slow your tethering workflow to a crawl. I’ve experienced sessions where switching WiFi lights caused noticeable lag in Lightroom’s image preview—frustrating when you’re showing clients real-time results.
Z-Wave operates on a separate 908.42MHz frequency (in North America), meaning it never interferes with your WiFi network. Your image transfers proceed at full speed while lights respond instantly to commands. This dedicated frequency also consumes significantly less power—Z-Wave devices typically last months on battery, while WiFi-based switches drain faster due to constant network polling.
Response time matters when you’re adjusting ambient lighting between setups. Z-Wave devices respond in under 100 milliseconds, comparable to WiFi systems under ideal conditions. However, Z-Wave maintains that reliability even when your network is saturated with file transfers, multiple cameras uploading simultaneously, or clients streaming your work to remote art directors.
The trade-off? Z-Wave requires a dedicated hub, adding initial cost. But for photographers who depend on stable, interference-free lighting control during critical shoots, that investment quickly pays dividends in workflow reliability.
Real-World Benefits for Your Photography Workflow
Creating and Recalling Custom Lighting Scenes Instantly
Imagine walking into your studio for a portrait session, tapping a button on your phone, and watching your entire lighting setup transform to your preferred configuration—output levels, color temperature, and even individual light placement sequences, all recalled instantly. That’s the power of Z-Wave scene programming, and it’s a genuine time-saver that keeps your sessions flowing smoothly.
Scene programming lets you save complete lighting configurations as presets you can recall with a single command. For portrait work, you might create a “Headshot” scene with your key light at 70% power, fill at 40%, and background at 90%. Switch to a “Moody Portrait” scene, and those same lights automatically adjust to 85%, 20%, and off respectively. No manual adjustments between clients or looks.
Product photographers benefit enormously from this approach. Your product photography lighting scenes might include “Reflective Surfaces” with diffused overhead lighting, “Matte Products” with harder directional light, and “White Background” optimized for seamless backgrounds. Each scene loads instantly when you switch product types.
Video shooters particularly appreciate scene control when moving between interview setups and b-roll. Your “Interview” scene provides consistent three-point lighting, while “Ambient” drops everything to 30% for natural-looking supplemental light.
The efficiency gains are tangible. Instead of spending five minutes adjusting multiple lights between setups, you transition in seconds. During client sessions, this professionalism keeps momentum high and reduces awkward waiting periods. Most photographers report saving 15-20 minutes per multi-setup session—time that translates directly into more creative work or booking additional clients.
Remote Control While Shooting Tethered
When you’re shooting tethered—with your camera connected directly to your computer—Z-Wave lighting adds another layer of convenience that can genuinely transform your workflow. Instead of running back and forth between your shooting position and light switches, or constantly asking an assistant to adjust the mood lighting, you can control everything from wherever you’re stationed.
The beauty of this setup is that most Z-Wave hubs offer smartphone apps or desktop software that let you trigger scenes and adjust individual lights remotely. Picture this: you’re working through a portrait session, and you notice the warm accent light behind your subject needs to drop by 30% for the next series of shots. With your phone or laptop right beside your tethered workstation, you can make that adjustment in seconds without breaking the flow or asking your client to hold their expression.
For client sessions, this seamless control is invaluable. Clients often feel self-conscious when there’s too much fumbling or technical delay, and maintaining momentum helps keep them relaxed and engaged. When you can adjust your ambient lighting as smoothly as you’d change your camera settings, the entire session feels more professional and effortless.
Many photographers create specific Z-Wave scenes for different shot types—”High Key Beauty,” “Moody Editorial,” “Natural Window Light Supplement”—and switch between them with a single tap. This approach works especially well for product photographers shooting multiple setups in one day, where consistency and speed directly impact your bottom line.
Automated Lighting for Video Transitions
If you’re shooting hybrid content—mixing stills and video in the same session—you know the frustration of inconsistent lighting between clips. Z-Wave automation solves this by programming your studio lights to transition smoothly as your camera modes change. Instead of manually adjusting ambient light levels each time you switch from photo to video, you can create preset scenes that trigger automatically.
Here’s where it gets practical: imagine you’re documenting a product launch with both photography and behind-the-scenes video. Set up a Z-Wave scene called “Video Mode” that gradually dims your overhead lights to 30% while maintaining your key lights at full power. When you hit record, trigger this scene from your smartphone or a wireless button—your video lighting transitions happen in three seconds, eliminating jarring jumps in exposure that ruin footage.
For time-lapse photographers, Z-Wave becomes even more valuable. Program your lights to shift color temperature incrementally over hours, simulating the golden hour effect indoors for product photography. Stop-motion animators can maintain absolutely consistent ambient conditions across shooting days—your Z-Wave system remembers exact dimming levels down to 1% increments.
The key advantage over traditional smart bulbs? Z-Wave’s mesh network ensures commands execute simultaneously across all fixtures. When you need six lights to change together for a seamless transition, there’s no visible lag between bulbs. This synchronized control is essential for professional results where lighting consistency directly impacts your final deliverables.
Building Your Z-Wave Lighting System: What You Actually Need
The Hub: Your System’s Brain
Think of your Z-Wave hub as the conductor of an orchestra—it doesn’t make the music itself, but it coordinates all the instruments to create harmony. In your photography setup, the hub communicates with every Z-Wave device, executing your commands and managing automations.
Popular hubs like Samsung SmartThings, Hubitat Elevation, and Home Assistant offer different strengths. SmartThings provides user-friendly smartphone control and works seamlessly with many brands, making it ideal if you’re just dipping your toes into smart lighting. Hubitat processes everything locally, meaning your lights respond instantly without internet dependency—crucial when you’re mid-shoot and need immediate adjustments. Home Assistant appeals to tech-savvy photographers who want deep customization, allowing complex scenes like “golden hour simulation” or “gradient backdrop lighting.”
For photography-specific needs, prioritize hubs with scene programming capabilities. You’ll want to create custom presets like “product photography” (bright, neutral white) or “portrait mood lighting” (warm, dimmed ambient) that activate with a single tap. Look for hubs supporting Z-Wave Plus for faster response times and better range—nothing kills creative momentum like waiting for lights to respond.
Compatibility matters significantly. Ensure your hub supports the Z-Wave frequency used in your region (908.42 MHz in the US, 868.42 MHz in Europe). If you’re already invested in another smart home ecosystem like Apple HomeKit or Google Home, choose a hub that bridges between systems. This integration lets you control your studio lighting alongside other smart devices, creating a truly unified workspace that adapts to your creative needs.
Smart Switches, Dimmers, and Bulbs: Which Option Works Best?
Choosing the right Z-Wave lighting setup depends largely on your space and how much control you need. **In-wall switches and dimmers** offer the most permanent, professional solution—ideal if you own your studio. These replace your existing light switches and control any bulbs you install, giving you complete dimming control and the cleanest look. They’re perfect for overhead lighting or controlling multiple fixtures at once. The downside? They require basic electrical work (or an electrician), making them impractical for renters.
**Smart bulbs** are the renter’s best friend. Simply screw them into existing fixtures, and you’re ready to go. Many Z-Wave bulbs offer color temperature adjustment—crucial for matching ambient light or creating specific moods during shoots. You can shift from warm 2700K for golden hour effects to cool 5500K for crisp product photography. However, remember that someone physically turning off the wall switch kills the smart functionality entirely.
**Plug-in modules** sit between your lamp and the outlet, offering a middle-ground solution. They’re excellent for controlling floor lamps, practical lights, or background lighting without any installation. While they won’t give you color temperature control, they do provide reliable dimming for most tungsten-based photography lights.
For most photographers, a hybrid approach works best: smart bulbs for key lights where color temperature matters, in-wall dimmers for overhead ambient control if you own the space, and plug-in modules for accent lighting. This flexibility lets you adjust your entire lighting environment from a single Z-Wave hub.
Budget Reality Check: What Does This Actually Cost?
Let’s talk numbers, because Z-Wave lighting isn’t exactly pocket change—but it might not break the bank either.
A basic starter system for a home photography studio runs around $150-$300. That includes a Z-Wave hub ($50-$100) and 2-3 smart switches or dimmers ($30-$60 each). Not terrible, especially considering you’re controlling existing lights rather than buying specialized photo equipment.
For hobbyists shooting occasionally at home, honestly? It’s a tough sell unless you’re already invested in smart home tech. Your money’s better spent on actual lighting gear first.
Professional studios looking at full implementation face $500-$1,500 depending on space size and complexity. That’s significant but justifiable if you’re shooting multiple times weekly and value efficiency.
The sweet spot? Photographers running regular client sessions from dedicated spaces. You’ll recoup the investment through time savings and the professional impression automated lighting creates when clients arrive to perfectly lit spaces.
Where to invest first: Start with your main shooting area’s overhead lighting. Add backdrop or accent lighting later once you’ve experienced the workflow benefits. Skip bedroom or hallway lights initially—they’re nice-to-haves, not photography essentials.
Setting Up Your First Z-Wave Lighting Scene
Pairing Your First Devices (It’s Easier Than You Think)
Getting your Z-Wave lighting system up and running is surprisingly straightforward, even if you’ve never worked with smart home technology before. Start by placing your Z-Wave hub in a central location—ideally near your router—and power it on. Most hubs walk you through setup via a smartphone app, which typically takes less than five minutes.
To pair your first light switch or dimmer, put your hub into “inclusion mode” (usually a button press or app selection), then tap the paddle on your Z-Wave switch three times quickly. You’ll see a confirmation light, and within seconds, the device appears in your app. Think of it like pairing Bluetooth headphones—simple and visual.
If a device won’t pair on the first try, don’t panic. The most common culprit is distance. Z-Wave has roughly 100 feet of range, but walls and metal studs can interfere. Try pairing closer to the hub first, then moving it to its final location. Also, ensure you’ve excluded any previously paired devices by running your hub’s “exclusion mode” before attempting to add them.
Once paired, name each light logically—”Overhead Softbox,” “Background Light,” “Main Studio”—so you can quickly identify and control them during shoots.
Programming a ‘Portrait Session’ Scene
Let’s walk through creating a “Portrait Session” scene that you can activate with a single command. This is where Z-Wave really shines in a photography workflow.
Start by positioning yourself where your subject will be standing. Open your Z-Wave controller app and navigate to the scene creation menu. I’ll typically name this something memorable like “Portrait – Soft Key.”
Now adjust each light individually: Set your main key light (perhaps a softbox-equipped strobe) to 75% power through its Z-Wave dimmer. Your fill light goes to 40% to maintain that classic 2:1 lighting ratio. Background lights? I set mine to 30% for subtle separation without distraction. Hair light at 50% adds that professional polish.
Here’s the practical beauty of this approach: Once you’ve dialed in these exact percentages, save the scene. Next time you’re shooting portraits, whether it’s tomorrow or three months from now, one tap recreates those perfect settings instantly. No more “close enough” adjustments or scribbled notes about which light was set where.
You can create multiple variations too—”Portrait – Dramatic” with higher contrast ratios, or “Portrait – High Key” with everything brighter. Save each as a separate scene, and you’ve built a professional lighting library at your fingertips.
Creating Physical Controls You Can Actually Reach
The beauty of Z-Wave lighting lies in giving yourself multiple ways to control your setup. Wall switches remain your primary control—mount them near your shooting area where you can quickly adjust lighting between shots without setting down your camera. Look for Z-Wave switches with physical buttons rather than touch-only interfaces; when you’re juggling a camera body and lens, tactile feedback matters.
Remote controls serve as your second line of defense. Small Z-Wave button controllers can clip to your belt or sit on your shooting table, letting you toggle scene presets with one hand. Many photographers keep a remote control attached to their tripod for easy access during long sessions.
Mobile apps provide the most flexibility but require a free hand. Set up your smartphone app with large, clearly labeled buttons for your most-used lighting scenarios. During client shoots, you can hand control to an assistant, while solo shooters benefit from pre-programming lighting sequences. The key is redundancy—having wall switches, a physical remote, and your phone ready means you’re never stuck with lights in the wrong configuration when inspiration strikes.
Integration with Your Existing Photography Gear
Working Alongside Studio Strobes and Continuous Lights
Here’s an important distinction that often confuses photographers new to Z-Wave: this technology isn’t meant to replace your studio lighting setup. Your strobes, speedlights, and continuous photo lights handle the main lighting duties—they’re the workhorses creating your exposure and shaping your subject. Z-Wave steps in to control your ambient and practical lighting.
Think of it this way: Z-Wave manages the environment around your subject. When you’re shooting in a home studio, Z-Wave can dim overhead fixtures so they don’t compete with your key light or create unwanted color casts. If you’re photographing a product with practicals in the frame—like a lamp on a bedside table—Z-Wave gives you precise control over that lamp’s brightness without touching it between shots.
This creates a cohesive lighting environment where everything works together. I’ve used Z-Wave bulbs in desk lamps and pendant fixtures that appear in my portraits, adjusting their intensity to complement rather than overpower my main strobes. The result? Images where practical lights look naturally lit while my strobes still deliver the professional quality my clients expect.
Advanced Automation for Serious Workflows
Once you’ve mastered basic Z-Wave lighting control, it’s time to explore automation that truly transforms your workflow. Motion sensors become invaluable allies in busy studios—walk into your shooting area with equipment in both hands, and your lights automatically spring to life at your preferred settings. No more fumbling for switches or apps when you’re carrying a camera and reflector.
For photographers conducting day-long sessions, scheduling features prevent those “Did I leave the studio lights on?” moments. Set your Z-Wave system to power down all non-essential lighting at 8 PM automatically, or create custom schedules that prepare your space before you arrive. Morning product shoots? Have your lights warming up at 7 AM so they’re color-stable when you walk in.
The real magic happens when Z-Wave lighting integrates with other studio systems. Connect your lights to door sensors so they automatically switch to client-friendly settings when someone enters through the main door, while your shooting area maintains its precise setup. Pair them with temperature sensors to prevent overheating during intense lighting setups. Some photographers even integrate Z-Wave with their camera systems, triggering ambient lighting changes based on shooting mode—continuous lights dimming automatically when flash units fire, for instance. These automations free you to focus entirely on capturing the perfect shot.
Common Problems (And How to Actually Fix Them)
When Lights Don’t Respond or Are Sluggish
When your Z-Wave lights become unresponsive or react slowly during a shoot, you’re likely dealing with mesh network issues. Think of Z-Wave as a web of interconnected devices—each light and switch helps relay signals to others. If one connection weakens, the entire chain suffers.
Start by checking your mesh network’s health through your Z-Wave controller app. Most systems display signal strength and connection paths. If you notice weak connections, the solution often involves adding a Z-Wave range extender between your controller and problematic lights. These plug-in devices strengthen signals across larger studios or spaces with thick walls.
Physical interference matters too. Metal shelving, large monitors, and even some photography equipment can block Z-Wave’s radio frequency signals. Try repositioning your controller away from Wi-Fi routers and wireless camera transmitters, which operate on similar frequencies. In my experience photographing in converted warehouse spaces, strategically placing just one or two extenders transformed sluggish lighting response into instant control. If problems persist, exclude and re-include the affected device in your network—this forces the system to find a better signal path.
Color Temperature Consistency Issues
Here’s a challenge many photographers encounter when building smart lighting systems: not all Z-Wave bulbs render colors the same way, even when set to identical Kelvin temperatures. I learned this the hard way when mixing Aeotec and Zooz bulbs in a three-point setup—what appeared as 5000K daylight on one brand looked noticeably cooler than another.
For photography work, this inconsistency matters. While Z-Wave excels at controlling power and timing, it wasn’t designed with color accuracy in mind like purpose-built photography equipment. If you’re shooting products or portraits where color precision is critical, you’re better served by traditional photography fixtures with known CRI ratings above 95.
That said, Z-Wave can work for ambient lighting or background control. The key is staying within a single manufacturer’s ecosystem and testing actual color output with a color meter rather than trusting the stated values. Some photographers successfully use Z-Wave dimmers with high-quality constant-output LED panels, maintaining the control benefits while keeping color reliability. Remember: smart doesn’t always mean photographically accurate.
Z-Wave lighting isn’t for every photographer, but if you’re a studio photographer managing multiple shooting spaces, a hybrid shooter who needs to quickly transition between video and stills, or a product photographer who relies on consistent ambient lighting, the investment makes genuine sense. The real question isn’t whether the technology works—it does—but whether your shooting frequency justifies the upfront cost. If you’re shooting several times per week and constantly adjusting your space, Z-Wave can save you significant time and mental energy. For weekend warriors or occasional shooters, manual switches might be perfectly adequate.
The beauty of Z-Wave is that you don’t need to commit to a complete overhaul immediately. Start with one critical area—perhaps your main shooting space or backdrop zone—and experience the workflow benefits firsthand. You’ll quickly discover whether the convenience matches your needs.
Ready to take the next step? Map out your most-used shooting area, identify which lights you adjust most frequently, and budget for a starter kit with 2-3 switches and a compatible hub. That’s all you need to begin transforming your photography workflow.