Look through your camera’s picture profile menu for options labeled “Log,” “S-Log,” “C-Log,” or “V-Log”—these flatten your image’s contrast and color, preserving maximum dynamic range in highlights and shadows that you’ll recover in post-production. Expose 1-2 stops brighter than you normally would, ensuring your subject sits around 40-50% on the waveform monitor, because log footage intentionally looks washed out and requires this overexposure technique to minimize noise in shadows. Shoot a color checker or gray card at the start of each scene to establish accurate reference points for color grading later, since log profiles strip away your camera’s color science and demand skilled correction to achieve professional results.
Log recording transforms your camera into a digital negative system, capturing a flat, desaturated image that contains far more tonal information than standard profiles. This approach mirrors cinematic techniques used in Hollywood productions, where colorists manipulate this expanded data to create specific moods and looks. The trade-off is significant: you cannot use log footage straight out of camera. Every clip demands color grading, and mistakes in exposure become magnified when you stretch that flat image back to normal contrast.
Understanding when log benefits your workflow versus when it creates unnecessary complications separates effective videographers from those chasing features they don’t need. If you’re delivering quick turnaround content for social media or shooting in controlled lighting, standard profiles often produce superior results with less effort. However, when you’re capturing high-contrast scenes, need maximum flexibility for color matching multiple cameras, or creating narrative work destined for serious post-production, log profiles become indispensable tools worth mastering.
What Is a Log Profile, Really?
The Science Behind the Flat Look
When you first play back log footage, don’t panic at what you see. That flat, washed-out image is exactly what’s supposed to happen, and understanding why requires a quick dive into how cameras capture light.
Every camera applies a gamma curve to your footage, which is essentially a mathematical formula that determines how brightness values are distributed across the image. Standard video profiles use a gamma curve designed to look good immediately, prioritizing midtones where human faces and everyday scenes live. This approach works perfectly for content that goes straight from camera to screen, but it has a critical limitation: it discards information in the highlights and shadows to make those midtones pop.
Log profiles flip this priority. Instead of creating a pleasing image, they preserve as much dynamic range as possible. Think of dynamic range as the span between the darkest shadows and brightest highlights your camera can capture with detail intact. A typical video profile might capture 8 to 10 stops of dynamic range, while log can preserve 12 to 14 stops or more, depending on your camera.
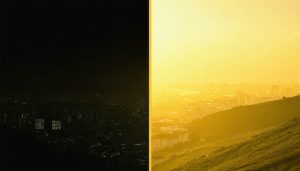
Here’s a practical example: imagine filming a wedding ceremony inside a church with bright windows in the background. With a standard profile, you’ll either properly expose the couple’s faces while the windows blow out to pure white, or you’ll expose for the windows while the couple becomes a silhouette. Log captures detail in both areas simultaneously, giving you the flexibility to balance them perfectly during color grading.
The washed-out appearance is simply the visual cost of spreading all that tonal information across the available data space. By flattening the contrast and reducing saturation, log profiles create breathing room for highlights and shadows that would otherwise be crushed into oblivion.
Why Cameras Don’t Just Record This Way by Default
If log footage captures so much more information, why isn’t it the default setting on every camera? The answer comes down to trade-offs that matter for most shooters.
Log profiles require a color grading workflow to look good. Straight out of camera, log footage appears flat, desaturated, and frankly unappealing. For wedding videographers shooting content clients need to see immediately, or news crews delivering footage on tight deadlines, this extra step becomes a significant obstacle. Standard profiles deliver punchy, contrasty images ready to share right away.
Log also demands more from your workflow. You’ll need color grading software, knowledge to use it effectively, and storage space for larger files. These requirements add time and complexity that many creators simply don’t need.
When are standard profiles better? If you’re shooting content for social media, simple event coverage, or anything requiring quick turnaround without extensive post-production, standard profiles make perfect sense. They’re designed to look great immediately, and that’s exactly what many projects require. Log is a specialized tool for specific creative goals, not a universal upgrade everyone should adopt.
Popular Log Formats You’ll Actually Encounter
S-Log, V-Log, C-Log: What’s the Difference?
If you’ve been researching log profiles, you’ve probably encountered a confusing alphabet soup of terms: S-Log3, V-Log, C-Log2, F-Log, and more. Here’s the good news—they’re all doing essentially the same thing, just with slightly different approaches based on each manufacturer’s engineering choices.
Think of log profiles like different brands of neutral density filters. They serve the same purpose but with subtle variations in execution. S-Log comes from Sony, V-Log from Panasonic, C-Log from Canon, F-Log from Fujifilm, and N-Log from Nikon. Each preserves highlight and shadow information while maintaining a flat appearance that maximizes your camera’s dynamic range.
The practical differences? They’re smaller than you might think. Sony’s S-Log3, for instance, is designed to mimic the latitude of traditional film stock, capturing around 14 stops of dynamic range. Panasonic’s V-Log takes a similar approach, closely matching the characteristics of their VariCam cinema cameras. Canon’s C-Log sits somewhere in the middle with a gentler curve that some colorists find more forgiving in post-production.
Which should you use? Simple: whichever one your camera offers. You can’t choose S-Log on a Canon camera or C-Log on a Sony—your manufacturer decides for you. What you can control is which version to select if your camera offers multiple options. Generally, the higher numbers (like S-Log3 versus S-Log2) represent newer, improved versions with better shadow performance and less noise.
The real-world impact is this: if you’re working solo and only shooting on your own gear, master your camera’s specific log profile. But if you’re collaborating across different camera brands or matching footage from multiple sources, understand that professional colorists can work with any of these profiles effectively. They all provide the flat, data-rich files needed for serious color grading—the name on the box matters less than your technique in capturing and processing the footage properly.
Does Your Camera Support Log Recording?
Before diving into log recording, you’ll need to confirm whether your camera actually supports it. Start by checking your camera’s manual or manufacturer’s website—look for terms like “log profile,” “picture profile,” or specific names like S-Log (Sony), C-Log (Canon), V-Log (Panasonic), or N-Log (Nikon). These profiles are typically found in your camera’s picture or color settings menu.
Keep in mind that some cameras require a firmware update or even a paid upgrade to unlock log capabilities. For instance, certain Panasonic cameras need a V-Log activation key purchased separately, while others include it out of the box. Always verify your current firmware version and whether updates have added log functionality since your camera’s release.
If your camera doesn’t support native log recording, don’t despair. You have several budget-friendly alternatives. Flat picture profiles, sometimes called “neutral” or “flat,” offer increased dynamic range compared to standard profiles, though not quite to log’s extent. They’re a solid stepping stone for learning color grading workflows without the full complexity of log footage.
Another option is exploring third-party picture profiles designed to mimic log characteristics. Many filmmakers share custom profiles online that maximize your camera’s latitude. While these won’t match true log performance, they provide valuable practice in post-production color work before investing in new equipment.
Setting Up Your Camera for Log Recording
Exposure When Filming in Log
When you switch to a log profile, your exposure approach needs to change too. Log footage straight out of camera looks flat and desaturated, which makes it harder to judge whether your exposure is correct just by looking at the LCD screen. What appears properly exposed in standard picture profiles might actually be underexposed when shooting log.
This is where the technique of “exposing to the right” becomes essential. The concept is simple: you want to push your exposure as bright as possible without clipping the highlights. Why? Because log profiles preserve more information in the brighter parts of your image, and by exposing brighter, you’re maximizing the signal-to-noise ratio. This gives you cleaner shadows when you grade your footage later.
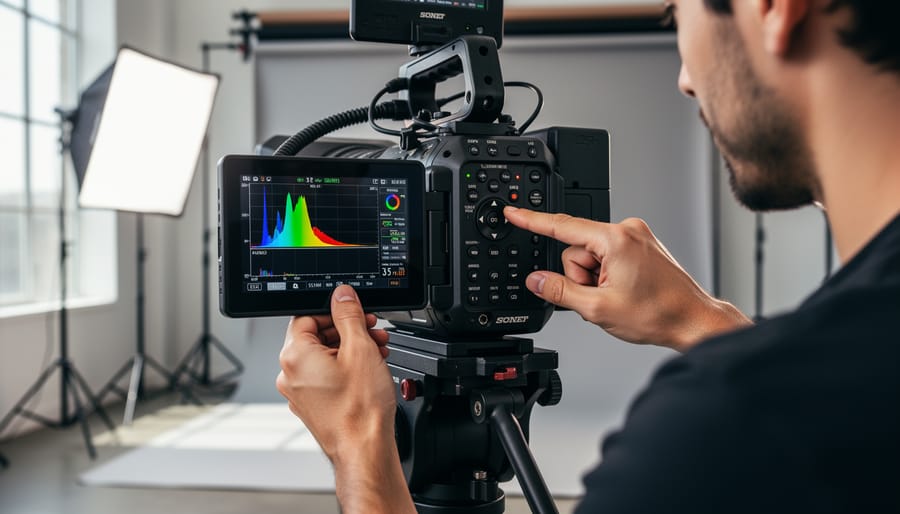
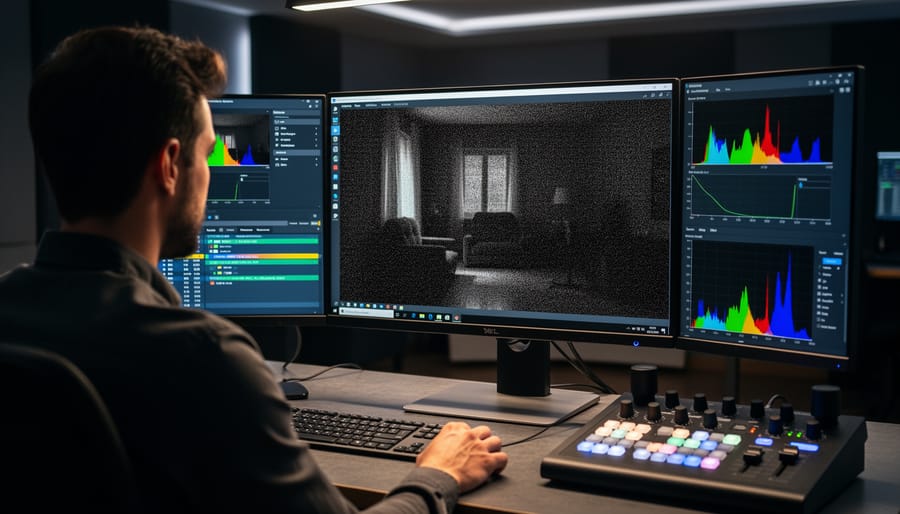
But here’s the catch—you can’t rely on your eyes alone. Your camera’s LCD preview in log looks so flat that it’s nearly impossible to judge proper exposure visually. This is where waveform monitors and zebras become your best friends. A waveform monitor displays the brightness values across your image, typically on a scale from 0 to 100 (or 0 to 1023 for 10-bit). When exposing to the right with log, you generally want your brightest areas sitting around 60-75% on the waveform, not the 90-100% you might target with standard profiles.
For practical application, imagine filming someone outdoors on a sunny day. In standard profiles, you’d expose for their face and accept blown-out skies. With log and proper waveform monitoring, you can expose brighter while retaining both facial detail and sky information. Combined with professional camera movement, this exposure technique creates cinema-quality results that give you maximum flexibility in post-production.
The Settings You Must Get Right
Getting the technical settings right is the difference between log footage that grades beautifully and footage that falls apart under color correction. Think of these settings as the foundation of your image quality—they determine how much information you’re actually capturing.
Bit depth is your first consideration. Most cameras offer 8-bit or 10-bit recording, and this matters enormously with log profiles. An 8-bit file captures 256 shades per color channel, while 10-bit captures 1,024 shades. When you’re working with the flattened contrast of log footage, those extra gradations prevent banding in skies and smooth gradients. If your camera only shoots 8-bit, you can still use log, but you’ll need to be more conservative in post-production. For professional work, 10-bit is the minimum recommended standard.
Color sampling, often shown as 4:2:0 or 4:2:2, determines how much color information is recorded. The first number represents full resolution luminance data, while the others indicate color detail. A 4:2:2 recording preserves more color information than 4:2:0, which becomes critical when color grading log footage heavily. If you’re planning significant color work or chroma keying, prioritize 4:2:2 when available.
Frame rates deserve attention too. Shooting at higher frame rates for slow motion reduces the amount of light hitting each frame, making proper exposure even more critical with log profiles. Many cameras also limit bit depth or color sampling at higher frame rates, so check your camera’s specifications carefully before committing to that slow-motion sequence.
RAW Capture: Taking It to the Next Level
Log vs. RAW: What You’re Actually Choosing Between
When you’re deciding between log and RAW, you’re essentially choosing between two different philosophies for capturing image data—and understanding this distinction can save you from both technical headaches and unrealistic expectations.
RAW is unprocessed sensor data. Think of it like a digital negative that captures everything your camera sees before any picture profile or processing is applied. This gives you maximum flexibility in post-production, allowing you to adjust white balance, exposure, and color interpretation with exceptional latitude. However, RAW files are massive—sometimes 5-10 times larger than compressed footage—and they require substantial storage, powerful computers, and specialized software to edit. You’re also looking at longer import and rendering times.
Log, on the other hand, is processed but strategically flat. It’s compressed video that uses a logarithmic curve to maximize the dynamic range your camera can record within a standard video file. While you lose some of the absolute data flexibility of RAW, log files are significantly smaller and more manageable for most editing systems. You can still grade extensively, recovering highlights and lifting shadows in ways that standard picture profiles simply can’t match.
Here’s a practical scenario: if you’re shooting a wedding where you need dual card backup, all-day recording capability, and quick turnaround, log makes perfect sense. You get professional-grade color grading potential without drowning in terabytes of data. But if you’re shooting a high-end commercial with controlled lighting, generous budgets, and time for meticulous post-production, RAW might justify its demands.
The reality is that log hits a sweet spot for most videographers—delivering 80-90% of RAW’s grading flexibility at a fraction of the file size and workflow complexity.
The Hidden Costs of RAW Recording
Let’s talk about what the camera manufacturers don’t advertise prominently: RAW recording demands serious investment beyond your camera body. If you’re considering jumping into RAW video, understanding these hidden costs upfront can save you from unwelcome surprises.
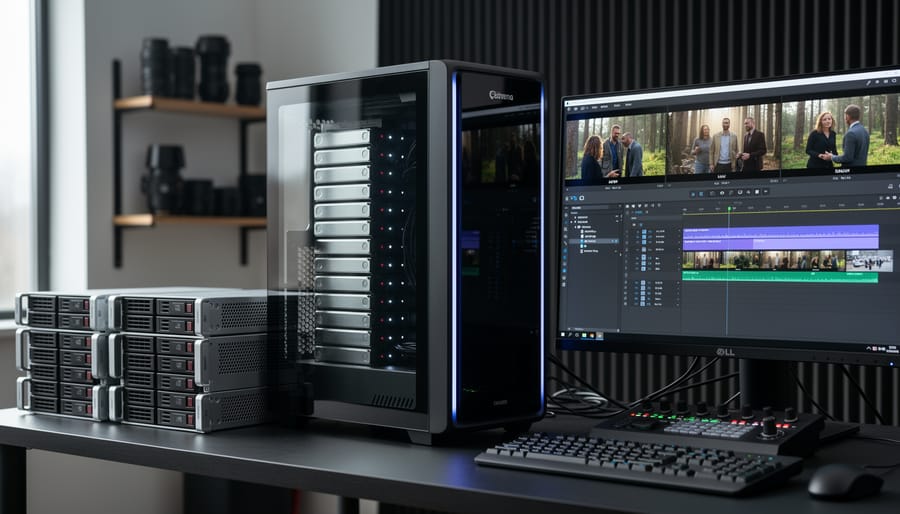
First, there’s storage. RAW files are massive—we’re talking 5-12GB per minute depending on your camera and resolution. That weekend shoot you planned? You might need 500GB to 1TB of fast media cards. And that’s just on set. Back home, you’ll need enterprise-grade hard drives or NAS systems to archive everything. One professional wedding videographer I know invested $2,000 in storage infrastructure before shooting a single RAW frame.
Processing power is another bottleneck. Your trusty five-year-old laptop won’t cut it. RAW footage requires a modern computer with dedicated GPU, preferably 32GB+ RAM, and fast SSD drives. Editing in real-time often means creating proxy files first, adding hours to your post-production workflow.
Then there’s time—the resource we often forget to budget. Transferring, backing up, and organizing RAW footage takes significantly longer than compressed formats. What used to be a two-hour editing session might become four.
None of this makes RAW bad, but it does mean you need realistic expectations. Calculate these costs honestly before committing. Sometimes the flexibility RAW provides justifies everything; other times, high-quality log profiles deliver 90% of the benefits at a fraction of the hassle.
Common Mistakes That Ruin Log Footage
Underexposing and Why It Destroys Your Image
One of the biggest misconceptions about log footage is that it’s somehow more resilient than standard picture profiles. In reality, the opposite is true when it comes to underexposure. Here’s why: log profiles are designed to capture an extended dynamic range by redistributing tonal information across the available bit depth. This redistribution means that shadows receive fewer code values (the digital data points that describe brightness) compared to standard profiles.
When you underexpose log footage, you’re essentially crushing those already-sparse shadow values into an even smaller range. During color grading, when you attempt to lift those underexposed areas back to normal brightness levels, you’re stretching very limited data across a much wider tonal range. The result? Severe noise, banding, and a general breakdown of image quality that no amount of noise reduction can fully rescue.
Think of it this way: if standard profiles give your shadows a comfortable cushion of data, log profiles give them a thin mattress. Underexpose, and you’re sleeping on the floor. This is particularly problematic in 8-bit recording, where you have even less data to work with from the start.
As a practical rule, many cinematographers actually recommend slightly overexposing log footage, protecting your shadows while relying on the extended highlight latitude that log profiles provide. Your exposure meter might show you’re a stop or two hot, but in the log world, this approach preserves clean shadows that grade beautifully. Always expose to the right without clipping highlights, and you’ll thank yourself in post-production.
The Monitoring Problem (And How to Solve It)
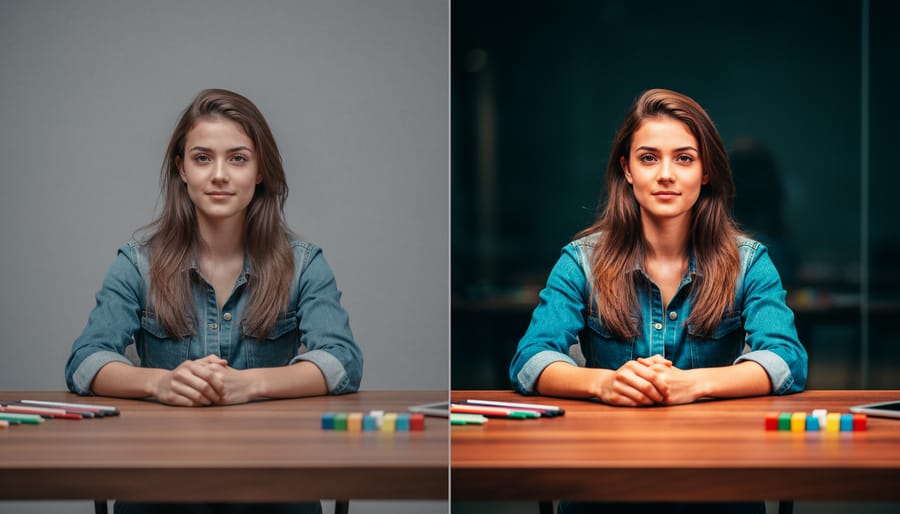
Here’s the challenge with log footage: it looks terrible on your camera’s screen. That flat, washed-out image can make proper exposure feel like guesswork, especially when you’re used to seeing punchy, contrasty previews.
This is where LUTs (Look-Up Tables) become essential monitoring tools. A LUT is basically a preset that applies a color transformation to your preview, showing you what the footage will look like after cinematic color grading. The beauty? It only affects what you see on the monitor, not what’s being recorded.
Most cameras that offer log profiles include corresponding monitoring LUTs. For example, if you’re shooting Sony S-Log3, you can apply an S-Log3 monitoring LUT that displays a more natural-looking image while still recording the flat log file. External monitors like the Atomos Ninja series also support custom LUTs, giving you even more flexibility.
Think of it like wearing prescription glasses—the LUT corrects your view without changing reality. You get to see accurate colors and contrast while preserving all that valuable dynamic range in your actual recording. This makes nailing exposure dramatically easier and helps your client or director visualize the final result on set.
When You Shouldn’t Film in Log
Log profiles aren’t always the right choice, and recognizing when to skip them will save you time and often produce better results. If you’re shooting content that needs to be delivered quickly with minimal post-production, standard picture profiles are your friend. Think about social media content, event coverage, or corporate interviews with tight turnarounds. The flat, desaturated look of log footage requires color grading to shine, and if you don’t have the time or expertise to grade properly, you’ll end up with lackluster visuals that would have looked better straight out of camera.
When working in low-light situations, log profiles can actually work against you. Since log compresses the tonal range to preserve highlight and shadow information, you’re essentially reducing the contrast in your image. This compression introduces more noise in the shadows, making your footage appear grainier than it would with a standard profile. If you’re filming a dimly lit wedding reception or a nighttime event, you’ll get cleaner results using your camera’s standard or even a custom picture profile designed for low light.
Beginners still learning the fundamentals of exposure, composition, and white balance should hold off on shooting log. There’s already enough to manage without adding the complexity of flat footage that looks washed out on your monitor. Master the basics first with standard profiles that give you immediate visual feedback about how your shots look.
Finally, if your camera’s bit depth is limited to 8-bit, log profiles often create more problems than they solve. The reduced color information in 8-bit recording combined with log’s compression of tonal values leads to banding and posterization when you try to grade. In these cases, maximizing your camera’s standard profiles will give you more usable footage than forcing a workflow your equipment wasn’t designed to handle.
Log profiles are powerful tools that give you flexibility in post-production, but they’re not magical solutions that automatically improve your footage. Think of them as specialized equipment—incredibly useful when you need what they offer, but unnecessary overhead when you don’t. If you’re shooting controlled interviews with proper lighting and plan to color grade, log can elevate your work. But if you’re capturing quick social media content or don’t have time for extensive post-production, standard picture profiles will serve you perfectly well.
The same perspective applies to RAW video formats. While RAW provides maximum image data and grading latitude, it demands significant storage, processing power, and workflow considerations. Many professional productions achieve stunning results without ever touching RAW or log footage.
As you explore these tools, start small. Test log profiles in controlled situations before committing to them on important projects. Learn the fundamentals of exposure for flat profiles, understand your camera’s limitations, and develop a color grading workflow that suits your needs. Watch for common mistakes like underexposing too aggressively or skipping proper monitoring tools.
Remember, compelling video comes from strong composition, good lighting, and intentional storytelling—not from any specific technical format. Log and RAW are simply tools in your creative toolkit, available when the project demands their specific advantages.