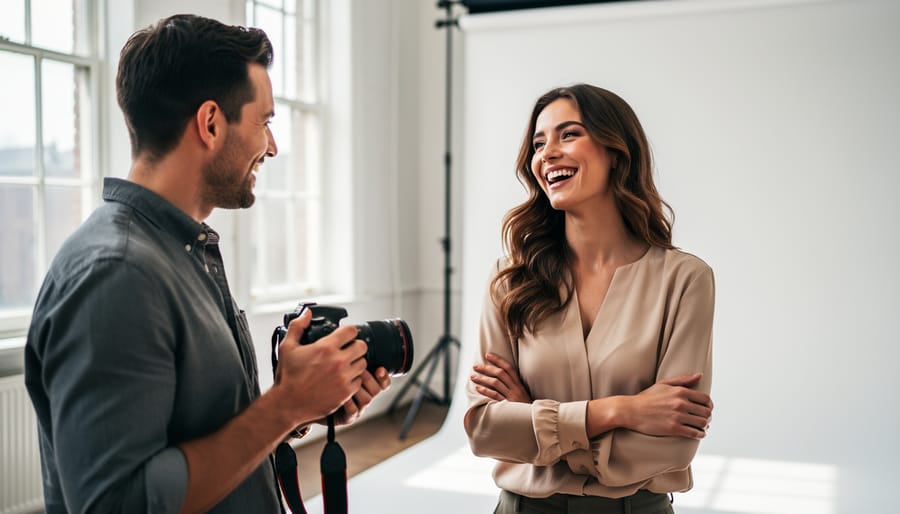
Establish genuine connection with your model before touching your camera—spend five minutes discussing their comfort level, the shoot’s vision, and any concerns they have. This builds trust that translates directly into relaxed, authentic expressions rather than stiff, self-conscious poses.
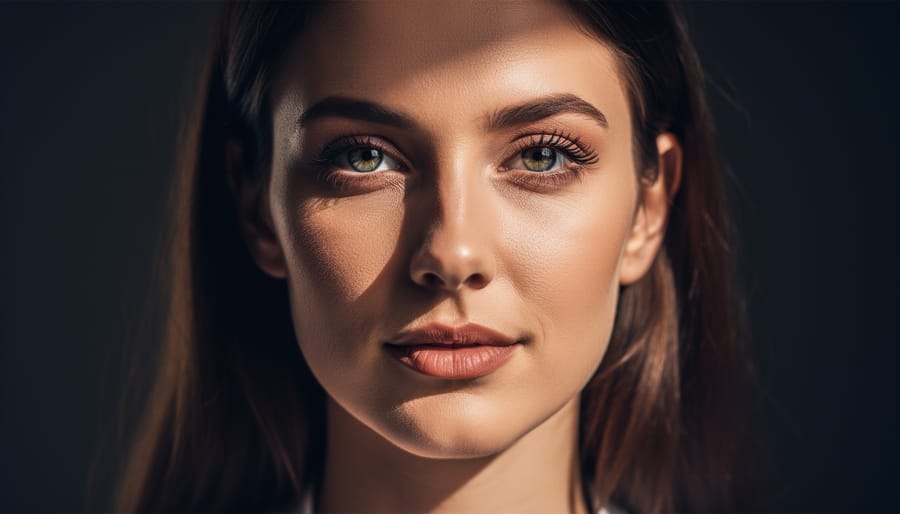
Position your primary light source at a 45-degree angle to your subject’s face, approximately six feet away, creating dimensional shadows that sculpt facial features naturally. Whether you’re using window light or studio strobes, this Rembrandt lighting setup flatters most face shapes while remaining simple to execute consistently.
Guide poses through demonstration rather than verbal instruction alone. Show your model the exact head tilt, shoulder position, or hand placement you’re envisioning—they’ll mirror your movements more accurately than they’ll interpret descriptions like “look more natural.”
Shoot in aperture priority mode between f/2.8 and f/5.6 for portraits, keeping eyes tack-sharp while gently softening distracting background elements. This selective focus draws viewers immediately to your subject’s expression, the emotional core of model photography.
Review images together periodically during the session, showing your model what’s working exceptionally well. This feedback loop boosts their confidence, helps them understand which subtle adjustments create the strongest results, and transforms the experience into genuine collaboration rather than one-sided direction.
Building Rapport: The Foundation of Natural Model Photography
The Pre-Shoot Conversation That Changes Everything
A productive pre-shoot conversation sets the foundation for stunning images and a relaxed atmosphere. Start by discussing the shoot’s creative direction at least a week before your session. Share mood boards or reference images that capture the style, lighting, and emotional tone you’re aiming for. Pinterest boards or simple image collections work perfectly for this. Ask your model to contribute their own inspiration too, creating a collaborative vision.
Wardrobe planning deserves dedicated attention. Discuss color palettes that complement your location and lighting setup. I always recommend models bring 3-4 outfit options, even if we’ve pre-planned everything. Fashion shoots benefit from variety, while portrait sessions might focus on one well-chosen look. Remind models to avoid clothing with large logos or busy patterns unless that’s your intentional aesthetic.
The comfort conversation matters immensely. Discuss pose boundaries and any specific concerns upfront. Some models feel uncomfortable with certain angles or body positions, and knowing this beforehand prevents awkward moments during shooting. Talk about break schedules, especially for longer sessions.
Finally, cover practical details like arrival time, exact location with parking information, whether you’ll provide hair and makeup services, and what they should bring. This conversation eliminates day-of confusion, letting everyone focus entirely on creating exceptional photographs together.
On-Set Communication Techniques
Effective communication during a shoot can transform stiff, awkward images into natural, compelling portraits. The key is establishing a conversational flow rather than barking commands like a drill sergeant.
Start by explaining your vision before you even raise the camera. Tell your model what emotion or story you’re capturing, which helps them understand the “why” behind your directions. Instead of saying “tilt your head left,” try “look toward that window like you’re watching something interesting outside.” This creates context and feels more natural.
Real-time feedback is essential. As you shoot, offer specific positive reinforcement: “That expression is perfect” or “The way you angled your shoulder just then was exactly what I needed.” This builds confidence and helps models repeat successful poses. When something isn’t working, avoid negative criticism. Rather than “that looks weird,” suggest adjustments: “Let’s try softening your shoulders a bit.”
Pay close attention to body language, both theirs and yours. If your model’s shoulders tense or their smile becomes forced, they’re likely feeling uncomfortable or self-conscious. Take a break, show them some frames on your camera’s LCD, or crack a joke to ease tension. Remember, you’re capturing a person’s essence, not just their physical form.
Creating this collaborative atmosphere where models feel seen and valued will consistently yield more authentic, engaging photographs than technical skill alone.
Posing Strategies That Actually Work
The Movement Method vs. Static Posing
Static poses often produce stiff, catalog-like images that lack authenticity. Instead, embrace the movement method—a technique where you direct your model to shift continuously between positions rather than freezing in place. This approach yields dramatically more natural expressions and body language.
Here’s why it works: when models hold rigid poses, they become hyper-aware of their body positioning, leading to tension in the shoulders, forced smiles, and awkward hand placement. By keeping them in motion—turning slowly, walking toward the camera, adjusting their hair, or shifting their weight—you capture genuine micro-expressions and relaxed body mechanics that feel spontaneous.
Try this practical exercise during your next shoot: instead of saying “hold that pose,” ask your model to slowly turn their head from left to right while you shoot continuously. You’ll notice their facial muscles remain relaxed, and you’ll capture dozens of subtle variations in expression. The same applies to full-body shots—having someone walk slowly or sway gently produces far more dynamic images than asking them to stand perfectly still.
The key is shooting in burst mode while providing gentle direction throughout. You’re essentially creating a performance rather than a series of static tableaux. This method also helps nervous models forget about the camera, as they’re focused on the movement itself rather than wondering if they look right.

Hand and Arm Placement Solutions
Hands and arms consistently challenge both new and experienced photographers because they can look awkward when positioned unnaturally. The key is avoiding stiff, soldier-like poses where arms hang straight down at the sides.
Instead, guide your model by demonstrating yourself. Show them how placing one hand on their hip creates natural shape and dimension. You might say, “Rest your hand gently on your hip, like you’re just casually standing at a coffee shop.” Notice the difference? The elbow creates a triangle of negative space that slims the silhouette.
For seated poses, suggest models rest their hands on their lap with fingers softly curved, never flat. Try directing them: “Imagine you’re holding something delicate, like a butterfly—relaxed fingers, nothing tense.” This prevents the dreaded claw hand that appears in countless amateur portraits.
When arms cross the body, ensure they don’t press tightly against the torso, which can appear restrictive. Instead, ask models to “float” their arms slightly away. One technique that works beautifully is having models touch their hair, face, or neck lightly—this creates graceful lines while giving nervous hands something to do.
Remember, anything bent looks more natural than anything straight. Slight bends at the wrists, elbows, and fingers transform robotic poses into elegant, flowing compositions that feel effortlessly professional.
Angles and Body Positioning Fundamentals
Mastering body angles transforms ordinary portraits into compelling images. Start with weight distribution—having your model shift weight to one leg creates natural curves and breaks up visual symmetry. This simple adjustment prevents the stiff, soldier-at-attention look that plagues many beginner photographers.
Shoulder positioning dramatically affects how your subject appears. For most body types, turning shoulders at a 45-degree angle to the camera creates a slimming effect and adds visual interest. Here’s a practical tip: ask your model to point their back shoulder toward the camera’s edge. This subtle rotation immediately flatters the figure.
Head tilts add personality and soften portraits. A slight tilt away from the raised shoulder (if one shoulder is higher) creates elegant lines. For example, if your model’s left shoulder is raised, have them tilt their head gently toward the right. Avoid extreme angles unless you’re aiming for editorial drama.
Remember, these are starting points rather than rigid rules. A broader subject might benefit from more pronounced angles, while someone petite can handle straight-on positioning better. Observe how each adjustment affects your frame through the viewfinder, and communicate openly with your model about what feels natural versus forced.
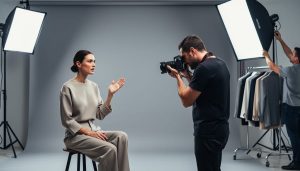
Lighting Setups for Model Photography
Three Versatile Lighting Patterns for Beginners
Understanding foundational lighting patterns transforms your model photography from snapshots to professional portraits. Let’s break down three essential setups that work beautifully in any space, whether you’re shooting in a studio or your living room.
Rembrandt lighting creates that distinctive triangle of light beneath the model’s eye on the shadow side of their face. Position your light source about 45 degrees to the side and slightly above your subject’s face. The key is seeing that small triangle appear on the cheek opposite your light—it adds depth and drama without feeling overly moody. I often use this pattern for editorial work because it flatters most face shapes while adding character. Try starting with a single strobe or even window light to practice identifying that signature triangle.
Loop lighting feels slightly more approachable than Rembrandt. Move your light source closer to the camera axis, still elevated and angled about 30-45 degrees from your subject. You’ll notice a small shadow from the nose that loops downward toward the corner of the mouth, but doesn’t connect with the cheek shadow. This pattern suits nearly everyone and works wonderfully for beauty and commercial modeling shots. The mastering light in photography fundamentals you build here will serve you throughout your career.
Butterfly lighting positions your light directly in front of and above your model, creating a butterfly-shaped shadow beneath the nose. This glamorous pattern works exceptionally well for beauty photography and emphasizes cheekbones. Place a reflector below your subject’s face to soften under-eye shadows. The symmetrical quality makes it perfect for headshots and portfolio builders.
Natural Light Techniques and Modifiers
Natural light remains one of the most flattering and accessible tools for model photography. Window light, in particular, creates beautifully soft, directional illumination that mimics expensive studio setups. Position your model about three to six feet from a large window, angling them so the light wraps around their features rather than hitting them straight-on. North-facing windows provide consistent, diffused light throughout the day, while east or west-facing windows offer warmer tones during golden hours.
Outdoors, timing is everything. Shoot during the first hour after sunrise or the final hour before sunset when light is warm and forgiving. Overcast days are actually ideal, as clouds act as a massive softbox, eliminating harsh shadows and reducing squinting. When bright midday sun is unavoidable, move your model into open shade under trees or building overhangs.
Mastering natural light techniques becomes even more effective with simple modifiers. A white foam board or collapsible reflector ($15-30) bounces light into shadowed areas, adding catchlights to eyes and reducing contrast. Position it opposite your main light source. For harsh conditions, a translucent diffuser held between the sun and your subject softens direct light beautifully. These affordable tools dramatically expand your creative control without requiring expensive equipment.
Common Lighting Mistakes That Ruin Model Shots
The most common lighting mistake? Positioning your main light directly above or below your model, creating unflattering shadows under the eyes or chin that resemble a horror movie aesthetic. Instead, position your key light at roughly 45 degrees to your subject—high enough to sculpt features but not so high that it hollows out the face.
Overcomplicating your setup ranks as another frequent pitfall. Many photographers assume more lights equal better results, but three or four poorly positioned lights often create competing shadows and confusing highlights. Start with a single light source, master it completely, then add a reflector or second light only when you’ve identified a specific problem to solve.
Watch for harsh shadows caused by small, direct light sources. A bare speedlight creates hard-edged shadows that rarely flatter. The solution is simple: make your light source larger relative to your subject by adding a softbox, umbrella, or even bouncing off a nearby wall. Remember that distance matters too—moving a softbox closer increases its effective size and creates softer, more appealing light that wraps around your model’s features naturally.
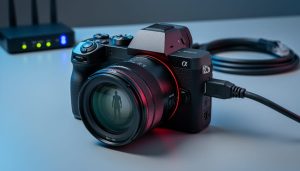
Camera Settings and Technical Considerations
The Aperture Sweet Spot for Portraits
Finding the right aperture for model photography involves balancing artistic vision with technical precision. The sweet spot typically falls between f/2.8 and f/5.6, where you’ll achieve beautiful background separation while keeping both eyes and key facial features tack sharp.
At f/1.8 or wider, you risk having one eye sharp while the other falls into soft focus, especially when shooting at angles. This can feel more distracting than artistic. Conversely, shooting at f/8 or smaller brings too much of the background into focus, pulling attention away from your subject and creating cluttered compositions.
Consider f/4 your reliable starting point for headshots and close-up portraits. It provides forgiving depth of field across the face while still rendering backgrounds as smooth, creamy blur. For full-body shots where your model is further from the camera, you can safely open up to f/2.8 without sacrificing sharpness.
Remember that your distance from the subject matters too. Step closer with a wider aperture, and your depth of field shrinks dramatically. Always focus precisely on the eyes, as they’re the first thing viewers notice in any portrait.
Shutter Speed and ISO for Different Scenarios
Getting your camera settings right transforms good model shots into exceptional ones. For studio work, start with ISO 100 to minimize noise and maintain crisp detail. Your shutter speed can hover around 1/125 to 1/200, which freezes most stationary poses while syncing with studio strobes. When shooting outdoors in natural light, bump your ISO to 200-400 depending on conditions, and increase shutter speed to 1/250 or faster to prevent motion blur from subtle movements. For fashion or movement-based photography where models are walking or posing dynamically, push your shutter speed to at least 1/500. This freezes fabric movement and hair flow beautifully. Remember that higher shutter speeds require more light, so adjust your ISO accordingly—ISO 400-800 works well for outdoor movement shots. Indoor movement photography presents the biggest challenge; you’ll likely need ISO 800-1600 combined with wide apertures to maintain those faster shutter speeds without sacrificing image quality.
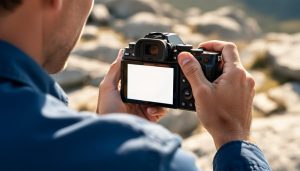
Lens Selection and Focal Length Impact
Lens choice dramatically shapes how your model appears in the final image. The classic portrait range of 85mm to 135mm on full-frame cameras creates the most flattering facial proportions by compressing features slightly and minimizing distortion. When you photograph someone with an 85mm lens, their nose appears proportional, their face looks naturally dimensional, and their features maintain pleasing relationships to each other.
Wider lenses like 35mm or 50mm can work beautifully for environmental portraits where you want to show context and location, but be cautious when shooting close-up faces. These focal lengths exaggerate whatever’s nearest to the camera, often enlarging noses and foreheads in unflattering ways. That said, creative photographers sometimes use this focal length impact intentionally for editorial or fashion work that demands a bolder, more dramatic aesthetic.
Longer lenses like 200mm create gorgeous compression and dreamy background blur, but require more shooting distance. This can actually help nervous models relax since you’re not hovering directly in their personal space. Each focal length also influences mood: wider lenses feel energetic and immediate, while telephoto ranges create intimacy and elegance.
Location and Background Selection
Scouting Locations That Elevate Your Work
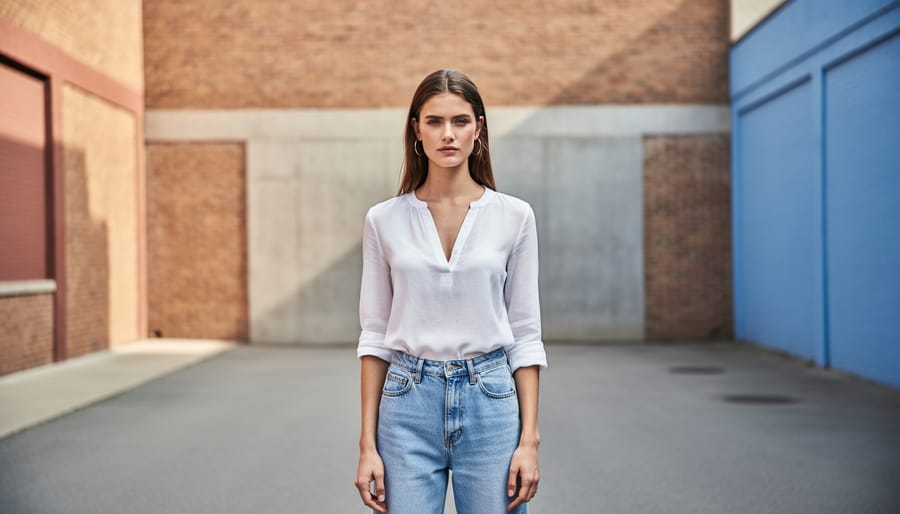
Your location can make or break a modeling shot, so choose environments that complement rather than compete with your subject. Start by evaluating texture—a weathered brick wall, smooth concrete, or natural foliage each tells a different story and creates unique visual interest. These elements should enhance your subject without overwhelming them.
Consider color relationships carefully. A neutral background allows vibrant clothing to pop, while complementary colors create harmony between model and environment. Urban settings with muted tones work beautifully for high-fashion looks, whereas natural greenery suits softer, romantic themes. Always think about how background hues interact with skin tones and wardrobe choices.
Context matters tremendously in storytelling. An industrial warehouse suggests edginess and drama, while a sunlit park conveys freshness and approachability. Scout locations beforehand—visit at the same time of day you plan to shoot to assess lighting conditions. Pay attention to photography composition elements like leading lines, natural frames, and depth.
Practical tip: Bring your camera during location scouts and take test shots. This helps you visualize final images and identify potential distractions like power lines or cluttered backgrounds. Remember, the best locations support your creative vision while giving your model room to shine.
Working with Limitations in Tight or Busy Spaces
Not every shoot happens in a spacious studio with pristine backgrounds. Sometimes you’re working in cramped apartments, cluttered cafes, or busy city streets. The key is learning to work with what you’ve got rather than fighting against it.
Start by using a wide aperture (f/1.8 to f/2.8) to create shallow depth of field. This naturally blurs distracting backgrounds, turning visual clutter into soft bokeh. Position your model as far from the background as space allows, even if it’s just a few feet. This separation amplifies the background blur and helps your subject pop.
Consider your focal length strategically. A longer lens (85mm or above) compresses the scene and further isolates your subject, making busy backgrounds less recognizable. You can also shoot from lower or higher angles to change what appears behind your model—sometimes tilting up captures only sky, while shooting down might reveal clean pavement instead of messy storefronts.
When space is tight, embrace negative space creatively. Frame your model against the cleanest patch of wall you can find, or use doorways and windows as natural frames that draw attention to your subject. I’ve salvaged shoots in chaotic locations by simply having the model stand in a plain corner while I shot from close range with a 50mm lens.
Don’t be afraid to physically rearrange small items or ask permission to temporarily move objects that create unwanted distractions in your frame.
Post-Processing for Model Photography
Skin Retouching That Looks Professional, Not Plastic
The secret to professional skin retouching isn’t making your model look like a porcelain doll—it’s preserving natural texture while cleaning up distractions. Think of it as enhancement, not transformation.
Start with frequency separation, a technique that separates skin texture from color and tone. In Photoshop, duplicate your layer twice. On the bottom layer, apply a Gaussian blur (around 5-10 pixels) to smooth color variations. On the top layer, go to Image, Apply Image, subtract the blurred layer, then change the blend mode to Linear Light. Now you can work on color issues and texture independently without creating that telltale plastic look.
For blemish removal, use the Healing Brush tool rather than the Clone Stamp for most situations. The Healing Brush blends texture naturally with surrounding areas, maintaining skin’s authentic appearance. Work on a separate layer so you can adjust opacity if needed—sometimes 80% opacity looks more believable than 100%.
Here’s the golden rule: zoom out frequently. What looks perfect at 300% magnification often appears overdone at actual viewing size. Remember, your audience will see the final image at normal distances, not through a magnifying glass. Leave pores visible, preserve natural skin variation, and only remove temporary imperfections like active blemishes or stray hairs—not permanent features that make someone uniquely themselves.
Color Grading and Mood Enhancement
Color grading transforms good model photography into striking, memorable images. The key is developing a cohesive visual style while protecting what matters most: natural, flattering skin tones.
Start by adjusting global exposure and white balance before diving into selective color work. In editing software, use the HSL (Hue, Saturation, Luminance) panel to fine-tune specific color ranges without affecting skin. For example, you might desaturate greens in the background while leaving your model’s complexion untouched.
Create a signature look by adjusting the color temperature consistently across your portfolio. Warmer tones (shifting toward orange) convey intimacy and comfort, while cooler tones (leaning blue) suggest sophistication and editorial polish. Many successful model photographers settle on a preferred temperature range that becomes recognizable in their work.
Watch for color casts that create unnatural skin tones. If your model looks too orange, too green, or overly pink, use targeted adjustments rather than heavy-handed filters. Subtle split-toning in the highlights and shadows adds dimension while maintaining realism. Remember, viewers forgive creative backgrounds but rarely overlook unflattering skin rendering.
At the end of the day, remember that outstanding model photography isn’t built on camera specs or lighting equipment alone. The images that truly resonate—the ones that stop viewers mid-scroll—are born from genuine connection and a comfortable, collaborative atmosphere. Your technical skills certainly matter, but they’re tools in service of something larger: capturing authentic moments that reveal your subject’s personality and energy.
As you practice these techniques, don’t feel pressured to follow every guideline rigidly. Use them as a foundation, then experiment. Try that unconventional angle you’ve been curious about. Test lighting setups that break the rules. Most importantly, keep checking in with your model throughout the session. Their comfort and confidence will always show in the final images, no matter how perfect your settings are.
Think of each shoot as a learning opportunity—not just for refining your technical abilities, but for developing your unique photographic voice. Pay attention to what makes your subjects light up, what poses feel natural versus forced, and which moments feel genuinely special. That intuition, combined with solid fundamentals, is what separates competent model photography from exceptional work that tells compelling stories.