Understand this first: true infrared photography underwater is physically impossible. Water absorbs infrared wavelengths within mere centimeters of the surface, making those ethereal IR effects you’ve achieved on land completely unachievable once submerged. The physics are unforgiving—infrared light penetrates water about as effectively as a brick penetrates concrete.
If you’ve seen images labeled “underwater infrared,” they’re either captured at the water’s surface with specialized techniques, heavily post-processed visible-light images, or deliberately misleading. This isn’t a matter of needing better equipment or filters—it’s fundamental physics that no camera manufacturer can overcome.
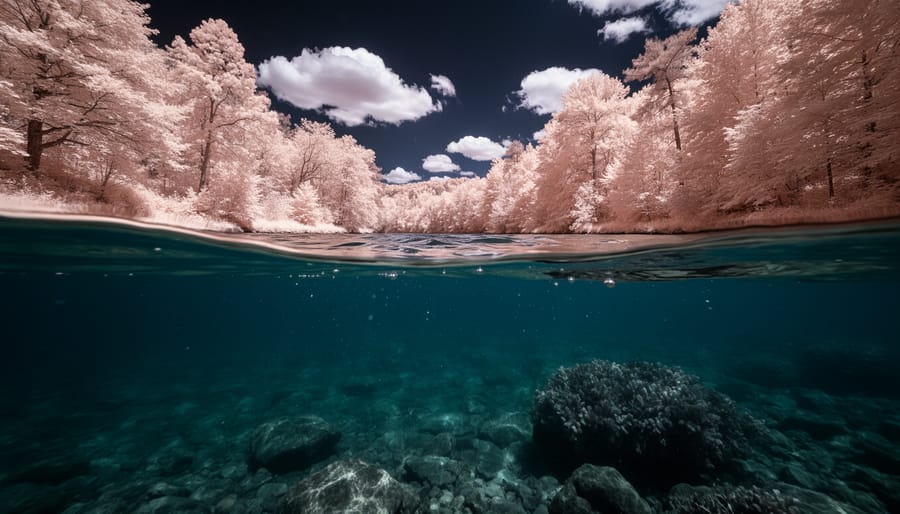
That said, you can create compelling near-infrared imagery around water. Shoot infrared from above the surface, capturing reflections and submerged subjects in shallow, crystal-clear water where visible light still reaches. Position your IR-converted camera just above the waterline to photograph partially submerged objects, creating split-world compositions where the above-water portion displays that signature infrared glow while the underwater section remains in visible spectrum.
Your most viable alternative involves shooting standard underwater photography, then applying infrared-style color grading in post-processing. Convert blues to magentas, shift greens toward cyan, and boost luminosity in foliage-adjacent areas. While purists might object, this achieves visually similar results without fighting impossible physics.
The key is setting proper expectations. Underwater infrared as commonly understood doesn’t exist outside heavily manipulated images, but creative workarounds can deliver striking, IR-inspired underwater imagery that pushes artistic boundaries without requiring you to defy the laws of physics.
The Physics Problem: Why Water and Infrared Don’t Mix
Here’s the disappointing truth: water and infrared light are natural enemies. While infrared photography on land creates those stunning, dreamlike images you’ve probably admired in night infrared photography, the moment you submerge your camera, those wavelengths simply vanish.
To understand why, let’s talk about the electromagnetic spectrum. Visible light occupies wavelengths between roughly 400-700 nanometers. Infrared light sits just beyond what our eyes can see, starting around 700nm and extending into thousands of nanometers. Water molecules, however, are incredibly efficient at absorbing these longer wavelengths.
Think of it this way: when you heat water in a microwave, you’re using electromagnetic radiation at even longer wavelengths than infrared. The water molecules vibrate and absorb that energy almost instantly. Water does something similar with infrared light, though the mechanism differs slightly. The molecular structure of H2O creates strong absorption bands in the infrared spectrum, essentially turning IR photons into heat before they can travel any meaningful distance.
The absorption happens shockingly fast. In crystal-clear water, near-infrared light (the most common type used in IR photography) penetrates only a few centimeters before being almost completely absorbed. Standard infrared wavelengths around 850nm? They’re essentially gone within inches. By contrast, blue-green visible light can penetrate hundreds of feet in clear ocean water, which is why underwater photography relies on these wavelengths.
Even in a swimming pool under perfect conditions, you’d need your subject pressed against your camera housing to capture any infrared signature. In natural bodies of water with suspended particles, algae, and dissolved organic matter, the problem intensifies exponentially. The physics simply doesn’t cooperate, no matter how expensive your equipment or how skilled your technique.
What Photographers Actually Mean by ‘Underwater Infrared’
Near-Surface IR Photography
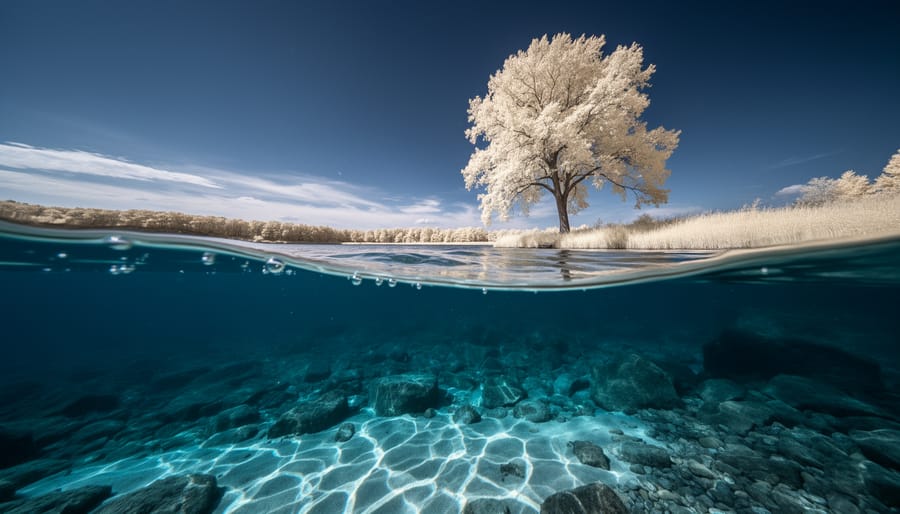
While true underwater infrared photography remains largely impractical due to water’s absorption of infrared light, shooting from just below the surface opens up fascinating creative possibilities. By positioning your converted infrared camera within a few inches of the waterline, you can capture split-level compositions that showcase both the underwater environment and the distinctive IR-rendered world above.
This technique works because you’re minimizing the water depth between your lens and subject matter. The thin layer of water allows some infrared light to pass through, particularly in the 720nm range. What makes this approach special is the dramatic visual contrast: the underwater portion appears relatively normal (since visible light still dominates at shallow depths), while the above-water scene displays classic infrared characteristics like luminous white foliage and darkened skies.
Practical applications include documenting coastal ecosystems, creating artistic double-world compositions, and producing images that challenge viewers’ perceptions. Marine biologists have used this technique to document surface-feeding behaviors, while fine art photographers exploit the surreal aesthetic for gallery-worthy pieces.
The key is using proper underwater housing with a flat port rather than a dome port, which can introduce distortion at the waterline. Calm water conditions produce the cleanest split between worlds, though ripples and waves can add dynamic energy. Experiment with different infrared filter wavelengths, as shorter wavelengths like 590nm preserve more color information in the above-water portion, while 850nm filters deliver more dramatic monochromatic results. This approach delivers genuinely unique imagery that standard underwater photography simply cannot achieve.
Above-Water IR of Underwater Subjects
If shooting true underwater infrared is off the table, there’s good news: you can still capture fascinating infrared images of underwater subjects by shooting from above the surface. This technique works beautifully with aquariums, shallow pools, and clear streams where you maintain a direct line of sight through relatively transparent water.
The key to success here is understanding how water acts as both window and filter. When shooting through an aquarium glass, for instance, you’re essentially capturing infrared light that reflects off or is emitted by your subjects before it travels through the water to your camera. The water column becomes a critical variable—the thicker it is, the more infrared absorption occurs. In a home aquarium, you might achieve compelling results shooting fish or plants through 12-18 inches of clean water. Push that to three feet, and your results become dramatically murkier.
Water clarity matters enormously in this scenario. Crystal-clear aquarium water or a pristine shallow stream will preserve more of that infrared signature than murky pond water filled with algae and suspended particles. Each impurity scatters and absorbs more IR wavelengths, degrading your image quality.
Practical applications abound: photographing koi in a shallow garden pond creates ethereal, dreamlike imagery where the fish become ghostly forms. Shooting downward into tide pools at the beach during low tide can reveal unexpected textures in coral and sea life. Museum aquariums with their carefully maintained water clarity offer ideal testing grounds.
Position yourself to minimize surface reflection and shoot at angles that reduce the water depth between camera and subject. Even a few inches less water makes a measurable difference in your final image quality.
Post-Processing Simulation Techniques
Since true infrared photography doesn’t work underwater due to the physics of water absorption, many photographers turn to post-processing to achieve that distinctive infrared aesthetic in their aquatic images. Think of it as creating the dreamlike look without needing actual infrared light transmission.
The magic happens primarily in your editing software. Start by adjusting the color channels to mimic infrared’s signature appearance. Swap the red and blue channels in programs like Photoshop or use the channel mixer to create that ethereal glow. This technique works especially well with images captured near the surface where natural light is abundant.
Here’s a practical approach: Begin by converting your underwater image to black and white, then add a subtle warm tone overlay. Increase contrast in the midtones while maintaining detail in highlights and shadows. The Wood Effect, a classic infrared characteristic where foliage appears white, can be simulated underwater by selectively brightening organic elements like coral or kelp through luminosity masks.
Color grading tools offer another avenue. Try shifting blues toward magentas and greens toward yellows, creating that surreal infrared palette. The Lightroom HSL panel becomes your best friend here, allowing precise control over individual color channels.
Remember, the goal isn’t necessarily to fool viewers into thinking you captured genuine infrared underwater. Instead, you’re borrowing the aesthetic to create compelling, artistic images. Many photographers openly share their post-processing techniques, and audiences appreciate the creative honesty. Experiment with different approaches until you find a signature style that resonates with your artistic vision.
Equipment Considerations for Near-Water IR Photography
IR-Converted Cameras vs. IR Filters
When shooting infrared near water, you’ll face an important equipment decision: should you invest in a full-spectrum camera conversion or stick with screw-on infrared filters? Each approach has distinct advantages and challenges, especially when water exposure is involved.
Full-spectrum conversions involve permanently modifying your camera by removing the internal infrared-blocking filter that manufacturers install over the sensor. This modification allows the camera to capture infrared light without the extremely long exposures that external filters require. The main advantage is speed—you can shoot handheld at normal shutter speeds, which is invaluable when working near moving water or capturing reflections on rippling surfaces. You’ll also see your composition clearly through the viewfinder in real-time, making framing much easier.
However, converted cameras present waterproofing headaches. Most conversion services void your camera’s original weather sealing, and the modification process itself can compromise dust and moisture resistance. If you’re shooting near-water infrared scenes—splashing waves, misty waterfalls, or humid coastal environments—this becomes a serious concern. You’ll need to be extra cautious about protecting your converted camera from spray and humidity.
Screw-on infrared filters, by contrast, attach to your lens like any standard filter. They’re significantly cheaper than camera conversions and can be moved between different cameras and lenses. Your camera’s weather sealing remains intact, which is reassuring when shooting in wet environments. The downside? These filters are extremely dark, requiring exposures of 30 seconds or longer even in bright daylight. This makes them impractical for anything but perfectly still water surfaces, and you’ll be working blind since the viewfinder will be pitch black.
For casual experimentation with near-water infrared photography, start with a screw-on filter. If you find yourself repeatedly frustrated by the long exposures and decide to pursue this seriously, then consider a dedicated conversion on a weather-sealed body you can protect carefully.
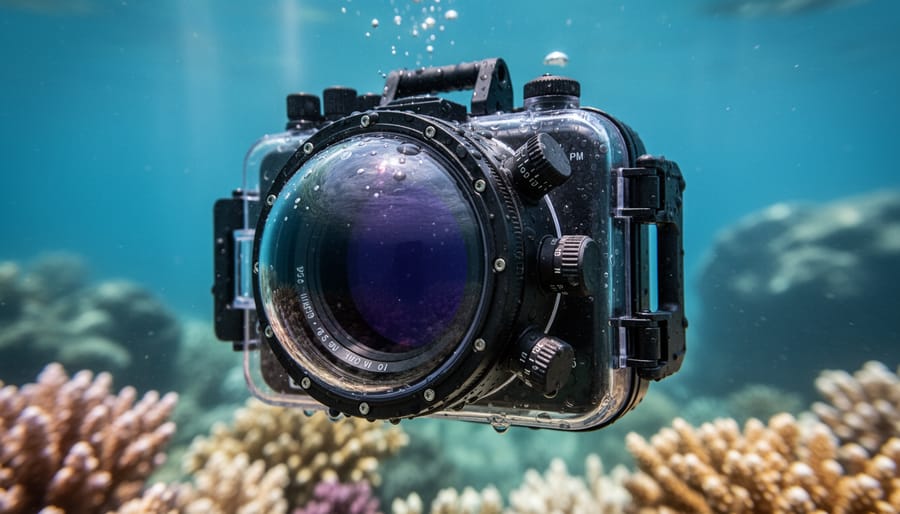
Waterproof Housing Compatibility
Getting your infrared setup to work with underwater housings presents some unique challenges that are worth addressing head-on. While most dedicated underwater photography techniques focus on capturing visible light, adapting housings for near-surface infrared work requires careful consideration.
The biggest obstacle you’ll face is filter mounting. Most underwater housings don’t accommodate the thick screw-on infrared filters typically used in IR photography. You have three practical options here: use a camera with an internal IR-converted sensor (eliminating the need for external filters), mount a gel-type IR filter inside the housing before sealing it, or choose a housing system that allows lens port changes where you can sandwich a filter between the port and lens.
Viewfinder visibility becomes trickier underwater. Dense IR filters block visible light, making composition through optical viewfinders nearly impossible. Electronic viewfinders (EVFs) and rear LCD screens work better since they display the processed image, but the housing’s acrylic viewfinder window may introduce color shifts or reduce clarity. Test your specific housing-camera combination before any critical shoot.
Autofocus presents another hurdle. Many cameras struggle with autofocus when IR filters are attached because AF sensors rely on visible or near-infrared wavelengths. Manual focus becomes essential, which means you need a housing with smooth, precise focus controls.
For housing recommendations, Nauticam and Ikelite systems offer the most flexibility for IR experimentation. Nauticam’s modular port system allows filter insertion, while Ikelite’s clear polycarbonate housings provide better visibility for manual focus work. Both manufacturers offer robust focus wheel controls essential for IR shooting. Keep in mind that housing manufacturers don’t specifically design for IR photography, so expect some trial and error to find what works best for your particular setup.
Lens Selection and Filter Choices
For waterline and shallow underwater infrared work, lens selection makes a significant difference in your results. Wide-angle lenses in the 16-35mm range work exceptionally well for split-shots where half your frame is above water and half below. These allow you to capture dramatic skies while including underwater elements in the foreground. Prime lenses like a 24mm or 35mm offer superior sharpness and better IR performance since they have simpler optical formulas with fewer glass elements.
Regarding infrared filters, the 720nm wavelength serves as your best starting point for waterline photography. It provides a reasonable balance between visible light blocking and maintaining some color information in your images. The 850nm filter creates more dramatic, true infrared effects but requires longer exposures, which becomes problematic with wave movement and camera shake. For practical shooting, especially handheld work near water, stick with 720nm or 665nm filters.
Dome ports present a unique challenge for underwater housing users attempting IR photography. The thick acrylic or glass dome can reduce IR transmission by 30-50%, requiring even longer exposures. Some photographers report better results with flat ports when working in very shallow water, though this limits your field of view. If you’re investing in underwater housing specifically for IR experiments, test your dome port’s IR transmission before committing to expensive modifications.
Shooting Techniques That Actually Work
The Split-Shot Waterline Technique
One of the most visually striking applications of infrared photography near water is the split-shot technique, where you capture both above and below the waterline in a single frame. While true infrared photography doesn’t work underwater due to water’s absorption properties, you can create compelling split-shot images using infrared for the above-water portion.
The key to successful split-shot infrared images starts with your equipment setup. You’ll need a dome port on your underwater housing, which creates that seamless transition between environments. Position yourself so the waterline sits exactly at the dome’s center. This sweet spot is where the optical magic happens, allowing both halves of your image to remain sharp.
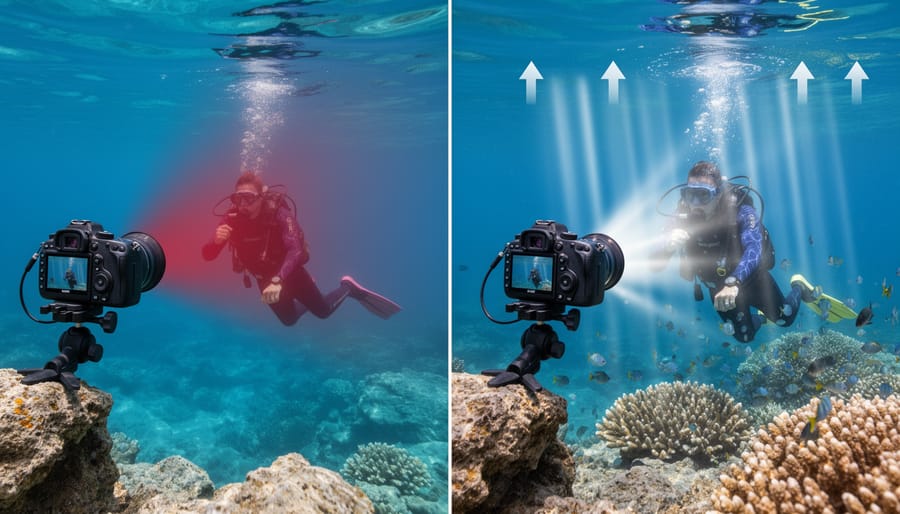
Focus presents your biggest challenge here. Since infrared focuses differently than visible light, and water adds another optical element, you’re essentially managing two completely different focus planes. Start by setting your focus manually for the above-water infrared scene. Most photographers find success using a smaller aperture, around f/8 to f/11, to maximize depth of field across both environments. Remember, the underwater portion will be capturing visible light only, following standard underwater photography basics.
Exposure balancing requires patience and experimentation. Your infrared-sensitive camera will read the above-water scene very differently than the underwater portion. Use spot metering to evaluate each half separately, then compromise between the two readings. I typically expose for the brighter above-water section and use strobes to illuminate the underwater foreground.
Timing matters enormously with split-shots. Calm water conditions are essential since even small ripples distort that critical waterline divide. Early morning offers the best combination of still water and interesting infrared cloud formations above.
Shooting Through Shallow Water
While true underwater infrared photography faces significant obstacles, shooting through shallow water from above opens up creative possibilities. This technique works because you’re essentially capturing a surface-level scene where the infrared light doesn’t need to penetrate deeply into the water.
The key is working with very shallow depths, typically no more than a few inches to maybe a foot at most. Think tide pools, stream beds, or the edges of lakes where rocks and vegetation sit just beneath the surface. The infrared light from the sun can reflect off these subjects and back through the minimal water layer to your camera.
Angle makes all the difference here. Shooting straight down minimizes the water’s filtering effect since the light travels the shortest possible distance. As you increase your angle, you’re forcing the infrared light to travel through more water, which rapidly diminishes your results. A 45-degree angle might still work in crystal-clear conditions, but perpendicular shooting gives you the best chance of success.
Polarizing filters become your best friend in this scenario. They cut through surface reflections and glare that would otherwise obscure your view of what’s beneath. Rotate the polarizer while looking through your viewfinder until the water’s surface seems to disappear. This effect works independently of your infrared conversion, giving you clearer access to submerged subjects.
Optimal conditions include bright, sunny days when infrared radiation is strongest, calm water without ripples that distort the view, and exceptionally clear water free of suspended particles. Overcast days simply don’t provide enough infrared energy to make this technique worthwhile.
Remember, you’re working at the absolute edge of what’s physically possible. Keep expectations realistic and treat successful shots as happy discoveries rather than guaranteed outcomes.
Creative Applications and Results to Expect
While true underwater infrared photography remains impractical due to water’s absorption of infrared light, near-water IR photography opens up a fascinating creative playground. When you position your infrared camera just above the water’s surface or photograph aquatic environments from shore, you’ll discover an otherworldly aesthetic that transforms familiar scenes into dreamlike compositions.
Coastal landscape photography benefits tremendously from infrared techniques. Rocky shorelines photographed in IR reveal stunning contrasts between the dark, mineral-rich stones and the luminous white vegetation clinging to cliffs. Beach grass and dune plants glow with that signature IR luminescence, creating ethereal foregrounds against darker ocean waters. One photographer I know captured a breathtaking series of Oregon coast images where the weathered driftwood appeared almost silver against cotton-white beach grass, with the Pacific Ocean rendered as an inky black expanse.
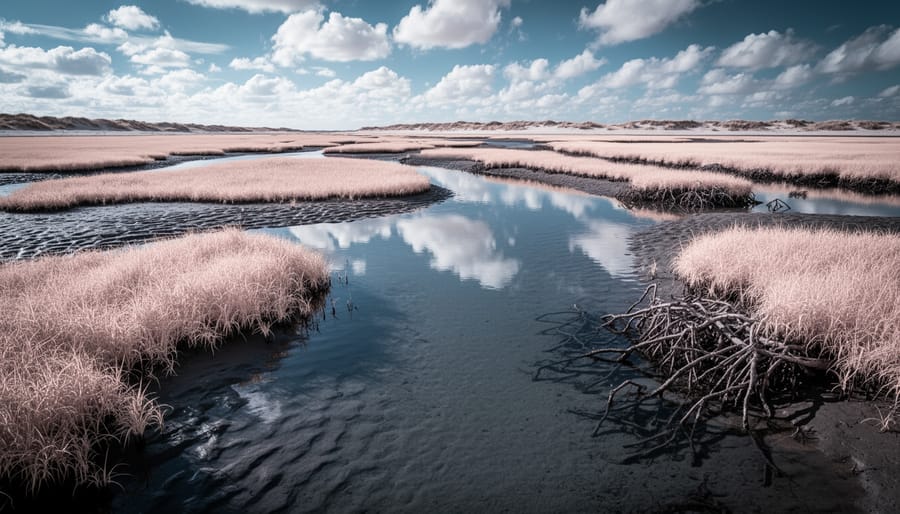
Wetland environments might be where near-water IR photography truly shines. Marshes, swamps, and mangrove forests transform completely under infrared light. The dense vegetation reflects IR light intensely, creating high-contrast scenes where water channels appear as dark ribbons weaving through brilliant white foliage. Cypress trees rising from still water take on a ghostly, luminous quality that’s impossible to achieve with standard photography.
Reflections deserve special attention in your IR work near water. When photographing ponds, calm lakes, or tidal pools during the golden hour, you’ll capture mirror-like reflections of IR-bright vegetation and clouds. The still water itself remains dark, creating a natural frame that enhances the reflected elements. These reflection shots often become portfolio standouts because they’re so visually striking and unusual.
Set realistic expectations, though. Fast-moving water loses much of its visual interest in IR, appearing simply as dark, featureless areas. Ocean waves work best when captured with longer exposures to smooth their motion. Marine life visible at the surface won’t benefit from IR treatment since living creatures don’t reflect infrared light dramatically. Focus instead on the environmental elements: plants, rocks, clouds, and the interplay between land and water. Success comes from emphasizing what IR does best, contrasting luminous vegetation and skies against darker water elements for maximum visual impact.
Common Mistakes and How to Avoid Them
Let me be honest with you: most disappointment in underwater infrared photography comes from expectations shaped by terrestrial shooting. I’ve seen countless photographers invest in expensive setups only to surface frustrated because the physics just don’t work the same way below the waterline.
The biggest mistake? Expecting infrared light to behave like it does in air. Many photographers assume they can shoot traditional IR imagery at depth, but water absorbs infrared wavelengths within mere centimeters. If you’re planning to capture those dreamy false-color landscapes at ten feet down, you’ll need to adjust your entire approach. The solution is simple but requires a mindset shift: focus on near-surface techniques or split-shot compositions where your subject breaks the waterline.
Housing leaks represent the most expensive error you can make. I’ve witnessed photographers rush their setup, eager to catch golden hour light, only to destroy thousands of dollars in gear. Always perform a depth test with your housing empty before trusting it with your camera. Check O-rings meticulously for sand, hair, or nicks. Apply a thin layer of appropriate lubricant, and never assume last week’s seal means this week’s safety.
Exposure miscalculation trips up even experienced shooters. Water reduces light intensity dramatically, but adding an IR filter compounds the problem. Your meter will likely give misleading readings. Start with test shots in controlled conditions, bracketing extensively. Keep detailed notes about your settings at various depths and lighting conditions. What works in noon sun at the surface will utterly fail three feet down.
White balance becomes particularly tricky when combining water’s natural blue-green cast with infrared’s unusual spectral characteristics. Don’t rely on auto white balance. Shoot RAW format exclusively, giving yourself maximum flexibility in post-processing. Custom white balance using a gray card at your shooting location helps, though you’ll still need significant adjustments later. Consider this part of your creative process rather than a technical hurdle.
The physics are clear: true underwater infrared photography at any meaningful depth simply isn’t possible. Water absorbs infrared wavelengths almost instantly, turning what works beautifully on land into an impractical technique beneath the surface. Understanding this limitation isn’t about crushing creativity, though. It’s about directing your energy toward approaches that actually work.
The techniques we’ve explored, from split-level surface photography to foam pattern imaging and controlled shallow-water experiments, all respect the science while opening up genuine artistic possibilities. These methods work precisely because they acknowledge water’s relationship with infrared light rather than fighting against it. You’re not cheating by photographing at the surface boundary or in extremely shallow conditions. You’re adapting your technique to physical reality, which is exactly what good photography requires.
If you’ve invested in infrared equipment hoping to capture dreamlike scenes ten feet underwater, that disappointment is understandable. But here’s the silver lining: the water’s surface presents opportunities that don’t exist anywhere else. Those ethereal split-level compositions, the unexpected textures in waves and spray, the haunting quality of reflection meets refraction, these are images unique to this intersection of techniques.
Keep experimenting. Push the boundaries of what works in those first few inches of water. Try different filters, angles, and lighting conditions. Just do it with eyes wide open to the science. The best creative work happens when you understand the rules well enough to know which ones you can bend and which ones simply won’t budge.