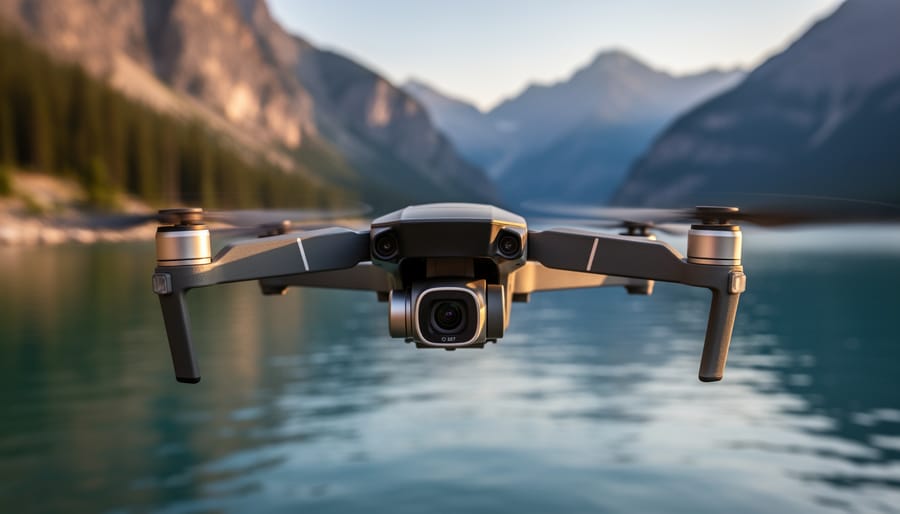
Choose drones with true 4K resolution at 60fps minimum—anything less creates choppy footage during fast movements or panning shots. The difference becomes glaringly obvious when you’re tracking a moving subject or capturing sweeping landscape panoramas. Many entry-level models advertise 4K capability but shoot at only 30fps, which severely limits your editing flexibility and creates motion blur in dynamic scenes.
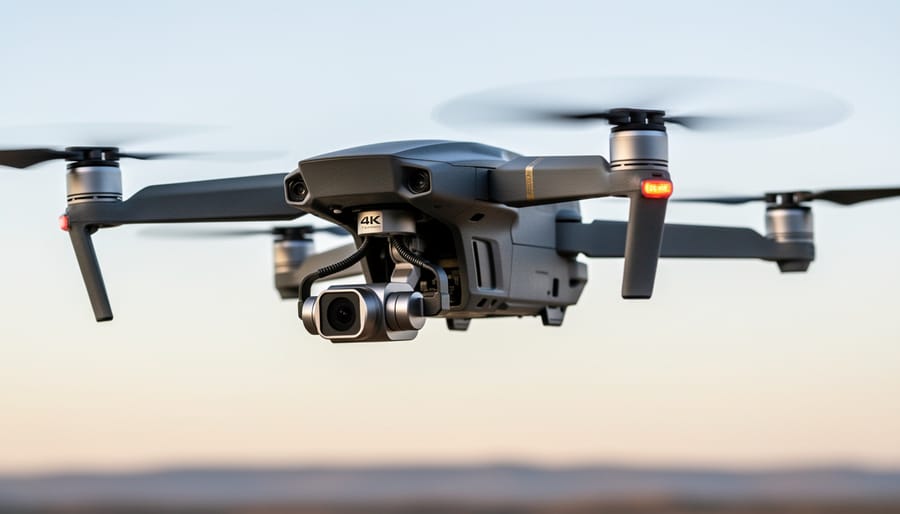
Prioritize 3-axis gimbal stabilization over advertised megapixel counts. A camera sensor means nothing if your footage shakes like a handheld phone video. Quality gimbals from manufacturers like DJI and Autel compensate for wind gusts and sudden movements, delivering the buttery-smooth cinematic footage that separates amateur clips from professional-looking content. Test footage reviews reveal this distinction instantly—watch actual flight videos, not promotional materials.
Match your drone’s flight time to your shooting needs, factoring in that advertised battery life drops by 25-30% in real-world conditions. A drone claiming 30 minutes of flight typically gives you 20-22 minutes actual shooting time, and you’ll want to land with at least 15% battery remaining. Professional photographers working on location shoots often need three to four batteries minimum to complete a single project without frustrating downtime.
Consider the complete ecosystem beyond the aircraft itself. The top camera drones include intelligent flight modes, obstacle avoidance systems, and intuitive controllers that dramatically shorten your learning curve. Features like ActiveTrack, waypoint navigation, and return-to-home functionality transform complex aerial maneuvers into simple button presses, letting you focus on composition rather than constantly fighting to keep your drone airborne and stable.
What 4K Actually Means for Drone Photography
When you’re shopping for a drone and see “4K” splashed across the marketing materials, it’s easy to assume all 4K is created equal. Spoiler alert: it’s not. Understanding what 4K actually means in the context of drone photography can save you from disappointment and help you make a smarter investment.
True 4K resolution means your drone’s camera captures footage at 3840 x 2160 pixels, which is roughly four times the pixel count of standard 1080p HD. This translates to sharper images, more detail, and significantly more flexibility when you’re editing. However, here’s where things get murky. Some budget drones advertise 4K capabilities but deliver what’s known as upscaled or interpolated 4K. This means the camera actually records at a lower resolution, say 2.7K or even 1080p, and the onboard software digitally enlarges it to 4K dimensions. The result? Footage that technically meets the 4K pixel count but lacks the crisp detail and clarity of genuine 4K capture.
For photographers and videographers who plan to crop into their shots or stabilize shaky footage in post-production, true 4K is a game-changer. When you crop a 4K image down to 1080p for final delivery, you’re essentially zooming in without losing quality. This gives you tremendous creative freedom to reframe compositions, follow moving subjects, or create dynamic punch-ins during editing. Real-world example: imagine capturing a sweeping coastal landscape and later deciding you want to highlight a distant lighthouse. With true 4K footage, you can punch in significantly without introducing pixelation.
So when is 4K worth the investment? If you’re creating content for clients, posting to social media where quality matters, or building a portfolio, investing in a drone with genuine 4K capabilities is essential. Our comprehensive drone camera buying guide can help you identify which models deliver authentic 4K versus marketing fluff.
That said, 4K might be overkill if you’re a casual hobbyist who primarily shares short clips on personal social accounts or simply enjoys flying for fun. These files are massive, requiring substantial storage space and processing power. A quality 2.7K or even 1080p drone might serve your needs perfectly while saving you money.
The Technical Specs That Matter More Than You Think
Sensor Size and Light Performance
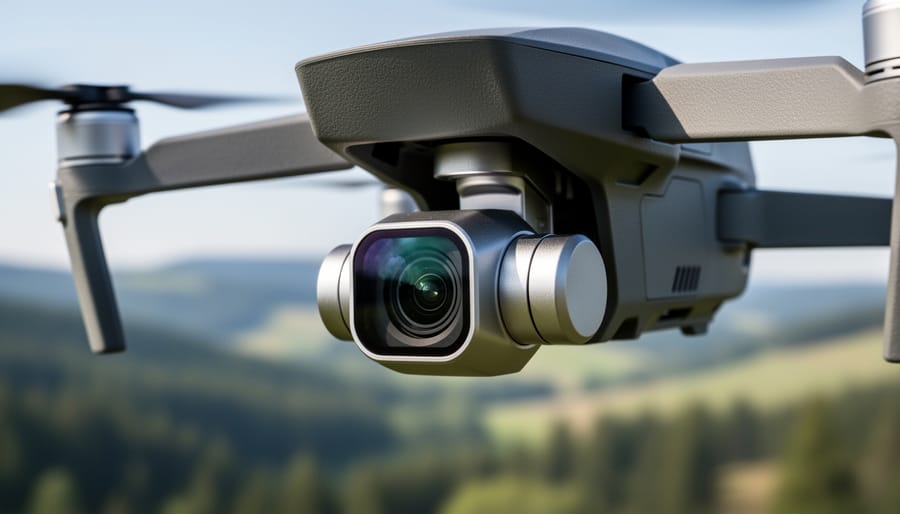
When you’re shopping for a 4K drone, the sensor size matters just as much as resolution—sometimes even more. Think of the sensor as your camera’s light-gathering surface. Larger sensors, typically one inch or bigger, capture significantly more light than the smaller half-inch sensors found in budget drones. This translates directly to better performance when you’re shooting during golden hour, in shaded forests, or on overcast days.
In practical terms, a drone with a larger sensor will give you cleaner footage with less digital noise when filming at dusk. You’ll also get superior dynamic range—the ability to capture detail in both bright skies and darker foreground elements simultaneously. For example, if you’re capturing coastal landscapes at sunset, a one-inch sensor can preserve cloud detail while still showing texture in shadowed cliffs below. Smaller sensors often force you to choose between blown-out highlights or murky shadows.
Most consumer drones use either half-inch or one-inch sensors. While half-inch sensors perform admirably in bright midday conditions, they struggle as light fades. If you frequently shoot during less-than-ideal lighting conditions or need professional-grade dynamic range for color grading, investing in a drone with a larger sensor pays dividends in image quality.
Bitrate and Color Depth
When evaluating 4K drones, bitrate is one of those specifications that often gets overlooked, but it significantly impacts your final footage quality. Think of bitrate as the amount of data your drone records per second, measured in megabits per second (Mbps). A higher bitrate means more information is captured, resulting in richer detail, smoother color transitions, and better performance in complex scenes with lots of movement or texture.
For real-world context, entry-level 4K drones typically record at 60-80 Mbps, which works fine for casual use and sharing on social media. However, if you’re planning to color grade your footage or crop in during editing, you’ll want at least 100 Mbps to maintain quality. Professional-grade drones often shoot at 150 Mbps or higher, giving you tremendous flexibility in post-production.
Color depth, measured in bits, determines how many color variations your drone can capture. Most consumer drones record in 8-bit, which provides 16.8 million colors and looks great straight out of the camera. Professional models offer 10-bit recording with over a billion color combinations, essential for serious color grading work. The practical difference? An 8-bit video can show banding in skies or gradients when heavily edited, while 10-bit footage handles adjustments gracefully.
Gimbal Stabilization Quality
Gimbal stabilization separates breathtaking aerial footage from shaky, unusable clips. Modern 4K drones typically feature 3-axis gimbals that compensate for pitch, roll, and yaw movements, but the implementation quality varies dramatically between models. High-end drones like the DJI Mavic 3 Pro utilize advanced mechanical stabilization combined with electronic image stabilization (EIS), delivering cinema-grade smoothness even in moderate winds. Budget-friendly options often rely more heavily on EIS, which can introduce cropping and occasionally produce that telltale “jello effect” during aggressive maneuvers.
The real-world difference becomes apparent when you’re capturing UAV photography techniques that require complex movements. A superior gimbal maintains horizon lock during rapid panning and handles sudden altitude changes without visible correction wobbles. When reviewing footage, watch for micro-jitters during slow cinematic movements and test how well the system handles transitions between flight modes. Professional-grade stabilization means you’ll spend less time in post-production trying to salvage shaky clips and more time creating compelling content.
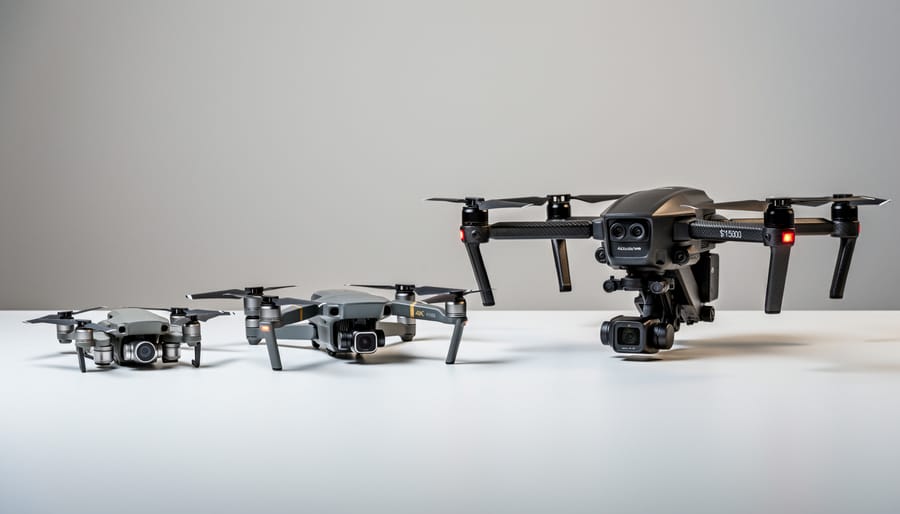
Best 4K Drones by Budget and Use Case
Budget-Friendly 4K Options (Under $500)
Breaking into 4K aerial photography doesn’t require emptying your savings account. Several capable drones now deliver genuine 4K video for under $500, though understanding their limitations is crucial before purchasing.
The Holy Stone HS720E (around $350) represents the most honest entry point into 4K drone territory. Its Sony sensor captures true 4K at 30fps, producing surprisingly detailed footage in good lighting conditions. The electronic image stabilization works adequately for calm-day flying, though windy conditions reveal its budget origins with noticeable shake. Flight time hits about 23 minutes per battery, respectable for this price range. The GPS-assisted return-to-home feature has proven reliable in testing, adding peace of mind for newer pilots.
Who should buy it? Beginners wanting to learn aerial composition without risking expensive equipment, or hobbyists shooting primarily for social media and YouTube where minor quality compromises won’t matter. Who shouldn’t? Anyone shooting professionally or needing footage for large-screen playback, where the limited dynamic range and compression artifacts become apparent.
The Potensic Atom SE (approximately $450) pushes closer to prosumer territory with three-axis mechanical gimbal stabilization, a significant upgrade from electronic systems. Its 4K footage at 30fps shows better color accuracy and less noise in shadows compared to cheaper alternatives. The obstacle avoidance system, while basic, prevents common beginner crashes. Maximum flight time reaches 31 minutes, extending creative possibilities during single-battery sessions.
Real-world testing revealed its sweet spot: real estate photography for smaller properties, documenting construction projects, or creating travel content for personal portfolios. The limitation? Wind resistance suffers above 15mph, and the fixed-aperture camera struggles with high-contrast scenes.
These budget options share common constraints: limited low-light performance, compressed video files that resist heavy color grading, and shorter transmission ranges than premium models. They’re perfect for learning drone cinematography principles and building your aerial portfolio, just don’t expect the same capabilities you’d find in 4K underwater cameras or professional-grade aerial platforms costing thousands more.
Mid-Range Powerhouses ($500-$1500)
This is where things get really exciting. If you’ve been flying budget drones and feel ready to level up, or if you’re jumping straight into serious aerial photography, the $500-$1500 range offers incredible value. These drones deliver professional-quality 4K footage without the jaw-dropping price tags of flagship models.
The DJI Air 3 sits at the top of this category for good reason. Priced around $1,099, it features dual cameras including a 48MP wide-angle and a 48MP medium telephoto lens, both capable of stunning 4K/60fps video. What impresses me most is its 46-minute flight time, which genuinely changes how you approach a shoot. Instead of constantly monitoring battery life, you can focus on capturing that perfect sunset or tracking a subject through a complex scene. The obstacle avoidance system works reliably in multiple directions, giving you confidence to fly in tighter spaces. Real-world performance shows excellent dynamic range in varied lighting conditions, and the footage holds up beautifully in post-production color grading.
For those seeking a more compact option, the DJI Mini 4 Pro (around $759) punches well above its weight class. Despite weighing under 249 grams, meaning you avoid FAA registration requirements in the US, it captures gorgeous 4K/60fps HDR video. I’ve tested this drone in moderate winds, and its stability rivals much larger models. The ActiveTrack feature works surprisingly well for following moving subjects, whether you’re filming a mountain biker or your kids playing soccer. The 34-minute flight time feels adequate, though you’ll want spare batteries for extended sessions.
The Autel EVO Lite Plus ($1,149) deserves attention as a solid DJI alternative. Its 1-inch sensor produces exceptional low-light performance, and the adjustable aperture gives you creative control over depth of field that most drones in this range lack. The 6K video capability provides extra resolution for cropping or future-proofing your content. Some users report the app interface feels less polished than DJI’s, but the image quality speaks for itself.
Budget tip: Watch for bundle deals that include extra batteries, ND filters, and carrying cases. These accessories typically cost $300-$400 separately, making bundles genuine money-savers that enhance your flying experience from day one.
Professional-Grade 4K Drones ($1500+)
When you cross the $1500 threshold, you’re entering the realm where drones become genuine professional tools rather than sophisticated toys. The price jump isn’t arbitrary—it reflects substantial differences in sensor quality, flight systems, and image processing that translate directly to your final output.
The DJI Mavic 3 Pro stands as the benchmark in this category, featuring a triple-camera system with a Four Thirds sensor that captures stunning 5.1K video at 50fps. In real-world testing, the difference in low-light performance compared to mid-range options is immediately noticeable. I’ve shot twilight real estate videos where the Mavic 3 Pro maintained clean footage at ISO 6400, while cheaper alternatives showed distracting noise at ISO 1600. The 43-minute flight time means less battery swapping during critical shoots, which matters tremendously when you’re racing against golden hour or coordinating with clients.
For cinematographers prioritizing absolute image quality, the Autel EVO II Pro 6K delivers what its name promises—genuine 6K resolution with adjustable aperture from f/2.8 to f/11. That aperture control is transformative for maintaining proper exposure in changing light conditions without relying solely on ND filters or shutter speed adjustments. I’ve used it for documentary work where lighting varied dramatically, and having that extra control saved numerous shots.
The Skydio 2+ distinguishes itself through autonomous tracking capabilities that border on magical. Its obstacle avoidance uses six 4K navigation cameras processing visual data in real-time, allowing it to follow subjects through dense forests or urban environments where other drones would crash. For action sports or wildlife videography, this technology is worth the premium price alone.
These professional drones justify their cost through reliability and consistency. When your reputation or client satisfaction depends on capturing specific footage, the advanced sensors, longer flight times, and superior stabilization systems eliminate the “did I get the shot” anxiety that plagues cheaper alternatives.
Specialized Options for Specific Needs
Not all 4K drones serve the same purpose, and understanding your primary use case will help you make a smarter purchase. For real estate professionals, drones with automatic flight paths and wide-angle lenses simplify property tours—the DJI Air series excels here with programmable routes that deliver consistent, professional-looking footage every time. If you’re capturing action sports, you’ll want a drone that can keep pace with fast-moving subjects while delivering smooth tracking, much like action cameras do for ground-level work. The Autel EVO Nano+ stands out with exceptional subject tracking in dynamic environments. Filmmakers seeking cinematic results should prioritize adjustable aperture settings and high bitrate recording—features found in professional models like the DJI Inspire series that give you genuine creative control over depth of field and color grading. Travel enthusiasts benefit most from ultra-portable options that don’t sacrifice quality, with foldable designs that slip into a backpack without adding significant weight to your gear load.
Common 4K Drone Pitfalls and How to Avoid Them
When shopping for a 4K drone, even experienced photographers can fall into traps that lead to buyer’s remorse. Let me walk you through the most common pitfalls I’ve seen people encounter, along with practical strategies to sidestep them.
The biggest mistake? Assuming all 4K is created equal. Marketing materials love to plaster “4K” across product pages, but this tells you remarkably little about actual video quality. A drone shooting 4K at 24fps with a highly compressed codec will produce noticeably inferior footage compared to one recording at 60fps with a higher bitrate. I’ve watched countless buyers excitedly unpack their new drone only to discover their footage looks soft or exhibits blocky compression artifacts during movement. Always check the bitrate specifications, which should ideally be 100Mbps or higher for professional-quality results.
Storage requirements catch people off guard constantly. True 4K footage devours space at an alarming rate. A single ten-minute flight can consume 10-15GB depending on your codec settings. Many buyers purchase their drone without considering they’ll need multiple high-capacity memory cards. Worse, they’ll grab whatever SD card is on sale, then face stuttering recordings or file corruption. For 4K drones, you absolutely need UHS Speed Class 3 (U3) cards at minimum, with V30 or V60 ratings being safer choices for higher frame rates.
Editing software compatibility represents another headache. Your computer that handles regular photos beautifully might choke on 4K drone footage. Before purchasing, verify that your editing setup can actually handle the drone’s specific codec. Some manufacturers use proprietary or resource-intensive formats that require significant processing power. I recommend downloading sample footage from the manufacturer’s website and testing it with your current software before committing to a purchase.
Don’t overlook controller and app compatibility either. Some drones require specific mobile devices or operating system versions. Nothing dampens enthusiasm like discovering your tablet won’t work with your shiny new drone. Check the manufacturer’s compatibility list thoroughly, and pay attention to user reviews mentioning connectivity issues or app crashes on specific devices.
Finally, weather limitations often surprise new drone owners. Many entry-level 4K drones marketed as “professional” lack adequate wind resistance or weatherproofing. Understanding these limitations upfront prevents both equipment damage and missed shooting opportunities.
Making Your 4K Footage Actually Look Professional
Getting stunning 4K footage from your drone isn’t just about having a capable camera—it’s about knowing how to use it properly. Let me share some practical techniques that separate amateur clips from truly professional-looking aerial content.
First, let’s talk camera settings. Always shoot in your drone’s flat or log color profile if available (typically called D-Cinelike on DJI drones). Yes, the footage will look washed out initially, but this preserves far more color information for post-production. Set your shutter speed to double your frame rate—if you’re shooting at 30fps, use a 1/60 shutter speed. This creates natural motion blur that mimics what our eyes expect to see.
Here’s where ND filters become essential. Think of them as sunglasses for your drone’s camera. Without them, you’ll struggle to maintain that proper shutter speed in bright conditions, resulting in jittery, unnatural-looking footage. I recommend starting with an ND16 for typical daylight shooting and adjusting from there. Most professional drone pilots carry a set ranging from ND8 to ND64.
For shooting techniques, slow and smooth wins every time. Rapid movements might seem dynamic, but they often look amateurish and make viewers queasy. Practice combining two movements simultaneously—like ascending while rotating—for cinematic results. Always shoot more footage than you think you need, holding each shot for at least 10 seconds to give yourself editing flexibility.
In post-production, resist the urge to over-sharpen or over-saturate your footage. Apply gentle color grading that enhances rather than transforms your images. The professional editing techniques you’d apply to still photography translate well to video, particularly regarding exposure balance and color correction.
Finally, stabilize your footage using your editing software’s built-in tools, even if your drone has a gimbal. This extra step removes subtle wobbles that can plague otherwise perfect shots, giving your work that polished, broadcast-quality appearance.
Choosing the right 4K drone ultimately comes down to understanding your specific needs and honest budget assessment. If you’re a beginner, don’t feel pressured to invest in professional-grade equipment right away. Entry-level 4K drones offer impressive image quality that will serve you well while you develop your skills. For enthusiast photographers looking to expand their creative toolkit, mid-range options provide the sweet spot between performance and affordability, with features like obstacle avoidance and extended flight times that genuinely enhance your shooting experience.
Remember that the drone itself is just the starting point. Factor in essential accessories like extra batteries, ND filters, and a quality carrying case when calculating your total investment. Take time to watch sample footage from your shortlisted models, read user experiences beyond just technical specs, and consider which ecosystem aligns with your existing equipment.
The best 4K drone isn’t necessarily the most expensive one or the one with the longest feature list. It’s the drone that matches your skill level, fits your budget comfortably, and meets your specific creative goals. Trust your research, start flying responsibly, and focus on developing your piloting and composition skills. Your investment will pay dividends when you capture that perfect aerial shot you’ve been envisioning.