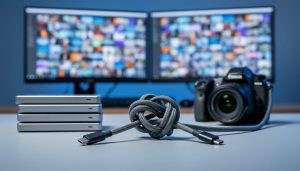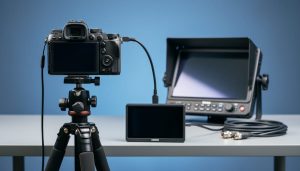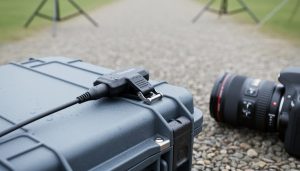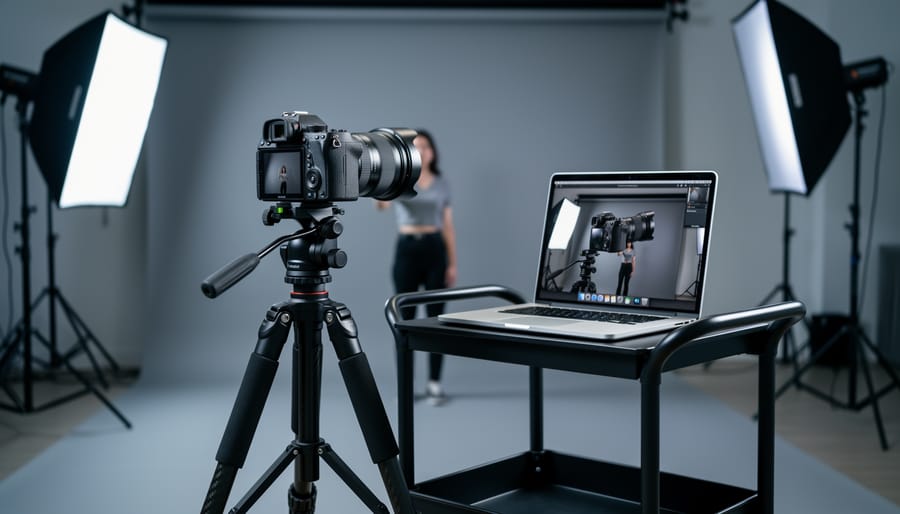
Connect your camera to your computer using a USB cable and dedicated tethering software like Lightroom or Capture One to instantly preview full-resolution images on a larger screen while shooting. This real-time workflow revolutionizes how photographers work on commercial shoots, studio sessions, and client presentations—but the traditional wired approach has evolved dramatically with wireless and cloud-based alternatives now reshaping the landscape.
Wireless tethering eliminates the physical cable that restricts your movement, allowing you to roam freely around your subject while maintaining instant image transfer to your computer or tablet. Modern solutions range from built-in camera Wi-Fi capabilities to dedicated wireless transmitters and cloud-based platforms that sync images across multiple devices simultaneously. The technology has matured enough that many professional photographers now rely exclusively on wireless setups for both studio and location work.
Understanding which approach fits your specific needs requires evaluating your equipment compatibility, typical shooting scenarios, and workflow priorities. A product photographer working in a controlled studio environment faces different requirements than a wedding photographer moving between ceremony locations. Budget constraints, image transfer speeds, and reliability concerns all factor into choosing between traditional USB tethering, direct wireless connections, or cloud-based solutions.
This guide breaks down everything you need to know about tethering your camera to your computer wirelessly, from fundamental concepts through practical implementation strategies that match your photography style and technical comfort level.
What Is Wireless Tethering and Why Should You Care?

The Evolution From Cables to Cloud
Tethering started as a purely wired affair back in the early 2000s, when professional photographers first began connecting their DSLRs to laptops using USB cables. It was revolutionary at the time—suddenly you could see your images on a larger screen almost instantly—but it came with real limitations. That cable tether meant restricted movement around the studio, tripping hazards, and the constant worry about accidentally disconnecting mid-shoot.
As wireless technology matured, manufacturers began integrating Wi-Fi capabilities directly into camera bodies around 2012. Early implementations were often clunky with sluggish transfer speeds, but they proved the concept worked. Photographers quickly realized that cutting the cord meant freedom to move around subjects, easier collaboration with clients who could view images on tablets, and safer shooting environments without cable snags.
The next leap came with dedicated wireless transmitters and cloud-based solutions that emerged in the mid-2010s. These systems addressed the speed concerns that plagued early Wi-Fi tethering while adding powerful features like instant client galleries and remote shooting capabilities. Today’s wireless tethering ecosystem offers options ranging from affordable Wi-Fi adapters to professional-grade systems that rival—and sometimes exceed—the reliability of traditional cables.
When Wireless Tethering Makes Sense (And When It Doesn’t)
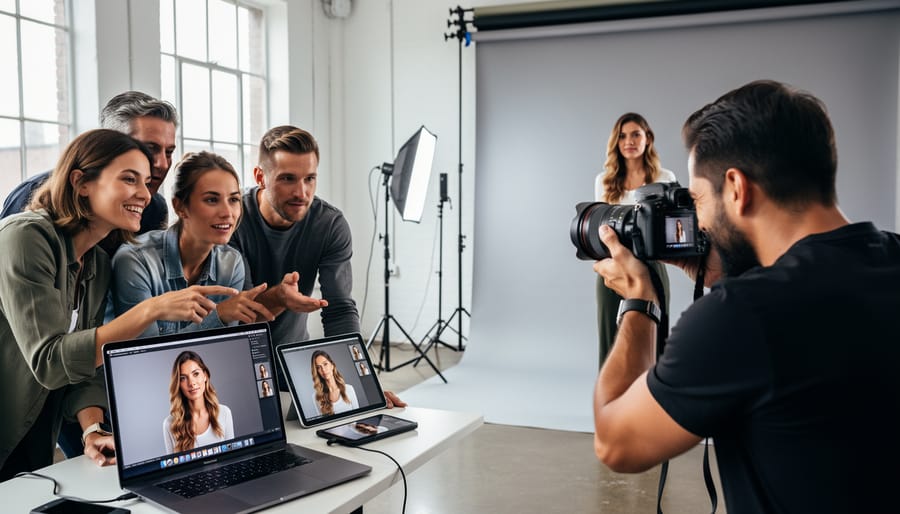
Wireless tethering shines brightest in specific shooting environments where cable limitations become genuine obstacles. Commercial product photography sessions with multiple lighting setups benefit enormously—imagine moving freely around a table-top scene without worrying about snagging cables on light stands. Event photography represents another sweet spot, particularly for corporate headshots or photo booth scenarios where you’re working with clients who need immediate previews on a larger screen positioned several feet away.
Studio portrait sessions with active posing also favor wireless solutions. When you’re directing models through movement-based shoots or capturing energetic performances, staying mobile while maintaining the tethered workflow keeps your creative momentum flowing. Similarly, architectural photographers working on tripods in expansive interior spaces appreciate eliminating the cable tether when moving between compositions.
However, wired connections remain superior for high-volume studio work where speed is paramount. Fashion shoots delivering hundreds of high-resolution RAW files daily need the consistent transfer speeds only cables provide. Sports and wildlife photography sessions requiring rapid-fire continuous shooting sequences will frustrate you wirelessly—the bandwidth simply can’t match a physical connection.
Long-duration time-lapse projects also demand wired tethering for reliability. Battery-powered wireless solutions introduce unnecessary failure points during shoots that might span hours or days. Similarly, any work requiring absolute file transfer certainty—think wedding photography where missing images isn’t acceptable—should stick with cables. The peace of mind knowing each frame transferred successfully outweighs wireless convenience. Consider your shooting cadence, file sizes, and tolerance for occasional transmission hiccups when deciding which approach serves your specific needs best.
How Wireless Tethering Actually Works
WiFi Direct vs. Network-Based Tethering
When it comes to wireless tethering, you’ll encounter two primary connection methods, each with distinct advantages and limitations.
WiFi Direct creates a point-to-point connection between your camera and computer, essentially turning your camera into its own wireless access point. Think of it as a private network just for these two devices. The main advantage here is simplicity—no router required, and you can shoot in locations without existing WiFi infrastructure. Cameras like the Sony A7 series and many Canon EOS R models support this approach. The downside? Your computer loses its regular internet connection while tethered this way, which can be problematic if you need to upload images to clients or access cloud storage simultaneously. Range is also somewhat limited, typically working reliably within 15-30 feet depending on environmental interference.
Network-based tethering, on the other hand, connects both your camera and computer to an existing WiFi network. This method keeps your internet connection intact, making it ideal for studio environments where you need continuous connectivity. Many professional photographers prefer this setup during client sessions, as they can instantly share preview galleries while shooting. Cameras supporting this include higher-end Nikon Z models and Canon’s professional DSLRs. The catch is you need a robust WiFi network with sufficient bandwidth—your home router might struggle if multiple devices are competing for bandwidth.
Your choice ultimately depends on your shooting environment. Location photographers often favor WiFi Direct for its portability, while studio shooters typically opt for network-based connections to maintain full connectivity throughout their workflow.
Understanding Image Transfer Speed and Quality
When you’re tethering your camera, understanding transfer speeds can save you from frustrating workflow bottlenecks. File size makes a huge difference here—a typical RAW file from a modern full-frame camera might weigh in at 30-50MB, while a high-quality JPEG of the same image could be just 5-10MB. That difference matters significantly when you’re moving files wirelessly.
The RAW vs. JPEG choice directly impacts your tethering experience. With a wired USB 3.0 connection, transferring a 40MB RAW file typically takes under a second. Switch to wireless tethering, and that same file might take 3-8 seconds depending on your setup. In a fast-paced portrait session where you’re shooting dozens of frames, those seconds accumulate quickly.
Several real-world factors affect wireless performance beyond theoretical speeds. Distance between your camera and computer matters—I’ve noticed transfer speeds can drop noticeably beyond 15-20 feet. Environmental interference from other Wi-Fi networks, Bluetooth devices, or even metal structures can create unexpected slowdowns. Camera battery drain is another consideration, as wireless transmission consumes significantly more power than wired connections.
For studio work where RAW file handling is essential, many photographers find hybrid approaches work best—shooting RAW but having the camera simultaneously transfer smaller JPEG previews for immediate client review. This balances image quality with practical wireless performance, giving you instant feedback without overwhelming your connection.
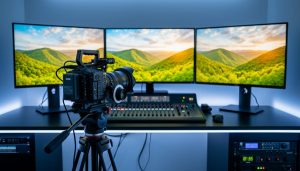
Camera-to-Cloud: The Future of Professional Workflows
What Camera-to-Cloud Really Means
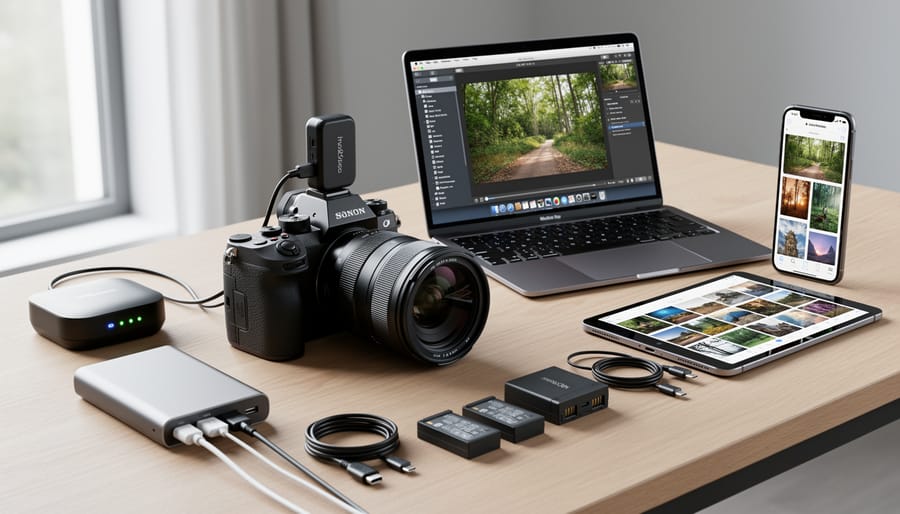
Camera-to-cloud technology represents a significant leap forward from traditional tethering, eliminating the physical connection between your camera and computer entirely. Instead of relying on USB cables or even local Wi-Fi networks, this approach uploads your images directly from your camera to cloud storage through cellular data or internet connectivity.
Here’s how it works: compatible cameras—currently limited to high-end professional models from manufacturers like Canon, Nikon, and Sony—include built-in cellular modems or connect to dedicated transmitters. As you shoot, the camera automatically sends image file formats to cloud platforms like Frame.io, Adobe Creative Cloud, or manufacturer-specific services. The uploads happen in the background, meaning your images arrive in the cloud seconds after capture.
The collaborative possibilities are transformative. Imagine shooting a wedding while your second shooter’s images simultaneously appear in the same cloud folder, or a sports photographer capturing action while editors halfway across the world begin processing images for immediate publication. Photo editors can review, select, and even begin retouching while you’re still on location.
This technology does require a reliable data connection and typically involves subscription fees for cloud storage and data plans. Real-world performance varies based on file size and network strength—uploading full-resolution RAW files demands substantial bandwidth. However, many systems offer smart preview options, uploading smaller proxy files first for quick review while full-resolution versions transfer in the background, giving you flexibility without sacrificing workflow speed.
Major Camera-to-Cloud Platforms and Services
Several manufacturers have developed camera-to-cloud platforms that eliminate the traditional USB tether, letting you upload images directly from your camera to cloud storage. These solutions vary significantly in capabilities, cost, and compatibility, so understanding what each offers helps you choose the right fit for your workflow.
Canon Image.canon launched as one of the first integrated solutions, allowing compatible mirrorless cameras like the EOS R5 and R6 Mark II to transfer images via Wi-Fi during or after a shoot. You get 30GB of free storage, with paid plans available for larger libraries. The platform integrates with image.canon’s editing and sharing tools, making it particularly valuable for Canon shooters who want a complete ecosystem. Setup requires creating an account and connecting your camera through the Canon Camera Connect app, then enabling automatic transfer in your camera settings.
Nikon’s Image Cloud service targets professional Z-series cameras, offering direct upload capabilities when paired with compatible FTP servers or Nikon’s own cloud infrastructure. This solution emphasizes reliability and speed for editorial and event photographers who need images delivered immediately to clients or newsrooms.
Sony Ci provides professional-grade cloud asset management with camera-to-cloud functionality for select Sony cameras. The service includes collaboration tools, making it ideal for production teams. However, it requires specific camera models and network configurations, including file compression considerations for efficient uploads.
Frame.io’s Camera to Cloud represents the most platform-agnostic approach, supporting multiple camera brands through compatible adapters and built-in connectivity. Popular among video professionals, it excels at collaborative review workflows where clients and editors can access footage immediately.
Each platform requires reliable internet connectivity, typically recommending upload speeds of at least 10 Mbps for JPEG transfers and significantly higher for RAW files.
Setting Up Wireless Tethering: A Practical Walkthrough
Using Manufacturer Apps and Software
Most camera manufacturers have developed their own wireless tethering solutions, and while they’re not always perfect, they offer the advantage of being designed specifically for your equipment. Let’s break down what each major brand offers and how to get the most from their native apps.
Canon users have two main options: the EOS Utility software for computers and Camera Connect for mobile devices. The EOS Utility wireless option works surprisingly well once you’ve completed the initial setup, which admittedly can be a bit finicky. You’ll need to ensure your camera has built-in WiFi or use a wireless file transmitter for older models. The software allows full camera control and automatic image transfer, though the interface feels dated compared to third-party alternatives. Pro tip: creating a dedicated WiFi network for your camera significantly improves connection stability.
Nikon’s SnapBridge and Wireless Transmitter Utility offer different approaches depending on your needs. SnapBridge excels at mobile connectivity and automatic low-resolution transfers, while the Wireless Transmitter Utility provides professional-grade tethering for supported models. Setup requires patience—Nikon’s WiFi configuration can be menu-heavy—but once established, connections remain reliable. The system works best when your camera and computer are on the same network subnet.
Sony’s Imaging Edge suite (Remote, Viewer, and Edit) provides comprehensive wireless control for compatible Alpha and RX series cameras. The Remote component handles live view and shooting control, while Viewer manages image transfers. Connection stability has improved dramatically in recent firmware updates, making this a genuinely viable wireless option for studio work.
Fujifilm’s X Acquire software delivers straightforward wireless tethering with an intuitive interface that matches the brand’s reputation for user-friendly design. Setup is relatively painless, and the software includes helpful connection diagnostics when issues arise. Image transfer speeds won’t break records, but they’re adequate for most shooting scenarios.
Third-Party Wireless Tethering Solutions
While camera manufacturers have made strides with their native wireless tethering apps, they often come with frustrating limitations like restricted file formats, slow transfer speeds, or lack of support for older camera models. This is where third-party solutions shine, offering professional-grade wireless tethering that frequently outperforms the manufacturer’s own offerings.
Capture One Live stands out as the premium choice for professional photographers who already use Capture One for their editing workflow. Unlike basic manufacturer apps, Capture One Live delivers full RAW file transfers wirelessly, maintaining the same image quality and metadata you’d get from a wired connection. The real-world advantage becomes apparent during client presentations—images appear on a large monitor or tablet almost instantly, allowing clients to review shots while you continue shooting. The investment makes particular sense if you’re already paying for Capture One’s subscription service, as Live functionality is included in higher-tier plans.
Cascable takes a different approach, focusing on universal camera control rather than brand-specific limitations. This iOS app works with dozens of camera models from various manufacturers, often unlocking features that the camera maker’s own app doesn’t support. For example, you might discover that Cascable can transfer RAW files from a camera whose official app only handles JPEGs. The app also excels at intervalometer functions and geotagging, making it valuable beyond just tethering.
For studio photographers seeking reliability, Smart Shooter offers robust wireless capabilities alongside its wired tethering features. It’s particularly appreciated for its customizable file naming and automatic backup options, which reduce the risk of lost images during wireless transfers.
The practical advantage of these third-party solutions is flexibility. If you shoot with multiple camera brands or need features like simultaneous transfer to multiple devices, these tools provide capabilities that manufacturer apps simply weren’t designed to offer.
Camera Compatibility: What Works With What
Wireless Tethering Across Major Camera Brands
Wireless tethering capabilities vary significantly across camera manufacturers, and understanding what your specific brand offers can save you considerable frustration down the road.
Canon has made impressive strides with their newer models. The EOS R5, R6, and R3 all feature built-in wireless tethering through Canon’s Camera Connect app and EOS Utility software. Even mid-range models like the EOS R7 support wireless file transfer, though connection stability improves noticeably as you move up their product line. Their older DSLRs, however, often require separate wireless file transmitters that can cost several hundred dollars.
Nikon’s Z-series mirrorless cameras offer solid wireless tethering options through their Wireless Transmitter Utility. The Z9 and Z8 deliver particularly robust performance for professional work, while the Z6 III and Z5 provide dependable connections for most studio scenarios. Like Canon, Nikon’s DSLR users often need additional hardware accessories for wireless functionality.
Sony leads in built-in wireless capabilities across their Alpha series. Even the entry-level a6400 supports basic wireless transfer through Imaging Edge software, while the a7R V and a1 offer professional-grade wireless tethering with impressive range and speed. This democratization of wireless features across their lineup makes Sony particularly appealing for photographers upgrading from budget to professional bodies.
Fujifilm’s X and GFX systems include wireless tethering through their HS-S software, though connection reliability can be more finicky than competitors. The real-world experience often depends heavily on your network environment and computer specifications rather than just the camera itself.
Checking Your Camera’s Wireless Capabilities
Before you invest time setting up a wireless tethering workflow, you’ll want to confirm your camera actually supports it. Start by checking your camera’s manual, either the physical copy that came in the box or a digital PDF available on the manufacturer’s website. Look for sections titled “wireless connectivity,” “Wi-Fi functions,” or “network features.”
Your camera’s specification sheet is another reliable resource. Most manufacturers list wireless capabilities prominently on their product pages. You’re looking for terms like “Wi-Fi,” “Bluetooth,” “wireless LAN,” or “FTP transfer.” Keep in mind that not all wireless-enabled cameras support actual tethering—some only allow image transfer after shooting, which is quite different from live tethered capture.
Here’s a practical tip: if your camera has a smartphone app for remote control or image transfer, that’s a good indicator it has the underlying wireless technology for tethering, though you may need additional software to make it work with your computer.
For older camera models without built-in wireless, don’t despair just yet. Some manufacturers offer wireless adapters or transmitters that attach to your camera’s accessory port or hot shoe, essentially adding wireless capabilities to cameras that didn’t ship with them. Check your manufacturer’s accessory catalog to see what’s available for your specific model.
Real-World Performance: What to Expect
Battery Life and Power Management
Wireless tethering is convenient, but it’s a battery-hungry beast. Your camera is constantly maintaining a Wi-Fi connection and transmitting data, which drains power significantly faster than shooting untethered. In real-world testing, I’ve seen wireless tethering reduce battery life by 40-60% compared to normal shooting, depending on the camera model and transmission frequency.
For shorter portrait sessions or product shoots, you can usually get by with a fully charged battery and a spare on hand. But for extended studio work or commercial shoots, you’ll want to plan ahead. Keep at least two extra batteries nearby, and swap them during natural breaks in the shoot. Some photographers rotate three batteries throughout the day to avoid interruptions.
Consider an AC adapter or battery grip for all-day sessions. Most professional cameras support external power solutions that eliminate battery anxiety entirely. This is particularly important when managing large RAW files that take longer to transmit wirelessly.
If battery life becomes problematic, wired tethering remains the most power-efficient option. The USB connection draws minimal power while maintaining reliable data transfer throughout your shoot.
Range, Obstacles, and Connection Stability
Let’s set realistic expectations: wireless tethering typically works reliably within 15-30 feet indoors, though manufacturer specs often promise more. In real-world shooting scenarios, that range shrinks considerably when obstacles enter the equation.
Physical barriers matter more than you might think. Concrete walls, metal structures, and even crowds of people at events can dramatically weaken your signal. I learned this the hard way during a wedding reception when my connection dropped repeatedly—the venue’s steel support beams were essentially creating dead zones throughout the room. If you’re shooting in challenging environments like warehouses or historic buildings with thick walls, position your computer strategically and consider keeping distances minimal.
Interference from other wireless devices is another common culprit. Conference centers, studios, and event venues often have crowded WiFi networks that can cause dropped frames or sluggish transfers. When possible, use the 5GHz band instead of 2.4GHz to avoid congestion, and consider a dedicated wireless network for tethering rather than sharing your regular WiFi.
For maintaining stable connections, keep your camera’s firmware updated, as manufacturers regularly improve wireless performance. Monitor your battery levels closely—wireless transmission drains power faster than you’d expect. Finally, always have a USB cable as backup for critical shoots where connection stability is non-negotiable.
Making the Switch: Is Wireless Tethering Right for Your Work?
Deciding whether wireless tethering makes sense for your photography business isn’t just about embracing new technology—it’s about understanding your actual shooting needs and whether the investment pays off.
Start by honestly assessing your current workflow pain points. If you’re constantly tripping over cables during client sessions or spending precious time repositioning your laptop for better angles, wireless tethering addresses real problems. However, if you primarily shoot in a controlled studio environment where cables don’t interfere, the upgrade might be solving a problem you don’t have.
Consider the financial equation carefully. A basic wireless tethering setup ranges from around $150 for smartphone-based solutions to $600-plus for professional transmitters. Factor in potential software subscriptions too. For working professionals shooting client sessions regularly, the return on investment often appears within months. Imagine recapturing even one lost client opportunity because wireless freedom allowed you to work more efficiently—that alone could justify the expense.
Your shooting volume matters significantly. Wedding photographers moving between ceremony and reception locations, real estate photographers covering multiple properties daily, or commercial photographers collaborating with art directors across the room all benefit enormously from wireless capabilities. Conversely, hobbyists shooting occasional personal projects might find wired tethering perfectly adequate.
Battery life and backup plans deserve consideration. Wireless systems drain camera batteries faster, so you’ll need spares on hand. Always have a USB cable as backup—wireless technology remains impressively reliable, but having a contingency plan protects client sessions from technical hiccups.
The sweet spot for wireless adoption? Photographers shooting paid client work in varied locations who value mobility and client interaction over their shooting table. If that describes your situation, wireless tethering transitions from luxury to legitimate business tool worth serious consideration.
Wireless tethering and camera-to-cloud technology have matured considerably over the past few years, transforming from experimental features into reliable tools that many photographers now depend on daily. While wired connections still offer the fastest transfer speeds and most stable performance for studio work, wireless options have carved out their own valuable niche—particularly for on-location shoots, event photography, and collaborative workflows where mobility matters.
The current landscape offers something for virtually every budget and skill level. Whether you’re using manufacturer apps like Canon’s Camera Connect or investing in professional solutions like CamRanger, the barrier to entry has never been lower. Cloud integration through platforms such as Imagen AI and SmugMug Pro further extends these capabilities, enabling instant client review and streamlined delivery that would have seemed impossible just a decade ago.
Looking ahead, expect continued improvements in transfer speeds as Wi-Fi 6E and 5G technologies become standard, along with better integration between cameras and editing software. Artificial intelligence will likely play a larger role in automatic culling and organization during the transfer process itself.
Ready to explore wireless tethering with your own gear? Start by checking your camera’s native wireless capabilities in the manual or manufacturer’s website. Download the companion app and experiment with basic image transfer during a casual shoot—no pressure, just exploration. If your camera lacks built-in wireless, research third-party adapters compatible with your specific model. Remember, the goal isn’t to replace every wired setup, but to add flexibility where it genuinely improves your workflow. Take it one step at a time, and you’ll quickly discover which scenarios benefit most from cutting the cord.