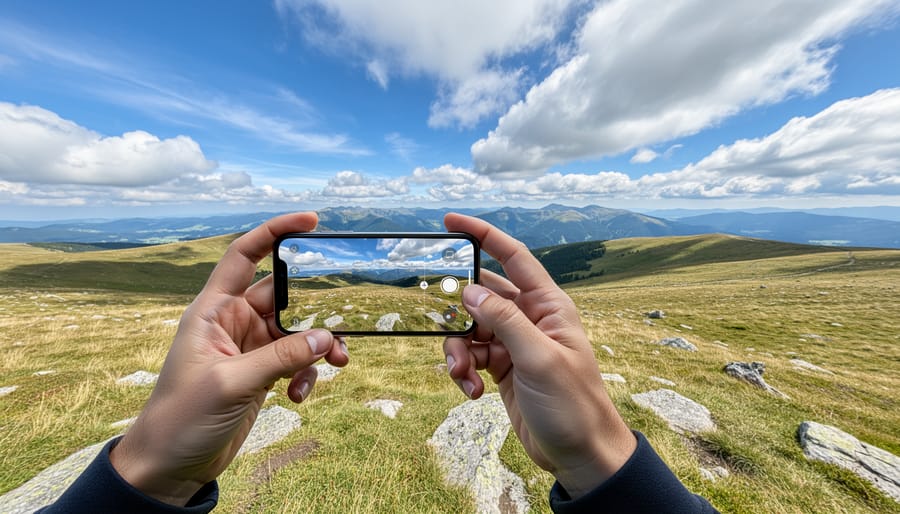
Hold your iPhone vertically, not horizontally, when shooting panoramas. This counterintuitive technique captures more vertical detail in your scene, from foreground to sky, giving you taller, more dramatic final images. Move the camera smoothly in one continuous motion at a steady pace—the iPhone’s software stitches frames together in real-time, and jerky movements or speed variations create visible distortion and alignment errors.
Lock your exposure and focus before you start panning by tapping and holding on your subject until the AE/AF Lock indicator appears. This prevents the camera from adjusting exposure mid-sweep, which creates unsightly light and dark bands across your panorama. For landscapes with bright skies, expose for the highlights to preserve detail where it matters most.
Start your pan from the darker side of the scene and move toward the brighter areas. The iPhone’s panorama mode handles gradual exposure increases more gracefully than sudden decreases, resulting in more balanced final images. Keep the guideline arrow perfectly centered on the horizontal line throughout your sweep—even slight vertical drift compounds across the frame, producing warped horizons and bent buildings.
The iPhone photography capabilities extend far beyond casual snapshots when you understand these fundamental techniques. Your device already contains professional-grade panoramic tools that rival dedicated cameras, requiring only proper technique to unlock their full potential. Master these core principles before investing in accessories or third-party apps—the native camera app delivers exceptional results when used correctly.
Why Your iPhone’s Panoramic Mode Outperforms Entry-Level Cameras
I’ll admit it—when I first compared my iPhone’s panoramas to shots from a friend’s entry-level DSLR with a panoramic head, I expected the dedicated gear to win hands down. But here’s what surprised me: in many real-world situations, my iPhone actually produced better results. Let me explain why.
The secret lies in computational photography. While traditional cameras capture individual frames that you must manually stitch together later, your iPhone does something far more sophisticated. As you sweep across a scene, it’s continuously capturing, analyzing, and blending dozens of exposures in real-time. This isn’t just stitching—it’s intelligent processing that accounts for exposure variations, white balance shifts, and even minor hand movements.
Consider a sunset panorama where one side features bright sky and the other shows shadowed buildings. An entry-level camera captures each frame at a single exposure setting, forcing you to choose between blown-out highlights or blocked shadows. Your iPhone? It automatically blends multiple exposures for each section of the panorama, creating a balanced final image that would otherwise require advanced HDR bracketing and complex post-processing. This is where understanding fundamental panoramic photography techniques becomes valuable—recognizing when your iPhone’s computational power gives you an edge.
The seamless stitching is another game-changer. Traditional panoramic software often struggles with moving elements like swaying trees or walking people, creating ghosting artifacts. The iPhone’s real-time processing and gyroscope integration minimize these issues by intelligently selecting which portions of overlapping frames to use.
Now, don’t misunderstand—your iPhone isn’t superior in every scenario. A high-megapixel camera still wins for massive prints or extreme crops, and manual controls trump automation when you need precise creative control. But for spontaneous panoramas, difficult lighting conditions, or situations where you simply don’t have time to set up a tripod and level a panoramic head, your iPhone’s combination of convenience and computational intelligence makes it genuinely superior to basic panoramic setups.
The best camera, as they say, is the one you have with you—and when that camera can process exposure blending faster than you can say “panoramic mode,” it’s hard to argue against pulling out your iPhone.
Mastering the iPhone Panoramic Sweep: Technique Makes the Difference
The Physics of a Perfect Sweep
Think of capturing a panorama like being a lighthouse—your body should rotate smoothly on a fixed axis rather than swaying or drifting. The most common mistake I see photographers make is trying to sweep their iPhone using only their arms, which creates an arc rather than a straight line. This misalignment is why you often see those telltale stitching errors or wavy horizons in failed panoramas.
The secret lies in engaging your entire body from the hips up. Start by planting your feet shoulder-width apart, with your toes pointing toward where you’ll finish the sweep, not where you’ll begin. Hold your iPhone at a comfortable distance from your body—about eight to twelve inches works well—and keep your elbows slightly bent to absorb any minor vibrations.
As you begin the sweep, rotate from your core and hips while keeping your upper body stable. Your arms should maintain the same position relative to your torso throughout the entire movement. Think of yourself as a rotating tripod rather than a pendulum. This technique ensures the camera travels along a consistent arc at the same distance from the central axis of rotation.
Speed matters too. The iPhone’s panorama mode works best with a steady, moderate pace—roughly three to four seconds per ninety degrees of rotation. Moving too quickly causes the software to struggle with image processing, while moving too slowly increases the chance of environmental changes like moving clouds or people walking through the frame. Practice this rotational technique a few times before capturing your final image, and you’ll notice dramatically improved results.

What to Do When Your Scene Won’t Cooperate
Even experienced photographers face challenging conditions when shooting iPhone panoramas. Here’s how to adapt when things don’t go as planned.
Moving subjects present the most common obstacle. If people are walking through your frame, patience becomes your best tool. Wait for natural breaks in foot traffic, or embrace the chaos. I once photographed a busy harbor boardwalk where waiting for an empty scene was impossible. Instead, I timed my sweep to match the flow of pedestrians, creating an intentional sense of movement. Just avoid having someone positioned at the stitching point where you pan, as this creates visible ghosting or duplicated limbs.
Changing light conditions require quick thinking. During golden hour, light shifts dramatically during your pan. Start your sweep from the brightest area and move toward darker sections. This gives your iPhone’s exposure algorithm a better starting point. If clouds are moving rapidly, causing uneven lighting across your panorama, consider shooting in HDR mode or waiting for more consistent conditions.
Crowded tourist locations demand creative timing. I’ve found that arriving 30 minutes before official opening times or during meal hours dramatically reduces the number of people in frame. When that’s not possible, shoot multiple panoramas. You can later use basic editing apps to manually composite the cleanest sections from each attempt.
Wind is another frequent challenge. Brace yourself against a solid structure or crouch low to minimize camera shake. On particularly blustery days, shoot faster panoramas even if it means sacrificing some resolution. A slightly less detailed image beats an unusable, motion-blurred one.
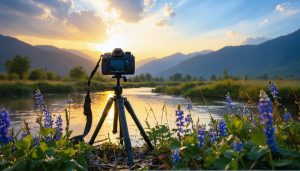
Essential Accessories That Actually Improve iPhone Panoramas
Stabilization Tools: From Budget to Pro-Level
Stabilizing your iPhone during panoramic captures can mean the difference between a professional-looking result and a wonky, misaligned mess. Let’s explore options that won’t break the bank while still delivering solid results.
At the budget end, smartphone tripods like the UBeesize Portable Phone Tripod (around $20) provide excellent value for static panoramas. This lightweight option includes adjustable legs and a Bluetooth remote, perfect for capturing landscapes where you can set up and take your time. I’ve used similar budget tripods on hiking trips, and while they won’t survive hurricane-force winds, they’re surprisingly capable for their price point.
Stepping up to the $50-80 range, the Joby GripTight GorillaPod offers more versatility with its flexible legs that wrap around railings, branches, or uneven surfaces. This becomes invaluable when shooting architectural panoramas in urban environments where traditional tripods can’t reach optimal angles. The magnetic feet option adds another dimension for metal surfaces.
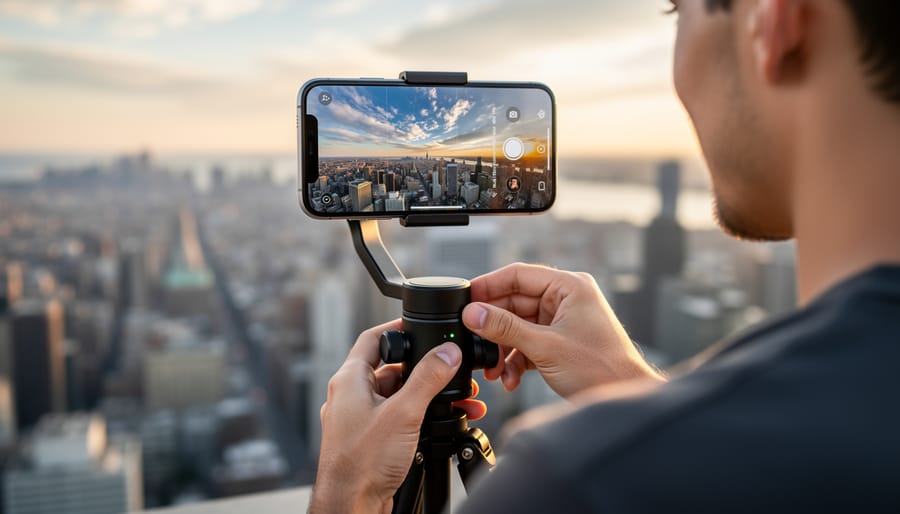
For moving panoramas or time-lapses, mini gimbals enter the conversation. The DJI Osmo Mobile 6 (approximately $130) represents the sweet spot between affordability and features. Its intelligent tracking and smooth motorized movements create cinema-quality panning shots. The built-in panorama mode automates the rotation, ensuring consistent speed throughout your capture.
Pro-level options like the Zhiyun Smooth 5 (around $180) add extended battery life and enhanced payload capacity, though for most iPhone panoramic work, the mid-range options provide everything you need. Remember, even a basic tripod dramatically improves your panoramic success rate by maintaining consistent height and eliminating the slight tilting that inevitably happens with handheld shooting.
When to Add External Lenses (and When to Skip Them)
External lenses for iPhone panoramic photography are a double-edged sword. Clip-on wide-angle lenses might seem like a natural fit for expanding your field of view, but they often introduce significant vignetting and distortion at the edges—exactly where your panorama overlaps stitch together. I tested a popular 0.6x wide-angle attachment on a coastal landscape, and while it captured more scene in each frame, the barrel distortion created wavy horizons that the iPhone’s stitching algorithm couldn’t reconcile smoothly.
Telephoto attachments, however, can be genuinely useful for compressed panoramas. When shooting cityscapes from a distance, a 2x telephoto lens helped me capture architectural details that would’ve been lost in the iPhone’s native wide lens. The key is maintaining consistent rotation—telephoto magnification amplifies even slight tilting errors.
The verdict? Skip external lenses for standard sweeping panoramas where the iPhone’s built-in ultra-wide already excels. Consider them only for specialized situations: telephoto for distant subjects requiring compression, or fisheye for creative 360-degree experiments. Quality matters enormously—cheap lenses with poor coatings create more problems than they solve. Before investing, shoot test panoramas and examine the stitching results at 100% zoom.
Advanced Panoramic Techniques for iPhone Photographers
Vertical Panoramas: Capturing Skyscrapers and Waterfalls
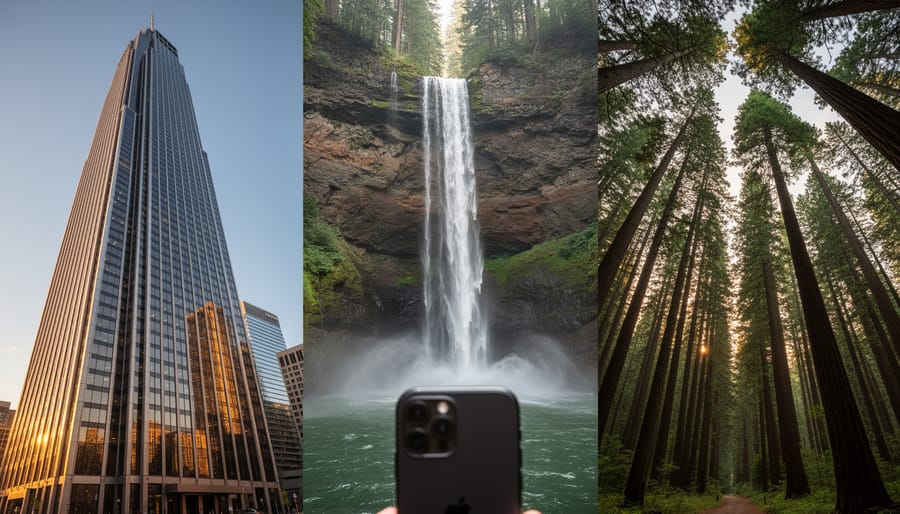
While most iPhone users pan horizontally for panoramas, vertical panoramas unlock a completely different dimension of storytelling. This technique is perfect for tall subjects like sequoia trees, cascading waterfalls, gothic cathedral interiors, or urban skyscrapers stretching into the clouds.
To capture a vertical panorama, open your iPhone’s Camera app and select Pano mode. Here’s the key difference: instead of moving your phone horizontally, you’ll tilt it 90 degrees so the arrow points upward or downward. Start at the bottom of your subject and slowly tilt your phone upward, keeping the yellow arrow aligned with the center line. Move even more deliberately than you would for horizontal panoramas, as vertical movement can be trickier to control smoothly.
The most common mistake is letting your phone drift left or right while tilting. Think of your body as a hinge. Keep your elbows tucked close and pivot from your waist rather than just moving your arms. This creates a more controlled, straight vertical movement.
For waterfalls, start at the base and work upward to maintain foreground context. With skyscrapers, beginning at street level and moving skyward emphasizes their towering height. If you’re photographing redwoods or tall buildings, step back farther than you think necessary to capture the full subject without running out of frame mid-pan. The extra distance helps you maintain better alignment throughout the sweep.
Beyond Apple’s Built-In App: When Third-Party Software Makes Sense
While Apple’s native Camera app delivers impressive panoramic results for everyday shooting, serious panorama work often demands capabilities that go beyond what’s built in. Third-party apps fill this gap by offering manual controls, RAW capture, and sophisticated stitching algorithms that can elevate your iPhone panoramas from good to exceptional.
Microsoft Pix Camera stands out as an excellent starting point for photographers wanting more control without overwhelming complexity. It automatically captures multiple exposures and uses AI-powered stitching to create seamless panoramas with improved dynamic range. The app’s intelligent exposure adjustment works particularly well in mixed lighting conditions, like capturing a sunset over a cityscape where you need detail in both bright skies and shadowed buildings.
For photographers seeking complete manual control, Camera+ 2 delivers professional-grade features including manual focus, exposure compensation, and RAW capture support. This becomes invaluable when shooting high-contrast scenes where you need to preserve highlight and shadow detail for post-processing. I’ve found it particularly useful for architectural panoramas where precise exposure control prevents blown-out windows or murky shadows.
Panorama 360 Camera specializes in creating immersive 360-degree panoramas with impressive ease. Unlike linear panoramas, these spherical captures are perfect for virtual tours, real estate photography, or documenting entire environments. The app’s real-time stitching preview helps you catch alignment issues before completing the capture, saving considerable frustration during post-processing.
For ultimate control over the stitching process itself, consider PTGUI Mobile. While it requires more technical knowledge, this app gives you granular control over control points, blending modes, and perspective correction. It’s the choice when you’re shooting challenging subjects like moving crowds or complex architectural details where automatic stitching might falter. The learning curve pays dividends when you need pixel-perfect results that rival DSLR panoramas.
Editing and Post-Processing Your iPhone Panoramas
Once you’ve captured your iPhone panorama, the real magic happens in post-processing. Even the best in-camera panoramas benefit from thoughtful editing to address common issues and enhance the final image.
Start by addressing the horizon line. iPhone panoramas often end up slightly tilted, especially when shooting handheld. In the native Photos app, simply tap Edit, then the crop tool, and adjust the angle slider until your horizon is level. This seemingly small correction makes an enormous difference in how professional your image appears.
Exposure inconsistencies are the next challenge to tackle. As you pan across a scene, lighting conditions change, sometimes leaving visible bands of varying brightness in your final image. The Photos app’s adjustment tools can help, but for more control, consider Snapseed (free) or Lightroom Mobile. These apps let you apply selective adjustments using gradient filters, evening out bright skies or shadowy foreground areas. In Lightroom Mobile, the Graduated Filter tool is particularly useful for balancing exposure across your wide frame.
Stitching artifacts, those occasional blurred areas or wavy distortions where the iPhone merged frames, require more delicate handling. Sometimes slight cropping eliminates edge artifacts without sacrificing composition. For more stubborn issues, the healing brush in Snapseed or Lightroom Mobile can blend problem areas, though this works best on relatively uniform textures like sky or water.
Color consistency matters too. White balance shifts can occur during your pan, creating noticeable color casts in different sections. Adjust the temperature and tint sliders globally first, then use selective adjustments if one area needs special attention.
When preparing your panorama for output, consider your intended use. For social media, export at reduced resolutions to avoid upload compression issues. Instagram, for example, works best with images under 1080 pixels on the longest edge. For prints or displays where panoramic dimensions really shine, maintain full resolution.
Desktop editing offers additional power. Transfer your panorama to a computer and use Adobe Lightroom or Photoshop for advanced corrections like perspective adjustments, detailed clone stamping, or sophisticated color grading. Lightroom’s Panorama Merge feature can even re-stitch your original frames if you shot using a third-party camera app that saves individual images.
Remember, subtle edits typically work best. Your goal is enhancing what you captured, not fundamentally transforming it.
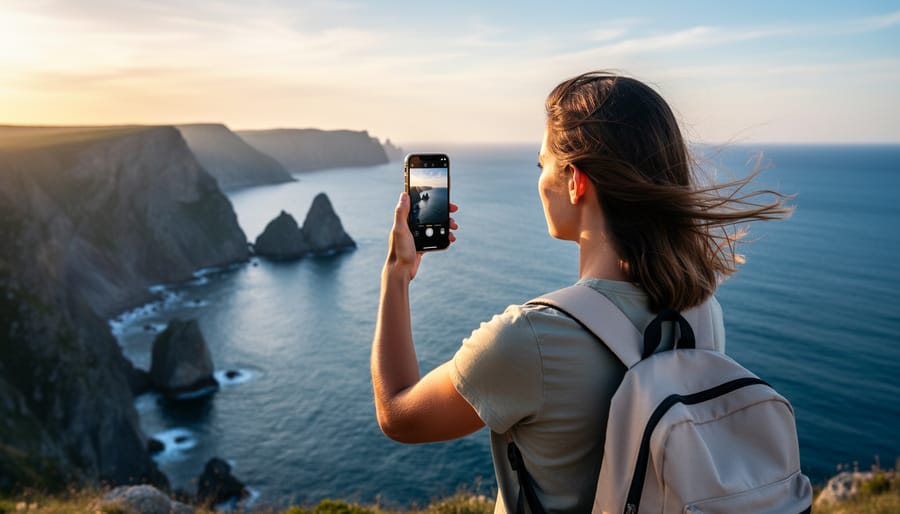
Real-World Scenarios: When to Choose iPhone Over Traditional Panoramic Equipment
Understanding when to reach for your iPhone versus dedicated panoramic equipment comes down to evaluating your specific shooting conditions and priorities. Let’s explore real scenarios where each tool shines.
For travel photography, the iPhone dominates. When hiking through Iceland’s highlands or navigating crowded markets in Marrakech, carrying a motorized panoramic head and tripod becomes impractical. The iPhone’s pano mode captures sweeping vistas in seconds, letting you remain spontaneous and mobile. You’ll get 90 percent of the quality with 10 percent of the hassle—a worthwhile tradeoff when you’re on the move.
Real estate applications present mixed results. For standard property listings, iPhone panoramas work exceptionally well for exterior shots and outdoor spaces. The speed matters when you’re shooting multiple properties daily. However, interior rooms with mixed lighting still favor dedicated equipment or proper wide-angle lenses with manual exposure control. The iPhone struggles with windows blowing out while maintaining detail in darker corners.
In serious landscape photography, traditional equipment maintains advantages. When you’re creating large prints or have time for methodical composition, a DSLR or mirrorless camera with a nodal slide produces superior dynamic range and resolution. The investment makes sense if panoramic work represents a significant portion of your portfolio.
Event coverage favors iPhone’s discretion and speed. Wedding receptions, conferences, and family gatherings don’t allow for elaborate setups. The iPhone captures group shots and venue overviews without drawing attention or disrupting moments.
The honest assessment: choose iPhone when portability, speed, and convenience outweigh absolute technical perfection. Reserve dedicated equipment for controlled environments where you’re creating deliverables requiring maximum resolution and dynamic range. Most photographers find themselves using iPhone panoramas far more frequently simply because it’s always accessible.
Here’s a truth that experienced photographers understand: the best camera for any situation is the one you actually have with you. For most of us, that means our iPhone. You’ve now learned the fundamental techniques, explored creative compositions, and discovered accessories that can elevate your panoramic work. The question isn’t whether your iPhone can capture compelling panoramic images—it absolutely can. The real question is whether you’re willing to practice the techniques we’ve covered.
The panoramic feature in your iPhone represents remarkable engineering, but technology alone won’t create memorable images. What matters is understanding how to move your camera smoothly, how to manage challenging lighting conditions, and how to compose scenes that work in the ultra-wide format. Professional photographers don’t succeed because they always have the latest equipment; they succeed because they’ve mastered their tools through repetition and experimentation.
Start simple. Take that same panorama of your favorite landscape three different times, adjusting your technique each time. Notice what changes. Try the handheld sweep we discussed, then experiment with a gimbal. Shoot during golden hour, then challenge yourself at midday. Each iteration teaches you something new about both the iPhone’s capabilities and your own creative vision.
The techniques you’ve learned today aren’t just applicable to iPhone panoramas—they translate to any panoramic system you might use in the future. But right now, your iPhone is ready. Stop waiting for the perfect conditions or better equipment. Get out there and shoot.