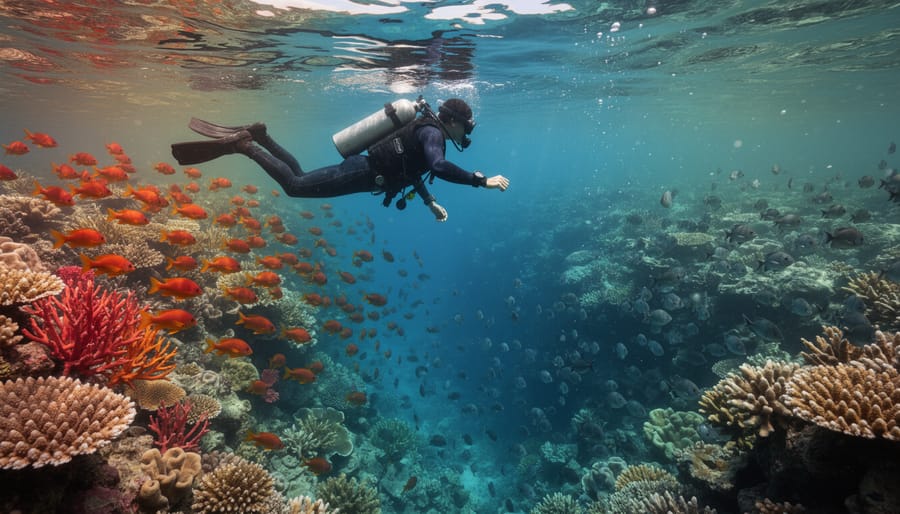
Descend below the surface with your camera in proper housing rated for your maximum diving depth, ensuring all O-rings are cleaned and properly sealed before each dive. Position yourself slightly below your subject and shoot upward whenever possible—this technique captures the magical interplay of natural light filtering through the water column while creating dramatic silhouettes and preventing the common mistake of photographing subjects against monotonous, darker backgrounds.
Shoot in RAW format exclusively and set your white balance to a custom underwater preset or around 5500-6500K, as water absorbs red wavelengths within the first 15 feet of depth, turning everything blue-green. Compensate for this color loss by staying within 3-6 feet of your subject, which dramatically improves color accuracy and sharpness while reducing the amount of suspended particles between your lens and the subject. When natural light isn’t sufficient, add an external strobe positioned at 45 degrees to your subject to restore lost reds and oranges without creating backscatter from illuminated particles.
Master your buoyancy control before focusing on composition—steady positioning in the water column separates amateur ocean shots from professional work. Once you’ve grasped underwater photography basics, the technical challenges of ocean environments become opportunities. Understanding how light behaves underwater, selecting appropriate equipment, and applying specific camera settings transforms murky, blue-tinted snapshots into vibrant, professional images that capture the ocean’s true magnificence.
Understanding Light Behavior in Ocean Water
The Color Absorption Problem
Water acts as a highly selective color filter, progressively absorbing wavelengths of light as you descend. This phenomenon dramatically affects your underwater images, and understanding it is crucial for capturing accurate colors without relying entirely on post-processing.
Red is the first casualty, disappearing almost completely within 15 feet of the surface. This explains why everything takes on that characteristic blue-green cast in shallow water shots. By 25 feet, oranges have largely vanished from the scene. Yellows follow suit around 30-40 feet, leaving you with predominantly blues and greens at recreational diving depths.
Here’s what this means practically: if you’re photographing a vibrant red coral at 20 feet without artificial lighting, it will appear dull brown or gray in your images. That colorful tropical fish? Its reds and oranges won’t register unless you’re shooting very close to the surface or using strobes.
The absorption problem intensifies with horizontal distance too. Even at shallow depths, a subject 10 feet away loses significant color information compared to one just 3 feet from your lens. This is why underwater photographers obsess over getting close to their subjects.
Understanding this color loss helps you make informed decisions about when strobes are absolutely necessary versus when you can work with available light and correct color balance in post-production.
How Visibility Affects Your Shots
Water clarity is perhaps your biggest challenge when shooting underwater. Even in pristine conditions, the ocean contains suspended particles like plankton, sand, and organic matter that scatter light from your strobes or video lights, creating backscatter—those annoying white specks that appear in your images like underwater snowflakes.
Think of backscatter like shooting through fog with your car’s high beams on. The solution is similar: angle your lights away from your camera’s line of sight at roughly 45 degrees. This side-lighting illuminates your subject while directing most of the scattered light away from your lens. Many underwater photographers use strobe arms that extend outward specifically for this purpose.
When visibility drops below 10 feet, adjust your strategy entirely. Get closer to your subject—much closer than feels natural. Wide-angle lenses excel here because they let you fill the frame while staying within a few feet of your subject, minimizing the water column between you and what you’re shooting. This reduces both color loss and particle interference.
In truly murky conditions, consider switching to macro photography instead. Focusing on small subjects like nudibranchs or coral polyps means you’re only shooting through inches of water rather than feet, and the reduced working distance practically eliminates backscatter issues.
Essential Gear Setup for Ocean Photography
Housing and Waterproofing Essentials
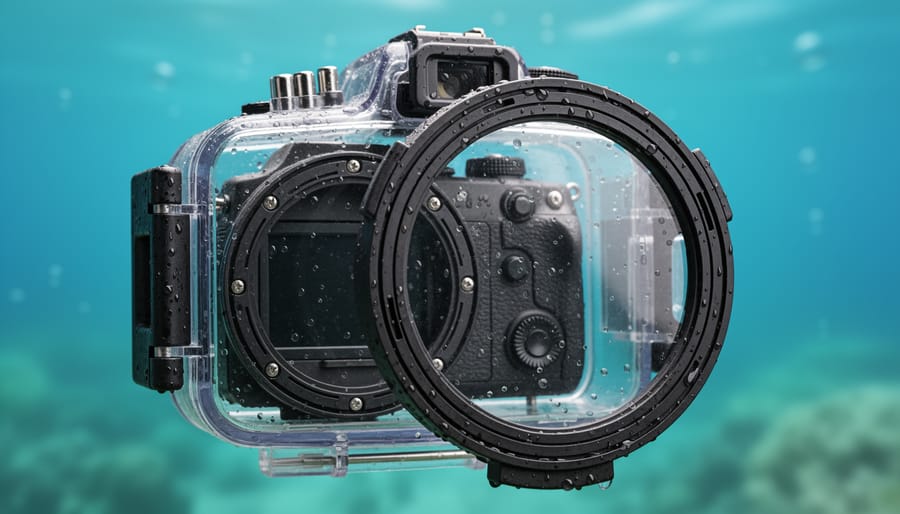
Your camera’s housing is the single most critical piece of equipment in underwater photography—it’s the barrier between expensive electronics and the ocean. I’ve heard too many stories of photographers surfacing to find their camera flooded, and it’s almost always preventable.
Most underwater photographers choose between camera-specific housings (molded for exact models) or universal waterproof cases. Dedicated housings offer better control access and deeper depth ratings, typically 130-300 feet, while universal cases work for budget-conscious shooters staying in shallow water.
The real vulnerability lies in your O-rings—those rubber seals that create watertight barriers. Before every dive, inspect them under good lighting for sand grains, hair, or nicks. Even a single grain of sand can compromise the seal. Clean them gently with a lint-free cloth and apply a thin layer of silicone grease. One photographer friend learned this lesson the hard way when a strand of hair destroyed his housing seal at 40 feet, flooding a $3,000 camera.
Always pressure test your housing before entering saltwater. Seal it without your camera inside, submerge it in fresh water for 30 minutes, then thoroughly dry and inspect for moisture. This simple 30-minute investment can save you thousands in equipment replacement and the heartbreak of losing irreplaceable shots.
Lens Selection for Different Ocean Subjects
Choosing the right lens transforms your underwater shots from snapshots into compelling images. For expansive reef scenes, shipwrecks, and large marine life like sharks or manta rays, wide-angle lenses between 10-20mm are your best friends. They minimize the water column between you and your subject, reducing color loss and particle interference while capturing the grandeur of the underwater landscape. Most professionals rely on fisheye lenses for maximum coverage and dramatic perspectives.
When you’re ready to explore the smaller wonders of the ocean, switching to macro lenses in the 60-100mm range opens up a new world. Nudibranchs, shrimp, and tiny reef fish become frame-filling subjects. If you’re interested in learning more about capturing these miniature marvels, check out our guide on macro photography underwater.
Port selection matters as much as your lens choice. Dome ports correct for refraction and work beautifully with wide-angle lenses, allowing split-level shots and maintaining edge sharpness. Flat ports suit macro work perfectly, though they create a magnifying effect that effectively increases your focal length by about 25 percent. Match your port to your shooting style for optimal results.
Lighting Equipment That Makes the Difference
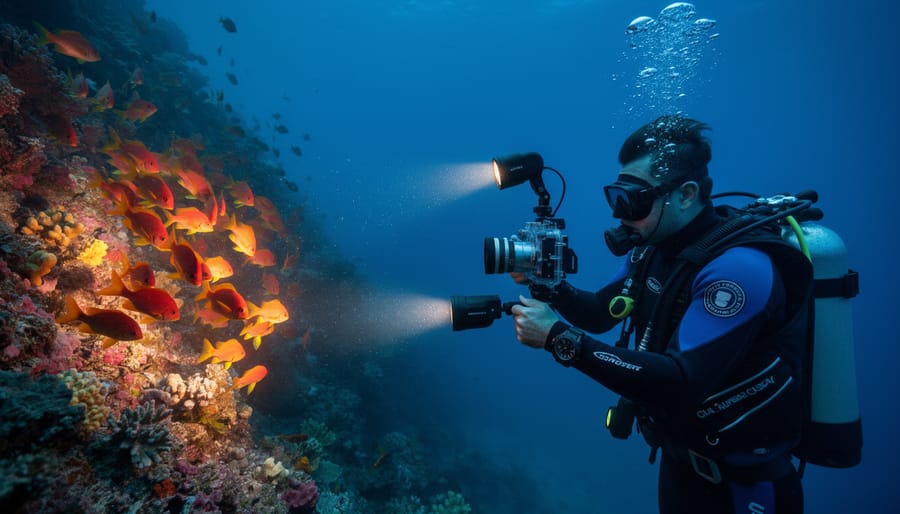
Choosing the right lighting equipment fundamentally changes your underwater images. Water absorbs red and orange wavelengths first, leaving everything blue-green beyond 15 feet deep. Artificial light restores these lost colors, but your choice between strobes and continuous lights depends on your shooting style.
Strobes deliver powerful bursts of light, perfect for freezing motion and illuminating subjects up to 6 feet away. They conserve battery life and won’t disturb marine life between shots. Position them at 45-degree angles from your camera, slightly above and outward, to minimize backscatter from particles in the water. For macro work, bring strobes closer and reduce power to avoid blown-out highlights.
Continuous LED lights work better for video and give you a “what you see is what you get” preview. They’re excellent for exploring caves or night diving, though they drain batteries faster and may attract curious fish or plankton.
Power considerations matter underwater. Start with strobes at half power and adjust based on your results. Shooting in manual mode lets you balance strobe output with ambient light, creating dimension rather than flat, artificially lit scenes. Remember, closer subjects need less power, while wider scenes demand maximum output and careful positioning to achieve even coverage.
Camera Settings for Ocean Environments
Mastering Manual Mode Underwater
Mastering manual mode gives you complete creative control over your underwater images, which is essential because automatic settings often struggle with the ocean’s unique lighting challenges. Let’s break down the exposure triangle for underwater shooting.
Start with ISO. In bright, shallow water (0-30 feet), keep your ISO between 200-400 to minimize noise. As you descend deeper or shoot in overcast conditions, you’ll need to increase it to 800-1600. Modern cameras handle higher ISOs well, but always use the lowest setting that gives you proper exposure.
For aperture, consider your subject and desired depth of field. Macro subjects like nudibranchs work beautifully at f/16-f/22, keeping intricate details sharp throughout. Wide-angle reef scenes shine at f/8-f/11, balancing sharpness with enough light intake. When shooting large subjects like sharks or mantas, f/5.6-f/8 helps separate them from the background while maintaining sufficient sharpness.
Shutter speed needs careful attention underwater. For stationary subjects, 1/125th second works well with strobes. Fast-moving fish require 1/250th or faster to freeze action. Remember, when using strobes, you’re limited by your camera’s sync speed, typically around 1/200th-1/250th second.
Here’s a practical starting point for mid-depth reef photography with strobes: ISO 400, f/11, 1/160th second. Adjust from there based on your results, checking your histogram frequently to avoid blown highlights on light-colored subjects.
White Balance Strategies
Water absorbs red and orange wavelengths first, leaving your images with an unappealing blue-green cast. The solution starts with shooting in RAW format, which gives you maximum flexibility to correct colors during editing without degrading image quality.
For in-camera correction, set a custom white balance before your dive. Submerge your camera with a white slate or dive slate at your typical shooting depth (usually 15-30 feet), fill the frame with the white surface, and use your camera’s custom white balance function. This tells your camera what “white” looks like at that specific depth and lighting condition.
Here’s the reality though: depths change during dives, and so does available light. Custom white balance works best when you’re staying at a consistent depth, like photographing a reef. For varied diving profiles, many experienced underwater photographers shoot with auto white balance and handle corrections in post-processing, where software like Lightroom offers precise control over individual color channels.
A practical middle-ground approach combines both methods. Use custom white balance as your baseline to get reasonably accurate colors straight out of camera, but always shoot RAW so you can fine-tune afterwards. This workflow reduces editing time while maintaining creative control over your final images.
Focus Techniques for Moving Subjects
Capturing fast-moving marine life like dolphins, sharks, or schooling fish requires adapting your autofocus strategy. Start by switching to continuous autofocus mode (AF-C on Nikon, AI Servo on Canon), which tracks subjects as they move through the frame. This mode constantly adjusts focus, essential when a sea turtle suddenly swims toward you or a manta ray glides past.
Consider implementing back-button focus, which separates focus activation from the shutter button. Assign autofocus to a button on your camera’s back panel using your custom function menu. This technique gives you precise control over when to lock focus and when to recompose, particularly useful when shooting in challenging visibility where your camera might hunt for focus.
For predictable subjects like patrolling reef sharks, pre-focusing works brilliantly. Estimate where the animal will swim, manually focus on that spot, then wait for your subject to enter the zone. This eliminates lag time and increases your hit rate dramatically. Use your camera’s focus points strategically, selecting the center point for maximum accuracy or using zone focusing for erratic swimmers. Practice these techniques in controlled environments like aquariums before tackling unpredictable ocean conditions.
Artificial Lighting Techniques
Strobe Positioning and Angles
The classic 45-degree rule serves as your starting point for strobe positioning. Position each strobe at roughly 45 degrees to the side and slightly above your housing, angled inward toward your subject. This configuration creates dimensional lighting that reveals texture and color while minimizing backscatter—those annoying white particles that plague underwater photos.
Backscatter occurs when your strobes illuminate particles between your camera and subject. The solution? Keep your light sources outside the lens’s field of view. Imagine two invisible lines extending from your lens edges—your strobes should sit just beyond these boundaries, lighting your subject without illuminating the water column directly in front of your port.
For wide-angle reef scenes, pull your strobes farther apart and angle them more dramatically outward. This broader spread evenly lights expansive compositions. When shooting macro subjects like nudibranchs, bring one strobe closer and positioned higher to create directional light that emphasizes detail, while using the second as subtle fill to soften shadows.
Practice adjusting your strobe arms before your dive. Different subjects demand different approaches—a school of fish needs centered, straight-ahead lighting to freeze motion, while a portrait of a sea turtle benefits from that classic side lighting to create depth. Start with the 45-degree rule, then experiment based on what you see in your viewfinder.
Balancing Natural and Artificial Light
The key to compelling underwater images lies in seamlessly blending ambient ocean light with artificial strobes or video lights. Without supplemental lighting, your photos will appear predominantly blue-green as water absorbs warm colors within the first 15-20 feet of depth. Strobes restore these lost reds, oranges, and yellows, bringing subjects back to life.
For beginners, TTL (Through The Lens) strobe mode offers a reliable starting point. Your camera communicates with the strobe to automatically adjust power output based on the scene. This works beautifully for quick shots and unpredictable subjects like passing fish. However, TTL can struggle with highly reflective subjects or when shooting through particle-heavy water, sometimes overexposing your image.
Manual strobe control gives you complete creative authority once you understand the fundamentals. Start with your strobes at quarter power, positioned at 45-degree angles from your housing to minimize backscatter. Adjust power based on your aperture choice and subject distance, keeping in mind that strobe light follows the inverse square law—doubling the distance requires four times the power.
The real artistry emerges when you balance strobe intensity with ambient light. Underexpose your background slightly (perhaps half a stop) using shutter speed, then use strobes to properly expose your main subject. This technique creates dimension and prevents that harsh, over-lit appearance that screams “flash photography.” Practice in shallow water where you can experiment freely before tackling deeper, more challenging environments.
Composition Strategies in the Ocean
Working with Depth and Layers
Underwater images often feel flat because water reduces contrast and clarity as distance increases. To combat this, position your subject close to the camera—ideally within three feet—and include foreground elements like coral formations, kelp fronds, or sandy textures. This layering technique creates visual depth by establishing clear spatial relationships between elements.
The water column itself becomes a compositional tool when used intentionally. Particles suspended in the water, called marine snow, can add atmosphere when backlit by your strobe or natural light. Shooting upward toward the surface lets you use light rays penetrating from above as leading lines, drawing the viewer’s eye through multiple depth planes.
Try the “over-under” approach by positioning yourself beneath an interesting subject with the sunlit surface behind it. This silhouettes your subject while the bright background provides separation and context. Alternatively, shoot through natural frames like cave openings or between rock formations to emphasize the three-dimensional environment.
Remember that side lighting enhances texture and dimension better than flat, head-on illumination. Angle your strobes at 45 degrees to your subject rather than pointing them straight ahead, which helps define form and creates shadows that suggest depth in your composition.
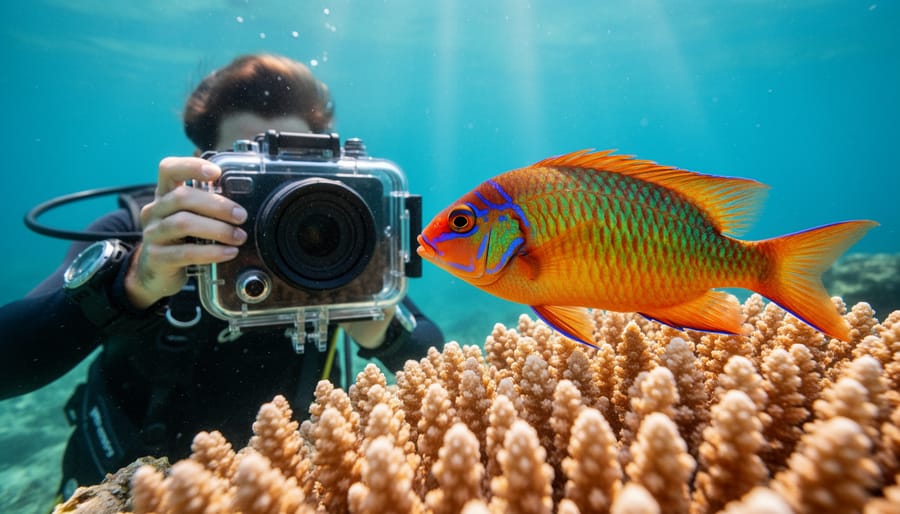
Getting Close: The Underwater Photographer’s Mantra
In underwater photography, there’s a golden rule that separates mediocre shots from stunning images: get close, then get closer. Water isn’t just a medium you’re shooting through—it’s an optical obstacle that degrades image quality with every inch between you and your subject. Even the clearest tropical water contains suspended particles that scatter light, reduce contrast, and filter out colors. This is why a turtle that looks magnificent to your eyes at ten feet away might appear as a washed-out, murky blob in your photograph.
The solution is simple in concept but requires practice and confidence: minimize the distance between your lens and subject. Professional underwater photographers often work within three to five feet of their subjects, and macro shooters get within inches. This proximity dramatically improves sharpness, color saturation, and overall impact.
Approaching skittish marine life requires patience and body control. Move slowly and deliberately, controlling your breathing to avoid excessive bubbles that startle fish. Approach from an angle rather than head-on, and never chase your subject—instead, anticipate their movement and position yourself in their path. Many reef creatures are naturally curious and will approach if you remain still and calm. This technique not only gets you closer but often results in more engaging compositions with subjects displaying natural behavior rather than fleeing in fear.
Managing Common Ocean Photography Challenges
Staying Steady in Current and Surge
Water movement presents one of the most frustrating challenges for underwater photographers, but mastering a few key techniques will dramatically improve your results. Start with proper weighting—you should be neutrally buoyant at your shooting depth, allowing you to hover effortlessly without constantly adjusting your buoyancy compensator. Being slightly negative helps in surge conditions, giving you natural stability against water movement.
Your body position matters more than you might think. Face the current when possible, using it to your advantage rather than fighting against it. Tuck your fins up and maintain a compact profile to reduce drag. In surge zones near reefs or rocks, time your shots between waves—observe the pattern for a few moments before shooting, then capture images during the calmer intervals.
For camera handling, use both hands and keep your elbows tucked close to your body, creating a stable triangle. In strong currents, find natural anchors like rocks or coral rubble (where environmentally appropriate) to stabilize yourself, or use a reef hook in designated areas. Increase your shutter speed to at least 1/250th of a second to freeze motion and compensate for both your movement and the subject’s. Practice controlled breathing—exhale slowly while shooting to minimize your own motion and avoid startling nearby marine life.
Working with Shy or Fast-Moving Subjects
Photographing elusive marine life requires understanding animal behavior as much as camera technique. Spend time observing your subjects before raising your camera—notice their movement patterns, comfort zones, and reactions to your presence. Shy creatures like octopuses or certain fish species often retreat when approached directly, so try positioning yourself along their probable path and waiting for them to enter your frame naturally.
For fast-moving subjects like dolphins or sharks, anticipation becomes your greatest asset. Watch their swimming patterns and pre-focus on areas where they’re likely to pass. Use continuous autofocus modes and burst shooting to increase your chances of capturing sharp images. Keep your movements slow and deliberate underwater—sudden gestures startle marine life and create water disturbance that affects image quality.
Patience pays dividends in underwater photography. Rather than chasing subjects around the reef, maintain a stable position and let curious animals approach you. Many species investigate stationary divers after initial wariness fades. These expert underwater tips apply whether you’re working with timid nudibranchs or energetic sea lions—respect their space and behavior patterns for compelling, natural-looking photographs.
Dealing with Backscatter and Particles
Backscatter, those annoying white spots caused by suspended particles reflecting your flash, is the bane of underwater photographers everywhere. The good news? You can minimize it significantly with proper technique. Start by positioning your strobes at 45-degree angles away from your lens axis, creating cross-lighting that illuminates your subject while leaving particles in shadow. Getting close to your subject is equally important—the less water between you and your subject, the fewer particles in your frame. Think “get close, then get closer” as your mantra.
When backscatter does appear, modern editing software can work wonders. Tools like the spot healing brush in Lightroom or Photoshop make quick work of individual spots. For more extensive particle problems, try using the dehaze slider sparingly to reduce the appearance of suspended matter. Some photographers create a custom brush to selectively reduce highlights where particles cluster. Remember though, prevention beats correction every time. If you’re shooting in particularly murky conditions, consider switching to available light or getting within arm’s reach of your subject to minimize the water column you’re shooting through.
Post-Processing Ocean Images
Color Correction Fundamentals
Water absorbs warm colors rapidly as you descend, leaving your underwater photos with that telltale blue-green cast. Fortunately, restoring natural colors is achievable with targeted post-processing techniques that bring your images back to life.
Start by using adjustment layers in your editing software. These non-destructive tools allow you to experiment without permanently altering your original file. Begin with a simple curves or levels adjustment, focusing on the red and yellow channels. You’ll notice that adding warmth to these channels counteracts the blue-green dominance caused by water filtration.
For more precise control, try selective color correction using masks. Isolate specific areas like a subject’s skin tones or a coral formation, then adjust them independently from the background. This technique prevents overcorrection while maintaining the underwater atmosphere.
The key is restraint. Your goal isn’t to make the image look like it was shot on land, but rather to restore enough color information that viewers can appreciate the scene’s true character. Leave subtle blue tones in the water column and background to preserve that authentic underwater feel. Compare your edited version against the original regularly to ensure you’re enhancing, not overpowering, the natural beauty of the ocean environment.
When to Enhance vs When to Reshoot
Not every underwater image can be rescued in post-processing, and knowing the difference saves valuable dive time. Images with severe motion blur, critical missed focus on your subject, or complete loss of detail in highlights and shadows are generally better left as learning experiences. If your histogram shows clipped data on both ends, enhancement becomes guesswork rather than refinement.
However, images shot in RAW with proper exposure, even if they appear dull or overly blue, typically respond well to color correction and contrast adjustments. A general rule: if you can see detail and definition in your subject, enhancement is worth attempting. If the image looks muddy with no separation between subject and background, or if backscatter dominates the frame, plan a reshoot instead.
Consider your available dive opportunities too. If you’re visiting a unique location once, push those files harder in post-processing and accept minor imperfections. For local dive sites you visit regularly, use mediocre shots as reference points for better camera settings and positioning next time. The decision ultimately balances technical salvageability with the practical reality of returning to that specific underwater scene.
Mastering ocean underwater photography isn’t about having the most expensive camera or diving to the deepest reefs. It all comes down to understanding how light behaves beneath the surface, applying the right techniques for your conditions, and building your skills through consistent practice. The beauty of this craft is that you don’t need to tackle everything at once.
Start with one or two fundamental techniques from what we’ve covered. Maybe that’s getting comfortable with your white balance settings on your next snorkeling trip, or experimenting with natural light in shallow water before investing in strobes. Each dive is an opportunity to refine your approach, test different angles, and develop an intuitive feel for how your camera responds to the underwater environment.
Remember that even professional underwater photographers spent years making mistakes, shooting thousands of mediocre images before consistently capturing stunning shots. The difference between disappointing photos and frame-worthy images often comes down to small adjustments: moving a bit closer to your subject, adjusting your strobe angle by a few degrees, or waiting patiently for that perfect moment when the light and composition align.
The ocean offers endless opportunities to practice and explore. So charge your batteries, check your housing seals, and get out there. Your next great underwater photograph is waiting just below the surface, and now you have the knowledge to capture it beautifully.