Double exposure film photography creates ethereal, layered images by exposing the same frame twice—a technique that transforms ordinary scenes into visual poetry. Unlike digital compositing, this analog method requires intention and technical precision before you even press the shutter. Start by underexposing each shot by one stop; if your meter reads f/8, shoot at f/11 for both exposures to prevent an overly bright, muddy final image. Choose complementary subjects where negative space in one image allows the second exposure to shine through—silhouettes paired with textures, portraits against sky, or architectural details layered with nature.
The beauty of exploring film photography techniques like double exposure lies in the element of surprise. You won’t see your results until development, which cultivates creative instinct and visual planning. Some cameras offer built-in multiple exposure modes that prevent film advance, while manual SLRs require engaging the film rewind button while advancing the film lever—a delicate dance that becomes second nature with practice.
Master this technique and you’ll discover endless creative possibilities: ghostly self-portraits, urban landscapes melded with organic forms, or conceptual narratives told through symbolic image pairing. The imperfections and unpredictability become part of the art, creating one-of-a-kind photographs that exist nowhere else—no files, no layers, just pure analog magic captured on a single frame of film.
What Is Double Exposure in Film Photography?
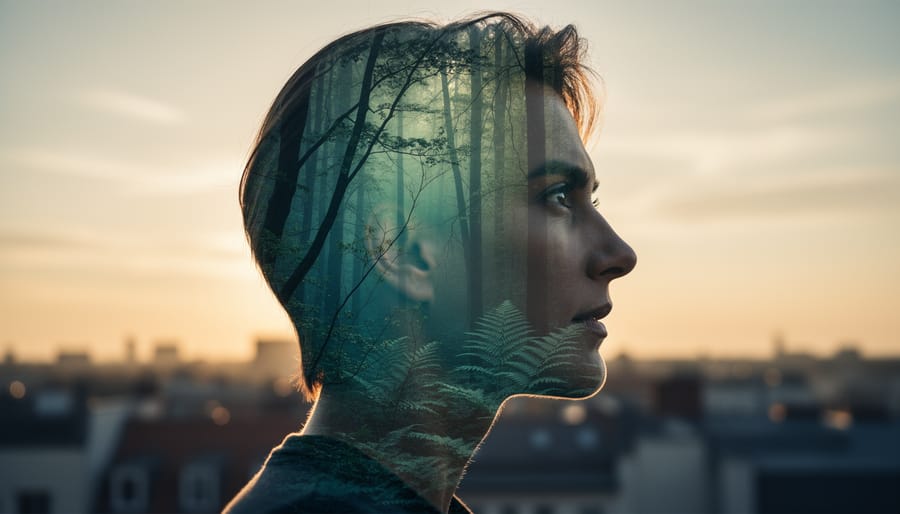
Double exposure in film photography is the art and technique of exposing the same frame of film to light twice, creating a layered image where two separate photographs blend into one. Unlike digital compositing where images are merged after the fact through software, film double exposures happen in-camera at the moment of capture, making each result truly one-of-a-kind.
The science behind it is straightforward but requires a shift in how you think about exposure. When you expose a frame of film the first time, light strikes the film’s emulsion and begins a chemical reaction. Instead of advancing to the next frame, you expose that same piece of film again, adding more light to areas that may have remained darker in the first exposure. The film records both sets of information simultaneously, with lighter areas from one image often appearing transparent enough for the second image to show through.
This is where the magic happens. The unpredictability of how two images will interact creates an aesthetic that digital manipulation struggles to replicate authentically. There’s a dreamy, ethereal quality to film double exposures that comes from the organic way light layers onto the emulsion. You might plan to superimpose a portrait over a forest scene, but the exact way the tree branches frame your subject’s face or how the light filters through becomes a beautiful surprise when you develop your film weeks later.
Film photographers love this technique because it embraces the medium’s inherent spontaneity and imperfection. There’s no undo button, no layers palette to adjust opacity. What you get is what the chemistry gives you, and that element of chance creates images with genuine character and depth. The process demands both technical understanding and creative vision, rewarding photographers who learn to visualize how separate exposures might harmonize before the shutter ever clicks.

Why Film Makes Double Exposure Special
There’s something genuinely magical about creating double exposures on film that digital methods struggle to replicate, even with sophisticated editing software. The fundamental difference lies in the chemical process itself. When you expose film twice, light physically interacts with the silver halide crystals in unique ways, creating organic blends and color interactions that happen naturally rather than through algorithmic processing. This chemical marriage of two images produces subtle gradations, unexpected color shifts, and ethereal overlaps that feel inherently authentic.
The unpredictability factor is both challenging and rewarding. Unlike digital photography where you can preview and adjust immediately, film forces you to commit to your vision without seeing results until development. This limitation might sound frustrating, but it actually sharpens your creative intuition. You learn to pre-visualize how images will interact, considering tonal values, composition, and subject placement more thoughtfully. Many photographers find that these constraints lead to more deliberate, meaningful work.
Film’s latitude, particularly with negative stocks, handles overlapping exposures gracefully. Areas of brightness and shadow merge more forgivingly than digital sensors often allow, creating dreamlike transitions rather than harsh overlays. This is just one of many film photography techniques that yield distinctively analog results.
There’s also an irreversible quality to film double exposures that heightens their value. Each frame represents a singular moment of creative decision-making. You can’t undo or endlessly tweak, which paradoxically removes the anxiety of perfectionism. The happy accidents, light leaks, and imperfect registrations often become the most captivating elements of the final image, reminding us that artistic beauty frequently emerges from embracing uncertainty.
Essential Gear and Film Choices
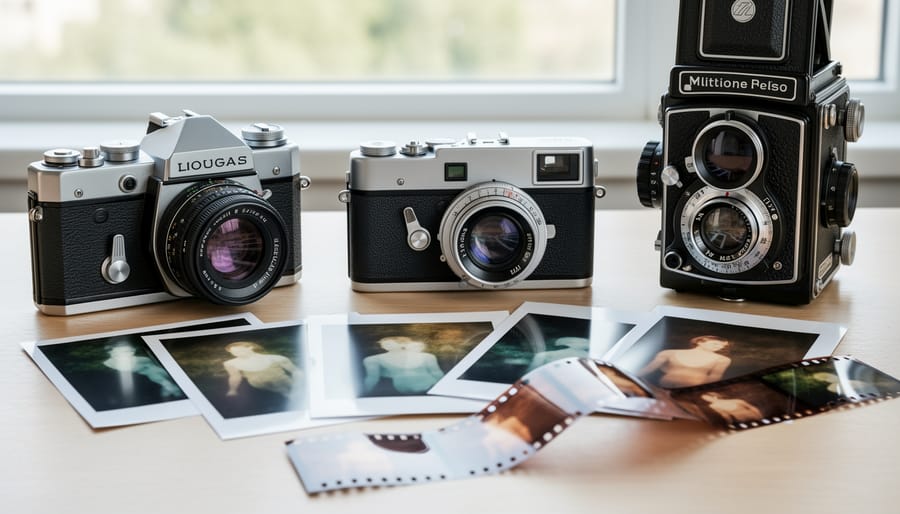
Cameras That Support Double Exposure
Not all film cameras can create double exposures, so knowing what features to look for will save you from frustration and help you make informed purchasing decisions.
The most reliable indicator is a dedicated multiple exposure button or lever, often marked as “ME” or with an overlapping frame icon. This feature temporarily disengages the film advance mechanism, allowing you to cock the shutter without advancing to the next frame. Cameras with this function essentially do the technical work for you, making the process straightforward and repeatable.
Manual wind mechanisms offer another route into double exposure territory. Many cameras without dedicated buttons can still create multiple exposures if you hold down the film rewind button while advancing the film. This method requires a gentle touch and practice, but it’s how countless photographers created double exposures throughout camera innovation history.
For budget-conscious shooters, the Canon AE-1 Program and Nikon FM2 both offer reliable multiple exposure capabilities at reasonable prices on the used market. Mid-range options include the Nikon F3 and Canon EOS-1V, both featuring intuitive multiple exposure controls. At the premium end, the Hasselblad 500 series and Mamiya RZ67 provide medium format possibilities with straightforward double exposure functions.
Fully manual cameras without auto-advance mechanisms, like the Pentax K1000 or any entirely mechanical camera, generally allow double exposures through the rewind button technique. If you’re just starting out, look for cameras with dedicated buttons to build confidence before attempting more finicky manual methods.
Best Film Stocks for Double Exposure
Choosing the right film stock can make or break your double exposure experiments. While you can technically create double exposures on any film, certain characteristics will give you more predictable and pleasing results.
When it comes to film speed, slower emulsions in the ISO 100-400 range work beautifully for double exposures. These films have finer grain and better dynamic range, which means they handle overlapping exposures more gracefully. I’ve found that ISO 400 films like Kodak Portra 400 or Ilford HP5 Plus offer a sweet spot between versatility and quality. They’re forgiving enough to handle slight exposure miscalculations while still delivering sharp, detailed results. If you’re shooting in controlled lighting, ISO 100 films produce stunning clarity, though you’ll need to be more precise with your exposure compensation.
The color versus black and white decision comes down to your artistic vision and complexity tolerance. Black and white film is wonderfully forgiving for beginners because you’re working with a single tonal range. When two images overlap, you’re simply combining light and shadow values. Films like Kodak Tri-X 400 or Ilford FP4 Plus render beautiful, dreamy overlaps where darker areas from one exposure allow details from the second exposure to shine through naturally.
Color film adds another layer of complexity since you’re now blending hues together. Complementary colors can create interesting interactions—imagine blue skies merging with warm portraits—but clashing colors might produce muddy results. Portra and Ektar stocks are popular choices because their balanced color palettes tend to play well together even when overlapped.
Higher contrast films will create more dramatic separations between your exposures, while lower contrast stocks produce softer, more ethereal blends. Consider what mood you’re after before loading your camera.
Mastering the Technical Fundamentals
Understanding Exposure Compensation
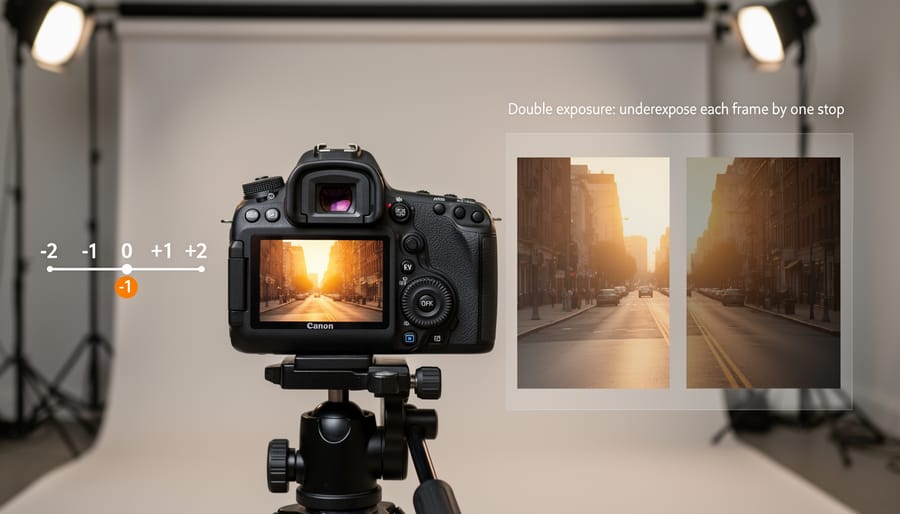
Here’s the fundamental principle that makes or breaks a double exposure: each frame needs to be underexposed, typically by one stop. Think of your film as having a limited capacity to hold light information. When you expose the same frame twice at normal exposure values, you’re essentially trying to pour two full glasses of water into one glass. It overflows, resulting in a washed-out, illegible mess.
By reducing each exposure by one stop, you’re shooting each frame at half the light it would normally receive. When you combine two half-exposures, you end up with one properly exposed final image. This is where understanding exposure becomes crucial to your success.
Let’s say you’re shooting portraits on a sunny day. Your meter reads f/8 at 1/250s for a proper exposure. For your double exposure, you’d adjust to f/11 (one stop down) while keeping your shutter speed constant. If you’re shooting a second frame of clouds, you’d use that same f/11 setting. The result? Both images combine to create a balanced final photograph without blown highlights.
Most manual film cameras require you to adjust your aperture or shutter speed manually for each frame. Some newer models, like certain Nikon and Canon bodies, offer automatic double exposure modes that handle this compensation for you. However, learning to do it manually gives you greater creative control and works with any camera capable of multiple exposures.
Planning Your Shot Combinations
The magic of double exposure lies in thoughtful planning rather than happy accidents. Before you press the shutter button for that first frame, take time to visualize how your two images will interact when layered together.
Start by considering density and negative space. Your first exposure should typically feature areas of darkness or shadow where your second image can appear. Think of a portrait silhouette paired with a forest scene, where the trees will only be visible within the subject’s dark outline. This principle of light and dark interplay is fundamental to successful double exposures.
Composition matters enormously here. Try pairing images with contrasting orientations—a vertical subject in your first frame can beautifully complement horizontal elements in your second. For example, shooting a standing figure first, then rotating your camera to capture a cityscape horizontally creates dynamic tension and visual interest.
Subject matter compatibility requires careful thought too. Some classic combinations work reliably: portraits with nature, architecture with clouds, or textures with solid shapes. The key is ensuring one image provides structure while the other adds detail or atmosphere. A busy scene paired with another busy scene usually results in muddy, confusing results.
Keep a small notebook or use your phone to sketch rough compositions before shooting. Draw simple shapes representing your subjects and imagine how they’ll overlap. This pre-visualization technique, borrowed from legendary film photographers, transforms random experimentation into intentional artistry. Remember, you’re essentially creating a composition across two separate moments in time—that’s the unique challenge and beauty of this technique.
Working with Light and Dark Areas
Understanding how light interacts with film during double exposures is the key to controlling your results. Film captures light cumulatively, meaning each exposure adds density to the negative. Here’s the crucial principle: darker areas from your first exposure have received less light, leaving room for the second image to appear brighter and more prominent in those spaces. Conversely, bright areas from the first shot will remain bright, often overpowering whatever you shoot next.
To leverage this effectively, think strategically about your subject placement. If you photograph a portrait against a white wall first, then shoot clouds second, those clouds will barely register against the bright background. But if you position your subject against a dark backdrop or shoot toward shadows, the second exposure will shine through beautifully around them.
A practical approach is to underexpose each frame by one or two stops, depending on your desired overlap. Shoot your first image at half the metered exposure, then repeat for the second. This prevents overexposure while maintaining detail in both images. Experiment with silhouettes for your first exposure, as these create perfect windows for the second image to inhabit, resulting in those striking double exposures where cityscapes or textures appear within human forms.
Creative Approaches and Composition Techniques
Classic Double Exposure Combinations
The beauty of double exposure lies in how contrasting elements interact, and certain combinations have proven themselves time and again as reliable creative formulas.
Portraits paired with nature scenes remain the most iconic approach. When you overlay someone’s profile with forest branches, the texture of leaves and bark creates an organic frame around facial features. The key is ensuring your subject has distinct edges—side profiles work better than straight-on poses. Photographer Brandon Woelfel frequently demonstrates this technique, overlaying portraits with flowers or foliage to create dreamlike, ethereal results.
Silhouettes with textures offer another foolproof combination. Start with a dark silhouette against a bright sky for your first exposure, then fill that shadowy space with clouds, ocean waves, or architectural details on your second frame. The contrast between the solid black outline and intricate texture creates striking visual tension. This works particularly well when photographing cityscapes—imagine a person’s silhouette filled with the glowing windows of nighttime buildings.
Urban landscapes combined with abstract patterns push into more experimental territory. Try overlaying geometric city grids with swirling bokeh, or combine street scenes with close-up shots of cracked pavement or peeling paint. These unexpected pairings often yield the most unique results.
The common thread across successful combinations is contrast—whether in subject matter, scale, or light values. When one image features bold shapes and the other intricate detail, or when organic forms meet geometric structures, the resulting tension creates images that invite viewers to look closer and discover new relationships between the layered elements.
Advanced Compositional Strategies
Creating harmonious double exposures requires more than just combining two images—it demands thoughtful planning and visual awareness. The most successful double exposures balance contrasting elements: pair busy, detailed scenes with simpler compositions that provide breathing room. For instance, layering a textured forest canopy over a minimalist portrait creates depth without overwhelming the viewer.
Negative space becomes your strongest ally in double exposure work. When shooting your first exposure, identify areas of plain sky, smooth water, or uniform backgrounds. These zones act as receptive canvases for your second image. A silhouetted figure against bright sky, for example, creates a perfect void for cityscapes or botanical details. Think of negative space as intentional emptiness rather than wasted frame area.
Visual weight distribution prevents your compositions from feeling lopsided. Apply the same composition techniques you’d use in single-frame photography—rule of thirds, leading lines, and balanced proportions all matter even more when working with layers. Position your dominant subject in one exposure to complement rather than compete with elements in the second frame.
Building narrative through double exposure transforms technique into storytelling. Consider thematic connections between your layers: portraits overlaid with childhood locations suggest memory, while combining urban architecture with natural elements can comment on environmental themes. Shoot with intention, asking yourself what relationship exists between your two subjects.
Start each double exposure session with a clear concept. Pre-visualize how your images will interact before pressing the shutter. This mental planning distinguishes random experimentation from purposeful art-making. Remember, the strongest double exposures communicate ideas that neither single image could express alone, creating visual poetry through deliberate layering.

Common Mistakes and How to Avoid Them
Even experienced photographers stumble when starting with double exposures, but recognizing these common pitfalls will save you both film and frustration.
Overexposure ranks as the most frequent mistake. When you combine two images without adjusting your exposure compensation, you’re essentially layering two normally-exposed frames, resulting in a washed-out, nearly white image. The solution is straightforward: underexpose each frame by one to two stops. If your camera lacks a built-in compensation dial, simply increase your shutter speed or close down your aperture. Remember, it’s easier to brighten a slightly dark double exposure in scanning than to rescue blown highlights.
Mismatched compositions create chaotic, unreadable results. I’ve seen countless attempts where every part of the frame contains competing elements with no breathing room. The fix involves planning negative space into at least one of your exposures. If your first frame shows a detailed portrait, your second should include areas of sky, blank walls, or simplified backgrounds where that portrait can shine through clearly. Think of it as a puzzle where pieces need to fit together rather than fight for attention.
Lack of contrast between elements makes your images muddy. When both exposures feature similar tones and busy details, they blend into an indistinguishable mess. Deliberately pair high-contrast subjects: silhouettes work beautifully with textured scenes, bright skies complement darker architectural elements, and backlit subjects create natural transparency for layering.
Not keeping notes might seem minor, but it becomes critical when you’re shooting multiple double exposures in one session. Without records, you’ll forget which frames you’ve already exposed and what subjects you paired together. Carry a small notebook or use your phone to jot down frame numbers and basic composition details. This simple habit transforms random experiments into intentional artistic practice, letting you replicate successful combinations and learn from less effective ones.
Practical Workflow Tips
Success with double exposures often comes down to organization and smart planning in the field. Let’s talk about practical systems that will save you from the frustration of forgetting what you’ve shot.
Your most valuable tool is a simple notebook or your phone’s notes app. After shooting your first exposure, immediately record the frame number, subject matter, and lighting conditions. For example: “Frame 12: bright sky with tree silhouette, f/16.” This takes ten seconds but becomes invaluable when planning your second exposure days or even weeks later. Some photographers photograph their notebook with a digital camera to create a backup reference.
The debate about timing is important: should you shoot both exposures immediately or return to locations later? Each approach has merit. Shooting both exposures in quick succession keeps the vision fresh and eliminates the risk of forgetting your plan. However, returning to different locations opens creative possibilities that wouldn’t exist otherwise. A practical middle ground is to shoot some frames as complete pairs while leaving others with just the first exposure, giving yourself flexibility.
Bracketing becomes your safety net when you’re still developing your intuition. Instead of shooting just one double exposure combination, shoot three versions of your second exposure at different density levels. This might mean varying your aperture by one stop in each direction or changing your distance to the subject. Yes, you’ll use more film, but you’ll learn much faster by seeing how slight variations affect the final result.
Keep your rewound film rolls in a separate labeled container. Mark them clearly as “DE – first exposure only” so you never accidentally reload one thinking it’s fresh film. This simple organizational habit prevents the heartbreak of accidentally creating triple or quadruple exposures you never intended.
Double exposure photography is one of those beautiful accidents-turned-intentional-techniques that reminds us why film remains so magical. Yes, there’s definitely a learning curve. Your first few attempts might not turn out as you envisioned, and that’s completely okay. In fact, those unexpected results often teach you more than the successes. You’ll learn to see the world differently, mentally layering scenes as you walk through your day, imagining how that tree might blend with a portrait, or how city lights could dance across a silhouette.
The beauty of this technique is that it grows with you. Start simple with high-contrast subjects against clear skies, then gradually experiment with more complex combinations as your confidence builds. Keep notes in a small journal about your exposures, subjects, and frame numbers. This documentation becomes invaluable as you develop your own style and approach.
Remember, double exposure is just one exciting chapter in the broader story of film photography. It connects you to decades of photographers who’ve pushed creative boundaries with nothing but chemistry, light, and imagination. Every roll of film is an opportunity to discover something new about your vision and technical skills.
So load up that camera, find your first two subjects, and take the shot. The worst that happens? You learn something. The best? You create something uniquely yours that couldn’t exist any other way. Your double exposure journey starts with a single frame.