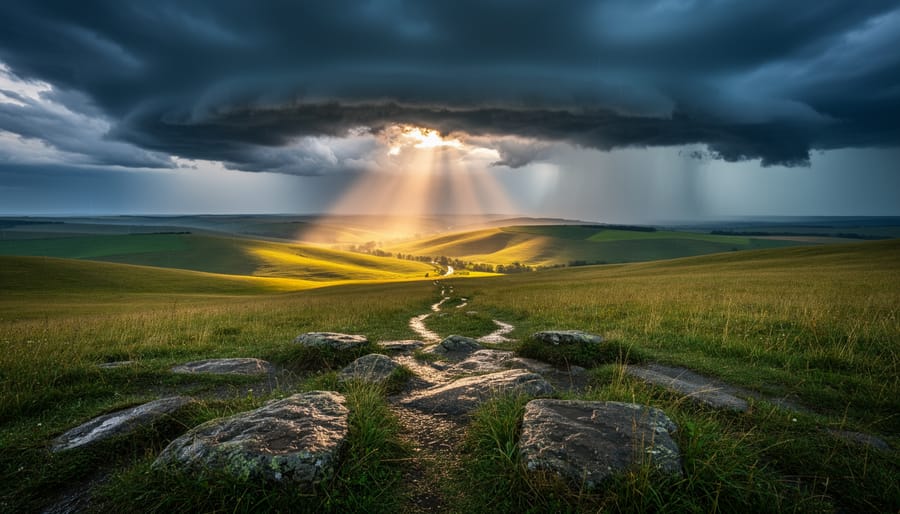
Shoot during weather transitions when dramatic clouds, fog, or clearing storms create atmospheric conditions that typical golden-hour photographers miss entirely. Most landscape shooters pack up when conditions deteriorate, but these moments—heavy overcast breaking into shafts of light, morning mist clinging to valleys, or post-storm clarity—produce images with genuine emotional weight that stand apart from the oversaturated sunset portfolios flooding social media.
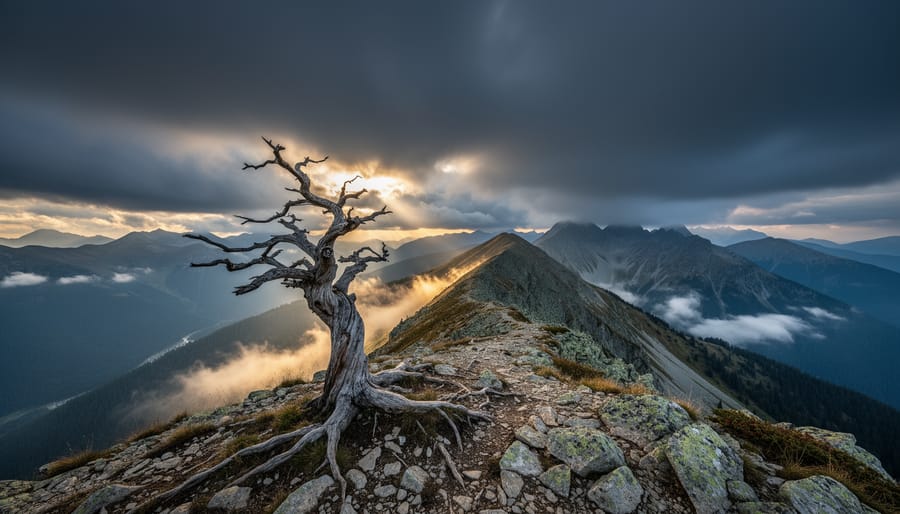
Break conventional composition rules by placing horizons at extreme positions, incorporating substantial negative space, or deliberately including “imperfect” elements like dead trees or weathered structures that tell environmental stories. The rule of thirds produces competent images, but photographers who understand when to violate these guidelines create tension and visual interest that holds viewer attention longer than technically correct but predictable frames.
Master focus stacking and exposure blending in-camera rather than relying solely on post-processing fixes, giving you complete control over depth of field and dynamic range that single exposures cannot capture. This technical approach lets you maintain sharpness from immediate foreground elements through distant peaks while preserving natural light transitions, creating images that feel both hyper-real and authentic rather than obviously manipulated.
Scout locations during off-seasons and unfavorable conditions when access restrictions ease and you’ll discover perspectives that peak-season visitors never see. Winter reveals geological structures hidden by summer vegetation, drought exposes lakebeds and riverbanks, and shoulder seasons offer solitude for patient experimentation without crowds forcing you into the same tired vantage points that define every location’s visual clichés.
Why Most Landscape Photos Look the Same (And How Yours Can Be Different)
The Instagram Effect: Breaking Free from Viral Locations
We’ve all seen them—the impossibly crowded viewpoints where dozens of tripods battle for position at sunrise, all capturing essentially the same composition. Social media has created what I call “viral location syndrome,” where certain landscapes get photographed to death while equally stunning locations remain virtually undiscovered.
Take Horseshoe Bend in Arizona. Ten years ago, it was a hidden gem. Today, it sees over two million visitors annually, all shooting from the same railed overlook. But photographer Michael Shainblum discovered something interesting: by hiking downstream just half a mile during midday (when most photographers are gone), he found entirely fresh perspectives featuring desert vegetation in the foreground and dramatic side-lighting that transforms the scene.
The lesson here isn’t to avoid popular locations entirely—it’s about timing and exploration. Crater Lake in Oregon is another example. While everyone camps at Rim Village for the classic reflection shot, walking the less-traveled eastern trails reveals lava formations and wildflower meadows that frame the lake differently.
Consider the story of landscape photographer Jennifer Renwick, who visited Iceland’s Diamond Beach expecting to capture the typical telephoto shots of ice chunks on black sand. Instead, she arrived during an extreme low tide, waded into shallow water, and captured wide-angle perspectives through translucent ice formations—images that looked nothing like the thousands of Diamond Beach photos flooding Instagram.
The key is asking yourself: what hasn’t been done here? Sometimes uniqueness means arriving when others won’t. Sometimes it means walking further. And sometimes it simply means turning your camera 180 degrees from where everyone else is pointing.
Your Personal Vision Matters More Than Your Gear
Here’s the truth that gear manufacturers don’t want you to hear: your unique perspective matters infinitely more than the camera hanging around your neck. I’ve seen photographers create stunning, one-of-a-kind landscape images with entry-level DSLRs while others with top-tier equipment produce forgettable shots that look like everything else flooding social media feeds.
The difference comes down to vision. When you’re standing at a viewpoint surrounded by other photographers, they’re likely all capturing the same angle, same composition, same light. Your job is to ask yourself what you see differently. Maybe it’s a reflection in a puddle that others stepped over, or an unusual foreground element everyone else ignored. Perhaps it’s returning at a time when no one else bothers to show up.
Stop chasing the iconic shots you’ve seen a thousand times and start trusting your instincts. Your experiences, emotions, and way of seeing the world are unique to you. That’s your greatest asset as a landscape photographer. Modern cameras, even smartphones, have remarkable technical capabilities. What they lack is your creative eye and willingness to experiment with unconventional approaches. Focus on developing that, and your images will naturally stand apart from the crowd.
Timing and Light: Beyond the Golden Hour
Storm Light and Dramatic Weather
Dramatic weather transforms ordinary landscapes into extraordinary photographs that captivate viewers with their raw energy and atmosphere. While shooting in challenging conditions requires preparation and caution, the payoff can be truly remarkable images that stand apart from fair-weather photography.
Safety should always come first. Monitor weather forecasts closely, bring appropriate protective gear for both yourself and your equipment, and never put yourself in genuine danger for a photograph. Rain covers, lens cloths, and plastic bags can protect your camera during light precipitation, while weather-sealed bodies and lenses offer additional security in harsher conditions.
Storm light—that brief window when sunlight breaks through storm clouds—creates stunning contrast and dramatic color temperatures. Position yourself so breaking storms move away from you rather than approaching, giving you that magical moment when golden light illuminates the landscape against dark, brooding skies. This technique works beautifully in coastal environments where you can watch weather systems move across the ocean.
Fog and mist add mystery and depth to landscapes by simplifying scenes and creating natural layers. Coastal areas, valleys, and mountain regions often produce morning fog that reveals landscape elements gradually, building visual interest through obscured backgrounds. These conditions naturally emphasize foreground subjects and create ethereal, painterly qualities impossible to achieve in clear weather.
Lightning photography requires patience and specific techniques—use a sturdy tripod, longer exposures during twilight hours, and consider lightning triggers for daylight storms.
Blue Hour and Night Photography
The magic between sunset and darkness offers extraordinary opportunities for creating distinctive landscape images. Blue hour—that brief window roughly 20-40 minutes after sunset or before sunrise—bathes scenes in rich, deep blues that create moody, atmospheric photographs you simply can’t capture at other times.
Start with your camera mounted on a sturdy tripod, since you’ll need longer exposures as light fades. Begin with ISO 400-800 to minimize noise while maintaining reasonable shutter speeds. As darkness deepens, switch to manual mode and experiment with exposures between 15-30 seconds at f/8-f/11. These settings give you sharp foregrounds while capturing ambient light beautifully.
Include artificial light sources in your compositions—city lights, lighthouses, or illuminated buildings add compelling contrast against darkening skies. A wide-angle lens (16-35mm) helps capture expansive scenes, while a cable release prevents camera shake during long exposures.
For advanced night photography techniques, consider adding foreground interest with light painting using a small flashlight during your exposure. Scout locations during daylight to identify compositions and potential hazards—navigating unfamiliar terrain in darkness presents real challenges.
Bring extra batteries since cold temperatures drain them quickly, and pack a headlamp with a red filter to preserve your night vision while adjusting settings.
Midday Magic: Working with Harsh Light
Midday light gets a bad reputation, but it’s actually your secret weapon for unique landscapes. When shadows become hard-edged and contrast peaks, you can create dramatic images that feel completely different from the typical golden hour fare.
Start by embracing silhouettes and graphically strong compositions. Position trees, rock formations, or architectural elements against bright skies to create bold, shape-focused images. The harsh overhead light simplifies scenes into pure form, which works beautifully for minimalist compositions.
Look for translucent subjects that glow when backlit. Think autumn leaves, thin ice formations, or wildflower petals—subjects that transform into luminous color when the sun shines through them. I once photographed a field of tall grasses at noon, and the backlit seedheads created an ethereal quality impossible to achieve in softer light.
Water bodies become your allies during midday. The high sun angle penetrates shallow water, revealing underwater details, patterns in sand, and colorful stones that disappear in low-angle light. Desert landscapes also shine at midday, when the intense light emphasizes texture in sand dunes and rock faces.
Don’t fight the contrast—use it intentionally. Expose for highlights to create moody, high-contrast images with deep shadows that add mystery rather than detail.
Composition Techniques That Create Visual Interest
Foreground Elements That Tell a Story
The right foreground element transforms a flat landscape into a three-dimensional story. Think of it as your visual anchor—the element that invites viewers into the frame and guides their eye toward the background.
Rocks are perhaps the most versatile foreground subjects. A weathered boulder in the corner of your frame instantly adds scale and texture. When scouting, look for stones with interesting character—moss coverage, unique coloring, or dramatic shapes. Position yourself low, sometimes just inches above ground level, to emphasize their presence without overwhelming the scene.
Water elements create compelling foregrounds through reflection and movement. Tide pools, puddles after rain, or flowing streams can mirror your sky or distant mountains. I’ve captured some of my most distinctive shots by positioning a small pool of water in the immediate foreground, creating a natural frame-within-a-frame effect.
Plants and vegetation work beautifully for seasonal storytelling. Wildflowers in spring, golden grasses in autumn, or frost-covered branches in winter immediately establish context and time. The key is selectivity—choose specimens that complement rather than compete with your background.
When scouting, walk your location slowly at shooting height. What looks insignificant from standing position often becomes dramatic when viewed through your viewfinder from a lower angle. Move around potential foreground elements, testing different distances and angles. Sometimes shifting just two feet left or right makes the difference between cluttered and compelling.
Unexpected Perspectives and Focal Lengths
Your choice of perspective and focal length can transform an ordinary landscape into something extraordinary. While wide-angle lenses are standard for landscape work, telephoto lenses for landscapes offer something different—they compress distance, stack elements, and isolate compelling details within vast scenes. A 200mm lens aimed at layered mountain ridges creates a dramatic stacking effect that wide angles simply can’t achieve.
Don’t forget to change your shooting height. Getting low, even lying on the ground, places foreground elements like wildflowers or textured rocks at eye level, creating immediate depth and intimacy. Conversely, elevated perspectives from hills, buildings, or even a step ladder reveal patterns and relationships invisible from standing height.
Consider incorporating abstract elements within your landscapes. Focus on the curves of sand dunes, the geometric patterns of cracked earth, or the interplay of shadow and light on canyon walls. These approaches blur the line between traditional landscape photography and fine art, creating images that intrigue viewers and invite longer contemplation. The key is experimenting beyond the expected eye-level, wide-angle approach that dominates landscape photography.
Negative Space and Minimalism
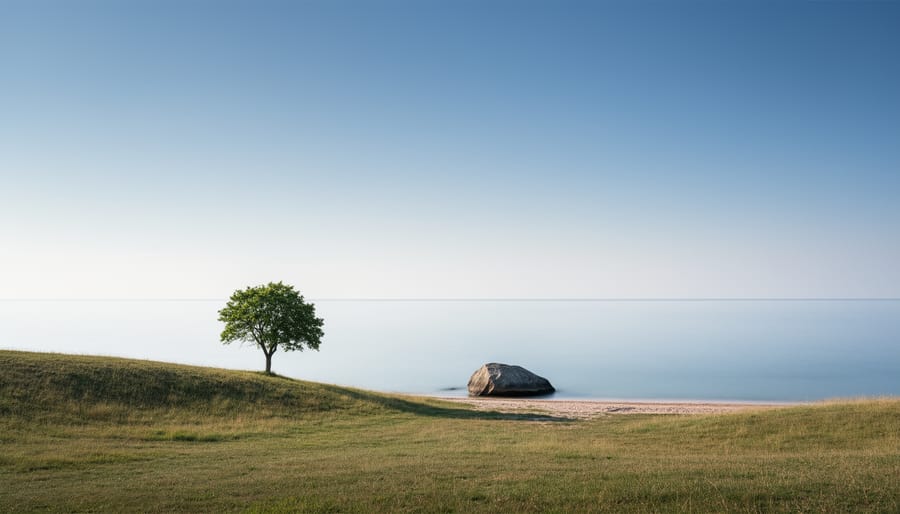
Sometimes the most powerful landscapes are the ones that leave things out. When you strip away distractions and embrace negative space, you force viewers to focus on what truly matters in your frame. This approach to minimalist photography can transform ordinary scenes into striking, unique images.
Consider a lone tree on a snow-covered hillside with nothing but white space surrounding it. The emptiness becomes as important as the subject itself, creating a sense of scale, isolation, or tranquility. Icelandic photographer’s work often demonstrates this beautifully—vast expanses of black sand with a single rock formation, or fog-shrouded mountains where the mist becomes the dominant element.
To execute this effectively, use wide apertures or telephoto lenses to isolate subjects, and don’t be afraid of large areas of sky, water, or uniform terrain. A useful rule: if an element doesn’t strengthen your story, exclude it. This might mean waiting for clouds to clear, repositioning to eliminate busy backgrounds, or shooting in conditions that naturally simplify scenes—fog, snow, or twilight.
The result? Images that breathe, invite contemplation, and stand apart from cluttered, overstuffed compositions.
Camera Settings and Techniques for Distinctive Results
Long Exposure for Movement and Mood
Long exposure transforms ordinary landscapes into ethereal scenes that capture the passage of time in a single frame. The technique is surprisingly accessible once you understand the fundamentals.
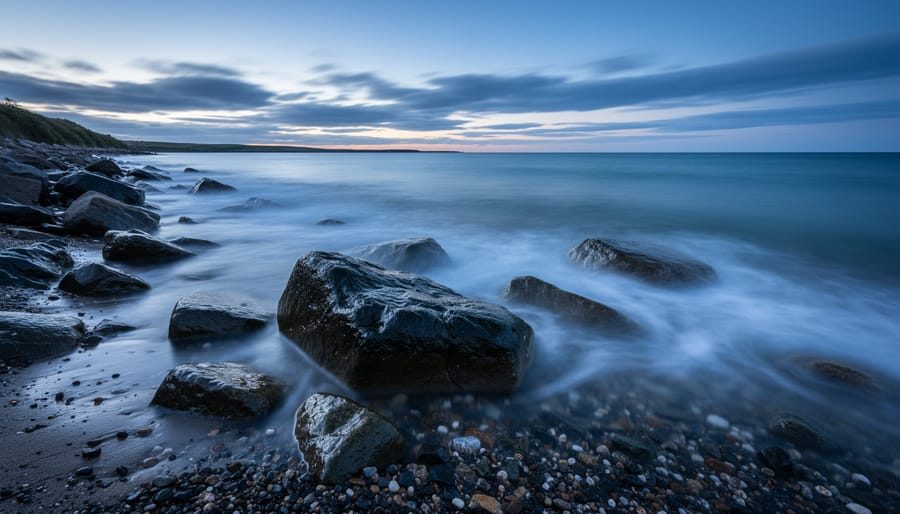
Start with a neutral density (ND) filter, which acts like sunglasses for your lens, blocking light so you can use slower shutter speeds even in bright conditions. A 6-stop or 10-stop ND filter gives you the flexibility to shoot in various lighting situations. For dramatic cloud streaks, try exposures between 30 seconds and 2 minutes. Water takes on that silky, dreamy quality at around 1-5 seconds, while longer exposures of 30 seconds or more create mirror-like surfaces.
Here’s a practical starting point: set your camera to aperture priority at f/11, attach your ND filter, and let the camera calculate the shutter speed. Use a sturdy tripod and remote release to eliminate any vibration. Keep your ISO at its base setting, typically 100, for maximum image quality.
Real-world applications bring this technique to life. Coastal scenes benefit from 2-4 second exposures that blur wave action while maintaining texture in the foam. Moving clouds during golden hour become painted brushstrokes across the sky with 60-90 second exposures. Even subtle elements like swaying grass or tree branches add motion and energy to otherwise static compositions when captured over 10-20 seconds.
Focus Stacking for Otherworldly Sharpness
Focus stacking transforms how we capture landscape images by combining multiple photos taken at different focus distances into a single frame with front-to-back sharpness that’s physically impossible with one exposure. This technique is particularly valuable when shooting scenes with strong foreground elements—think wildflowers mere inches from your lens alongside a distant mountain range.
Here’s how it works: mount your camera on a sturdy tripod and take a series of shots, adjusting your focus point slightly between each frame. Start with your nearest subject in focus, then gradually move the focus plane deeper into the scene until you’ve covered the entire depth range. Most scenes require 3-10 images, though macro-style landscape work might need more.
Modern software like Photoshop or Helicon Focus analyzes these images and intelligently blends the sharpest areas from each frame. The result? An image where everything from that textured rock at your feet to the peak on the horizon appears tack-sharp—something even stopping down to f/16 can’t achieve due to diffraction.
This technique shines during blue hour when longer exposures at smaller apertures become problematic, or when you want maximum sharpness without the image-softening effects of extreme f-stops. The otherworldly clarity creates genuinely unique images that immediately stand out from typical landscape photographs.
Intentional Camera Movement and Multiple Exposures
Intentional camera movement (ICM) and multiple exposures transform ordinary landscapes into painterly abstractions that stand distinctly apart from conventional photography. These techniques work best when the scene contains strong color contrasts, bold lines, or interesting light patterns—think autumn forests, coastal scenes at dusk, or wildflower meadows.
For ICM, use shutter speeds between 1/4 and 2 seconds while deliberately moving your camera during exposure. Vertical panning works beautifully in forests, creating streaked tree trunks, while horizontal movements suit horizons and seascapes. The key is controlled, smooth motion rather than random shaking.
Multiple exposures shine when combining different focal points or times of day in a single frame. Modern cameras let you preview exposures before committing, making experimentation easier. Try overlaying a sharp foreground with a blurred canopy, or merge sunrise colors with twilight silhouettes.
These approaches demand patience and produce many failures before success, but when they work, the results are unmistakably unique. Start with high-contrast scenes and embrace the unpredictability—some happy accidents become your strongest images.
Finding Your Unique Locations and Subjects
Research Tools Beyond Google
Finding truly unique locations requires going beyond a simple Google search. Start with topographic maps—apps like Gaia GPS and CalTopo reveal terrain features like ridgelines, valleys, and water sources that might not be obvious from roads. I’ve discovered countless hidden waterfalls and viewpoints by studying contour lines during my evening planning sessions.
Satellite imagery through Google Earth Pro offers a bird’s-eye perspective that helps identify interesting patterns, isolated rock formations, or meandering rivers worth investigating. Toggle between different time periods to see seasonal changes and assess accessibility.
Local knowledge remains invaluable. Strike up conversations with park rangers, outdoor gear shop employees, and hiking club members. They often know about lesser-traveled trails and optimal viewing times that never appear online. I once learned about a spectacular desert slot canyon from a coffee shop owner that had zero online presence.
Scouting apps like PhotoPills and The Photographer’s Ephemeris help you preview how light will interact with potential locations before you arrive. These tools calculate sun and moon positions, golden hour timing, and shadow patterns—saving you wasted trips and helping you plan return visits when conditions align perfectly with your creative vision.
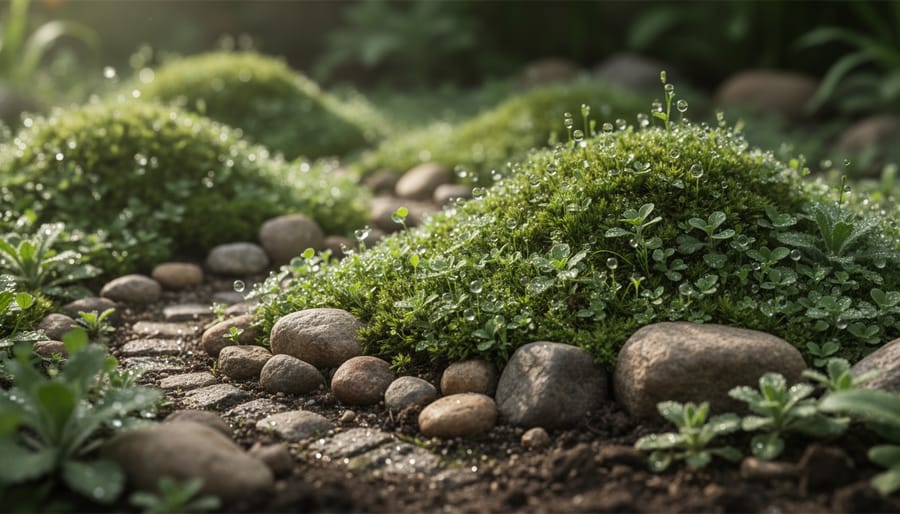
Micro-Landscapes in Your Backyard
You don’t need to travel to Iceland or Patagonia to capture extraordinary landscapes. Your own backyard holds countless opportunities for unique images if you train your eye to see them differently. The key is shifting your perspective from grand vistas to intimate scenes that most people overlook.
Start by exploring your yard during different times of day and weather conditions. That patch of moss after rain becomes a miniature forest when photographed at ground level. Frost patterns on fallen leaves transform into abstract art. A puddle reflecting bare tree branches creates a moody, inverted landscape. These micro-landscapes offer the same dramatic potential as sweeping mountain ranges, just at a different scale.
Applying macro photography techniques helps reveal hidden details in ordinary subjects. Get low, use a shallow depth of field to isolate your subject, and pay attention to lighting. Side-lighting from early morning or late afternoon sun adds dimension to textures you’d otherwise miss.
The advantage of shooting close to home is experimentation without pressure. You can revisit the same spot repeatedly, refining your approach until you capture something truly distinctive. That familiarity breeds creativity rather than contempt.
Post-Processing for a Signature Style
Developing Consistent Color Grading
Your editing style is as distinctive as your fingerprint, and developing consistency here will make your landscapes instantly recognizable. Start by analyzing images you’ve naturally gravitated toward editing a certain way—look for patterns in your color temperature, contrast levels, and saturation preferences. Maybe you’re drawn to cooler blues in shadows or warmer golden highlights.
Create a simple reference document with specific adjustment values that define your style. For instance, photographer Michael Shainblum is known for his vibrant, punchy colors with lifted shadows, while others like Ted Gore maintain a more muted, film-like palette. Choose one approach that resonates with you rather than chasing trends.
The key to maintaining a natural feel while staying distinctive is restraint. Pick two or three signature adjustments—perhaps you always add a subtle split-tone with warm highlights and cool shadows, or you consistently pull back saturation in greens while boosting blues. These small, repeated choices build recognition without screaming “over-processed.”
Test your consistency by viewing ten of your recent images side by side. They should feel cohesive even if they’re from different locations. If one looks drastically different, ask yourself whether that serves the image or breaks your visual brand.
Selective Adjustments That Guide the Eye
Your camera captures everything equally, but your eyes don’t work that way. When you stood at that viewpoint, your attention naturally gravitated to specific elements—perhaps the way morning light kissed a distant peak or how shadows carved definition into rolling hills. Selective adjustments help recreate that visual hierarchy in your final image.
Dodging and burning, techniques borrowed from the darkroom era, remain powerful tools for guiding viewer attention. Subtly brightening your main subject while gently darkening less important areas creates a natural flow through the frame. For example, if you’ve captured a winding river leading to mountains, carefully brightening the water’s highlights while burning the edges pulls eyes along your intended path.
Local adjustments take this further. Use graduated filters to balance an overly bright sky without flattening the entire scene. Apply radial filters to add gentle vignetting that keeps attention centered. Adjustment brushes let you enhance specific elements—warming sunlit rocks while cooling shadowed areas creates depth and dimension.
The key is subtlety. Your adjustments should feel invisible, enhancing rather than overpowering your unique composition. Think of yourself as a conductor, orchestrating where viewers look first, second, and third throughout your landscape.
Creating truly unique landscape photographs isn’t about owning the most expensive camera or knowing every technical specification by heart. It’s about developing your personal vision and having the courage to execute it, even when it means breaking away from conventional approaches.
The photographers whose work consistently stands out aren’t necessarily the ones with the best gear—they’re the ones who see differently. They’re willing to wait for unusual light, experiment with perspectives that feel uncomfortable, or deliberately underexpose a scene because their creative instinct tells them it’s right. This kind of intentionality separates memorable images from forgettable ones.
Think of your camera as a tool for translating your unique perspective, not as the source of creativity itself. A photographer who understands composition, light, and storytelling will create compelling images with modest equipment, while someone relying solely on technical specifications will produce technically perfect but emotionally empty photographs.
The path to developing your distinctive style requires practice, lots of failed experiments, and the willingness to take creative risks. Shoot the same location in ways others haven’t considered. Combine techniques that conventional wisdom says don’t belong together. Study work that inspires you, but resist the urge to replicate it exactly.
Your most unique landscapes will emerge when you stop asking “how do other photographers shoot this?” and start asking “what do I want to say about this place?” Trust your creative instincts, embrace the learning process, and remember that every photographer whose work you admire started exactly where you are now—with curiosity and a willingness to try something different.