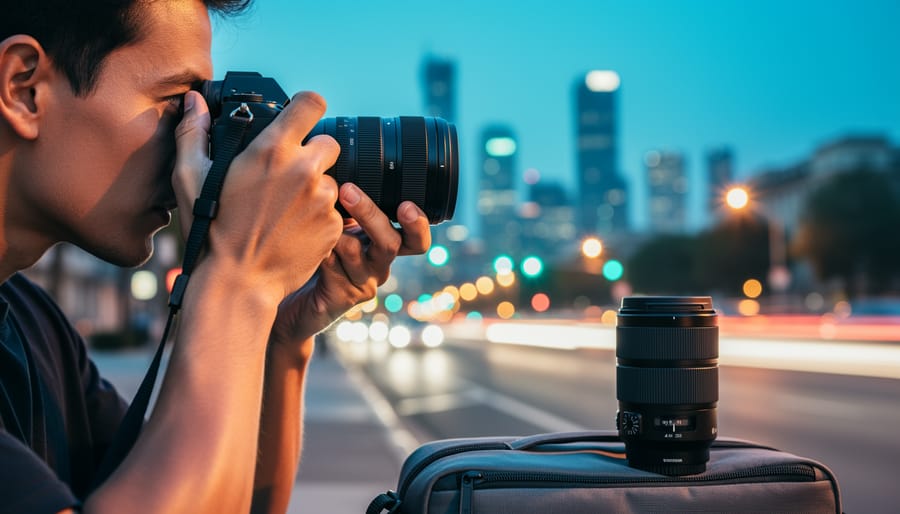
In-Body Image Stabilization (IBIS) has transformed handheld photography, letting you shoot at shutter speeds that would have been impossible just a decade ago. This sensor-shift technology compensates for camera shake by physically moving your camera’s sensor in the opposite direction of detected movement, typically delivering 3 to 8 stops of stabilization depending on your camera model and shooting conditions.
Understanding how IBIS performs on your specific camera body matters more than manufacturer claims. A camera advertised with 5-stop stabilization might deliver 7 stops when you’re using proper technique with a wide-angle lens, but only 3 stops with a telephoto in windy conditions. Real-world performance varies dramatically based on focal length, your shooting stance, breathing rhythm, and even your caffeine intake that morning.
Testing your IBIS effectiveness gives you confidence to push boundaries in low-light situations. The traditional “reciprocal rule” suggested using a shutter speed of 1/focal length—shooting a 50mm lens meant using at least 1/50th of a second. With IBIS, that same 50mm lens might remain sharp at 1/6th or even 1/3rd of a second, opening creative possibilities for handheld long exposures, available light portraits, and documentary work where tripods aren’t practical.
This guide walks you through systematic testing methods to measure your camera’s actual stabilization performance, explains the math behind handheld shutter speed calculations, and compares IBIS with lens-based optical stabilization so you’ll know exactly when to trust your hands over a tripod.
What Is IBIS and How Does It Work?
The Sensor on Springs: IBIS Mechanics Explained
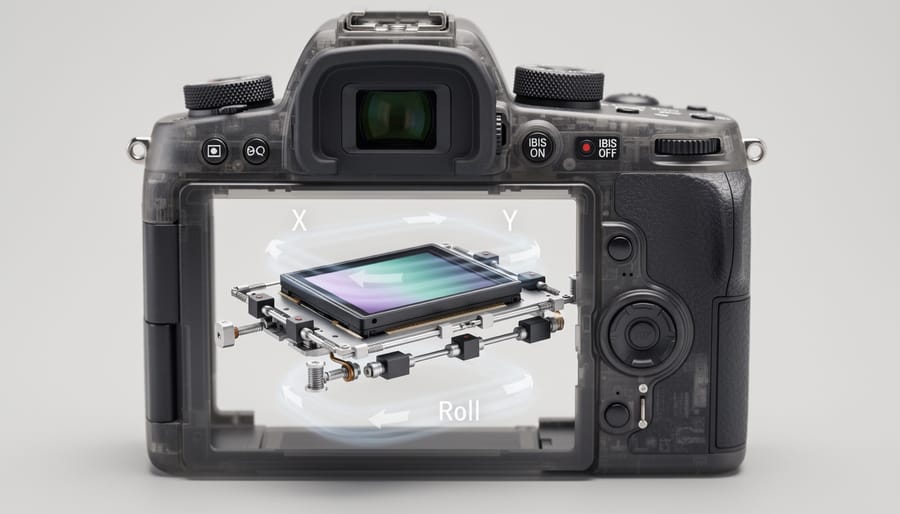
Think of IBIS as a sophisticated dance between sensing and movement. At its heart, the system relies on gyroscopic sensors that detect the slightest camera shake in multiple directions—up and down, side to side, and even rotation. These sensors are incredibly sensitive, monitoring your movements thousands of times per second.
When you press the shutter button, here’s what happens: the gyroscopic sensors immediately detect any unwanted movement. They send this information to a processing unit that calculates exactly how much the camera is shaking and in which direction. This is where the magic begins.
The image sensor itself sits on a platform suspended by electromagnetic actuators, which you can think of as tiny, precise motors. Based on the shake data, these actuators move the sensor in the opposite direction of your hand movement at the exact same speed. If your hand shifts up, the sensor shifts down. If you sway left, it moves right. This countermovement happens so quickly that the light hitting the sensor remains steady, even though the camera body is moving.
The result? Sharp images that would otherwise be blurry. For real-world context, imagine photographing your child’s birthday party in dim lighting at 1/30th of a second. Without IBIS, that photo would likely be a blurry mess. With IBIS compensating for your natural hand tremor, you’ll capture that candlelit moment with impressive clarity. The system typically provides anywhere from 3 to 8 stops of stabilization, depending on your camera model and shooting conditions.
IBIS Effectiveness: What Those ‘Stop’ Ratings Really Mean
When camera manufacturers tout “5-stop” or “7-stop” IBIS, they’re telling you how much slower you can shoot handheld compared to the traditional handheld rule. Here’s what that actually means for your photography.
The classic handheld rule suggests using a shutter speed of at least 1/focal length. So with a 50mm lens, you’d need 1/50s minimum. A 5-stop IBIS system theoretically lets you shoot 5 stops slower—that’s 1/1.6s instead of 1/50s. That’s the difference between needing a tripod and shooting handheld in dim light.
In practice, you’ll notice the biggest difference in real-world situations. A 3-stop system helps significantly for casual handheld video or low-light street photography. With 5-stop stabilization, you can confidently shoot handheld during blue hour or in dimly lit interiors without boosting ISO dramatically. The latest 7-stop and 8-stop systems feel almost magical—you can capture surprisingly sharp images in near-darkness at shutter speeds you’d never attempt otherwise.
However, these ratings assume ideal conditions and proper shooting technique. Your actual results depend on factors like focal length, how steady your hands are, and whether your subject is moving. A 7-stop rating won’t freeze a running child, but it will absolutely transform your landscape photography at dusk.
IBIS vs OIS: Understanding the Key Differences
Why Some Lenses Have OIS (And Why It Matters)
While IBIS moves the camera’s sensor to counteract shake, Optical Image Stabilization (OIS) takes a different approach by moving lens elements instead. Think of it this way: IBIS stabilizes at the body level, while OIS stabilizes before light even reaches the sensor.
OIS shines particularly with telephoto lenses. When you’re shooting at 300mm or beyond, even the tiniest hand tremor becomes magnified dramatically in your frame. Lens-based stabilization can be engineered specifically for that focal length’s characteristics, making it incredibly effective at taming those exaggerated movements. Many wildlife and sports photographers swear by OIS telephoto lenses because they provide a stable viewfinder image, making it easier to track moving subjects and compose your shot precisely.
Here’s a practical advantage you’ll notice immediately: with OIS, what you see through the optical viewfinder is already stabilized. This makes manual focusing and composition significantly easier, especially when following action. IBIS, on the other hand, only stabilizes the final image capture.
The real magic happens when you combine both systems. Many modern cameras can use IBIS and OIS together, creating what manufacturers call “dual stabilization” or “sync IS.” In real-world testing, photographers often report gaining 6 to 7 stops of stabilization with this combination, compared to 3-5 stops with either system alone. This means you could potentially handhold a shot at 1/15 second that would normally require 1/500 second for sharp results.
However, not all lenses need OIS. Wide-angle lenses benefit less from optical stabilization since camera shake is naturally less noticeable at shorter focal lengths.
The Best of Both Worlds: Dual IS Systems
Here’s where things get really interesting. Some modern cameras don’t make you choose between IBIS and OIS—they use both simultaneously in what’s called dual stabilization or synchro IS. This combination delivers the strongest stabilization available, often reaching 7 to 8 stops of correction.
The technology works by having the camera body and lens communicate to coordinate their stabilization efforts. The IBIS system typically handles slower, larger movements like swaying while standing, while OIS tackles faster, smaller vibrations like hand tremor. By working together rather than fighting each other, they achieve results neither could manage alone.
Panasonic pioneered this approach with their Dual IS system, pairing IBIS-equipped bodies with stabilized lenses. Olympus and OM System followed with their Sync IS, which is particularly impressive given their Micro Four Thirds sensor advantage. Sony’s recent full-frame cameras also support coordinated stabilization when paired with compatible lenses, as do Canon’s EOS R bodies with certain RF lenses.
In real-world shooting, dual IS systems let you handhold shots at shutter speeds that would typically require a tripod. Night photography, long telephoto work, and video recording all benefit tremendously from this combined approach, giving you maximum creative flexibility.
When IBIS Beats OIS (And Vice Versa)
IBIS shines brightest when you’re shooting handheld video, especially while walking or moving. The sensor-shift technology smooths out micro-movements beautifully, giving you gimbal-like stability without the extra gear. I’ve found IBIS particularly valuable for macro photography too—at high magnifications, even your heartbeat can cause blur, and IBIS compensates for these tiny vibrations better than lens-based stabilization.
OIS takes the lead with telephoto lenses, especially beyond 200mm. Since the stabilization happens closer to the front element, it can correct for the amplified movement that occurs at longer focal lengths more effectively. When shooting fast action or tracking moving subjects through your viewfinder, OIS provides a steadier preview, making it easier to follow your subject and nail focus.
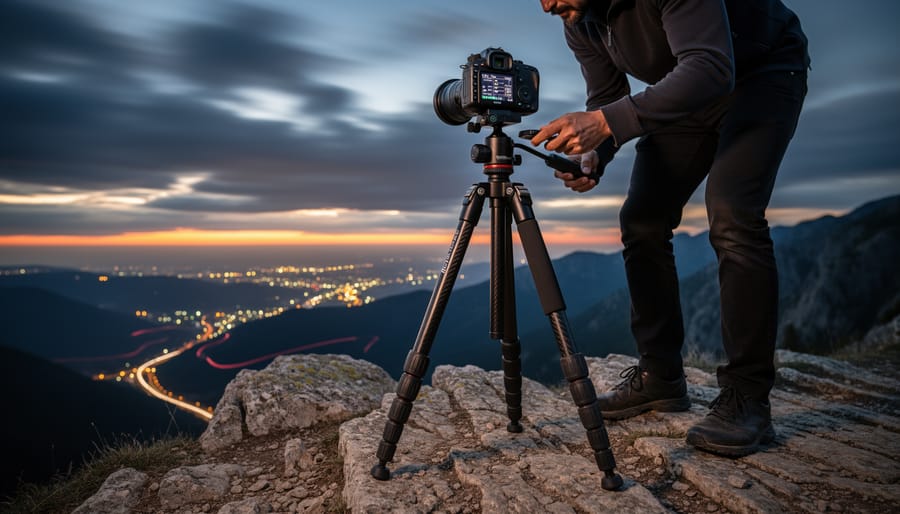
For long exposures on a tripod, ideally you’d disable both systems to prevent the stabilization mechanism from introducing unwanted movement. However, if you’re shooting handheld exposures around 1/4 to 1 second—think low-light street photography—IBIS often delivers better results since it works across multiple axes simultaneously, compensating for the complex hand movements that occur during longer exposures.
Testing Your Camera’s IBIS Performance
The Simple Wall Test: Finding Your Camera’s Real-World Limits
Want to know exactly how well your camera’s IBIS performs? Forget the manufacturer’s claims—let’s run a simple test that reveals your system’s true capabilities. This wall test has become the go-to method for photographers worldwide, and you can complete it in about ten minutes.
Find a textured surface like a brick wall, painted concrete, or even wallpaper with visible patterns. Position yourself perpendicular to the wall, about 6-10 feet away. Switch your camera to manual mode and set your ISO to a moderate level (around 800-1600 works well in most lighting). The goal is to maintain consistent lighting throughout your test while allowing shutter speeds slow enough to challenge your IBIS.
Start at your lens’s focal length—if you’re shooting with a 50mm lens, begin at 1/50th of a second. Take three shots at this speed with IBIS enabled, trying to handhold as you normally would. Don’t brace yourself against anything or use special breathing techniques yet. Now slow down to 1/25th, then 1/13th, 1/6th, and finally 1/3rd of a second. Take three shots at each speed.
Here’s where it gets interesting. Repeat the entire sequence with IBIS turned off. This side-by-side comparison reveals exactly how many stops of stabilization you’re actually getting. Just like testing your camera for other performance characteristics, reviewing these images at 100% magnification on your computer shows the truth.
Check for sharp edges on the texture—that’s your indicator. Most photographers discover their IBIS sweet spot falls between 2-4 stops of real-world stabilization, though this varies with focal length. Repeat this test at different focal lengths to build your personal IBIS performance chart.

What to Look For: Evaluating Your Test Results
Once you’ve completed your test shots, it’s time to evaluate the results. Start by reviewing your images at 100% magnification on your computer rather than on your camera’s LCD screen, where critical details can be deceiving.
Focus on sharpness in the center and corners of your frame. A truly sharp image will show crisp edges on high-contrast areas like tree branches against sky or text on signs. If you notice motion blur that creates a double-edge effect, that’s a sign IBIS couldn’t compensate for your movement at that particular shutter speed.
Rather than expecting every single shot to be perfectly sharp, pay attention to your hit rate, which is the percentage of usable images from your series. For example, if seven out of ten shots at 1/15 second look sharp, that’s a 70% hit rate. Professional photographers often consider anything above 60% acceptable for handheld work, though this depends on your specific needs. A wedding photographer might need higher reliability than someone shooting landscapes with unlimited time for retakes.
Compare hit rates across different shutter speeds to identify your personal threshold. You might find that 1/30 second gives you 90% keepers while 1/8 second drops to 30%. Understanding these numbers helps you make confident decisions when shooting in challenging lighting conditions.
Testing Variables That Impact Your Results
IBIS performance isn’t just about your camera’s specifications—your technique and environment play crucial roles. Your shooting stance matters significantly. A stable, feet-shoulder-width-apart position with elbows tucked provides the foundation IBIS needs to work effectively. Try comparing shots while standing relaxed versus braced against a wall to see the difference.
Breathing technique dramatically affects results. The classic tip applies here: exhale gently and shoot during the natural pause before inhaling. This minimizes body movement that even advanced IBIS struggles to compensate for. Practice shooting at the end of your exhale versus mid-breath to witness the impact.
Environmental factors create variables too. Wind can introduce vibration that challenges stabilization systems. Temperature extremes affect both your steadiness and mechanical performance. When you test your gear, replicate real-world conditions you typically shoot in—indoor lighting, outdoor breezes, or cold weather scenarios. This ensures your baseline shutter speed calculations reflect actual performance, not idealized lab conditions. Understanding these variables helps you compensate and achieve consistently sharp handheld images.
The Handheld Shutter Speed Calculator: Your New Best Friend
The Reciprocal Rule: Where It All Starts
Before we dive into the magic of IBIS, let’s establish the foundation that photographers have relied on for decades: the reciprocal rule. This time-tested guideline suggests that your minimum handheld shutter speed should be 1 over your focal length. Shooting with a 50mm lens? Keep your shutter speed at 1/50s or faster. Using a 200mm telephoto? You’ll want at least 1/200s to avoid camera shake.
The math changes slightly when you’re working with crop sensor cameras. A Canon APS-C body with a 1.6x crop factor turns that 50mm lens into an effective 80mm field of view, meaning you should aim for 1/80s minimum. This is where understanding shutter speed limitations becomes crucial for different shooting scenarios.
Why does this rule still matter in the age of advanced stabilization? Because it gives us a baseline for measuring IBIS effectiveness. If you can consistently get sharp shots at 1/10s with that 50mm lens when the reciprocal rule says you need 1/50s, you’re seeing real stabilization gains. Think of the reciprocal rule as your control group in a scientific experiment. Without knowing where you’d normally fail, you can’t truly appreciate how much IBIS is helping you succeed. It’s the starting point that makes everything else measurable and meaningful.
Adding IBIS to the Equation
Here’s the practical part: translating your camera’s IBIS rating into actual shutter speed benefits. Most manufacturers rate their stabilization in “stops” of compensation. If your camera boasts 5-stop IBIS, you can theoretically slow your shutter speed by five stops beyond the traditional 1/focal length rule and still maintain sharp images.
Let’s walk through some real-world examples. Say you’re shooting with a 50mm lens on a camera with 5-stop IBIS. The old-school rule suggests using 1/50s minimum, but with IBIS, you can calculate your new handheld limit. Five stops slower than 1/50s gives you: 1/25s (one stop), 1/13s (two stops), 1/6s (three stops), 1/3s (four stops), and approximately 1/1.6s (five stops). That’s a massive difference when shooting in dim conditions.
For a 100mm lens on the same camera, you’d start at 1/100s and calculate downward. With 5-stop compensation, you could theoretically handhold at around 1/3s. However, there’s an important caveat: manufacturer ratings represent ideal conditions. In practice, you’ll want to build in a safety margin.
A good rule of thumb is to use about 70-80 percent of the rated compensation for consistent results. So with that 5-stop system, plan for 3.5 to 4 stops of real-world stabilization. At 100mm, this means targeting 1/6s to 1/13s rather than pushing all the way to 1/3s. This conservative approach accounts for variables like fatigue, shooting position, and subject movement.
Real-World Calculator: Making It Work for You
Let’s walk through some practical examples to demystify those IBIS ratings you see on spec sheets.
Starting with a 24mm lens on a camera with 5-stop IBIS: The traditional 1/focal length rule suggests 1/24 second as your baseline. With 5 stops of stabilization, you can theoretically drop your shutter speed by five clicks. That means 1/12, 1/6, 1/3, and even 1/1.5 second becomes feasible. In real-world shooting, you might feel comfortable around 1/3 second for static subjects, though your mileage will vary based on technique.
Moving to a 50mm lens with the same 5-stop system: Your baseline shifts to 1/50 second. Adding those five stops of stabilization brings you down to approximately 1/1.6 second. Realistically, most photographers find consistent success around 1/4 to 1/2 second with proper breathing technique and a stable stance.
Now consider a 200mm telephoto with 6-stop IBIS: The baseline jumps to 1/200 second. Six stops of compensation theoretically allow 1/3 second exposures. However, longer focal lengths amplify every micro-movement, so practicing good form becomes essential. Many professionals still prefer staying around 1/15 to 1/30 second with telephoto lenses, even with excellent IBIS.
Remember, these calculations represent ideal conditions. Your actual safe shutter speed depends on your steadiness, subject movement, and acceptable sharpness standards. Always test your specific setup to establish personal limits.
Practical Tips for Maximizing IBIS Effectiveness
Proper Shooting Technique Still Matters
While IBIS works wonders, it’s not a magic bullet that compensates for poor technique. Think of stabilization as a powerful ally that amplifies good fundamentals rather than replacing them entirely.
Start with your grip. Hold your camera with your right hand on the grip and left hand cradling the lens from underneath, creating a stable platform. Tuck your elbows close to your body rather than letting them flare outward. This simple adjustment creates a tripod-like structure with your torso and arms.
Your breathing matters more than you might think. Before pressing the shutter, exhale gently and pause naturally at the end of that breath. This brief moment of stillness, combined with IBIS, can make the difference between a sharp image and a slightly soft one. Professional wildlife photographers have used this technique for decades, even with modern stabilization technology.
Stance plays a crucial role too. Stand with your feet shoulder-width apart, one foot slightly forward. If possible, lean against a wall, tree, or doorframe for extra support. When shooting at longer focal lengths, even with IBIS engaged, consider kneeling and bracing your elbow on your raised knee.
The real magic happens when these techniques work together with your camera’s stabilization system. You’re essentially giving IBIS less movement to correct, allowing it to focus on eliminating the subtle micro-movements that technique alone can’t address.
When to Turn IBIS Off (Yes, Really)
Here’s something that might surprise you: IBIS isn’t always your friend. There are specific situations where leaving it on can actually introduce unwanted artifacts into your images.
When you’re shooting from a tripod, IBIS can become confused. The system is designed to detect and compensate for movement, but when your camera is rock-solid, the sensor may start compensating for motion that doesn’t exist. This creates a phenomenon called “stabilization drift,” where the sensor subtly shifts position, potentially reducing sharpness. Most modern cameras detect tripod use automatically, but it’s worth double-checking your menu settings or simply switching IBIS off for static setups.
Panning shots present another challenge. When you’re tracking a moving subject horizontally, IBIS can fight against your intentional movement, creating jerky motion blur or uneven tracking. Many cameras offer a panning mode that disables vertical stabilization while maintaining horizontal compensation, but if yours doesn’t, turning IBIS off completely gives you smoother results.
In video work, watch for the “warping” effect during quick camera movements. Some IBIS systems can create a jello-like distortion at the frame edges when you whip-pan or make sudden directional changes. For these dynamic movements, electronic stabilization in post-production often yields cleaner results than in-camera IBIS.
IBIS Settings You Might Be Overlooking
Many cameras offer IBIS customization options that photographers often leave at default settings, potentially limiting performance. Start by exploring your camera’s IBIS mode settings. Some systems offer different stabilization profiles: one for static subjects, another optimized for panning movements. If you shoot sports or wildlife, switching to a panning mode prevents the system from fighting your intentional camera movement.
Check if your camera has focal length priority settings. When using adapted lenses without electronic contacts, manually entering the focal length ensures the IBIS algorithm applies appropriate correction. This simple adjustment can mean the difference between sharp and slightly soft images.
The stabilization strength setting is another overlooked gem. While maximum stabilization sounds ideal, dialing it back slightly when shooting video can reduce the subtle warping effects that sometimes occur with aggressive correction. For photography, experiment with reduced IBIS strength when using tripods—some systems don’t fully disengage when mounted, causing micro-vibrations that actually decrease sharpness. Real-world testing with your specific shooting style will reveal which settings deliver optimal results.
IBIS Limitations: What Stabilization Can’t Fix
IBIS is impressive technology, but it’s not a magic wand that fixes every photography challenge. Understanding its limitations helps you know when to rely on it and when to reach for other solutions.
The most important thing to remember: IBIS only stabilizes camera movement, not subject movement. If you’re photographing a child running toward you or a bird taking flight, IBIS won’t prevent motion blur from your moving subject. You’ll still need fast shutter speeds to freeze action, regardless of how good your stabilization system is. Think of IBIS as steadying your hand, not stopping time.
Extreme low light presents another challenge. While IBIS lets you use slower shutter speeds than you could handheld otherwise, there’s a practical limit. Even with 7 stops of stabilization, shooting at 1/2 second handheld remains difficult. Your breathing, heartbeat, and involuntary muscle movements eventually overwhelm any stabilization system. For truly long exposures like astrophotography or light painting, you’ll still need a tripod.
IBIS also struggles with certain technical situations. It can sometimes interact poorly with rolling shutter issues when panning quickly, creating unexpected warping effects. In artificial lighting conditions with LED flicker, IBIS won’t help you avoid banding problems.
Video work presents unique challenges too. While modern IBIS systems have improved dramatically for video, they can’t match the smoothness of a gimbal for walking shots or complex movements. The system corrects micro-shakes beautifully but larger, deliberate movements can still appear jerky.
Finally, consider battery life. IBIS constantly adjusts the sensor position, consuming noticeable power. On long shooting days, this matters more than you might expect.
Understanding your camera’s IBIS system and how to calculate appropriate shutter speeds is more than just technical knowledge—it’s about empowering yourself to push creative boundaries with confidence. When you know your system’s capabilities and limitations, you can make informed decisions in the field rather than guessing whether a shot will be sharp.
Take the time to test your own gear using the methods we’ve discussed. Every camera and lens combination behaves differently, and your own shooting technique plays a significant role in results. Spend an afternoon photographing at various shutter speeds, review your images critically at 100 percent magnification, and establish your personal baseline. You might discover you can handhold at slower speeds than you expected, or you might find that certain focal lengths require faster shutter speeds despite what the calculator suggests.
Remember that IBIS is a powerful tool, but it’s not magic. It complements good shooting fundamentals rather than replacing them. Proper stance, controlled breathing, and gentle shutter release still matter enormously. Stabilization technology extends what’s possible, giving you perhaps two to five extra stops of flexibility, but it works best when combined with solid technique.
As you head out with your camera, let this knowledge inform your settings without constraining your creativity. IBIS gives you freedom to work in challenging lighting conditions and experiment with motion blur effects that would otherwise be impossible. Test, practice, adjust, and most importantly, shoot with confidence knowing you’ve mastered one more aspect of your photographic toolkit.