Understand that the lighting color wheel maps the relationship between light temperature and complementary colors, operating on a different principle than the traditional artist’s color wheel you learned in school. In photography, this tool reveals how your camera sensor interprets mixed lighting sources and why that overhead fluorescent creates a sickly green cast on your subject’s skin while the window light reads beautifully warm.
Master color temperature shifts by recognizing that moving from tungsten (3200K) to daylight (5600K) doesn’t just make light “cooler”—it fundamentally changes how colors interact in your frame. When your studio lighting setup includes multiple sources, each with different Kelvin ratings, you’re essentially layering different positions on the color wheel, creating either harmonious or clashing color relationships.
Apply complementary color theory to eliminate unwanted casts by adding the opposite color on the wheel. If your LED panels skew magenta, introduce green gels at precisely calculated intensity. This same principle explains why professional colorists use warming filters to counteract the blue cast from overcast skies or add CTO gels to match strobe output with practical tungsten lamps in the scene.
Calibrate your workflow by shooting a gray card under your lighting setup, then examining the RGB values in your raw processor. When those numbers don’t match equally, the color wheel shows you exactly which direction to shift your white balance or which corrective gel to apply, transforming guesswork into precision.
What Is the Lighting Color Wheel?
The Science Behind Light Color
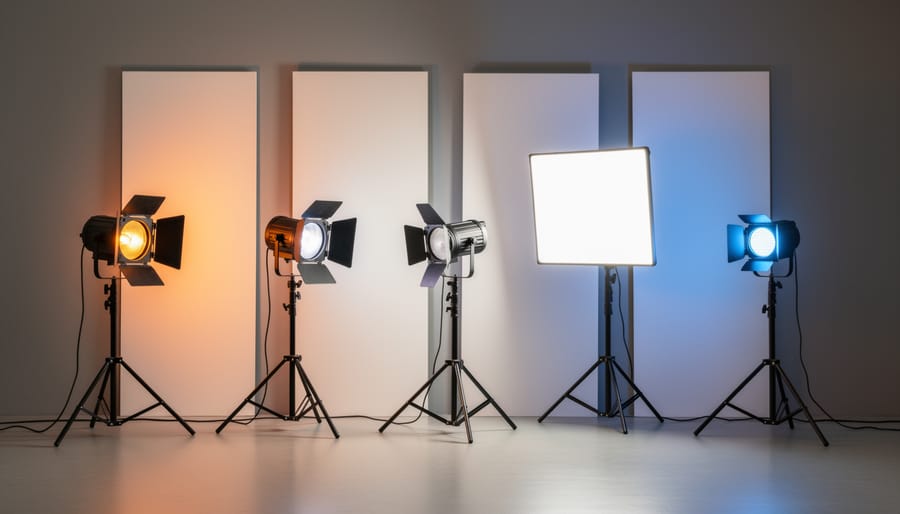
Understanding how light creates color is fundamental to mastering photography, and it all starts with color temperature measured on the Kelvin scale. Think of this scale as a thermometer for light—except instead of measuring heat, it measures the color characteristics of different light sources. The scale runs from warm orange tones at lower values (around 2000K) to cool blue tones at higher values (10,000K and beyond).
Here’s where it gets interesting for your photography: different light sources emit distinctly different color spectrums. Natural daylight at midday typically measures around 5500K, producing a balanced, neutral white light that our eyes perceive as “normal.” This is why many photographers consider it the gold standard and why your camera’s daylight white balance setting is calibrated to this temperature.
Tungsten bulbs, like traditional incandescent lights, emit light at around 3200K, creating that warm, cozy orange glow you see in living rooms. If you’ve ever taken a photo indoors without adjusting your white balance, you’ve probably noticed everything looks unnaturally orange—that’s tungsten at work.
LED lights have revolutionized essential lighting equipment because they can be manufactured to produce virtually any color temperature. Quality LED panels often allow you to dial in specific Kelvin values, giving you unprecedented control over your lighting environment.
Why does this matter? Because your camera sensor records these color differences faithfully. Understanding color temperature helps you either match your lights to create consistent illumination or intentionally mix temperatures for creative effect. When you know a tungsten light will add warmth while an LED set to 6500K will add coolness, you can strategically use the lighting color wheel to craft the exact mood and color palette your image demands.
Complementary Colors in Lighting
Complementary colors sit opposite each other on the color wheel, and understanding this relationship is essential for both correcting unwanted color casts and creating intentional color effects in your photography. When you combine complementary colors in equal intensity, they neutralize each other, producing white or neutral gray light. This principle forms the foundation of color correction in lighting.
Let’s say you’re shooting in a location with heavy tungsten lighting that’s casting an unwanted orange glow on your subject. By introducing blue light (orange’s complement on the color wheel), you can neutralize that warm cast and achieve more accurate skin tones. This is exactly what your camera’s white balance does digitally, but doing it with physical light gives you more control and better quality results.
In studio work, you might notice a greenish tint from fluorescent fixtures. Adding magenta gels to your lights counteracts this since magenta and green are complementary colors. Professional colorists keep gel swatch books handy specifically for these correction scenarios, often using CTO (Color Temperature Orange) and CTB (Color Temperature Blue) gels for temperature adjustments, and plus or minus green gels for tint corrections.
On the creative side, complementary color schemes create visual tension and drama. Think of a classic film noir setup with warm orange key light on one side of your subject and cool blue rim light on the other. This complementary pairing draws the viewer’s eye and adds depth. Fashion photographers frequently employ this technique, bathing backgrounds in one complementary color while lighting their subject with another, creating separation and visual interest that makes images pop.
Color Temperature vs. Color Tint: Understanding the Full Spectrum
Reading Your Camera’s White Balance Tools
Your camera’s white balance tools are essentially translators between the color wheel of light sources and accurate color reproduction. Understanding how to read and use these tools will transform your approach to color management.
Most cameras offer several white balance presets—Daylight, Tungsten, Fluorescent, Cloudy, and Flash—each designed to counteract specific color casts. Think of these as shortcuts around the color wheel. When you select Tungsten mode under warm incandescent lights, your camera applies a blue filter digitally, shifting opposite on the color wheel to neutralize that orange glow. The key is recognizing that these presets work by applying the complementary color to whatever dominant cast they’re designed to correct.
The Kelvin temperature setting gives you precise control, displaying values typically between 2500K and 10000K. Lower numbers add warming tones to counteract cool light, while higher numbers add cooling effects for warm environments. This direct correlation to the lighting color wheel helps you visualize exactly what’s happening: choosing 3200K tells your camera to expect warm tungsten light and compensate accordingly.
Custom white balance is your most accurate tool. Point your camera at a neutral gray or white card under your actual shooting light, activate the custom white balance function in your menu, and let the camera measure the exact color temperature and tint. This process essentially samples your light’s position on the color wheel and calculates the precise opposite correction needed.
Many cameras also display live histograms with RGB channels. When these three channels align closely, you’re achieving neutral color. If one channel is significantly elevated or depressed, you’re seeing a color cast. Red channel too high? You’ve got warm light that needs cooling. Blue channel dominating? Your scene skews cool and needs warming compensation. These visual indicators connect directly to color wheel principles, making color correction intuitive rather than guesswork.
Calibrating Your Studio Lights for Accurate Color
Matching Multiple Light Sources
When you’re working with multiple light sources, one of the most common challenges is getting them all to speak the same color language. I learned this the hard way during a product shoot where my main strobe had a slightly cool cast while my fill light leaned warm. The result? A confusing color palette that took hours to correct in post-production.
The key to color consistency starts with understanding that not all lights are created equal. Strobes typically emit light around 5500K, while LED panels might drift anywhere from 3200K to 6500K depending on their settings. Even lights from the same manufacturer can vary slightly. This is where your knowledge of the color wheel becomes invaluable for identifying and correcting these differences.
For a professional lighting setup, start by measuring the color temperature of each light source with a color meter or by taking test shots with a gray card. Compare your readings and identify which lights need adjustment. If you’re mixing continuous LED lights with strobes, LED panels usually offer built-in color temperature controls that let you dial in precise Kelvin values to match your strobes.
Color correction gels are your best friend when dealing with stubborn mismatches. CTO (Color Temperature Orange) gels warm up cooler lights, while CTB (Color Temperature Blue) gels cool down warmer sources. These come in various densities, from quarter-cut to full-cut, giving you fine control over the correction amount.
Here’s a practical workflow: Set your key light first, then match your fill and accent lights to it. Take test shots between each adjustment, checking not just the overall color but also how the lights interact on your subject. Pay special attention to shadow areas where multiple light sources overlap, as these zones reveal color inconsistencies most dramatically. Remember, slight variations might be acceptable depending on your creative intent, but unintentional color casts will always look amateurish.
Creating a Baseline with Color Reference Tools
Before you can navigate the lighting color wheel effectively, you need to establish what “correct” color actually looks like in your specific shooting environment. This is where color reference tools become invaluable—they give you an objective benchmark that removes the guesswork from color correction.
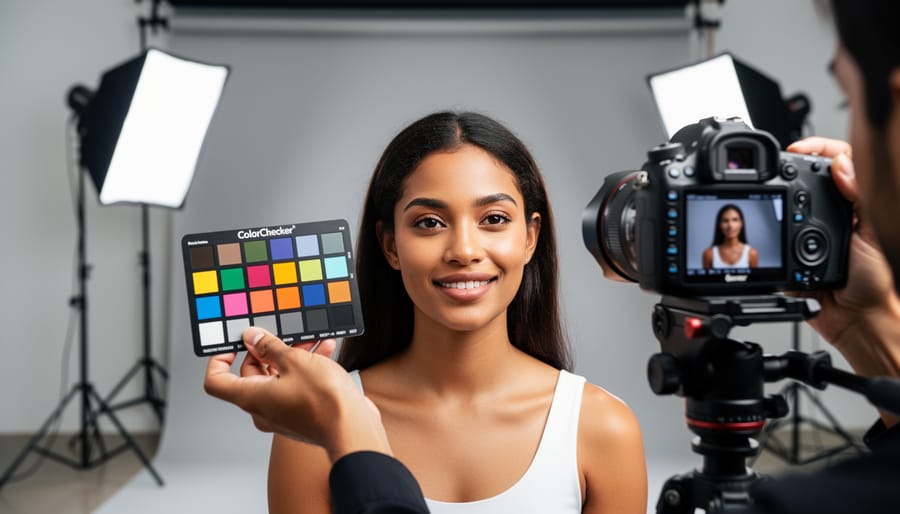
The X-Rite ColorChecker is the industry standard for color calibration. This portable chart contains 24 scientifically formulated color patches representing natural colors, including skin tones, primary colors, and a six-step grayscale. Here’s how to use it: place the ColorChecker in your scene under the same lighting conditions you’ll be shooting in, and capture a reference shot at the beginning of your session. During post-processing, you can use this reference image with software like Lightroom or Capture One to create custom camera profiles that accurately represent colors as they appeared in real life.
Gray cards serve a simpler but equally important purpose. An 18% gray card helps you establish proper white balance, which is the foundation of accurate color rendering. Place the card in your scene, fill your frame with it, and take a shot. In post-processing, use your software’s white balance eyedropper tool on the gray card to neutralize any color casts. This gives you a neutral starting point before making creative color adjustments.
For video work or continuous lighting setups, color temperature meters can measure the exact Kelvin temperature of your lights, helping you match different light sources or identify unwanted color shifts. While these tools require an initial investment, they’re essential for maintaining consistency across multiple shoots and ensuring your colors translate accurately from capture to final output.
Using Gels to Manipulate the Color Wheel
Color Correction Gels: When and How to Use Them
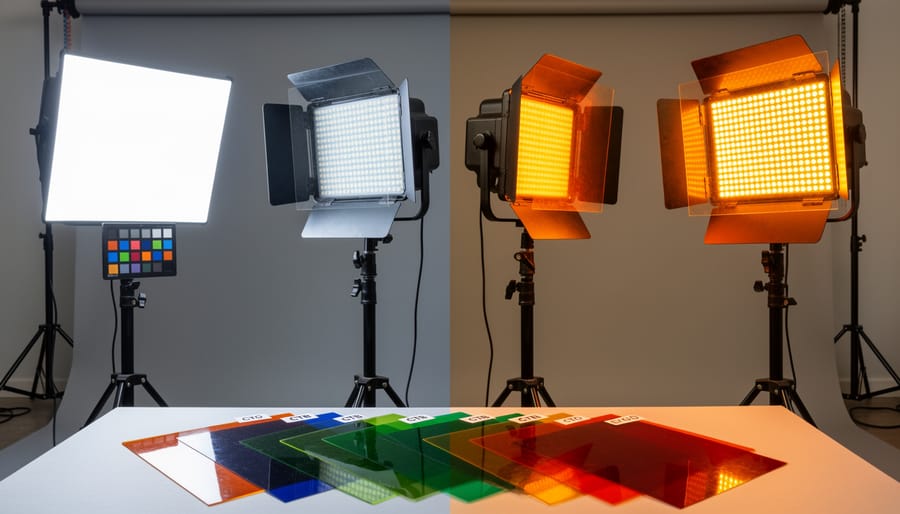
Color correction gels become essential when you’re mixing light sources with different color temperatures. The most common scenario? You’re shooting with LED panels rated at 5600K (daylight-balanced) alongside your trusty strobes, but notice your LEDs look slightly green compared to the flash output. A quarter or half minus-green gel on your LEDs neutralizes that color cast, bringing everything into harmony.
Think of fluorescent office lighting as another prime example. Those overhead tubes typically emit light around 4000K with a distinct green-magenta shift. If you’re shooting a corporate headshot and need to add fill light, slapping a half plus-green gel on your strobe matches it to the ambient fluorescents. You can then correct everything in post with a single white balance adjustment rather than fighting mismatched sources.
Window light presents its own challenges. Daylight streaming through windows measures around 5500K, but when you’re supplementing with tungsten lights at 3200K, you’ll need full CTO (Color Temperature Orange) gels on your tungsten fixtures to raise their color temperature. Alternatively, use full CTB (Color Temperature Blue) on your windows to lower the daylight temperature, though this reduces light intensity.
Here’s a practical tip: always carry a set of quarter, half, and full-strength CTO and CTB gels, plus minus-green options. These five gel types handle 90 percent of color-matching situations. Your color meter or camera’s custom white balance function helps verify you’ve achieved neutral results before you start shooting.
Creative Color Applications
Once you’ve mastered color correction, the real fun begins. The color wheel becomes your creative playground, helping you craft images with intentional emotional impact and visual punch.
Complementary colors—those sitting opposite each other on the wheel—create dramatic, high-energy images that practically leap off the screen. Think about positioning an orange-gelled key light on one side of your subject while using a blue-gelled rim light on the other. This blue-orange combo is a favorite in cinematic portraiture because it creates immediate visual tension and depth. Similarly, pairing magenta with green can produce an otherworldly, fashion-forward aesthetic that’s popular in editorial work. The contrast between complementary colors naturally draws the viewer’s eye and creates separation between your subject and background.
For a more subtle, harmonious approach, reach for analogous colors—those neighboring each other on the wheel. Combining warm tones like red, orange, and yellow creates inviting, cozy atmospheres perfect for golden-hour inspired portraits or food photography. On the cooler side, blending blue, cyan, and green produces tranquil, ethereal moods ideal for beauty or conceptual work.
Here’s practical advice: start with lighting modifiers and colored gels to experiment safely. Place a piece of colored acetate over your light source and observe how it interacts with other lights in your scene. Keep your color choices intentional—every hue should support your story. Remember, the color wheel doesn’t just fix problems; it unlocks creative possibilities that transform competent photography into memorable art.
Common Color Problems and How to Fix Them
That Dreaded Green Cast
If you’ve ever photographed under LED or fluorescent lighting and noticed your subjects looking vaguely seasick in the final images, you’ve encountered the infamous green cast. This color shift happens because many budget and mid-range LED lights, as well as older fluorescent tubes, emit an unbalanced spectrum that skews green. Unlike traditional tungsten bulbs that emit a relatively continuous spectrum, these lights can have spikes in the green wavelengths that your camera sensor picks up faithfully—even when your eyes compensate for it in real time.
Identifying a green cast is usually straightforward when you know what to look for. Check the skin tones in your images first; they’ll appear sallow or sickly rather than warm and natural. White backgrounds may look mint or seafoam rather than pure white. Your camera’s histogram might not immediately reveal the problem, but switching to the individual RGB channel histograms often shows the green channel sitting noticeably higher than red and blue.
The most reliable solution is addressing the problem at the source. Place a magenta gel—specifically a minus green gel like Rosco’s “Tough Plusgreen” series in reverse—over your light fixtures. Start with a quarter-cut minus green and test your results. You can also use a magenta filter on your camera lens, though this affects all light sources in the scene, not just the problematic ones.
In post-processing, you have several options. Use your editing software’s color temperature and tint sliders together; shifting toward magenta counteracts green. For selective correction, use HSL sliders to target and desaturate the green channel specifically, or adjust the green luminance values to bring skin tones back to neutral.
Inconsistent Skin Tones
One of the most frustrating moments in portrait photography happens when you nail the composition, the expression is perfect, but your subject’s skin tone looks oddly orange, greenish, or simply lifeless. This common challenge stems from mismatched color temperatures and poor understanding of how different light sources interact with various skin tones.
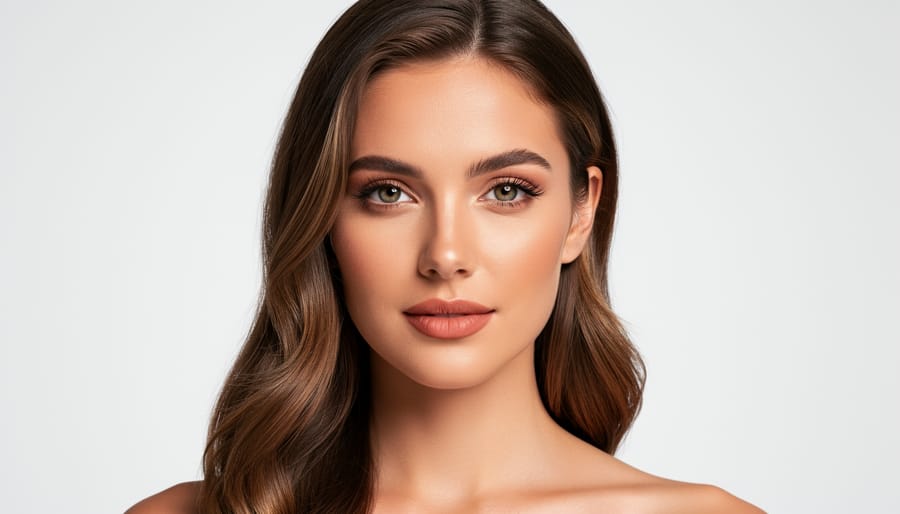
The key to consistent, flattering skin tones lies in understanding that skin reflects light differently across the spectrum. For lighter skin tones, even slight color casts become immediately obvious. A light source that’s too warm (below 3200K) can push caucasian skin toward an unflattering orange-yellow, while cooler temperatures above 6000K can create a sickly blue-gray appearance. The sweet spot typically falls between 4500K and 5500K, which provides natural-looking warmth without overwhelming the skin’s natural undertones.
Deeper skin tones present different considerations. Lighting that’s too cool can wash out rich melanin tones, making skin appear ashy or gray. These tones generally benefit from slightly warmer color temperatures, around 4000K to 5000K, which enhance the natural warmth and depth. The critical mistake many photographers make is using identical lighting setups regardless of their subject’s complexion.
Here’s a practical approach: start by setting your key light to 5000K as a baseline, then adjust based on what you see in your camera’s LCD. Take test shots and examine the skin closely. If you notice color casts, use complementary colors on the color wheel to correct them. A green cast requires adding magenta gels, while magenta casts need green correction. For mixed lighting scenarios, ensure all sources fall within 200K of each other to maintain consistency. Custom white balance is your best friend here, allowing you to precisely calibrate for the actual lighting conditions rather than relying on presets.
Building Your Color-Managed Workflow
Understanding color theory is one thing, but actually implementing it in your daily photography work requires a systematic approach. Let’s walk through building a color-managed workflow that ensures consistency from the moment you press the shutter to final delivery.
Start with monitor calibration, because everything you see needs to be accurate. Invest in a hardware calibration device like the X-Rite i1Display Pro or Datacolor SpyderX. These tools measure your monitor’s actual output and create a custom profile that corrects what you see. Calibrate monthly, or weekly if you’re doing commercial work where color accuracy is critical. Without this foundation, you might be correcting color problems that don’t actually exist in your files.
Next, establish reliable camera profiles. Shoot a color checker target in the first frame of every session under your main lighting setup. The X-Rite ColorChecker Passport is industry standard and works beautifully with Adobe software. Import that reference shot and use it to create a custom camera profile that accounts for your specific lighting conditions. This single step eliminates most color cast issues before they become problems in post-processing.
Your lighting equipment matters tremendously here. Modern wireless lighting systems often include built-in color temperature displays and adjustment controls, making it easier to maintain consistency across multiple light sources. Record your light settings for each setup, including power output, color temperature, and any gels used. This documentation becomes invaluable when you need to recreate a look or troubleshoot color issues later.
In post-processing, work in a consistent color space. For most photographers, Adobe RGB provides a good balance between color range and compatibility. If you’re outputting to high-end printers or commercial applications, consider ProPhoto RGB for maximum color information. Always soft-proof your images before final export, checking how they’ll look in different color spaces, particularly sRGB for web delivery.
Finally, establish regular calibration routines. Set calendar reminders for monitor calibration, verify your camera profiles when you change equipment or locations, and periodically check your entire workflow by shooting a reference target and comparing results across different sessions. Consistency comes from repetition and attention to these seemingly small details.
Understanding the lighting color wheel isn’t just another technical concept to check off your photography learning list—it’s a foundational skill that bridges the gap between capturing images and creating intentionally crafted photographs. Once you grasp how colors interact, complement, and neutralize each other in your lighting setup, you’ll find yourself troubleshooting color casts more confidently and designing more sophisticated lighting scenarios with purpose.
The beauty of color management is that you don’t need to master everything overnight. Start with simple calibration exercises: photograph a color checker under your main light, learn to recognize when your whites aren’t truly neutral, and practice correcting basic color temperature mismatches. As these fundamentals become second nature, gradually introduce complementary and split-complementary lighting schemes into your work. Experiment with gels, observe how mixed color temperatures affect your subject’s skin tones, and don’t be afraid to intentionally break the rules once you understand them.
Remember, every professional photographer you admire went through this same learning curve. The technical quality of your images will improve as color accuracy becomes consistent, but more importantly, your creative possibilities expand exponentially when you can deliberately manipulate color to evoke specific moods and guide viewer attention. Keep your color wheel reference handy, practice regularly, and watch your studio work transform.