Monitor your thermal analog camera’s operating temperature by checking the manufacturer’s specifications for maximum ambient conditions, typically ranging between 40-50°C (104-122°F), and ensure your setup location stays well below these thresholds to prevent automatic shutdowns or permanent sensor damage.
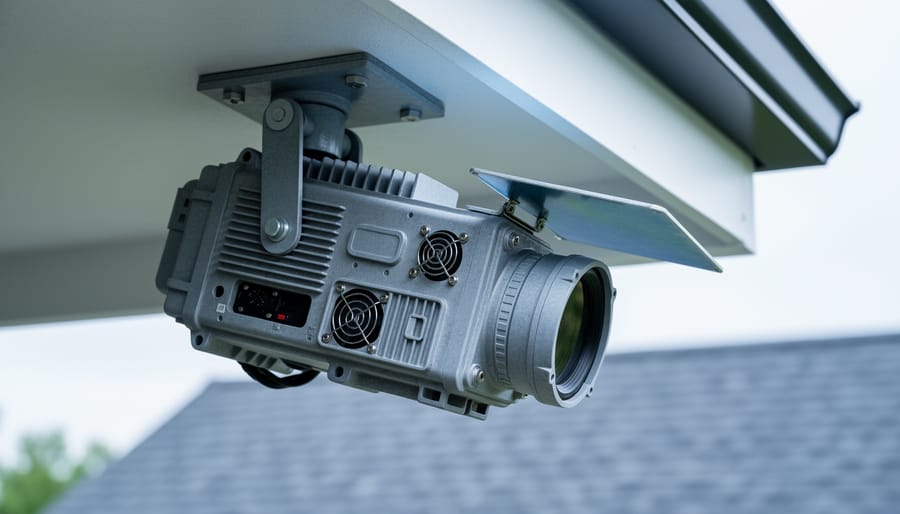
Position passive cooling solutions strategically around your camera housing by installing heat sinks on the camera body’s exterior surfaces, mounting the unit away from direct sunlight and heat-generating equipment, and maintaining at least 6 inches of clearance on all ventilated sides to promote natural airflow.
Implement active cooling systems when ambient temperatures exceed 30°C (86°F) by adding small, low-vibration cooling fans rated for continuous operation, using Peltier cooling modules for enclosed spaces, or investing in purpose-built camera cooling jackets that circulate air without introducing moisture or dust into sensitive components.
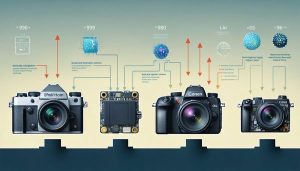
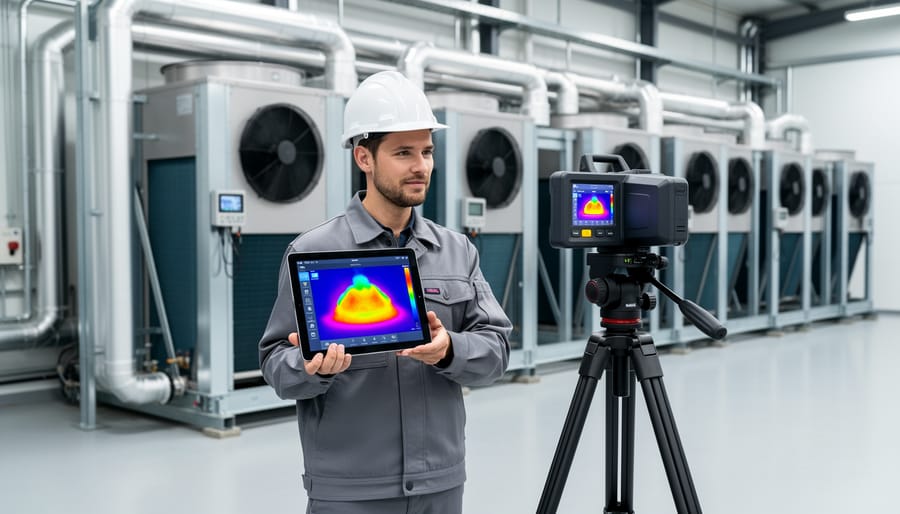
Thermal analog cameras represent a unique intersection of traditional video technology and infrared imaging capabilities, offering photographers and thermal imaging professionals a reliable solution for long-duration monitoring and surveillance applications. Unlike their digital counterparts that dominate today’s emerging camera technologies, analog thermal cameras convert infrared radiation into continuous electrical signals, making them particularly valuable for legacy systems and applications requiring real-time analog output.
The fundamental challenge with these cameras lies in their inherent heat generation. The very sensors designed to detect thermal signatures produce substantial heat themselves during operation, creating a paradoxical situation where the imaging device becomes its own thermal source. This heat buildup can compromise image quality, reduce sensor sensitivity, and ultimately shorten equipment lifespan if left unmanaged. Understanding how to properly cool and maintain these specialized cameras ensures consistent performance whether you’re conducting building inspections, wildlife observation, or security monitoring in demanding environmental conditions.
What Makes Thermal Analog Cameras Run Hot

The Sensor Sensitivity Problem
Thermal cameras face a unique challenge that sets them apart from conventional imaging devices: their sensors are incredibly temperature-sensitive. Unlike traditional cameras that simply capture visible light, thermal sensors detect infrared radiation and convert it into temperature readings. Here’s the catch—these sensors must maintain a stable operating temperature themselves to provide accurate measurements.
Think of it like trying to measure the temperature of your coffee with a thermometer that keeps changing its own temperature. The readings would be unreliable, right? The same principle applies to thermal cameras. When the sensor’s baseline temperature fluctuates due to ambient heat, it struggles to differentiate between the heat signatures it’s trying to capture and its own thermal noise.
In real-world scenarios, this becomes particularly problematic. Imagine you’re conducting building inspections on a hot summer day. As your thermal camera heats up from prolonged use and environmental conditions, you might notice image quality degrading—what should appear as distinct temperature variations becomes muddled. Hot spots may appear less defined, and subtle temperature differences that could indicate energy leaks or electrical issues might disappear entirely from your readings.
Professional thermal imaging often requires accuracy within fractions of a degree. Even minor temperature drift in the sensor can throw off measurements significantly, leading to misdiagnosis of problems or missed detections. This is why many high-end thermal cameras incorporate active cooling systems or require regular calibration periods, adding complexity and sometimes interrupting your workflow when you need continuous monitoring.
When Heat Kills Your Image Quality
When your camera’s internal temperature rises, image quality takes a nosedive in ways you might not immediately recognize. Thermal drift is the primary culprit, where heat causes the sensor and supporting circuitry to shift their baseline values. Imagine shooting a long timelapse on a summer afternoon: your first frames look crisp, but as the session progresses, you notice increasing color shifts and reduced contrast. That’s thermal drift at work.
Heat also amplifies electronic noise, particularly in the shadow areas of your images. Those beautifully detailed low-light shots you were after suddenly display ugly grain patterns and loss of dynamic range. Professional photographers shooting extended video sessions or rapid burst sequences often see this firsthand when their gear literally becomes warm to the touch.
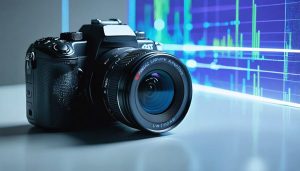
Calibration accuracy suffers too. Many modern cameras use internal reference points that assume specific operating temperatures. When components exceed their designed thermal range, these calibration routines become unreliable. You might notice inconsistent exposure metering or autofocus errors during prolonged shooting sessions. For thermal imaging cameras specifically, accuracy can drift by several degrees when operating outside recommended temperature ranges, making precise temperature measurements impossible. Understanding these thermal limitations helps you plan shoots more effectively and recognize when cooling breaks become necessary.
Understanding Thermal Management Hardware
Passive Cooling Solutions
When your thermal camera’s workload doesn’t justify active cooling, passive solutions can effectively manage heat while keeping your setup simple and maintenance-free. Think of passive cooling as the silent partner in your thermal management strategy—no moving parts, no power draw, just smart materials and physics doing the heavy lifting.
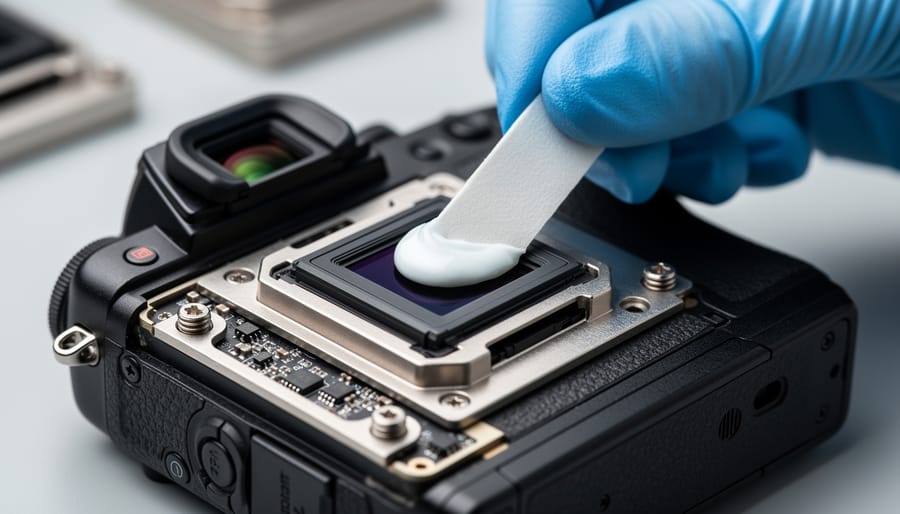
Heat sinks are your first line of defense. These metal components, typically made from aluminum or copper, draw heat away from your camera’s sensor and electronics through conduction, then dissipate it into the surrounding air through their finned surfaces. The larger the surface area, the better the heat dissipation. You’ll often see heat sinks incorporated directly into camera housings, but aftermarket options exist for specific models. Copper offers superior thermal conductivity compared to aluminum, though it’s heavier and more expensive.
Thermal pads and thermal paste bridge the gap between your camera’s hot components and the heat sink. Without proper thermal interface material, microscopic air gaps reduce heat transfer efficiency. Thermal pads are convenient and reusable, while thermal paste provides slightly better performance but requires careful application.
Housing design plays a crucial role too. Metal enclosures act as large heat sinks themselves, while strategic ventilation holes allow convective airflow without exposing sensitive electronics. Some manufacturers design ribbed or finned housings that maximize surface area without significantly increasing size.
Passive cooling works well for intermittent use, moderate ambient temperatures (below 85°F), and cameras with lower power consumption. However, it has limitations. During extended recording sessions, high-resolution imaging, or operation in hot environments, passive cooling may struggle to maintain safe operating temperatures. If your camera consistently feels uncomfortably hot to touch or displays temperature warnings, it’s time to consider active cooling solutions.
Active Cooling Systems
When your thermal camera starts overheating during extended shoots, active cooling systems offer powerful solutions that go beyond simple ventilation. These systems actively work to pull heat away from your camera’s sensor and internal components, making them ideal for long recording sessions or challenging environmental conditions.
Fan-based systems represent the most straightforward active cooling approach. Small, dedicated cooling fans attach directly to your camera body or cage, creating forced airflow across hot spots. These compact units typically draw minimal power—usually between 0.5 to 2 watts—making them compatible with most camera battery systems. The trade-off comes in noise generation. While modern fans designed for camera use operate relatively quietly at 20-30 decibels, they can still interfere with audio recording in quiet environments. Many photographers find them perfectly acceptable for video work with separate audio capture or outdoor shooting where ambient noise masks the fan sound.
Thermoelectric coolers, commonly known as Peltier devices, take cooling performance up a notch. These solid-state components use electrical current to transfer heat from one side of the device to the other, creating impressive temperature differentials. When properly mounted to your camera housing, Peltier coolers can drop sensor temperatures by 10-15 degrees Celsius. However, they come with significant power requirements—typically 30-60 watts—necessitating external battery packs for field use. They also generate heat on their opposite side, requiring additional heat sinks or fans for optimal performance.
Liquid cooling systems, while rare in photography applications, offer the ultimate thermal management for specialized industrial or scientific thermal cameras. These closed-loop systems circulate coolant through channels near critical components, efficiently dissipating heat through external radiators.
How to Choose the Right Cooling Solution for Your Setup
Environmental Factors That Matter
Your thermal camera’s cooling requirements aren’t one-size-fits-all—they shift dramatically based on where and how you’re shooting. Understanding these environmental factors helps you anticipate problems before they interrupt your work.
Ambient temperature plays the most obvious role. Operating a thermal camera in a 95°F studio versus a 70°F climate-controlled space creates entirely different thermal loads. The smaller the temperature difference between your camera’s sensor and the surrounding air, the harder your cooling system must work. This becomes particularly challenging with outdoor photography equipment during summer months, where direct sunlight adds radiant heat to the equation.
Humidity matters more than many photographers realize. High moisture levels reduce your cooling system’s efficiency—think of how a muggy day feels hotter than a dry one at the same temperature. Condensation can also form on sensors when moving equipment between temperature zones, requiring acclimatization time.
Continuous versus intermittent use significantly impacts thermal management. Shooting a 10-minute test sequence allows heat to dissipate between takes, while hour-long continuous recording sessions create cumulative thermal buildup. Professional applications often demand sustained operation, necessitating more robust cooling solutions.
Indoor environments generally offer stable, controllable conditions, but outdoor work introduces variables like wind (which can aid cooling) and extreme temperature conditions that challenge even well-designed systems. Desert shoots, tropical locations, and arctic environments each present unique thermal management puzzles requiring specific adaptations to keep your camera performing reliably.

Matching Cooling Power to Your Camera
Getting the cooling right starts with understanding how much heat your thermal analog camera actually produces. Think of it like matching an air conditioner to a room—you need to know the heat load before selecting the solution.
Start by checking your camera’s manufacturer specifications, typically found in the technical documentation or datasheet. Look for power consumption figures, usually listed in watts. For example, a thermal camera sensor might consume anywhere from 2 to 10 watts during continuous operation. This power consumption directly translates to heat output, since nearly all electrical energy eventually becomes thermal energy in cameras.
Here’s a practical approach: if your camera draws 5 watts and runs continuously, you’ll need cooling capacity that exceeds this by at least 20-30% to maintain a safety margin. In real-world conditions, ambient temperature matters significantly. A camera running in a 75-degree room requires less aggressive cooling than one operating in a 95-degree environment.
Don’t overlook secondary heat sources either. Processing circuits, power regulators, and even the housing itself can add thermal load. Many photographers make the mistake of only considering sensor heat, then wonder why their cooling solution underperforms.
For cameras without clear specifications, use an infrared thermometer to measure surface temperatures during typical operation. If your housing exceeds 100 degrees Fahrenheit, you’re likely pushing thermal limits. Most thermal analog cameras perform optimally below 85 degrees Fahrenheit, so use this as your target threshold when selecting cooling solutions. Remember, undersized cooling is worse than no cooling—it gives false confidence while still allowing damage.
Installing and Optimizing Your Cooling Hardware
Thermal Interface Materials Done Right
Getting thermal interface materials right can mean the difference between a camera that runs cool and one that throttles during critical shots. Think of thermal paste or pads as the handshake between your camera’s sensor and its cooling system—any gaps or air pockets will sabotage heat transfer.
When applying thermal paste to custom cooling solutions, less is often more. A rice-grain sized amount spread thin across the contact surface creates optimal transfer without spilling over edges. I’ve seen photographers enthusiastically glob on paste, only to create an insulating layer that traps heat rather than channeling it away. The goal is filling microscopic surface imperfections, not building a barrier.
For thermal pads, which come pre-sized and are less messy, proper thickness matters tremendously. Too thin and you won’t bridge the gap between components; too thick and compression won’t be adequate for good contact. Measure your gap carefully before ordering—calipers are your friend here.
Before installation, clean all contact surfaces with isopropyl alcohol to remove oils, dust, or old material residue. Even a fingerprint can create an insulating layer. Apply gentle, even pressure when mounting heatsinks or cooling blocks to ensure the interface material spreads uniformly. If you’re working with a particularly valuable thermal camera setup, consider practicing the technique on scrap electronics first—confidence makes for cleaner application.
Airflow and Placement Strategies
Where you position your thermal analog camera can make the difference between reliable performance and frustrating overheating issues. Think of your camera like a small computer—it needs proper airflow to function optimally, especially during extended shooting sessions.
Start by considering your camera’s ventilation design. Most thermal cameras have intake and exhaust vents, typically located on the sides or back of the body. Never block these openings with your hands, accessories, or mounting equipment. I’ve seen photographers inadvertently cover vents with poorly positioned accessories or grip modifications, creating unnecessary thermal stress.
When mounting your camera on a tripod or rig, ensure adequate space around all sides. A good rule of thumb is maintaining at least two inches of clearance around ventilation points. If you’re shooting in tight spaces or using enclosed housings, the situation becomes more critical. Consider adding small external fans or ensuring your housing has its own ventilation strategy.
Avoid positioning your camera in direct sunlight whenever possible, as this creates a double challenge—your camera generates internal heat while absorbing external heat. If outdoor shooting is unavoidable, use reflective covers or position yourself in shade between takes.
Creating a cooling pathway matters too. In studio environments, position fans to create gentle airflow across your equipment setup rather than directly blasting the camera, which can introduce unwanted vibration. For field work, simply keeping your camera out of enclosed bags between shots allows natural convection to work its magic, preventing heat buildup that compounds with each successive use.
Troubleshooting Common Cooling Problems
When Your Camera Still Overheats
Even with cooling measures in place, your camera might still shut down from heat. The warning signs are pretty clear: frequent thermal warnings appearing sooner than expected, the camera body feeling uncomfortably hot to touch even during moderate shooting, or automatic shutdowns occurring despite using active cooling solutions.
To test whether your current setup is actually working, try this simple comparison: shoot a known problematic scenario (like 4K video for 20 minutes) with and without your cooling solution. If you’re only gaining 5-10 minutes of extra recording time, your cooling approach isn’t cutting it.
When basic solutions fail, it’s time to consider upgrades. Professional-grade camera cages with integrated heat dissipation channels can significantly outperform simple clip-on fans. Some photographers working in extreme conditions have found success with thermal paste modifications or external recording solutions that reduce internal heat generation altogether.
Sometimes the answer isn’t better cooling but rather workflow adaptation. Breaking longer shoots into shorter segments, pre-cooling your camera in air conditioning before critical takes, or investing in a second camera body for rotation can be more practical than fighting an uphill thermal battle. Consider whether your specific camera model has known thermal limitations that no amount of external cooling will fully overcome.
Noise, Condensation, and Power Issues
Cooling systems solve overheating problems but introduce their own challenges. Understanding these trade-offs helps you maintain peak performance without unexpected complications.
Active cooling fans generate noise that can disrupt video work or sound recording. While some high-end units feature whisper-quiet fans operating below 30 decibels, budget models often sound like small desk fans. If noise matters for your workflow, check manufacturer specifications before purchasing. Consider positioning your camera away from microphones or using sound dampening enclosures when practical.
Condensation poses a more serious threat. When cooled sensors meet humid air, moisture can form on optical elements and electronics. This issue becomes critical in outdoor environments or when moving equipment between temperature zones. Quality thermal camera housings include sealed chambers with desiccant packs to absorb moisture. Always allow your equipment to acclimate gradually when changing environments, and store cameras with moisture-absorbing packets in your camera bag.
Power consumption increases significantly with active cooling. Thermoelectric coolers can draw substantial current, reducing battery life by 30-50% compared to passive systems. Plan accordingly by carrying spare batteries for extended shoots. Some photographers use external battery packs or AC power when stationary to avoid interruptions. Monitor your power usage during initial testing to establish realistic shooting durations for your specific setup.
If there’s one takeaway from our exploration of thermal analog cameras, it’s this: proper thermal management isn’t a luxury feature or optional upgrade. It’s absolutely fundamental to getting consistent, reliable results from your equipment. Whether you’re conducting building inspections, monitoring electrical systems, or capturing wildlife behavior patterns at night, an overheating camera means compromised data, shortened equipment lifespan, and potentially wasted opportunities in the field.
Think about it from a practical standpoint. You’ve invested in quality thermal imaging equipment because you need accurate temperature readings and clear thermal imagery. Without adequate cooling, that investment delivers diminishing returns every time your camera heats up during extended use. The noise creeps into your images, the calibration drifts, and suddenly you’re questioning whether that hot spot you’re seeing is real or an artifact of your own sensor temperature.
The good news is that we’re living in an exciting time for thermal camera technology. Active cooling solutions have become more compact and energy-efficient than ever before. Peltier coolers now offer impressive temperature control in surprisingly small packages. Meanwhile, emerging technologies like microfluidic cooling systems and advanced phase-change materials are making their way from research labs into commercial products. These innovations promise even better thermal stability with less power consumption and quieter operation.
So here’s my recommendation: take an honest look at your current setup. Are you experiencing any of the telltale signs of thermal issues we’ve discussed? Increased noise after twenty minutes of operation? Inconsistent readings during long sessions? If so, it’s time to implement a proper cooling solution. Your equipment, your clients, and your final results will all benefit from keeping those sensors at their optimal operating temperature. The technology is available, accessible, and increasingly affordable. There’s never been a better time to ensure your thermal imaging work meets the highest standards of quality and reliability.