Position your key light at a 45-degree angle to your subject’s face, raised slightly above eye level and angled downward. This creates dimension and natural-looking shadows that define facial features. Set your power to full or three-quarters strength as your foundation, then build the rest of your setup around this primary source.
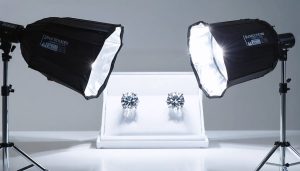
Add a fill light on the opposite side to soften the shadows created by your key light, positioning it at roughly half the intensity. Place it closer to camera level to lift shadows without eliminating them entirely. The ratio between key and fill determines your lighting’s mood—a 2:1 ratio produces gentle, flattering results for portraits, while 4:1 creates dramatic, high-contrast looks perfect for editorial work.
Place your back light behind and slightly above your subject, aimed toward the back of their head and shoulders. This separation light prevents your subject from blending into the background and adds a professional polish that immediately elevates your images. Even a small speedlight at quarter power makes a noticeable difference.
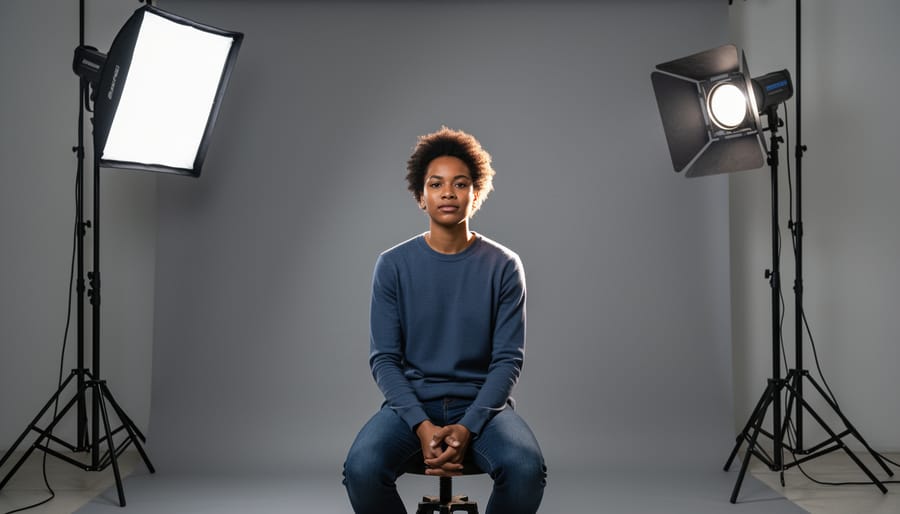
This three-point lighting setup forms the foundation of professional photography and cinematography, transforming flat, amateur-looking images into dimensional, polished work. Whether you’re shooting corporate headshots, product photography, or creative portraits, mastering these three lights gives you complete control over how your subject appears. The technique works equally well with studio strobes, continuous LED panels, or speedlights, making it accessible regardless of your budget. Modern wireless systems have simplified the process dramatically, allowing you to adjust all three lights from your camera position without climbing ladders or walking across the studio between test shots. Understanding this fundamental approach unlocks countless creative possibilities while giving you a reliable framework that works in virtually any situation.
What Is 3-Point Lighting (And Why Photographers Still Swear By It)
The Key Light: Your Main Player
Think of the key light as the director of your scene—it’s the primary light source that does the heavy lifting in your three-light setup. This is the brightest light in your arrangement, and it establishes the fundamental exposure and overall mood of your photograph. Without a properly positioned key light, the rest of your lighting setup simply won’t work as intended.
Typically, photographers place the key light at a 30-45 degree angle from the camera, slightly elevated above the subject’s eye level. This positioning creates natural-looking shadows that add dimension and depth to your subject’s features. You’ll notice this mimics how we experience light in everyday life—think of sunlight streaming through a window or overhead lighting in a room.
The beauty of the key light lies in its versatility. Position it closer to your subject for dramatic, high-contrast shadows, or move it further away for softer, more flattering illumination. The distance and angle you choose will fundamentally change the character of your image. For portrait work, many photographers favor a slightly off-center placement to create gentle shadow definition on one side of the face, adding visual interest while maintaining a natural appearance. Remember, your key light sets the baseline—once you’ve nailed its position and intensity, the fill and backlight will fall into place much more easily.
The Fill Light: Softening the Drama
The fill light is your shadow whisperer—it doesn’t eliminate the drama created by your key light, but rather tames it to match your creative vision. Positioned opposite the key light, typically at a 15-45 degree angle from your subject, the fill light gently lifts shadows without overpowering the directional quality that gives your image depth.
Understanding power ratios is where the real magic happens. A 2:1 ratio (key light twice as powerful as fill) creates moderate contrast suitable for corporate headshots or beauty photography. Push it to 4:1 or 8:1, and you’ll achieve that moody, cinematic look perfect for dramatic portraits. For bright, cheerful imagery—think lifestyle or e-commerce—a 1.5:1 ratio keeps shadows minimal.
Here’s a practical starting point: set your fill light to half the power of your key light, then adjust based on what you see. If you’re shooting a portrait and the shadow side of the face looks too dark, increase your fill power. Too flat? Pull it back. The beauty of modern lighting setups is you can make these adjustments quickly without repositioning anything.
Many photographers use a larger light modifier for fill—like a softbox or umbrella—to create an even, gentle wash that wraps naturally around the subject.
The Back Light: Creating Separation
The back light, sometimes called a rim light or hair light, is your secret weapon for creating professional-looking images with genuine dimension. Positioned behind your subject and angled toward the camera, this light does something magical: it creates a subtle glow along the edges of your subject, visually separating them from the background.
Think of it this way—without a back light, your subject can appear flat or even merge into the background, especially when shooting against darker backdrops. That thin outline of light changes everything. It adds depth perception that our eyes naturally recognize, making your subject pop forward in the frame.
The practical benefit becomes immediately obvious when you’re photographing people with dark hair against dark backgrounds. That rim of light on their hair and shoulders creates definition that would otherwise be lost. You’re essentially sculpting with light, carving your subject out of the scene.
Start with your back light at about half the power of your key light, positioned high and behind your subject at roughly a 45-degree angle. Watch for lens flare—you may need to adjust the angle slightly or use a flag to prevent light from hitting your lens directly.
How Wireless Control Changed Everything for 3-Light Setups
Before Wireless: The Cable Nightmare
If you’ve been photographing for more than a few years, you probably remember the cable chaos. Setting up a three-light configuration meant running sync cables from your camera to each flash unit—often requiring you to purchase extension cables just to position lights at optimal distances. The result? A spiderweb of wires crisscrossing your studio floor that turned every shoot into an obstacle course.
Beyond the obvious tripping hazards, these cables severely limited your creative freedom. Want to move your key light five feet to the left? You’d better hope your cable reaches. Need to raise your rim light higher? Time to untangle everything and readjust. Each repositioning meant physically walking to the light, making adjustments, walking back to check the result through your viewfinder, then repeating the process until you got it right.
For location photographers, the situation was even worse. Outdoor shoots meant carefully managing cable lengths while dealing with uneven terrain, curious bystanders, and unpredictable weather. Many photographers stuck to single-light setups simply because managing multiple wired units was too cumbersome. This self-imposed limitation prevented them from achieving the dimensional, professional look that proper three-point lighting delivers—not because they lacked skill, but because the equipment itself created practical barriers to creativity.
The Modern Solution: Wireless Systems That Actually Work
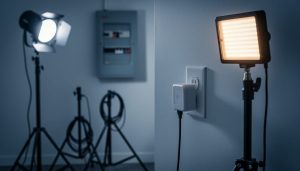
Modern wireless lighting systems have revolutionized three-point lighting setups, eliminating the frustration of constantly running back and forth between your camera and each light stand. Today’s radio frequency triggers, such as those operating on the 2.4GHz band, provide reliable communication over distances up to 100 meters or more, even through walls and obstacles that would block traditional infrared signals.
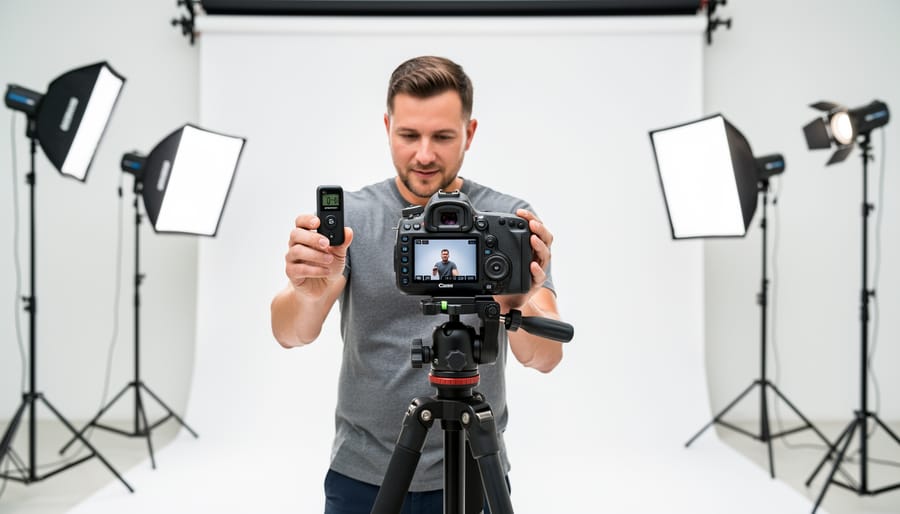
The real game-changer is the ability to adjust power output, zoom settings, and even modeling light intensity directly from your camera position. Systems like Profoto Air, Godox wireless triggers, and Canon’s Speedlite transmitters let you fine-tune your key, fill, and rim lights in real-time while viewing results on your camera’s LCD screen. This means you can make precise adjustments to your lighting ratios without losing your composition or breaking your model’s concentration.
Many current systems also support high-speed sync capabilities, expanding creative possibilities beyond the typical 1/200th second flash sync speed. Some advanced options incorporate Bluetooth or Wi-Fi connectivity, enabling control through smartphone apps where you can save and recall complete lighting setups for different scenarios.
For photographers implementing three-point lighting, this technology translates to faster workflows and more experimental freedom. You can respond instantly when you notice your fill light needs dialing down by half a stop or your rim light requires repositioning, making the entire creative process more intuitive and efficient than ever before.
Real-World Benefits You’ll Actually Notice
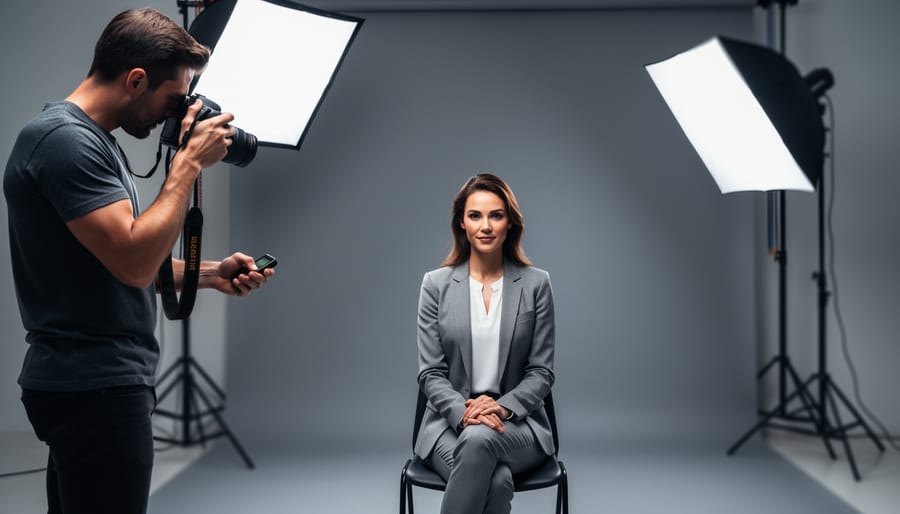
The real-world advantages go beyond technical specs. Imagine you’re shooting corporate headshots and notice the fill light is too strong on your subject’s left side. Instead of walking across the studio, adjusting the power, and returning to your camera position, you can dial it down from where you stand and immediately see the difference. This keeps your workflow smooth and maintains rapport with your client, who isn’t left waiting while you tinker with equipment.
Wireless control truly shines in challenging locations. When shooting on-location portraits in a park or urban environment, running cables across walkways creates trip hazards and limits your positioning options. A three-light wireless setup lets you place your rim light behind a subject on a separate pathway or your fill light several meters away without worrying about power cord length or foot traffic.
For client sessions, speed matters. Professional photographers often report cutting session times by 20-30% once they master wireless lighting adjustments. You’ll spend less time physically moving around and more time directing your subject and capturing expressions. Those saved minutes add up across multiple sessions, letting you book more clients or simply reduce the stress of rushed shoots.
Setting Up Your 3-Light System With Wireless Control
Starting With Your Key Light Position
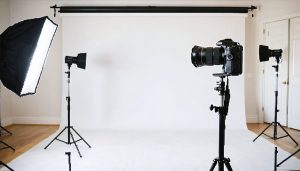
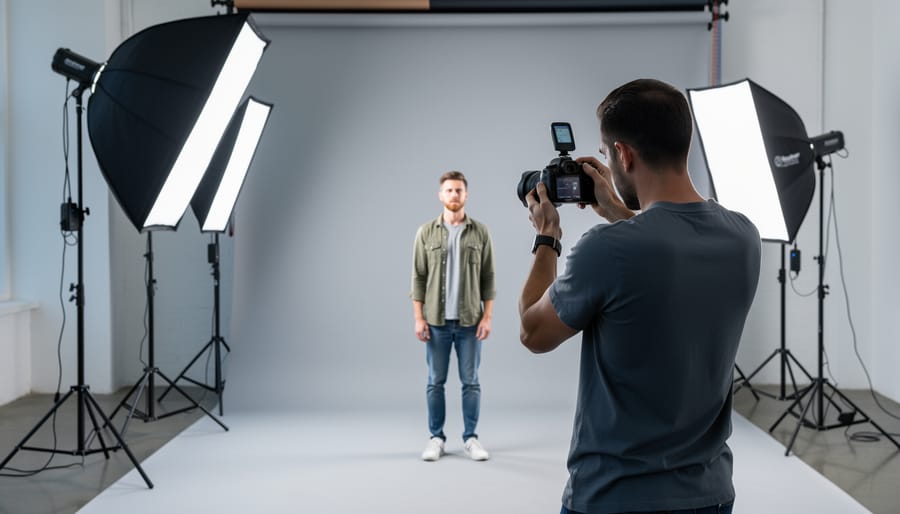
Your key light does the heavy lifting in three-point lighting, so its placement sets the foundation for everything else. Start with the classic 45-degree rule: position your key light roughly 45 degrees to either side of your subject and about 45 degrees above eye level. This creates that flattering shadow definition across facial features without harsh darkness.
In your home photography studio, place your light stand in this position and set your power level to about half strength initially. Most wireless systems let you adjust output from your camera position, which saves you from constantly walking back and forth. This is where wireless control truly shines.
Once positioned, take a test shot and evaluate the shadows. Too dramatic? Move the light closer to your camera’s axis or reduce the angle. Too flat? Increase that 45-degree separation. The beauty of wireless triggers is making these power adjustments on the fly. Drop the output by a stop if shadows seem too pronounced, or bump it up if your subject appears underexposed.
Remember that moving your key light even slightly changes the entire mood of your shot, so take time experimenting with different positions before locking in your setup.
Adding the Fill: Getting Your Ratios Right
With your key and rim lights established, the fill light completes the triangle by controlling shadow depth. This is where light ratios come into play, and understanding them transforms your portraits from flat to dimensional.
A light ratio describes the relationship between your key light and fill light. A 3:1 ratio means your key light is three times brighter than your fill, creating moderate contrast with visible but gentle shadows. This works beautifully for corporate headshots and flattering portraits. A 4:1 ratio increases drama, while 2:1 offers softer, more even illumination perfect for beauty work. Higher ratios like 6:1 or 8:1 venture into dramatic territory, where shadows become a defining element.
Position your fill light on the opposite side of your key, typically at camera height or slightly below. The common mistake is placing it too close to your subject, which can create competing light sources rather than shadow control. Start about the same distance as your key light, then adjust power rather than position.
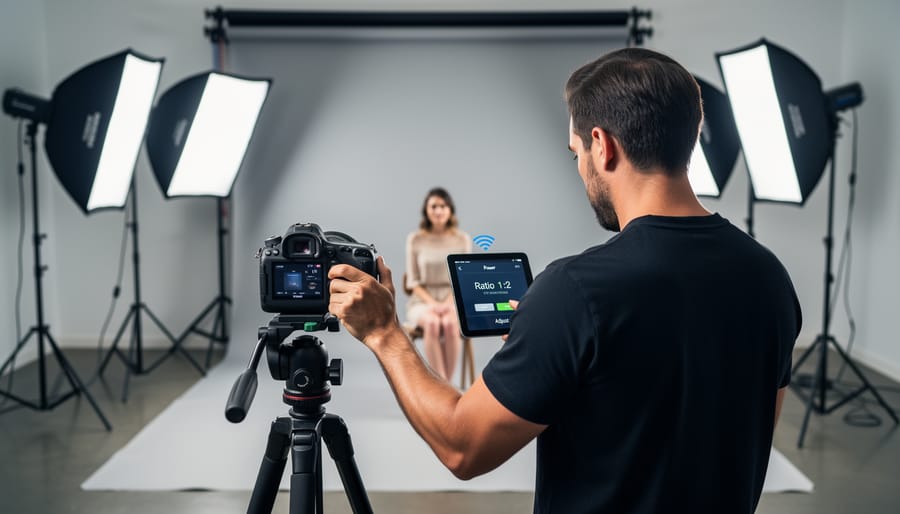
Here’s where wireless control becomes invaluable. Instead of walking back and forth between your light and camera position, use a wireless system to adjust your fill light’s power in quarter-stop or third-stop increments. Take a test shot, review your histogram and shadows, then dial the fill up or down accordingly. This precision lets you nail exact ratios without guesswork.
For real-world application, I typically start with my fill light at half the power of my key light, then refine from there. Check your subject’s shadow side. Can you see detail and texture, or does it go completely black? That feedback guides your adjustments toward your desired ratio.
Completing the Triangle With Your Back Light
Your back light, positioned behind your subject and often slightly elevated, creates that professional separation between your subject and background. This light defines edges and adds depth that transforms a flat image into something three-dimensional. Position it roughly 45 degrees behind your subject, angled toward the camera but out of frame.
Power control is critical here. Your back light should be subtle, creating a rim or hair light without overwhelming your subject. Start with the power set about one stop brighter than your key light, then adjust based on your subject’s hair color and clothing. Dark hair needs more power to show that rim effect, while blonde hair requires less to avoid blown-out highlights.
This is where wireless control systems truly shine. Rather than climbing ladders or repositioning stands repeatedly, you can adjust your back light’s power directly from your camera position. Take a test shot, review it on your LCD, and make immediate adjustments using your wireless trigger’s controls. Most modern systems let you modify power levels in third-stop increments, giving you precise control over that separation effect.
Watch for lens flare as you position your back light. If direct light hits your lens, use a barn door attachment or flag to control spill while maintaining that edge definition you’re after.
Choosing Wireless Lighting Gear for 3-Point Lighting
What to Look for in Wireless Flash Systems
When you’re investing in wireless flash systems for your three-light setup, focus on what actually matters during a shoot rather than getting lost in specification sheets. Here’s what will make your life easier.
Range is critical, but 100 feet is usually plenty for most studio and location work. I’ve found that anything claiming 300+ feet sounds impressive until you realize you’re rarely shooting from that distance. What matters more is consistency at typical working distances of 20-40 feet.
Reliability trumps everything else. A system that triggers 95% of the time will frustrate you endlessly during paid work. Look for systems with multiple frequency channels to avoid interference from other photographers or household devices. Real-world testing shows this matters more than advertised range.
TTL versus manual control is a personal choice, but having both options gives you flexibility. TTL works beautifully for fast-paced events where you’re adjusting positions quickly, while manual control gives you consistency for repeatable setups. Think about your typical shooting scenarios when choosing essential lighting equipment.
High-Speed Sync capability lets you overpower sunlight and shoot with wider apertures outdoors. If you photograph portraits on location, HSS becomes invaluable rather than just a nice feature.
Cross-brand compatibility matters if you work with rental equipment or collaborate with other photographers. Systems that only work within one manufacturer’s ecosystem can limit your options down the road. Some third-party triggers offer excellent compatibility across multiple brands while maintaining reliability.
Budget-Friendly Options That Don’t Sacrifice Control
You don’t need to spend a fortune to control three lights wirelessly. Entry-level systems like the Godox X2T trigger paired with their TT600 or TT685 flashes offer surprisingly reliable performance for around $200-300 for a complete three-light setup. These budget-friendly lighting setups let you adjust power settings from behind the camera, which is essential when fine-tuning the balance between your key, fill, and rim lights.
Acceptable compromises at this price point include slightly slower recycling times and less precise power adjustments—often in full or half-stop increments rather than tenth-stop precision. What’s not acceptable? Unreliable triggering or inconsistent flash output, which some ultra-cheap systems suffer from. The difference between adjusting three lights individually versus walking to each one during a portrait session isn’t just convenience—it’s about maintaining your creative flow and your subject’s patience.
Look for systems that offer at least three separate groups or channels, allowing independent control of each light. This functionality is standard even in budget triggers and makes the difference between simply illuminating your subject and truly sculpting with light.
When It Makes Sense to Go Professional
While basic lighting gear works wonderfully for learning and controlled environments, certain situations justify the investment in professional wireless systems. If you’re frequently shooting on location—think corporate headshots, event coverage, or architectural photography—the reliability and range of systems like Profoto Air or Elinchrom EL-Skyport become essential. Nothing tests equipment like varying environments, and when you’re being paid, gear failures aren’t an option.
Demanding clients expect efficiency and consistency. Professional wireless triggers eliminate the fumbling between lights that eats into billable time, letting you make precise adjustments from your camera position. This becomes particularly valuable when your three-light setup includes hard-to-reach fixtures or lights positioned on booms and stands.
Technical requirements also drive professional investment. If your work demands high-speed sync for outdoor portraits, TTL metering for fast-paced events, or multiple groups controlling dozens of lights simultaneously, consumer-grade systems simply can’t deliver. Similarly, photographers shooting in radio-congested environments like convention centers benefit from the superior interference resistance of premium systems. Consider it less about the gear itself and more about what the reliability and features enable you to accomplish consistently.
Common Mistakes (And How Wireless Control Helps You Avoid Them)
The ‘Too Much Light’ Problem
We’ve all been there: you set up your three-light configuration, turn everything on, and your subject looks like they’re being interrogated rather than photographed. One of the most common mistakes beginners make with three-point lighting is using too much power across all lights, creating an unnaturally harsh, flat look that defeats the entire purpose of using multiple light sources.
Here’s the thing: your lights don’t need to blast at full power to be effective. In fact, keeping your key light at 50-70% power, your fill at about half that intensity, and your backlight just strong enough to create separation often yields far better results than cranking everything to maximum.
This is where wireless lighting control becomes invaluable. Instead of walking back and forth to each light stand to manually adjust power levels, you can make instant adjustments from your camera position while observing the actual results on your subject. See too much fill washing out your shadows? Dial it down two stops without leaving your shooting position. Need a subtler rim light? Drop the backlight power in seconds.
This real-time control transforms the learning process. You’ll quickly develop an intuition for ratios and understand how even small adjustments dramatically affect mood and dimension in your images.
Poor Light Ratios That Flatten Your Subject
The most common lighting mistake in three-point setups is using a light ratio that’s too subtle, typically around 2:1 or less. When your key and fill lights have similar intensities, you lose the dimensional modeling that makes three-point lighting effective. Your subject ends up looking flat and lifeless, defeating the entire purpose of using multiple lights.
To spot this problem, review your test shots and look for minimal shadow definition on the shadow side of your face or subject. If you can barely distinguish the lit side from the shadowed side, your ratio needs adjustment. A good starting point is a 4:1 ratio between key and fill lights, which creates visible dimension while maintaining detail in shadows.
The beauty of wireless flash systems is making these corrections without walking back and forth between your lights. After reviewing your test shot, simply adjust your fill light’s power down by one or two stops from your camera position. Take another test shot and evaluate. You’re looking for shadows that clearly define facial structure or product contours without going completely black. Remember, you can always bring the fill back up slightly if you’ve gone too far, making small half-stop adjustments until you achieve that sweet spot of dimensional modeling.
Wireless Interference and Signal Issues
Wireless triggers can be frustratingly unreliable when you’re in the middle of a shoot. If your lights aren’t firing consistently, start by checking for frequency interference. Many wireless systems operate on 2.4GHz, the same frequency as WiFi routers, Bluetooth devices, and even microwave ovens. If you’re shooting in a studio building with multiple photographers or near office spaces, competing signals can cause misfires. Try switching to a different channel on your transmitter, which most systems allow through a simple menu option.
Range limitations are another common culprit. Most budget wireless triggers work reliably up to 30 feet, but obstacles like walls, your own body, or reflective surfaces can dramatically reduce this distance. Position your receiver with clear line-of-sight to the transmitter when possible, and avoid tucking it behind the light stand where metal components might block the signal.
Battery levels matter more than you’d think. Weak batteries in either the transmitter or receiver can cause intermittent firing even when they’re within range. Make it a habit to replace batteries before important shoots, and always carry spares in your kit.
Three-point lighting has stood the test of time for good reason—it’s a foundational technique that transforms flat, uninspiring images into dimensional, professional-looking photographs. What’s truly exciting is that modern wireless control systems have removed many of the traditional barriers that once made this technique feel intimidating or impractical for many photographers.
Gone are the days of running back and forth between your camera and each light stand, making minute adjustments that turn a 30-minute shoot into a two-hour ordeal. With wireless triggers and remote power controls, you can fine-tune your key, fill, and rim lights from behind the camera, maintaining your connection with your subject and preserving the flow of your session. This technological leap doesn’t just save time—it fundamentally changes how you can work, opening up creative possibilities that would have been frustrating to explore manually.
If you haven’t yet invested in a wireless lighting system, there’s never been a better time to start. Begin with the basics—perhaps a simple wireless trigger system—and expand as your needs and budget allow. The beauty of this approach is that you can start experimenting immediately, even with modest equipment.
Remember, mastery of three-point lighting doesn’t come from reading articles or watching tutorials alone. It comes from hands-on practice, from making mistakes, and from developing an intuitive feel for how light shapes your subjects. Set aside time to experiment without the pressure of a client deadline. Try different ratios between your lights, move them to unexpected positions, and see what happens.
The investment in wireless control pays dividends that extend far beyond convenience. You’ll work more efficiently, collaborate more naturally with your subjects, and unlock creative approaches that simply weren’t practical before. Your future self will thank you for making the leap.